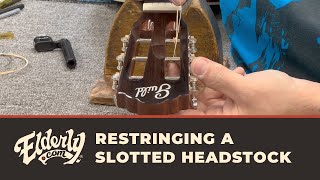
How to cut the string slots on the head of a Spanish guitar

ฝัง
- เผยแพร่เมื่อ 1 ต.ค. 2024
- In this video you can see how I cut the slots on the head so the the strings can be attached to the tuners.
To build your own classical guitar in your own workshop using my step by step 40 hour plus video course series visit:
onlineguitarma...
If you are interested in building a guitar in my workshop in Spain all the information that you will need about the 4 week course is available at:
guitarmakingcou...


After building steel string guitars for 12 years, I'm building my first classical guitar and find your videos most helpful. Thank you.
I am a total (& very lowly) amateur. However, I built a small jig from a metal plate for this routing procedure. It is attached with four screws & the routing is done before the head is cut out on top so two little screws can go in the (soon to be) scrap and the other two go below the slots where the slots will be lengthened & thus the screw holes disappear. (Obviously you countersink so the screws do not interfere with the router.)
Thanks, Pablo, I will certainly make the jig. This was very helpfull.
Muchas gracias Maestro, muy buena aportación
thanks pablo great video..
Perfect thanks👌😍
Subtitles.. 'hello , my name is Todd Oregon!' Wtf?? Lmao
Thank you
Very nice I've been using a single jig and removing all the bumps by hand but this is so much cleaner and faster. Also the dowel clamping works great. Thank you pablo
Thanks so much! Best regards from Brazil
I love your videos! I've built 10 dreadnought guitars and am thinking maybe it's time for a Spanish Guitar! I have learned a lot from you and appreciate your dedication to detail! Thankyou!!
Thanks David, I am very pleased you found my videos useful. Just in case you are interested, I have a complete course available on www.onlineguitarmakingcourse.com
Brilliant thank you so much.
thank you . such great info thank you for sharing
Que grande eres maestro, es justo lo que rondaba mi cabeza para mejorar el resultado, con tu permiso, una vez más adopto tu idea, gracias por tu generosidad. Sin duda la mejor forma de aprender a hacer una guitarra es asistiendo a uno de tus cursos.
Gracias por tus comentarios Sergio.
Por supuesto, copiado si quieres, para eso pongo mis ideas en youtube..... por si le sirven a alguien.
Un abrazo
Saludos Pablo; quiero darte las gracias por tan importante informaciòn que nos ofreces a traves de los videos. yo soy Luthier de la Guitarra classica en Puerto Rico y todos los videos me han sido de gran utilidad. Te felicito por el trabajo que estàs realizando. Adelante.
Gracias Edwin, me alegro de que mis videos te sean utiles, Buena suerte con todo en Puerto Rico.
Una pregunta: En la primera y segunda pasada veo que utilizas la misma fresa. Siendo así, al arrancar la fresadora en la segunda pasada la fresa se encuentra dentro de un canal del mismo diametro que ella. ¿como evitar al arrancar un posible problema de vibración?. ¿no sería mejor usar en la segunda pasada una fresa de menor diametro?. ¿que ancho final y distancia al lateral usas para los canales?. Gracias por adelantado. Lo he dicho otras veces pero lo repito. Tus videos son todo un lujo. Gracias
Onofre Garrido tienes toda la razón, sería mejor una fresa de menor tamaño, yo lo hago con la misma por simplificar el proceso, y si lo haces con cuidado y posicionas la fresa justo en el centro y agarrando bien la fresadora antes de arrancarla te puede pegar un pequeño tirón pero no hace ningún perjuicio. Aún así, como tú bien dices , lo correcto sería usar una fresa de menos diámetro.
El ancho del corte es de 16 mm y la longitud total de 100 mm
Let's make some noise! 😂
Your website links are not working Pablo
Steve Ballance thanks, I will have a look
Hi Pablo, are those rare Earth magnets in the dovetail? And if so, why?
If you are referring to the tenon at the heel end of this neck, they are nuts inserted into the tenon so that the neck can be bolted onto the body. This is not a system that I normally use, for this guitar in particular I did it this way but I normally use the traditional Spanish heel with slots for the sides.
Also, just in case you’re interested I have a complete course available on www.onlineguitarmakingcourse.com
Ah, I see. Yes, you ususally use the Spanish heel. Thanks for the fast reply.
I've done a headstock slotting jig in your method and i think it's pretty cool although i have to say it was extremely hard to do it. Especially the actual routing template needed to be CNC routed and it was a hassle to get it done right but now i'm sure it will be of great help for all of my future standard headstocks.