Hi everyone - It's come to my attention that there has been someone masquerading as myself, responding to some comments here with a link to a Telegram chat to win a prize from me. THIS IS A SCAM, I am not holding a contest, nor do I have a Telegram account. PLEASE DO NOT RESPOND TO THESE MESSAGES!! It's happening on a lot of my videos, I'm taking steps to remove them manually, but as I have 162 videos, it will take some time. If you do run across a suspicious comment, I would appreciate you letting me know at info@dronebotworkshop.com. Thanks! Bill (The real one!)
This was a very well made and proper educational video. It COULD have been made *much* shorter and as many others do, in more of a 'review' format.. But you went through every single concept slowly and methodically. But without sounding tedious. You made everything so clear and understandable that literally anybody could watch this video and have a solid starting point with either of these boards with zero prior knowledge. But it was also in depth enough for those of us who already know what both of these boards are and have a few of each lying around both used and unused. I will go and sign up for that forum now.
I had a professor in college that would skip parts of problems that were "obvious" to him when explaining a concept. He was a very smart guy, but a horrible teacher.
I like that I can just swap the atmega328p for a new one if it's damaged. Just put in a bootloader, swap it and go. Spare ICs take up little space. Also the max current load/pin is very generous. Integrating atmega to your own project is also very simple. You only need to add 1-5 components to the IC to make it work on your PCB. Uno is not dead yet.
I love the patient way you explain everything in your videos. Jam packed with information but still very clear and there are no tangled details that takes time to understand. Keep up the great work!
Yet another quality video from Bill DroneBot's workshop. Clear and patient explanation which allows any Arduino lover, from entry level to advanced level, to understand and build a new generation Uno experimental board. Thank you Bill
The thing that I found most difficult when I first started using the pico after using Arduinos for a while was the 3.3v I/O requirement. I needed to get logic converters and do a lot more soldering and/or connecting of jumpers in order to use many of the components that I have in my workshop.
Thank you for this video. I will probably still reach for the UNO for now, but you certainly have helped me to understand why I am hearing so much about the pico these days.
An excellent video like all your other videos. My passion is electronics since I was 12 years old and now Im 64 and seeking knowledge in the world of Microcontrollers.
Your video's are always interesting, well made, and educational. You make even complicated stuff seem ease to use. Thank you for the "lessons" - after seeing a video I not only have envy to try it, but I also am confident I can do it. Please keep up the great work !
The design of this Pico board is very clever and looks well organized - I'll try to make one of these myself.. Keep up the good work - I really enjoy watching your videos 👍
Nice one! I enjoy these kinds of projects because we are making useful tools to make other useful things. I also made my own pi pico board this week because the pico , the nano and the esp8266 can be cumbersome and awkward because they move all over the place. Now that I think about it, I also made my own nano shield a while back because a while back I saw that you made one and I thought that was useful. So now I made a pico board and find that you have done it again and taken it to another level. As always, you make useful and fun videos.
Great video as always and kudos for all your hard work putting it together. When you show the schematic for the final version you have a single capacitor symbol coming off pin 36 but it looks like from the pictures that you used a 10uf in parallel with a small bypass capacitor. I built the circuit and used a 0.1u in parallel with a 10u on the 3.3V bus.
I put together a similar adapter on an Arduino proto board, which was a little snug but with careful choice of pin mapping means I could then plug in some of my Arduino project sheilds onto it. I used a linear regulator and barrel jack, I suppose I should have put in a diode too! If I had a lot of commercial Arduino sheilds I would probably had to be a little more careful with which pins I mapped to the Analog lines, since there are only 3 on the Pico, but most of my sheilds are ones I made myself and most of them only us 1 or 2 of the analog pins for analog reading.
Well done Bill. Similar to Filipe L's comment, you might have mentioned that this particular buck converter (mini360) has an adjustable output between 1-17 volts, ergo it is critical that people know to adjust it to 5 volts before plugging it into their picos.
I don't know if anyone has asked yet? but I'd LOVE to see a continuation of this.. as in adding the small oled LCD to it. so we can use it with output.. or how to hook up a few different types of small LCD's to it.. I'd like to 3d Print a case etc. to put it all into etc..
When using the mini360 as a fixed voltage value, I would suggest replacing that crap potentiometer with fixed value resistors. It has happened to me that the potentiometer changed its value, making 3v3 turn into 3v9 and killing an ESP32
Mini360 is unstable crap that overheats at a fraction of rated current. I got one that got so hot that the inductor literally reflowed and fell off :D only thing connected to it was an ESP-12 module. Probably especially crappy variant but why risk it. There are awesome modern modules that stay perfectly cold.
I've used them in a few projects, and I make sure I tune the voltage then put superglue on the pot to fix it. Its possible the value might still change if the pot itself is faulty but that hasn't happened yet.... It is a good idea to replace the pot with fixed resistors if you can find the right combo for the voltage you want. I have found that the main problem with them is they are usually advertised at their peak rating of 3A when their continuous rating should be half that, and people tend to unintentionally overload them. Also like all these modules, they vary a lot in quality and with power modules I like to hook up a sample to my dummy load and run it for a few hours to make sure it will cope. I had one that got quite hot with a 1A load, but the others I have tested were OK.
Another awesome video Bill! One item that I don’t believe you have covered before is sending SMS with a microcontroller. I’m trying to connect a SIM800L to an ESP8266 and send an SMS to my phone. I’ve seen some videos about it but none of them seem to be working for me. I think it’s a topic that needs some clearing up.
Excellent video ! We are sort of spoiled for choice here in Australia , we have a company ( core electronics - this is their TH-cam channel name also )that have developed the Picodev system that has a pile of sensors that are plug and play and you simply daisy chain them on the I2C bus using the supplied jst style cables . They are Currently working on their makerverse board that takes a pico and brings its pins out on an uno form factor so you can use Arduino shields . They did hint at making it an Arduino form factor board with the 2040 mounted directly to the board .
Instead of soldering there are Pico H and Pico WH available versions available with pre-soldered headers to plug into a breadboard. Slightly more expensive, but not massively so.
A great idea - Bill - to shift over to the modern MCU and create the PICO-UNO . Thus you combine the exiting new features of the PICO with the widespread and well known UNO-design. Now you should also pay attention to the.... EARLE PHILHOWER Arduino Core ..... which makes all those new features accessible via the well known ARDUINO IDE (old and new) . I am waiting for the moment , when the PHILHOWER CORE is integrated to PlatformIO - which seems to be done during the next months. This will be the non plus ultra combination . A lot of top libraries - like for example the TFT_eSPI from Bodmer are already modified to use touchscreens with the PICO using memory buffers and DMA - the result is absolutely stunning - flickerfree and highspeed . LETS GO PICO ! greetings from Germany.
Here's a tip... The separate functions of a male header pin and a female "Dupont" socket may be combined, by using a Samtec SSW-150-24-F-S Connector, which has a Dupont socket head and a long, square header pin, underneath. This is the part number for the greatest number of pins, on a single row, and the longest pin length. I buy them this way, for the most versatility, and I just cut them to whatever socket count and pin length that I need. They have a myriad of advantages. Here's just one application, to get your creative juices flowing... Whenever you use a common male header pin to connect a PCB to a breadboard, the breadboard socket hole that the male pin resides in can not be used for any other purpose. Using the SSW connector, this lost breadboard socket is replaced by the Dupont socket which rides on top of the header pin. I use them for all sorts of my DIY Demo and Breakout board designs. The datasheet shows the many model types for this connector, including right-angle versions. So, ordering the exact type that you need is easy and will save you the effort of customizing them, yourself. IMHO, Samtec connectors are terrific! There are many more styles of connectors. Check them out! I am not affiliated with Samtec. Cheers!
11:45 I'd include 3 more analog inputs, then the pico, cause I more often use all of the analog inputs then the PWM pins, and more convenient package for human soldering (TQFP32) in case I make my own board, which I usually end up doing. Soldering a large pico board on a circuit that has to be the smallest possible is a no go, which makes me kinda reluctant to use pico as often. But then again I couldn't find ATMEGA chips for almost 2 years now, which leaves ESP8266 12E or 12F modules in those cases plus those run faster, and have wi-fi...
Very nice project there is one more thing that would make it even close to an arduino and that is 5v logic adding logic level converts for all the pins will be very useful to drive stuff that require no less then 5v.
Awesome video and great, very detailed explanation! I just picked up a pico myself few days ago and have two questions: 1) Is there any reason I should not directly connect a modern 5v dc power supply through a barrel jack to the VSYS and GND pins of the pico? Besides the obvious fact that you should never plug in both the USB and an external power source at the same time? 2) Lets say I solder male headers to my pico just like in your video and also create a proto board with female headers. Would there be any (physical) protection against accidently connecting it 180° turned around (so that Pin 1 on the pico ends up it Pin 21 of the female header on the proto board)? I think the Arduino Uno has some pins that are slightly offset on one side, so it is physically impossible to connect the wrong way.
I have a few pico's. I had quite a few issues when trying to solder header pins onto it. Maybe a 'dodgy' batch? I recommend you get a pre-soldered pico if available.
@@picklerix6162 Yes. I think I had presumes they would be pre-fluxed given it's obvious they are going to be soldered. My bad. Tq for the reminder... although next time I think I'll get the soldered ones anyway.
While the PICO has more flash, programs typically take MANY times more flash space when compiled on the PICO than on the atmega328 processor. RPi should upgrade the PICO with more flash, since the flash memory is external to the processor, the board can be upgraded to as much as 16mb of flash, and many PICO clones (such as the Adafruit feather) already ship with 8 or 16 MB of flash. The PICO has an ARM Cortex M0+ processor core(s) which doesn't have floating point or DSP instructions. I'm hoping that RPi is working on a upgraded processor that will have at least one ARM Cortex M4 core, or even an M7 core. Both support DSP instructions, the M7 always has floating point, it's optional on the M4.
Hello Bill , Are you planning to make a video about PID control with arduino or another one ? If you dont , please consider because it is a very interesting topic.
Thanks Bill. After I finish my latest arduino project, I'm thinking of going either esp32 or Pico. What would you suggest for something with a touchscreen TFT display? You're right, we should be moving on from Arduinos.
Either will do, if you meed anything wireless capability bluetooth / wifi the esp32 is the de factor dev board selected having them all built in. LILYGO TTGO if I recall has tons of dev boards with screens already on them other brands of esp32 dev boards might do touch if they do not, usually I see what seems like the largest selection of everything from tft to amoled to e-paper displays on offer with esp32. If you go separate components and wire it all up you can use any microcontroller you prefer which is nice if any of the all in one dev boards don't fit your wants.
I've been making use of maple mini for years which was way better than what was available in nano. Thing is I often use the maple in development and then spin a board, the chips are cheap but is that the case for this new board? also sometimes good to have 5v tolerant like on the cortex m3 on a maple mini
Definitely the Pico is my current microcontroller of choice, and a pro tip is to program it with MMBasic to get a "PicoMite". Being able to program it directly in BASIC through regular terminal software (e.g. Tera Term, Putty) is a real time saver. On Aliexpress there are also Pico clones with bonus features like USB-C and programmable RGB LED for US$2.70, plus the one I got comes with male headers in the bag. Using the same RP2040 chip means they operate identically to the standard Pico. As long as you can design in 3V logic it's a no-brainer.
It's been a while since I played with mine, but I wrote a micropython program to read from my GPS over serial and write commands to it. So I think yes to your question.
Ironic. My latest sensor arrived and I too grabbed an arduino uno but guess what, I couldn’t find the old usb cable interface for it so I put my uno back on the shelf and pulled off an ESP32 and tested that new sensor and continued developing on that. Why? I have millions of usb cables that the ESP32 uses. My raspberry pi picos are still on a dev board from my last experiment still wired up to each other or I might have grabbed one of them to use. What a difference a usb cable plug type makes 🤣
I still have a lot of USB A to B cables. My office gets a lot of printers and scanners, then networks them and puts all the USB cables in a box. It's a bit heavy of a connector for a tiny thing like an MCU, but a much nicer connector for bigger-than-a-bread-box devices like printers.
Anyone have a US source for that PTSolns proto board or one one like it? Looks like it's only available in Canada. I love the extra solder points for power and ground.
I see they have an Amazon store on the Canadian servers. I don't know how well that translates to the US though. Customs , exchange rates, concerns about returns and all that. I would think it would be pretty seamless via Amazon but that is just my guess. I don't purchase much through Amazon.
Arduino has 5 volts as do most sensors and shift registers LSN74HC595N chips and LSN74HC165N Now if there was way to use Pico UNO to do this and the only way, I could think of is by using Transistors in the PNP 2n3906 or A1015 to go from 3.3 volts logic to 5 volts. Which would bump up the cost of Pico Uno from let's say an Arduino Every board. Just saying it's nice to keep some 5 volts around.
There are libraries that allow you to use part of the flash memory as an EEPROM. I use the EEPROM libraries to write serial numbers and initialization variables that only need to be written once. If you write frequently to the flash, you can wear it out so you may have to use a dedicated EEPROM for those frequent write applications.
If y'all are still using that horrible Arduino IDE, you should take a look at Visual Studio code with Platform IO. All free, better syntax highlighting, code building (much faster too!), and automatic identification of which port your arduino is on, to name a few. There's no comparison.
A long long video about almost nothing, just to show the best way to destroy a Pico : most of Arduino shields will immediately destroy the Pico as they are powered on 5V, and will send 5V signals on Pico pins which are not 5V tolerant. You *NEVER* speak of this compatibility problem at any moment on your video !! And morever, you make people think that using some of the adapters you present, they can do with the Pico exactly what they do with a Uno Comparing the Uno to the Pico is totally useless, why didn't you compare the Pico to one the ARM based Arduinos ?


Hi everyone - It's come to my attention that there has been someone masquerading as myself, responding to some comments here with a link to a Telegram chat to win a prize from me. THIS IS A SCAM, I am not holding a contest, nor do I have a Telegram account. PLEASE DO NOT RESPOND TO THESE MESSAGES!!
It's happening on a lot of my videos, I'm taking steps to remove them manually, but as I have 162 videos, it will take some time. If you do run across a suspicious comment, I would appreciate you letting me know at info@dronebotworkshop.com.
Thanks!
Bill (The real one!)
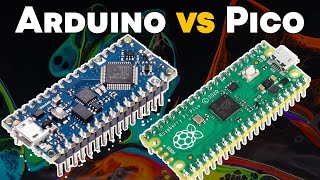
This was a very well made and proper educational video. It COULD have been made *much* shorter and as many others do, in more of a 'review' format.. But you went through every single concept slowly and methodically. But without sounding tedious. You made everything so clear and understandable that literally anybody could watch this video and have a solid starting point with either of these boards with zero prior knowledge. But it was also in depth enough for those of us who already know what both of these boards are and have a few of each lying around both used and unused. I will go and sign up for that forum now.
I had a professor in college that would skip parts of problems that were "obvious" to him when explaining a concept. He was a very smart guy, but a horrible teacher.
That is the spirit dude. This videos are long and we learn every details.
I like that I can just swap the atmega328p for a new one if it's damaged. Just put in a bootloader, swap it and go. Spare ICs take up little space. Also the max current load/pin is very generous. Integrating atmega to your own project is also very simple. You only need to add 1-5 components to the IC to make it work on your PCB. Uno is not dead yet.
I love the patient way you explain everything in your videos. Jam packed with information but still very clear and there are no tangled details that takes time to understand. Keep up the great work!
Yet another quality video from Bill DroneBot's workshop.
Clear and patient explanation which allows any Arduino lover, from entry level to advanced level, to understand and build a new generation Uno experimental board.
Thank you Bill
The thing that I found most difficult when I first started using the pico after using Arduinos for a while was the 3.3v I/O requirement. I needed to get logic converters and do a lot more soldering and/or connecting of jumpers in order to use many of the components that I have in my workshop.
Thank you for this video. I will probably still reach for the UNO for now, but you certainly have helped me to understand why I am hearing so much about the pico these days.
a "Reset" button is not needed if you close the Serial Monitor.. yes for the "expension", love your idea!!!
I am a fan of the pico. I love the philhower III board manager and C++. Thx for the video.
An excellent video like all your other videos. My passion is electronics since I was 12 years old and now Im 64 and seeking knowledge in the world of Microcontrollers.
watching your videos is like being in a mental therapy ,great content keep going.
Your video's are always interesting, well made, and educational. You make even complicated stuff seem ease to use. Thank you for the "lessons" - after seeing a video I not only have envy to try it, but I also am confident I can do it. Please keep up the great work !
Good information here, now I understand the relationship and differences between the Pico and the Uno. Thanks for the video.
The design of this Pico board is very clever and looks well organized - I'll try to make one of these myself..
Keep up the good work - I really enjoy watching your videos 👍
Great. Just info. No fluff. Wish everybody took this approach.
A very absorbing tutorial that was over too quickly. Lovely work.
What an outstanding teacher you are !
Nice one! I enjoy these kinds of projects because we are making useful tools to make other useful things. I also made my own pi pico board this week because the pico , the nano and the esp8266 can be cumbersome and awkward because they move all over the place. Now that I think about it, I also made my own nano shield a while back because a while back I saw that you made one and I thought that was useful. So now I made a pico board and find that you have done it again and taken it to another level. As always, you make useful and fun videos.
Can't wait to see new PiPico based tutorials to demonstrate the power of RP2040 CPU :D
Great video as always and kudos for all your hard work putting it together. When you show the schematic for the final version you have a single capacitor symbol coming off pin 36 but it looks like from the pictures that you used a 10uf in parallel with a small bypass capacitor. I built the circuit and used a 0.1u in parallel with a 10u on the 3.3V bus.
I put together a similar adapter on an Arduino proto board, which was a little snug but with careful choice of pin mapping means I could then plug in some of my Arduino project sheilds onto it. I used a linear regulator and barrel jack, I suppose I should have put in a diode too! If I had a lot of commercial Arduino sheilds I would probably had to be a little more careful with which pins I mapped to the Analog lines, since there are only 3 on the Pico, but most of my sheilds are ones I made myself and most of them only us 1 or 2 of the analog pins for analog reading.
Thank you for all the great and professional videos...
Well done Bill. Similar to Filipe L's comment, you might have mentioned that this particular buck converter (mini360) has an adjustable output between 1-17 volts, ergo it is critical that people know to adjust it to 5 volts before plugging it into their picos.
Thanks!
Thank you as well!
Your videos always leave me with a desire to build. Thanks.
Thanks for making this video. This is just what I was looking for!
This channel is priceless!
Sunday morning magic in the workshop. Am I always in your first row too?
I don't know if anyone has asked yet? but I'd LOVE to see a continuation of this.. as in adding the small oled LCD to it. so we can use it with output.. or how to hook up a few different types of small LCD's to it.. I'd like to 3d Print a case etc. to put it all into etc..
I think ESP32 kicks this MCU to the curb in every respect.
Perhaps I missed it, but since the pico is not 5v tolerant on its IO pins, this limits its use further compared to an Uno.
Voltage divider among other techniques. Not as convenient but there are ways around 5v to 3.3v interfacing.
@@pd8559 , true, but it requires other components, making it a bit less convenient and more work.
When using the mini360 as a fixed voltage value, I would suggest replacing that crap potentiometer with fixed value resistors. It has happened to me that the potentiometer changed its value, making 3v3 turn into 3v9 and killing an ESP32
Yes, I noticed that and wondered why it drifted. The potentiometer did not move the physical screw and should not have changed. So it is a concern.
How about adding a 3v3 zener diode instead of removing the pot?
@@iot_cdp I think it could work as a protection, but you would never know about an overvoltage until that zener started to get warm
Mini360 is unstable crap that overheats at a fraction of rated current. I got one that got so hot that the inductor literally reflowed and fell off :D only thing connected to it was an ESP-12 module. Probably especially crappy variant but why risk it. There are awesome modern modules that stay perfectly cold.
I've used them in a few projects, and I make sure I tune the voltage then put superglue on the pot to fix it. Its possible the value might still change if the pot itself is faulty but that hasn't happened yet.... It is a good idea to replace the pot with fixed resistors if you can find the right combo for the voltage you want.
I have found that the main problem with them is they are usually advertised at their peak rating of 3A when their continuous rating should be half that, and people tend to unintentionally overload them. Also like all these modules, they vary a lot in quality and with power modules I like to hook up a sample to my dummy load and run it for a few hours to make sure it will cope. I had one that got quite hot with a 1A load, but the others I have tested were OK.
What a bundle of good info. Thanks for sharing 👍
Another awesome video Bill!
One item that I don’t believe you have covered before is sending SMS with a microcontroller. I’m trying to connect a SIM800L to an ESP8266 and send an SMS to my phone. I’ve seen some videos about it but none of them seem to be working for me. I think it’s a topic that needs some clearing up.
Excellent video !
We are sort of spoiled for choice here in Australia , we have a company ( core electronics - this is their TH-cam channel name also )that have developed the Picodev system that has a pile of sensors that are plug and play and you simply daisy chain them on the I2C bus using the supplied jst style cables . They are Currently working on their makerverse board that takes a pico and brings its pins out on an uno form factor so you can use Arduino shields .
They did hint at making it an Arduino form factor board with the 2040 mounted directly to the board .
I'd love to see someone release a controller with the format of the Uno but the RP2040 chip in it.
Amaizing video and tutorial! 🙂
Thanks you as always. You have many enjoyable and learning videos that makes my head swim at times.
Great video presentation. I have a pico waiting for time to play.
Instead of soldering there are Pico H and Pico WH available versions available with pre-soldered headers to plug into a breadboard. Slightly more expensive, but not massively so.
Im glad these projects are cheap cause now I need to add a Pico to my collection
Thank you for this cool video! The Pico is a lot of fun!
Another well explained and researched video. Thank you
A great idea - Bill - to shift over to the modern MCU and create the PICO-UNO . Thus you combine the exiting new features of the PICO with the widespread and well known UNO-design.
Now you should also pay attention to the.... EARLE PHILHOWER Arduino Core ..... which makes all those new features accessible via the well known ARDUINO IDE (old and new) .
I am waiting for the moment , when the PHILHOWER CORE is integrated to PlatformIO - which seems to be done during the next months. This will be the non plus ultra combination .
A lot of top libraries - like for example the TFT_eSPI from Bodmer are already modified to use touchscreens with the PICO using memory buffers and DMA - the result is absolutely stunning - flickerfree and highspeed .
LETS GO PICO ! greetings from Germany.
Great tutorial and you have my interest will you be covering setup of software and stuff ?...cheers.
As always, an interesting and useful episode! Thanks again!
Here's a tip... The separate functions of a male header pin and a female "Dupont" socket may be combined, by using a Samtec SSW-150-24-F-S Connector, which has a Dupont socket head and a long, square header pin, underneath. This is the part number for the greatest number of pins, on a single row, and the longest pin length. I buy them this way, for the most versatility, and I just cut them to whatever socket count and pin length that I need. They have a myriad of advantages. Here's just one application, to get your creative juices flowing... Whenever you use a common male header pin to connect a PCB to a breadboard, the breadboard socket hole that the male pin resides in can not be used for any other purpose. Using the SSW connector, this lost breadboard socket is replaced by the Dupont socket which rides on top of the header pin. I use them for all sorts of my DIY Demo and Breakout board designs. The datasheet shows the many model types for this connector, including right-angle versions. So, ordering the exact type that you need is easy and will save you the effort of customizing them, yourself. IMHO, Samtec connectors are terrific! There are many more styles of connectors. Check them out! I am not affiliated with Samtec. Cheers!
11:45 I'd include 3 more analog inputs, then the pico, cause I more often use all of the analog inputs then the PWM pins, and more convenient package for human soldering (TQFP32) in case I make my own board, which I usually end up doing. Soldering a large pico board on a circuit that has to be the smallest possible is a no go, which makes me kinda reluctant to use pico as often. But then again I couldn't find ATMEGA chips for almost 2 years now, which leaves ESP8266 12E or 12F modules in those cases plus those run faster, and have wi-fi...
Very nice project there is one more thing that would make it even close to an arduino and that is 5v logic adding logic level converts for all the pins will be very useful to drive stuff that require no less then 5v.
Excellent and entertaining ! As usual !
Excellent Bill !
Thank you for sharing your knowledge in an accessible way!
Awesome video and great, very detailed explanation! I just picked up a pico myself few days ago and have two questions:
1) Is there any reason I should not directly connect a modern 5v dc power supply through a barrel jack to the VSYS and GND pins of the pico? Besides the obvious fact that you should never plug in both the USB and an external power source at the same time?
2) Lets say I solder male headers to my pico just like in your video and also create a proto board with female headers. Would there be any (physical) protection against accidently connecting it 180° turned around (so that Pin 1 on the pico ends up it Pin 21 of the female header on the proto board)? I think the Arduino Uno has some pins that are slightly offset on one side, so it is physically impossible to connect the wrong way.
I have a few pico's. I had quite a few issues when trying to solder header pins onto it. Maybe a 'dodgy' batch? I recommend you get a pre-soldered pico if available.
A little flux makes the solder flow so much better.
@@picklerix6162 Yes. I think I had presumes they would be pre-fluxed given it's obvious they are going to be soldered. My bad. Tq for the reminder... although next time I think I'll get the soldered ones anyway.
Brilliant as usual. Can I ask where you got the PTSolns proto board.
RP2040 supports up to 32MB so u can modify thee board easely for more memory( havent tried)
While the PICO has more flash, programs typically take MANY times more flash space when compiled on the PICO than on the atmega328 processor. RPi should upgrade the PICO with more flash, since the flash memory is external to the processor, the board can be upgraded to as much as 16mb of flash, and many PICO clones (such as the Adafruit feather) already ship with 8 or 16 MB of flash.
The PICO has an ARM Cortex M0+ processor core(s) which doesn't have floating point or DSP instructions. I'm hoping that RPi is working on a upgraded processor that will have at least one ARM Cortex M4 core, or even an M7 core. Both support DSP instructions, the M7 always has floating point, it's optional on the M4.
Middle size breadboard is good enough (although not cheap), but microusb port was not a good idea.
Thanks for great video. But what about pico vs Arduino Nano?
Thanks Mr. Bill
Hello Bill , Are you planning to make a video about PID control with arduino or another one ? If you dont , please consider because it is a very interesting topic.
Top Video! THX Sir! 😎
fascinating possibilities ❤
Thanks Bill. After I finish my latest arduino project, I'm thinking of going either esp32 or Pico. What would you suggest for something with a touchscreen TFT display? You're right, we should be moving on from Arduinos.
Either will do, if you meed anything wireless capability bluetooth / wifi the esp32 is the de factor dev board selected having them all built in. LILYGO TTGO if I recall has tons of dev boards with screens already on them other brands of esp32 dev boards might do touch if they do not, usually I see what seems like the largest selection of everything from tft to amoled to e-paper displays on offer with esp32. If you go separate components and wire it all up you can use any microcontroller you prefer which is nice if any of the all in one dev boards don't fit your wants.
I've been making use of maple mini for years which was way better than what was available in nano. Thing is I often use the maple in development and then spin a board, the chips are cheap but is that the case for this new board? also sometimes good to have 5v tolerant like on the cortex m3 on a maple mini
Definitely the Pico is my current microcontroller of choice, and a pro tip is to program it with MMBasic to get a "PicoMite". Being able to program it directly in BASIC through regular terminal software (e.g. Tera Term, Putty) is a real time saver. On Aliexpress there are also Pico clones with bonus features like USB-C and programmable RGB LED for US$2.70, plus the one I got comes with male headers in the bag. Using the same RP2040 chip means they operate identically to the standard Pico. As long as you can design in 3V logic it's a no-brainer.
What does Sainsmart bring to the table that an genuine Uno doesn't?
Hello sir ,i want to get more ,how can i connect with you ?
Still the uno is kind of a standard if things don't work on another micro what do we all grab ?
Another great video. Thanks for that. Can I ask what program you use for simulate the wiring the components. I like it a lot.
This may be unrelated question but I have 2 com ports com1 and com2 in my pc. Can i use to program the uno or esp?
You answered my questions.
Is it possible to serial read and write like an arduino uno, on the pi Pico with MicroPython?
If anyone know I while like to know the answer.
It's been a while since I played with mine, but I wrote a micropython program to read from my GPS over serial and write commands to it. So I think yes to your question.
Of course. Install mpython on the pico to make the code even more versatile.
Yes
why would I use the Pico and not the ESP32?
Ironic. My latest sensor arrived and I too grabbed an arduino uno but guess what, I couldn’t find the old usb cable interface for it so I put my uno back on the shelf and pulled off an ESP32 and tested that new sensor and continued developing on that. Why? I have millions of usb cables that the ESP32 uses. My raspberry pi picos are still on a dev board from my last experiment still wired up to each other or I might have grabbed one of them to use. What a difference a usb cable plug type makes 🤣
I still have a lot of USB A to B cables. My office gets a lot of printers and scanners, then networks them and puts all the USB cables in a box. It's a bit heavy of a connector for a tiny thing like an MCU, but a much nicer connector for bigger-than-a-bread-box devices like printers.
Does the Pico do i2c?
I tried to print the article. NONE of the pictures printed.
Anyone have a US source for that PTSolns proto board or one one like it? Looks like it's only available in Canada. I love the extra solder points for power and ground.
I see they have an Amazon store on the Canadian servers. I don't know how well that translates to the US though. Customs , exchange rates, concerns about returns and all that.
I would think it would be pretty seamless via Amazon but that is just my guess. I don't purchase much through Amazon.
Just checked it ... Looks like they've added US shipping.
Arduino has 5 volts as do most sensors and shift registers LSN74HC595N chips and LSN74HC165N
Now if there was way to use Pico UNO to do this and the only way, I could think of is by using Transistors in the PNP 2n3906 or A1015 to go from 3.3 volts logic to 5 volts.
Which would bump up the cost of Pico Uno from let's say an Arduino Every board.
Just saying it's nice to keep some 5 volts around.
As of July, you can buy the pico with headers for just one dollar more...
Top !❤
This was a little repetitive, but I liked it.
Arduino can be powered using v in 5v!! Not just 7 to 12!
pico faster than uno but tiny85 is enough for simply project
I have those circuit boards👍.
ThePiHut sells Pico's with headers for a buck more if you don't want to solder.
It's such a shame the pico does not have eeprom or non volatile ram.
There are libraries that allow you to use part of the flash memory as an EEPROM. I use the EEPROM libraries to write serial numbers and initialization variables that only need to be written once. If you write frequently to the flash, you can wear it out so you may have to use a dedicated EEPROM for those frequent write applications.
If y'all are still using that horrible Arduino IDE, you should take a look at Visual Studio code with Platform IO. All free, better syntax highlighting, code building (much faster too!), and automatic identification of which port your arduino is on, to name a few. There's no comparison.
They aren’t 4 dollars anymore, they’re averaging 8. I guess inflation doubled their prices. I wonder what percentage of that is greed.
I just bought two Pi Pico boards for $3.99 each at a Micro Center store. A very good deal.
ouch! $13 each and $16 shipping.
A long long video about almost nothing, just to show the best way to destroy a Pico : most of Arduino shields will immediately destroy the Pico as they are powered on 5V, and will send 5V signals on Pico pins which are not 5V tolerant.
You *NEVER* speak of this compatibility problem at any moment on your video !! And morever, you make people think that using some of the adapters you present, they can do with the Pico exactly what they do with a Uno
Comparing the Uno to the Pico is totally useless, why didn't you compare the Pico to one the ARM based Arduinos ?
Thanks Bill, another informative and impressive video