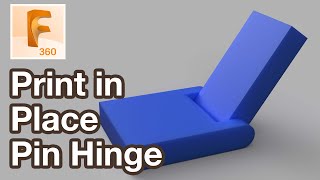
How to Design 3D Printable Hinge | Fusion 360 Tutorial

ฝัง
- เผยแพร่เมื่อ 5 มิ.ย. 2024
- Monthly 3D Modeling Challenges: bit.ly/3DModelChallenge
3D Printer for Beginners: geni.us/3dprinter
3D Printable hinges that print in place are not as crazy hard as they may sound. I break it down to a few simple points that you'll need to consider when designing your hinges. I also discuss Fusion 360's latest update to the Chamfer command.
SUPPORT KEVIN'S MISSION
━━━━━━━━━━━━━
[Making CAD education accessible]
1. Kevin's Patreon: / productdesignonline
2. Buy Kevin a Coffee: www.buymeacoffee.com/pdo
3. Amazon storefront: bit.ly/amazonpdo
4. Subscribe to this channel: bit.ly/sub-right-now
TUTORIAL RESOURCES
━━━━━━━━━━━━━
1. 3D Design Competition: bit.ly/3dpchallenge
2. Thangs 3D Model Community: bit.ly/Thangs3D
3. Demo file: bit.ly/hingedBoxFile
4. 3D Printer Blog Post: bit.ly/3DPrinterComparison
5. Step-by-Step tutorial per hinges: • How to 3D Model a Hing...
TOP FUSION 360 PLAYLISTS
━━━━━━━━━━━━━
30 Days Series: bit.ly/learn-fusion360
Woodworkers: bit.ly/woodworker-playlist
3D Printing: bit.ly/3D-printing-playlist
Sculpting: bit.ly/sculpt-playlist
KEVIN’S FAV 3D PRINTERS
━━━━━━━━━━━━━
➞ Ultimaker: bit.ly/kevins-printer
➞ Prusa: bit.ly/prusa3dp
➞ Ender: bit.ly/ender3proSale
➞ Resin Printer: geni.us/5CANog
JOIN THE PDO COMMUNITY
━━━━━━━━━━━━━
Discord Group: bit.ly/PDO-Discord
Facebook Group: bit.ly/PDO-Fb
PDO Forum: bit.ly/PDO-Forum
TIMESTAMPS
━━━━━━━━━━━━━
0:00 - How to Design 3D Printable Hinges in Fusion 360
1:03 - Adding Chamfered edges in Fusion 360
3:16 - Discussing User Parameters in Fusion 360
4:20 - Making sure there is enough clearance
5:49 - How the hinges work by printing in place
8:40 - Thangs and the 3D Printable Gift Competition
9:17 - Preparing the model for a test print
9:58 - Save as STL in Fusion 360
-
Disclaimer:
This video description may contain affiliate links, meaning I get a small commission if you decide to make a purchase through my links, at no cost to you.
-
#3dprinting #Fusion360 #ProductDesignOnline


*So many LINKS for this one...* (see coupon code at bottom)
1. 3D Design Competition: bit.ly/3dpchallenge
2. Thangs 3D Model Community: bit.ly/Thangs3D
3. Demo file: bit.ly/hingedBoxFile
4. Download the Rugged Box STL file: bit.ly/HingedBoxSTL
5. 3D Printer Blog Post: bit.ly/3DPrinterComparison
6. Step-by-Step tutorial per hinges: th-cam.com/video/iSBsBTMsGTk/w-d-xo.html
Get *$30 OFF* an Ender 3D Printer via my link: bit.ly/ender3proSale
Apply coupon code ZBENDER3PUS at checkout
Many thanks for the videos, just found your series and they are very easy to follow unlike some others I have tried to watch. keep up the good work.
Thanks for this one as I already have used it for Christmas gifts! I would say that I found that I needed to remove about .5mm on the top and bottom lips of the box so it would actually close when printed.
Thanks Kevin. I must try this out. I have just finished a dovetail enclosure based on your vid. It has a 33mm long 90 deg overhang that I made no effort to include support feature during the Cura slicing. Never gave it a second thought. It went without issue on my 200$ Anet A8. Ignorance is such bliss!
You are a good man! I've subscribed after watching a single (two year old) video and looking at titles of videos created since then.
Im using rhino for 3 years , finally bought my first 3d printer and i want to learn fusion 360 for ease of use. Your videos helped me alot and still helping , thanks for sharing your knowledge. :)
Glad to hear that! What 3D printer did you get?
@@ProductDesignOnline Ender 3 V2 lovely printer but it has some flaws.
@@ropse7952 those are great starter printers. Once you get hooked you'll want to upgrade to something better :)
Awesome dude, love your tutorial
Great design and tutorial!
I tried the parametric changes, but I notice that everytime i changed a user parameter eg boxLength, boxHeight, etc - the Top Left Hinge disappears. Not sure if I am doing something wrong or I need to consider some special setting.
This is amazing! Very clear explanation and something I always look for in may projects, 3D or not, is to automate whenever possible. I was fiddling around with the parameters and got a model working where every dimension is relative to the ones you showed in your video. In this way, the length of each part of the hinge is automatically adjusted according to the width or length of the box. I wouldn't be able to do it without this video and the explanation of functions inside the parameters! I was wondering if the use of conditionals in the syntax of the expression are available. For instance, set a minimum 'gap' dimension *IF* the length of the box is 'X' value. I know it wouldn't be very practical in real prints or modeling, but for the sake of knowledge I'd like to know. Also, if you'd like to check de file I made, I can share it with you.
Thank you very much for your time and dedication to your channel! Keep up the good vibe!
Thanks! Glad to hear you found this to be helpful. Conditional parameters are not allowed, though there are some 'workarounds' - forums.autodesk.com/t5/fusion-360-ideastation-archived/conditional-parameters-if-then-else/idi-p/9058418
Sure thing, I always love seeing others files, especially when they've learned from one of my lessons. You can join my new community space and share it there -> bit.ly/PDOcommunity
The pin is made with a bridge that connect the two flanges, right? Speed and distance that you suggest? Thanks in advance and keep up the great work! 🙏🏻
Your T-shirt is awesome. Thanks for another great tutorial.
Déjà vu! - looks strangely like the case I just printed for my safety glasses. Sadly, the new chamfer tool wasn't about when I sketched mine...
Another great video! You said something about making the wall thickness divisible by your nozzle diameter. Just want to make sure I have that right. So, if I have a 0.4mm nozzle, a wall thickness of 1.6mm or 2.0mm would be good choices, and 1.5 or 1.4 not so good. Is that correct? And by the same reasoning, if I switch out to a 0.6mm nozzle, then 1.8 or 2.4 would be good. I'm asking because I thought the nozzle would be so close to the surface that it would squish the filament a bit and widen it out during printing.
Hi Mark, that's correct. Its to ensure when your Slicer creates the gcode for each layer you do not end up with awkward/irregular walls or paths. You're right that the final thickness will change slightly due to how the filament is spread.
How can I divide a line into equal parts ?, the command "divide cannot be found in fusion 360 and pattern is not what I am looking for
. just want to be able to share a line from end to end.
Thanks for the help
I’d love to see this application on a curved surface. I’m having trouble selecting the split on my curved surface to draw the 2.95mm line from the split.
Kevin - Thanks again for another excellent insight into the workings of Fusion 360.
You might like to know I experienced an issue with the Demo file. When I downsized the dimensions to do the test print of the hinge, I immediately got an error.
Unfortunately I can't upload a screen snapshot - but the error was a message box "Fusion Team Error Message. Remove Body Hinge left. The body reference is lost...." This related to the second of four remove element actions in the Timeline - but I don't know how to fix that. In addition, the Timeline action in question was coloured red.
A second issue noted was that when editing the box size (and keeping within the bounds you noted), I kept finding that one of the hinges would disappear. Playing around with the dimensions would sometimes cause the missing hinge to reappear. This sounds as though it is a related issue? For info I was trying to dimension a box to 35 x 95 x 40mm.
It may be relevant that I had just been 'forced' to update Fusion when I launched it for the first time in a couple of months. My previous version was 2.0.9512, and the new version is 2.0.9854.
I get the same issue
Hello! I want to print a hinged box in 2 separate prints, so that each half of the box can fill my print area, resulting in a larger box. How would I do that? / do you have a video for that?
Thanks!
Right click the component (or body, if it is just a body) and save as a separate STL file (with a proper name like "lid").
But you won't be able to do a "print in place" hinge in two pieces. That's kind of the whole point of this tutorial. If you do separate parts, then you'd have to print a separate hinge pin and manually insert afterwords. And the round hinge cavities may not be so dimensionally accurate, if they're printed separately without any internal support.
Huge fan of your videos! I was just wondering if anyone else had any "Print-in-Place" problems with this hinge? When I printed it, some of the hinge pieces were fused together, which led to stress fractures in the PLA material. Did I miss a step somewhere? lol. I am using an Ender 3 Pro, sliced in Matter Control. Using layer thickness of 0.18mm. Any help would be greatly appreciated, as I am fully exploring this newfangled "Print-in-Place" method now more extensively. Thanks!
Thanks, Naman!
I printed mine at .15 layer and .1 layer and they both worked well. .1mm being the best. Depending on layer height and other settings (infill, etc) it may fuse too much to the layers below which will cause it to break when in use. I also did the hinge at the minimum size. Scaling the entire hinge up will also make it stronger and be a huge help 😎
Hello man, I am now in your 12 days beginners course. But I really would like you to make a wrist watch design from A to Z.
This is ingenious. Love it.
Thanks :)
You are the boss Kev!
how did you make the hinge and make it workable? im confused
Hi Kevin, another great video. Thank you. You don't actually say what you mean "Print-in-Place". Having never heard the term before, I wasn't sure what you meant - my first thought was being able to print on the printer without leaving the Fusion360 environment (for slicing etc). In the end, I did some online research and discovered this definition.
"Print in place means that an assembly is printed without the need for any further manual assembly, and one can start using the part right away."
I'm writing this comment in case it's any use to anyone else out there.
This is correct, but it also means that the parts do not need to be separated for 3D printing. In the latter case, you need to create separate STL files.
Love your work. Thanks!. Dont see a link to the competition
found the competition link :)
Here's the link for everyone else looking for it - bit.ly/3dpchallenge
Would this hinge strong enough for daily use?
I would definitely thicken it (the pin and the flangs) if you plan on using it with a part/object for daily use. I have a very similar print from 2 years ago that is still holding up. Of course, the materials and other factors are at play.
How would you add a latch or tab to keep the box closed ?
Do you plan on doing a step by step for this specific box?
Hi Justin. I did the same box/hinges in a step-by-step tutorial: th-cam.com/video/iSBsBTMsGTk/w-d-xo.html
If you compare the demo files, you'll see that I've tweaked the user parameters a bit and simplified the sketches. Other than that, the hinges are nearly identical.
Great tutorial!
Thanks, Haneen! Glad you enjoyed it :)
can I please get help with a hinge on a project for a flip open wrist watch?? Please I really need help to finish this project
Would this be a similar process for a sphere rather than a box? I want to design some pokeballs with hinges on the back.
Yep! I don't have a separate video on it, but I have used the similar hinge style on a sphere. You'll want to use a mid-plane or another construction plane to sketch from starting in the middle of the sphere working your way outward.
@@ProductDesignOnline thanks! This helps give me some insight before I open up fusion 360 this evening. Much appreciated for the reply!
I am having trouble animating my CAD. I have two pegs that need to line up and I can get it to.
Can you make a video on making phone cases? particularly an iPhone 6s😂 it’s hard to find a good file for those😂
He already made one. You will have to do a little work because its not for a 6s but that won't kill you haha
th-cam.com/video/eW9IrA3i4w4/w-d-xo.html
Hi John. Per West Weld's comment, I do already have a video that covers phone cases (iPhone X). With that said, I would like to make another one that covers more universal workflows since the original one was tailored towards the specific phone model that I had for reference.
@@ProductDesignOnline lol I’ll check that video out! I love this Chanel!
@@ProductDesignOnline maybe the new iphone case design could be ... parameterized? : )
Hi, I have a problem with the tutorial, in the demo you used what I think is the cut and paste function, how to do it? to move the object from one component to the other component, deleting it in the previous location
Could you tell me at what time in the video you're referencing?
@@ProductDesignOnline
Thanks for the quick answer :) I mean more about your demo of the box that I opened at my place in Fusion360, and there, after dividing the block into 2 cubes and making a shell, you move the top cover from the first component to the second and in the first this cover disappears, in history it is like this icon, similar to copy and paste but there is a red arrow and it says CutPasteBodies2
This is the 10th icon from the left :) looking at this video :)
@@1MRsnuppy Thanks for clarifying! That helps, I see what you're talking about now.
I created the box as one solid body at the start. To move to the "top" component you simply click and drag the body in the Browser and release it over top the desired component (new location). The key thing is to make sure your black timeline marker is all the way at the end of the timeline. You also need to have the top-level component active.
In this scenario, I placed the bodies in separate components so I could apply the revolute joint.
@@ProductDesignOnline
Thanks a lot :) it's so simple, I tried to do it but the marker was not at the end of the timeline and I probably did not succeed;) thanks and best regards
the demo box you have does not work with a wallthickness of 4.8 because on the hinge shape sketch the distance from the box that the hinge center circle is set to 3 not a variable off of wallthickness so the center circle will extended into the box. I set it to wallthickness *1.5 and then everything worked for a wallthickness of 4.8 just in case anyone else runs into this problem.
other wise love the videos and I am leaning a lot thanks
So you didn't have to stand it up eh? You could just print it horizontally? I would've thought the pin would end up bowing a little bit. I am going to try this with ABS tomorrow!
I don't get how it's printing the pin inside the hinge in mid-air. Wouldn't you have to print this on it's side or something?
your teaching us all of this but how did you learn fusion so indepth?
I was fortunate to learn CREO and some other CAD programs at 12 years old...then went on to use Solidworks for many years. I made the switch to Fusion when it first came out because I was looking for something that worked on Mac :)
Hello sir please make a video on car Modeling with sclupt
Hi kevin is it possible if I receive your email I want to ask some questions for a school project
Valeu!
Thanks for your support!
Does anyone here have the problem of there abs prints sticking to the build sheet too good like me? And any solutions?
For some reason, my model does not accept nearly as small dimensions as you use. Why does this happen? See screenshot -> imgur.com/xZQesLV
how do i MAKE the hinge????
Please see the pinned comment where I've linked to the step-by-step hinge video
The design part is working fine. good tutorial. But Printing this.... is disappointing. After printing, it turned out the 45 degree chamfer edges needed supports, and the box did not close all the way , and there is no lock mechanism. Maybe a nice topic for you next video. The hinges worked fine.
Hey, thanks for sharing! Are you able to share a pick of edges? I didn't have any issues. what resolution did you print in?
Hello Kevin, I sent you an email regarding making a wooden clock.
DO THE BOX FROM ZERO STEP BY STEP TO SEE HOW TO MAKE IT IN THIS VIDEO CANT DO IT
I realize that this video is pretty old, so you may not see this comment. However, I have a question relating to the hinge design.
I went through your detailed tutorial and was able to reproduce it with no problem... lid closes and everything. However, the joint was a bit sloppy so I tried reducing the gap to 0.4 and then 0.3. I also tried to increase the shell thickness to make it a bit more robust. But, with these changes, the box would not close completely. (Printed everything with 0.2 layers)
It seems like one issue is the spacing between the pin and the back wall of the box. In your full video, I think that value is set to 2.95 mm. Where does that come from? Is there some design rule that one can use if the hinge pin and shell are made thicker, for example? Or, is there a minimum required gap between the back wall of the box and the hinge knuckle?
If you're getting your first 3D printer, don't let price drive your purchase. Be willing to spend some extra bucks to get a better printer. I didn't do this, and I regret it. Features that I consider a must on any printer I'll buy (been printing for around 5 years or so and on my second printer) are a removable print bed and auto bed leveling. The removable print bed allows you to take the bed off, give it a small flex, and have the print pops right off. Usually, the bigger the print, the easier it is to pop it off, which is the opposite of printers without a removable bed. Auto bed leveling is a must for me because I could never get the bed properly leveled with a screw system. The nozzle was constantly digging into the print bed. (I'm pretty sure this was a failing on my part and not my printers.) Auto bed leveling means I tell my printer to print, it levels itself, and I get a near perfect first layer every time. Other features to consider include filament run out detection, power outage backup, built in web interfaces, and so on. But those first two are a non-starter for me. I won't consider a printer, no matter how good it prints, without auto bed leveling and a removable, flexible print bed. (PS: For me, this means a Prusa MK3 i3S, but there are other printers and other manufacturers that have these features as well, so you don't have to get the Prusa to get these features.)
Well said, Rick! Thanks for sharing your experiences, especially with the auto-bed leveling. Bed leveling is certainly a big one that beginners aren't aware of.
I also recommend Prusa printers to those who can afford it. The price jump can be significant for some that are looking at the entry-level enders. I discuss that more (how it's worth it) in the blog post - bit.ly/3DPrinterComparison
Cheers!
@@ProductDesignOnline Thanks Rick for this thread. I agree with the points you made. I started with 3D printing just over a year ago. I decided to buy an Ender 3 Pro as my first printer, because I didn't have any experience and the price-point was low enough for me to put to discard the whole idea if I didn't think it worthwhile. Soon after buying the Ender 3, I realised a few things: first, if 3D printing is going to be of good use, I need to learn how to design models myself, instead of just downloading STL files from Thingiverse etc. Secondly, as a novice, I had real problems getting the model to stick. I immediately bought the BLTouch upgrade for Ender 3 Pro, but even then I had problems with adhesion. I tried different ideas, different glues (yuk!) etc. In the end, I put and end to the Ender 3. I decided it had paid its worth in teaching me about the 3D printing process, about the workflow issues and about the importance of things like 3D modelling and bed-levelling. I then went and bought a Prusa Mk3/S and haven't looked back. On the face of it, the Ender 3 and Prusa Mk3 look fairly similar, and when I try to describe the differences it seems impossible to convince others, apart from saying try it for yourself and see. The Prusa has a myriad of minor improvements and details that make it work (it just works), but the most important things are the software (eg things like a menu option for first-layer calibration, and live Z-adjust) AND even more than all of that, the support service. Prusa have a online chat support, which operates 24/7 and is second to none.
Finally, I decided to jump into 3D modelling and get CAD software. I chose between Fusion360 and Onshape and decided on Fusion360. I struggled and struggled, without much progress. I looked at loads of tutorials and videos, including those from Lars Christensen, but made very little progress until I came across Kevin Kennedy's videos. After watching just a few of Kevin's videos I starting running with Fusion 360 and haven't looked back.
Anyway, that's my experience, in case it's any use to anyone.
I disagree with the bed leveling comment. I got a glass bed and upgraded springs for my Ender 3. The springs allow leveling the bed using this level test, then I never have to bother with it again. www.thingiverse.com/thing:2987803
I had a BL Touch clone but never installed it.
@@burtonkent4549 I'm glad you found a solution that works for you. Everyone is going to be different in what they want, and in this case, what they can and can't do. Like I said, I think the inability to level the bed on my first printer was on me, not the printer. I'm sure other people had no problems leveling that bed. Ender printers are good printers, and although I'm going to stick with Prusas for the foreseeable future, I wouldn't steer anyone away from an Ender printer.
@@rickseiden1 Fair enough. I don't want you to scare people away from Enders. At my makerspace (pumpingstationone.org) we have both Enders and Prusas. It does take a bit more time to dial in an Ender, but once you do it's hands off. I'd rather have 3 Enders than one Prusa.
Didnt help much as you just showed what you alreayd did not how you did iti
This is an overview video that many people requested. I have 3 other videos showing how to design them step by step, including this one: th-cam.com/video/fYDJLdOV_zE/w-d-xo.htmlsi=IdPmrxpa8DdlQuUL
This video shows for 10 minutes how the hinge works and never talks about how to design it (from scratch). Sorry but 👎 (contents are actually great but do not reflect the title)
See pinned comment. Linked to the design lesson.
Kinda useless video, you just chamfered the object and hinges were already there...
I have two other videos showing how to design the hinges from scratch. This was a follow-up video requested by many to talk more about the design. See the video here - th-cam.com/video/iSBsBTMsGTk/w-d-xo.html