Thanks, its good to hear a video from a actual painter, I was looking for the best rubber sealant, and Dicor products are what I've used over the years
You're welcome! It is still looking great after 2 year! I was always happy with Dicor products too, that is why I went with this coating. Thanks for watching!
Well, I don’t even own a camper (I’m in a campervan), but that cleaning agent is amazing! Instant gratification. Just like mowing an over grown lawn, immediately looks 100% better. You’re pretty tough to be doing that in 92F heat! Hat tip to you!✌🏼
Heck yeah that cleaning agent is awesome! Lol, good analogy! Thankfully I had some shade from the neighbor's tree so it wasn't too bad! Thanks for the comment and watching!
I recently subscribed to your Chanel and I love how well you answer people! First time camper owner here! So I ordered all the things I need, but I was wondering if I should go through and reseal all the cracks around the vents on the roof ahead of time, or if this method will seal them in the process? Thank you in advance!
Thanks for subscribing Julia! I sealed the cracks first and then put this coating over the top. I wanted to make sure the cracks were definitely sealed up. So, it may have been overkill, but I'd rather be safe than sorry. Hope that helps. Thanks for the comment and watching!
I'm getting ready to do mine. It's 8 x 28 plus a slide out and was told it would take 5 gal for 1 coat....and that will be very expensive. I like your 2 gallon that did 3 coats better. LOL Great video and tips.
Lol! Yeah, 5 gallons would be a lot! You may need 3 gallons. I scraped the bottom of my buckets to get a full third coat. Good luck and thanks for watching!
Heeeey Brian thanks for the tips , I have to do the same to the Arctic Fox travel trailer soon my wife was just telling me (ha)! Let me know how that product works out in the long run ? I have done my truck slide in camper before with the stuff from home depot or lowes only . But yea prepping before is key .well its cooling off here and Im getting game camera pics of mule deer and Elk around the cabin now . I have water out for the critters so they come in nightly for a drink ......Ok lets pray to the snow gods for a good snow board and ski season !
You're welcome! It's a pretty easy project overall. Like I said in the video, it just takes setting aside the time to do it. I'll definitely keep you guys posted on how it works in the long run. I'm hoping it is good. It got pretty good reviews on Amazon and at this point, either the Dicor product or another product was our only hope to saving the roof. That is awesome you have mule deer and elk on your game cams! I have a few cams up on the property but I haven't seen any big game yet. We're going to the land this weekend so it will be interesting to see if that crazy early snowfall helped bring them down the mountain. I'm thinking we probably got around 12inches of snow at the land. If that keeps up, I can definitely do some BC around the land! I'm with ya, I've been praying to the snow gods!
Thanks for video, getting ready to do this on my 2004 Jayco. Never had any problems but think it is time. Going with two gallons for our 27 x 8 roof. Concerned because DICOR says it should take 4 gallons.
You're welcome! We have a 25x8' and only used 2 gallons for 3 coats. My guess is Dicor is covering their butt so people can't complain about not buying enough. I'd be really surprised your roof would take 4 gallons. Good luck with the project and thanks for watching!
I found you looking for help fixing my RV camper, I been washing all your videos, funny we are north of Denver Colorado and looking for land too. Same ideals why we want land .I need to do do my roof and inside wall , I definitely appreciate any help.
That is great Anita! I hope you guys find some land. Good luck with your roof and wall. It's always great to have another Coloradon on here, thanks for watching!
Pro tip- never use a power washer on your rv roof. You can easily damage the roof and/or caulking. As someone who seals rv roofs for a living I’ve seen it done countless times. Also. A extended reach handle on your roller will take off a ton of strain to your back and knees when rolling the Dicor on
I see where you are coming from. I wouldn't say NEVER use a powerwasher. I've been in the painting business for 20 years. I've seen plenty of homeowner's mess up fences, decks, concrete, and more with a powerwasher. Does that mean that we don't powerwash those surfaces because you can damage them? No. Someone who knows what they're doing with a powerwasher, can use it to do this job. An extension pole can definitely help! Thanks for watching.
Thanks for the great video. I had a question about the second coat. We’re you able to stand on the roof for the second coat, like you did for the first coat? Thx!
Be careful walking on a RV roof, the dealer told me that 300 lbs is about the max one can expect the roof to support but to be safe spread out the weight with plywood and walk on the plywood, or get on your hands and knees while on the roof. One thing you dont want is to damage the roof structure or fall through the roof. Also remember that the rubber membrane is only about as thick as a nickel, very thin material that can puncture and tear easily, notice this man is barefooted on the roof :) Also remember that soap and rubber together are very slippery, so walk or crawl slowly and be careful.
Great video! I noticed the pre taped masking film is 5 feet deep. Should I be concerned about it not reaching down the full sides like 12 feet? Thank you.
It was not an issue for me. If you are concerned about it, you could get a box of plastic that is 12' long, it just isn't pre-taped. 3M makes a really good box that is relatively easy to mask with tape, we use it on jobs all the time. Here's a link to the plastic on Amazon: amzn.to/3EsTL1X Thanks for watching!
It's been 3 years, is it holding up. Do you know if that Dicor ribber roof coating could be used on a TPO roof? I'm not looking to recoat the roof, I replaced the entire roof 4 years ago bit eant to use it to help seal the dicor self leveling sealant around vents and skylights as I don't like the way the dicor lap sealant is working. It never glows out that well (unless it's really hot outside). Thanks for all your tips.
I'm not 100% sure if you can use it on TPO, I think you can. Check Dicor's website. We sold that camper in the fall. The roof still looked great! Thanks for watching.
Thank you! Good call on the eternabond. If you look at the video at 8:59, check out my vent to the right. I actually put down some eternabond tape when I did a maxx air vent/fan. I put the coating over the tape. So far, no issues and I'm coming up on one year. Hope that helps! Good luck with the project and thanks for watching!
I did this once and used the Hueng's. When I went to put the second coat on the first immediately started peeling like Elmer's glue would peel from your hand after drying. How did this hold up for you? I really want to do it again, but it's a lot of effort and time. I was so disappointed last time, and I would really want this to work and last. Thanks. Great video btw.
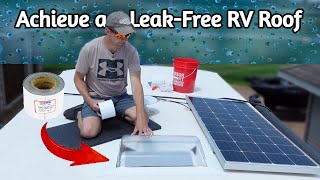
Sorry to hear about your experience! That happened in one area while I was putting on the second coat, but I didn't allow the first coat to dry as long as I probably should have. So far it seems to be holding up very well! I installed some solar panels on my roof a month or so after this project. Everything cured very well and it seems like the roof is protected. I'll try to do another video this summer when it has been a year. Thanks for watching!
@@ColoradoCamperman thanks for the update. Since the dicor worked well for you I'm going to try it on mine, as soon as weather permits. Great videos, enjoy your RVing life!
I am going to apply about 6sq ft of flexseal liquid sealant over my dicor sealed epdm roof. I am going to trim around the flex seal with eternabond tape. I have been told that flexseal won't adhere to the tape because the tape is very slick. Do you or any subs know whether eternabond will adhere to the flexseal. I think it will as the flexseal is acrylic but I would appreciate your reply. Thanks happy camping!
Thanks for your question Steve. While I have not tried this combo, I would think it would adhere. We purchased some eternabond tape for a project. The roll is sitting in my garage on top of a wood shelf. As it has heated up in my garage, the glue substance has "leaked" a little bit from the roll and the roll is extremely difficult to remove from the shelf. The roll is still usable and nothing is wrong with the tape. The point I'm trying to make is that when this stuff is heated up, I think it will adhere to almost anything. Prior to applying everything on your roof, you may want to try your combination on some scrap wood. Leave it out in the sun for a few days to a week and see how it holds. If it seems solid, go with it! Hope that helps. Thanks for watching!
I recently repainted/resealed my RV roof for maintenance and peace of mind. I followed your video for guidance. However, about a month after I noticed a bunch of air pockets in the paint. I was wondering if I should be worried or if i just let them be or pop them? What could be the best remedy for this?
Are they always there or do they just come out when the sun hits the surface? How many are there? How big are they? Air pockets/bubbles can be an indication of moisture trying to escape. If they are not too big, or there are not too many of them. I would pop them. Then, let the surface sit for a day or two to let any moisture escape (make sure there is no rain in the forecast). Then, seal up those areas with some dicor sealant. You could also use the dicor rubber roofing coating if you have any left.
@@ColoradoCamperman it is quite a few about 20-25 about the size of a quarter to about 2-3 inch the biggest ones. Not sure if it's air or moisture pockets but my roof didn't have those blisters before I painted/resealed. I have trailer temporarily parked in florida keys now so it is hot.
@@ivanmejia4557 Maybe try what I suggested on one larger one and one smaller one. It it works, there is your answer! If it doesn't work, I wouldn't worry about it, just keep a close eye on the bubbles.
@@ColoradoCamperman thanks. Went up there this morning and they where there but soft. Yesterday with heat they were harder when I pressed. I popped one of them gonna let it sit in heat and cover with small piece of eternabond.
Great informational video. Can I sure this product on plywood? I am building a DIY overland trailer and this seems like it would be perfect for the roof or even the entire outside of the camper. What are your thoughts?
I would not recommend applying this product directly on plywood. The instructions say it needs to be installed over a TPO or EPDM roof. I bet you'd run into a whole bunch of issue long term if you applied it directly to plywood.
The instructions say to use the cleaner activator, so I did . I did not even consider using another product. If you're going to commit the time necessary to do this project, you should probably follow the instructions. Just my opinion. Thanks for watching.
Yes use the activator before coating. I would not use another product and only use what dicor recommends. If you're going through the hassle of doing the job, I would follow the instructions exactly. Thanks for watching.
I used a 1/2in Purdy Marathon. It's a nylon/poly blend. It doesn't lay down a thick texture, but it lays down enough of one for the roof. Here's an Amazon link to the exact one that I used: amzn.to/3iGrszQ Thanks for the comment and watching!
Dicor says, "DICOR ACRYLIC COATING shall be applied in a minimum of 2 coats at a rate of 1 gallon per 125 sq. ft per coat (i.e. 8′ X 30′ roof takes 4 gallons)." For our roof (which is approximately 24'x8') I applied 3 coats and used almost exactly 2 gallons. I mainly applied the 3rd coat because I had enough extra, it probably wasn't 100% necessary. I hope that helps. Thanks for watching!
@@ColoradoCamperman So based on the math, it sounds like you got a little better "mileage" than what manufacturer says. I'm about to do my camper (BTW, thanks for the video .. very helpful!) and I kinda based the amount I purchased on the info you provided (and the cost of this stuff). My roof is approximately 27'x8' and I also bought 2 gallons. Now I'm a little worried I didn't buy enough. But I'm crossing my fingers that if you got 3 coats, I'll eke out 2 coats. Thanks again for posting this video, very informative!
@@joelyoung9901 Thanks Joel! Glad you found the video helpful. I think you will be good with what you purchased and I bet you'll get 2 coats. Let me know how it goes! Thanks for the comment and watching!
@@joelyoung9901 wondering how you did with the 2 gallons? Getting ready to apply to my 27x8 and don't want to buy the recommended four gallons. How did your project go?
I used 2 gallons to do three coats on our roof. As stated in the video, I did a third coat because I had the extra. Our roof is approximately 25 ft by 8 ft. So, you might be able to use 2 gallons and do 2 coats. Good luck with the project, thanks for watching.
@@CM-gx8tu No. Just make sure you wait the amount of time specified in the directions. I tried to do it earlier and the first coat started to lift up in areas where it was not dry all the way.
You received something different then me. Maybe they changed their product? It's been almost 2 years since I made this video, so maybe things have changed. Thanks for watching.
I know, right?!? We have tons of room for solar. After this project, I'm going to add 200 watts up there and start with that. Thanks for watching Gary!
@@garyausher Good to know! 400 is a nice amount, that is what I was wanting to put on, but we may only have this camper for another season or two. So we thought 200 watts wouldn't break the bank and it'll take care of us in the mean time.
The EPDM roof is rubber. The 'rubber' coating is not rubber, it is acrylic (plastic - same as plexiglass). I don't know how they get away calling this acrylic coating 'rubber' and 'latex'. Just like latex house paint is not rubber either but acrylic. In other words, this is very close to the same latex paint used on house walls. It infuriates me that they are allowed to get away with this blatant misrepresentation of product. From what I have read of reviews, all these acrylic fake 'rubber' paints don't last. Heng's and Henry's Elastomeric and Dicor are all the same genre of acrylic paints. Some of them wash away!!!!! The only thing I've read that works is Henry's Tropi-Cool Silicone coating. Its pricey! There two types - 887 and 887HS (Heavy Solids). Don't use the HS version. Also look for the gallon cans, as the 5 gal buckets are too big and not stirred up well. Silicone is very sticky, much more than acrylic. Silicone is also very slippery when wet. So all in all, not sure if its the right product for me. However, it does last 15 yrs and insulates better. There is one other option: Durabak 18 Textured paint. This can be applied to roof. Its a flexible polyurethane paint with bits of rubber in it. Roller brush it on. Needs two coats. Pressure wash, sand roof lightly, clean up with Xylene, and roll on one coat, let dry to touch but not cure, and apply second coat. Durabak is very hard, and prevents tears. The textured form prevents slipping. Silicone also attracts dirt easily but not Durabak. This product might be the best one yet for the roof. A bonus is that you can put Durabak on metal, fiberglass, wood, cement, just about anything. So you can repaint your RV with it too. I would use the Smooth version for RV. Roller brush it on, no need to spray. Self leveling, and finishes satin, not matte, not glossy. Only Satin, and only a fixed range of colors plus Clear. But so what. Seems like the best option so far.
Lol, believe me, we would love a new camper! If we didn't have to buy a new truck last year, we would have a new camper! We're saving for a new one, so hopefully this roof lasts for at least a few years and then we can sell this camper and get a new one.


Thanks, its good to hear a video from a actual painter, I was looking for the best rubber sealant, and Dicor products are what I've used over the years
You're welcome! It is still looking great after 2 year! I was always happy with Dicor products too, that is why I went with this coating. Thanks for watching!
Great detail as to tools, appreciate the entire display and description! Agreed, clean first - lotsa lazy folks out there who blame the products.
Thanks for the comment and watching!
Super helpful! Thanks!
Glad it was helpful! Thanks for watching!
Well, I don’t even own a camper (I’m in a campervan), but that cleaning agent is amazing! Instant gratification. Just like mowing an over grown lawn, immediately looks 100% better. You’re pretty tough to be doing that in 92F heat! Hat tip to you!✌🏼
Heck yeah that cleaning agent is awesome! Lol, good analogy! Thankfully I had some shade from the neighbor's tree so it wasn't too bad! Thanks for the comment and watching!
Thank you, very helpful video
Glad it was helpful! Thanks for the comment and watching!
I recently subscribed to your Chanel and I love how well you answer people! First time camper owner here! So I ordered all the things I need, but I was wondering if I should go through and reseal all the cracks around the vents on the roof ahead of time, or if this method will seal them in the process? Thank you in advance!
Thanks for subscribing Julia! I sealed the cracks first and then put this coating over the top. I wanted to make sure the cracks were definitely sealed up. So, it may have been overkill, but I'd rather be safe than sorry. Hope that helps. Thanks for the comment and watching!
Great vid straight to the point 👍thanks my man
You're welcome Chris, thanks for watching!
Always enjoy your diy videos. Keep up the good work.👍
Thank you, glad you enjoy the DIY videos! There's been a lot lately, our camper is falling apart, lol! Thanks for watching!
Thx man I was worried about camper roof project.
You're welcome! It wasn't too bad of a job. Good luck with the project and thanks for watching!
Great video! How has it held up over the years?
Thank you! It held up great, we sold the camper last fall but before we did, it still looked awesome.
@@ColoradoCamperman amazing! Thanks for the update as we are in the process of choosing products for ours, this helped tremendously!:)
I'm getting ready to do mine. It's 8 x 28 plus a slide out and was told it would take 5 gal for 1 coat....and that will be very expensive. I like your 2 gallon that did 3 coats better. LOL Great video and tips.
Lol! Yeah, 5 gallons would be a lot! You may need 3 gallons. I scraped the bottom of my buckets to get a full third coat. Good luck and thanks for watching!
Good job brother and keep up the great videos. Subscribed!
Thanks! I'm glad you enjoyed the video. Thank you for watching and subscribing!
Great video. Keep making them please :)
Thanks Jason! Will do! I'm a little behind right now due to work, but I'll get back on posting videos soon!
Thanks bro, very informative!
You're welcome! Thanks for the comment and watching!
Heeeey Brian thanks for the tips , I have to do the same to the Arctic Fox travel trailer soon my wife was just telling me (ha)! Let me know how that product works out in the long run ? I have done my truck slide in camper before with the stuff from home depot or lowes only . But yea prepping before is key .well its cooling off here and Im getting game camera pics of mule deer and Elk around the cabin now . I have water out for the critters so they come in nightly for a drink ......Ok lets pray to the snow gods for a good snow board and ski season !
You're welcome! It's a pretty easy project overall. Like I said in the video, it just takes setting aside the time to do it. I'll definitely keep you guys posted on how it works in the long run. I'm hoping it is good. It got pretty good reviews on Amazon and at this point, either the Dicor product or another product was our only hope to saving the roof. That is awesome you have mule deer and elk on your game cams! I have a few cams up on the property but I haven't seen any big game yet. We're going to the land this weekend so it will be interesting to see if that crazy early snowfall helped bring them down the mountain. I'm thinking we probably got around 12inches of snow at the land. If that keeps up, I can definitely do some BC around the land! I'm with ya, I've been praying to the snow gods!
Great video. I have a 2009 Forest River that is about 19 x 8 so I will be doing this very soon. .
Thanks Rick! It's not too difficult, it just takes a long time to do. Thanks for the comment and watching!
Thanks for video, getting ready to do this on my 2004 Jayco. Never had any problems but think it is time. Going with two gallons for our 27 x 8 roof. Concerned because DICOR says it should take 4 gallons.
You're welcome! We have a 25x8' and only used 2 gallons for 3 coats. My guess is Dicor is covering their butt so people can't complain about not buying enough. I'd be really surprised your roof would take 4 gallons. Good luck with the project and thanks for watching!
Good information I have a 20ft travel trailer so maybe 1 gallon would give me 2 coats of protection?
I found you looking for help fixing my RV camper, I been washing all your videos, funny we are north of Denver Colorado and looking for land too. Same ideals why we want land .I need to do do my roof and inside wall , I definitely appreciate any help.
That is great Anita! I hope you guys find some land. Good luck with your roof and wall. It's always great to have another Coloradon on here, thanks for watching!
I am wondering how this turned out after doing it a few years ago?
We sold the camper last year but before we sold it, it still looked great!
Pro tip- never use a power washer on your rv roof. You can easily damage the roof and/or caulking. As someone who seals rv roofs for a living I’ve seen it done countless times. Also. A extended reach handle on your roller will take off a ton of strain to your back and knees when rolling the Dicor on
I see where you are coming from. I wouldn't say NEVER use a powerwasher. I've been in the painting business for 20 years. I've seen plenty of homeowner's mess up fences, decks, concrete, and more with a powerwasher. Does that mean that we don't powerwash those surfaces because you can damage them? No. Someone who knows what they're doing with a powerwasher, can use it to do this job. An extension pole can definitely help! Thanks for watching.
Thanks for the great video. I had a question about the second coat. We’re you able to stand on the roof for the second coat, like you did for the first coat?
Thx!
Yes, you will need to wait until it is pretty dry though, otherwise some of the first coat will pop up.
Be careful walking on a RV roof, the dealer told me that 300 lbs is about the max one can expect the roof to support but to be safe spread out the weight with plywood and walk on the plywood, or get on your hands and knees while on the roof. One thing you dont want is to damage the roof structure or fall through the roof. Also remember that the rubber membrane is only about as thick as a nickel, very thin material that can puncture and tear easily, notice this man is barefooted on the roof :) Also remember that soap and rubber together are very slippery, so walk or crawl slowly and be careful.
These are all great tips! Thank you for the comment and watching!
Great video! I noticed the pre taped masking film is 5 feet deep. Should I be concerned about it not reaching down the full sides like 12 feet? Thank you.
It was not an issue for me. If you are concerned about it, you could get a box of plastic that is 12' long, it just isn't pre-taped. 3M makes a really good box that is relatively easy to mask with tape, we use it on jobs all the time. Here's a link to the plastic on Amazon: amzn.to/3EsTL1X Thanks for watching!
Do you want to level the rv the best you can before getting started?
It probably wouldn't hurt, but I'm not sure it is 100% necessary if you're not able to.
It's been 3 years, is it holding up. Do you know if that Dicor ribber roof coating could be used on a TPO roof? I'm not looking to recoat the roof, I replaced the entire roof 4 years ago bit eant to use it to help seal the dicor self leveling sealant around vents and skylights as I don't like the way the dicor lap sealant is working. It never glows out that well (unless it's really hot outside). Thanks for all your tips.
I'm not 100% sure if you can use it on TPO, I think you can. Check Dicor's website. We sold that camper in the fall. The roof still looked great! Thanks for watching.
Do you use the cleaner first then tape holes then add paint
Tape holes? Sorry, what do you mean by that?
Great video Bud. I put down Eternabond around vents and antenna. Can I paint over the tape with this stuff?
Thank you! Good call on the eternabond. If you look at the video at 8:59, check out my vent to the right. I actually put down some eternabond tape when I did a maxx air vent/fan. I put the coating over the tape. So far, no issues and I'm coming up on one year. Hope that helps! Good luck with the project and thanks for watching!
Thanks Brother.
You're welcome, thanks for watching!
Can you do that to your slide-out roofs?
If your slide out was the same roofing material, I would think you could. But I am not 100% sure
I have on order from RV roof magic 5 gallons ? My fifth wheel is 26 foot long ! Have I been taken on how much they have sold me ? Very helpful vid
I'm not sure, I didn't used the RV roof magic. Good luck with the project and thanks for watching.
Good job!
Thanks for the comment and watching!
I did this once and used the Hueng's. When I went to put the second coat on the first immediately started peeling like Elmer's glue would peel from your hand after drying. How did this hold up for you? I really want to do it again, but it's a lot of effort and time. I was so disappointed last time, and I would really want this to work and last. Thanks. Great video btw.
Sorry to hear about your experience! That happened in one area while I was putting on the second coat, but I didn't allow the first coat to dry as long as I probably should have. So far it seems to be holding up very well! I installed some solar panels on my roof a month or so after this project. Everything cured very well and it seems like the roof is protected. I'll try to do another video this summer when it has been a year. Thanks for watching!
@@ColoradoCamperman thanks for the update. Since the dicor worked well for you I'm going to try it on mine, as soon as weather permits. Great videos, enjoy your RVing life!
@@oldfartnewstart1928 No problem, thanks and good luck with the project!
I am going to apply about 6sq ft of flexseal liquid sealant over my dicor sealed epdm roof. I am going to trim around the flex seal with eternabond tape. I have been told that flexseal won't adhere to the tape because the tape is very slick. Do you or any subs know whether eternabond will adhere to the flexseal. I think it will as the flexseal is acrylic but I would appreciate your reply. Thanks happy camping!
Thanks for your question Steve. While I have not tried this combo, I would think it would adhere. We purchased some eternabond tape for a project. The roll is sitting in my garage on top of a wood shelf. As it has heated up in my garage, the glue substance has "leaked" a little bit from the roll and the roll is extremely difficult to remove from the shelf. The roll is still usable and nothing is wrong with the tape. The point I'm trying to make is that when this stuff is heated up, I think it will adhere to almost anything.
Prior to applying everything on your roof, you may want to try your combination on some scrap wood. Leave it out in the sun for a few days to a week and see how it holds. If it seems solid, go with it! Hope that helps. Thanks for watching!
Can you do this on a enclosed car trailer? I think I just have a metal roof.
I think it was only designed to be applied over an rubber RV roof. I wouldn't apply it over metal. Thanks for watching.
I recently repainted/resealed my RV roof for maintenance and peace of mind. I followed your video for guidance. However, about a month after I noticed a bunch of air pockets in the paint. I was wondering if I should be worried or if i just let them be or pop them? What could be the best remedy for this?
Are they always there or do they just come out when the sun hits the surface? How many are there? How big are they? Air pockets/bubbles can be an indication of moisture trying to escape. If they are not too big, or there are not too many of them. I would pop them. Then, let the surface sit for a day or two to let any moisture escape (make sure there is no rain in the forecast). Then, seal up those areas with some dicor sealant. You could also use the dicor rubber roofing coating if you have any left.
@@ColoradoCamperman it is quite a few about 20-25 about the size of a quarter to about 2-3 inch the biggest ones. Not sure if it's air or moisture pockets but my roof didn't have those blisters before I painted/resealed. I have trailer temporarily parked in florida keys now so it is hot.
@@ivanmejia4557 Maybe try what I suggested on one larger one and one smaller one. It it works, there is your answer! If it doesn't work, I wouldn't worry about it, just keep a close eye on the bubbles.
@@ColoradoCamperman thanks. Went up there this morning and they where there but soft. Yesterday with heat they were harder when I pressed. I popped one of them gonna let it sit in heat and cover with small piece of eternabond.
@@ivanmejia4557 Good thinking, eternabond should work well too. Let me know what happens!
Great informational video. Can I sure this product on plywood? I am building a DIY overland trailer and this seems like it would be perfect for the roof or even the entire outside of the camper. What are your thoughts?
I would not recommend applying this product directly on plywood.
The instructions say it needs to be installed over a TPO or EPDM roof. I bet you'd run into a whole bunch of issue long term if you applied it directly to plywood.
No lap sealant?
I did lap sealant on cracks prior to applying the coating.
IT works if i dont use the cleaner activator? Can i use another cleaner product?
The instructions say to use the cleaner activator, so I did . I did not even consider using another product. If you're going to commit the time necessary to do this project, you should probably follow the instructions. Just my opinion. Thanks for watching.
Is power washing that membrane really okay?
I'm very worried about ripping off the membrane.
Thank you
Yes, the instructions call for powerwashing. Use a white or green tip and it should be fine, that is exactly what I did. Thanks for watching!
Do you have to use the Activator before coating? Would another cleaning product work as well?
Yes use the activator before coating. I would not use another product and only use what dicor recommends. If you're going through the hassle of doing the job, I would follow the instructions exactly. Thanks for watching.
Was your roller a thick rough nap type roller or one that has those yellow loops for texture type applications?
I used a 1/2in Purdy Marathon. It's a nylon/poly blend. It doesn't lay down a thick texture, but it lays down enough of one for the roof. Here's an Amazon link to the exact one that I used: amzn.to/3iGrszQ Thanks for the comment and watching!
Did you use just one bottle of activator?
Yes just one bottle.
Are 3 coats recommended? Also how many gallons did it take for 3 coats?
Dicor says, "DICOR ACRYLIC COATING shall be applied in a minimum of 2 coats at a rate of 1 gallon per 125 sq. ft per coat (i.e. 8′ X 30′ roof takes 4 gallons)." For our roof (which is approximately 24'x8') I applied 3 coats and used almost exactly 2 gallons. I mainly applied the 3rd coat because I had enough extra, it probably wasn't 100% necessary. I hope that helps. Thanks for watching!
@@ColoradoCamperman awesome, thank you for the information.
@@ColoradoCamperman So based on the math, it sounds like you got a little better "mileage" than what manufacturer says. I'm about to do my camper (BTW, thanks for the video .. very helpful!) and I kinda based the amount I purchased on the info you provided (and the cost of this stuff). My roof is approximately 27'x8' and I also bought 2 gallons. Now I'm a little worried I didn't buy enough. But I'm crossing my fingers that if you got 3 coats, I'll eke out 2 coats. Thanks again for posting this video, very informative!
@@joelyoung9901 Thanks Joel! Glad you found the video helpful. I think you will be good with what you purchased and I bet you'll get 2 coats. Let me know how it goes! Thanks for the comment and watching!
@@joelyoung9901 wondering how you did with the 2 gallons? Getting ready to apply to my 27x8 and don't want to buy the recommended four gallons. How did your project go?
You were able to do a 25ft. trailer with less than a gallon per coat? Doesn’t seem like it would go that far, as thick as it is.
Yep, 3 coats, 2 gallons. Thanks for watching.
How many gallons would I need to cover a 28' X 9" roof?
I used 2 gallons to do three coats on our roof. As stated in the video, I did a third coat because I had the extra. Our roof is approximately 25 ft by 8 ft. So, you might be able to use 2 gallons and do 2 coats. Good luck with the project, thanks for watching.
@@ColoradoCamperman Thank You
@@ColoradoCamperman any other prep to putting on the 2nd coat?
@@CM-gx8tu No. Just make sure you wait the amount of time specified in the directions. I tried to do it earlier and the first coat started to lift up in areas where it was not dry all the way.
😊
Thanks for watching!
I bought this product and received two cans..An orange can and a silver can..It's a two part system ,right?..
You received something different then me. Maybe they changed their product? It's been almost 2 years since I made this video, so maybe things have changed. Thanks for watching.
Dang, look at all that real estate up there for solar! Fill the roof with panels & roof cleaning is way faster!
I know, right?!? We have tons of room for solar. After this project, I'm going to add 200 watts up there and start with that. Thanks for watching Gary!
@@ColoradoCamperman Looking forward to a solar install video. Be sure to pull extra cable for expansion, I have 400 on the truck camper. Never enough!
@@garyausher Good to know! 400 is a nice amount, that is what I was wanting to put on, but we may only have this camper for another season or two. So we thought 200 watts wouldn't break the bank and it'll take care of us in the mean time.
Great video except you should be using prob atleast 1.5 gal per coat . Not 1 gal for the whole job !
I used 2 gallons. Thanks for watching
The EPDM roof is rubber. The 'rubber' coating is not rubber, it is acrylic (plastic - same as plexiglass). I don't know how they get away calling this acrylic coating 'rubber' and 'latex'. Just like latex house paint is not rubber either but acrylic. In other words, this is very close to the same latex paint used on house walls. It infuriates me that they are allowed to get away with this blatant misrepresentation of product. From what I have read of reviews, all these acrylic fake 'rubber' paints don't last. Heng's and Henry's Elastomeric and Dicor are all the same genre of acrylic paints. Some of them wash away!!!!!
The only thing I've read that works is Henry's Tropi-Cool Silicone coating. Its pricey! There two types - 887 and 887HS (Heavy Solids). Don't use the HS version. Also look for the gallon cans, as the 5 gal buckets are too big and not stirred up well. Silicone is very sticky, much more than acrylic. Silicone is also very slippery when wet. So all in all, not sure if its the right product for me. However, it does last 15 yrs and insulates better.
There is one other option: Durabak 18 Textured paint. This can be applied to roof. Its a flexible polyurethane paint with bits of rubber in it. Roller brush it on. Needs two coats. Pressure wash, sand roof lightly, clean up with Xylene, and roll on one coat, let dry to touch but not cure, and apply second coat. Durabak is very hard, and prevents tears. The textured form prevents slipping. Silicone also attracts dirt easily but not Durabak. This product might be the best one yet for the roof. A bonus is that you can put Durabak on metal, fiberglass, wood, cement, just about anything. So you can repaint your RV with it too. I would use the Smooth version for RV. Roller brush it on, no need to spray. Self leveling, and finishes satin, not matte, not glossy. Only Satin, and only a fixed range of colors plus Clear. But so what. Seems like the best option so far.
Thanks for the comment and watching.
That sulf is trash so your Cheating that thing is 11 years old time for a new one
Lol, believe me, we would love a new camper! If we didn't have to buy a new truck last year, we would have a new camper! We're saving for a new one, so hopefully this roof lasts for at least a few years and then we can sell this camper and get a new one.
@@ColoradoCamperman not a new camper a new roof lol
@@sarmce Lol, ok, although if we need a new roof, I think it may be time for a new camper! We will see!