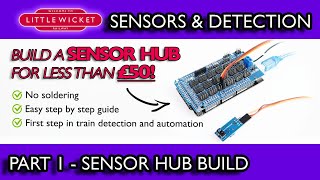
Model Railway Sensors & Detection Part 2 - Train Detection and Automation with IR Sensors

ฝัง
- เผยแพร่เมื่อ 6 พ.ค. 2024
- A step by step guide to adding sensors to your layout using an Arduino and JMRI. Adding sensors is the first step in automation and can be used to control trains, signals and points.
Part 1 - we build the sensor hub and connect an infrared (IR) sensor. This can be used to provide feedback from analogue or digital layouts.
• Model Railway Sensors ...
Part 2 - we use two IR sensors to automate a train controlled by JMRI on a digital layout.
JMRI Website
www.jmri.org/
Geoff Bunza's blog for sensor hub documentation:
model-railroad-hobbyist.com/n...
##### IMPORTANT INFORMATION #####
A few people have pointed out that the link to the files (script and sketch) on Geoff Bunza's website no longer works. I have uploaded these files to my GitHub area (github.com/LittleWicketRailwa..., but all credit should still go to Geoff Bunza for developing this system.
This is a simple way of adding sensor to a layout, but I would encourage anyone interested in this to explore the CMRI video series which uses the same hardware, but allows use of different sensor names, doesn't require a script to be run in JMRI and can be adapted to change inputs to outputs.
CMRI Part 1 - • Arduino, CMRI and JMRI...
CMRI Part 2 - • Arduino, CMRI and JMRI...
CMRI Part 3 - • Arduino, CMRI and JRMI...
########################################
Ebay and Amazon Affiliate Links
(Full disclosure, as an Amazon Associate and Ebay partner I earn from qualifying purchases through these links and this helps to support the channel)
Arduino Mega:
amzn.to/3poEBQK
ebay.us/Zl3sDT
Mega Sensor Shield:
amzn.to/3rTq80V
ebay.us/M2VnYX
Variable Voltage Power Supply:
amzn.to/3b4wtj9
IR Sensors:
amzn.to/2LQJmVF
ebay.us/rnR5wn
26AWG Servo Cable:
amzn.to/3daEp55
ebay.us/L1q3FE
Crimping Tool:
amzn.to/3tRJXHE
ebay.us/XE2Dxl
Servo Wires (male to male):
amzn.to/3alIrFS
ebay.us/HfgTaO
Chapters
0:07 - Introduction
1:08 - Tools & Equipment
2:19 - Steps
2:28 - Step 1 - Connect IR Sensors to Hub
4:33 - Step 2 - Build Sensor Gates
7:19 - Step 3 - Setup Sensors in JMRI
10:21 - Step 4 - Download and Modify Script
14:42 - Step 5 - Run Script - วิทยาศาสตร์และเทคโนโลยี


![[TH] VCT Pacific - Playoffs // T1 vs PRX | GEN vs DRX](http://i.ytimg.com/vi/8FpC03jCU_Q/mqdefault.jpg)


Brilliant. Now that winter is coming I plan on implementing this into my RR.
Extreme well done, lots of great information!!
Thanks Bryan 👍
Great videos 👍 very informative and will help a lot. Thank you!
Thanks Edward 👍
Hi thank you for your videos there really informative and I’m enjoying working through them
Cheers Kevin 👍
I have to tell you...that was a very well Scripted tutorial... bookmarking this.
Thank You!
Thanks 👍 😊
I'm going through your technology series and I'm loving it! I'm coming back to the hobby after some time and as I have an IT background this Arduino tech is right up my street! (also cost being low is a bonus) I think I will follow your video's instructions while setting up my shunting layout in regards to DCC++, Block Detection and servos for points and signals.
These tutorials have been great! Thank you.
Thanks and welcome back to the hobby! 😀 If you're going down the DCC++ base station route then check out DCC++EX. It's an upgraded version, but I've not got round to making a video on it yet. Stay in touch, let know how you're getting on 👍
@@LittleWicketRailway I’ll do just that Thanks! Currently watching your mimic panel video. I might need to rethink power source for it as I have several points and signals on a smallish layout. I’ll be posting updates regularly on my channel once officially started :)
This is a very informative tutorial, nicely presented.👍
Thanks, much appreciated 👍
Thank you for your efforts with this. I found it easy to follow and have successfully controlled my points. I would prefer to use a panel of switches to individually control points but the coding is beyond me. Can you help please?
Just what I was looking for, although I would like to do the same thing on the Arduino Nano ( I have plenty of them)
Many Thanks
Just got around to using this and so impressed with this simple script and having used python for other projects I am looking at expanding this for now. I am still working on the block detection setup but so far I think my soldering is not that good as the first Merg senor doesn’t seem to work for me. Bit of head scratching required to find the issue. I also decided to keep the arduinos separate as I will need a lot of infra red sensors. I am also using the larger 5mm infrared sensors which are picking up the locomotives up no problems and they are running on 5 volts.
If you're good with scripts then you can do pretty much anything in JMRI, they're really powerful.
The MERG forum may be able to help troubleshoot your sensor issue.
@@LittleWicketRailway well turned out I had not put the link wire in so was a ground issue. Now to get making the rest up. And so happy with the script have now got the trains stopping at the different stations on route. Thanks for getting me started on this journey.
This is really good. One question though. Why not run everything through arduino. The mega you have has plenty of inputs to control the loco and many many inputs. You could daisy chain sensors also i2c for many more or just groups, points or signals for example.
Thanks for the well explained tutorial on automating your layout. I would be interested other projects using the part 1 set up. Like stopping at a station, driving signals, filling up at a water tank, etc. Have you looked at RFID to identify your locos?
Thanks James. Check out the video on servos (pt3) for examples of driving semaphore signals. In the near future I'll be posting a video bringing together DCC++, the sensor hub and servos to semi-automate the test layout using JMRI dispatcher and fully automate the test layout by writing a script.
RFID isn't something that I've properly looked into yet, but I am aware of it and it's something that I'm interested in. McKinley Railway have put some RFID technology in place and are using it to track their wagons I believe, I recently watched their video on that, but it wasn't really a tutorial on how to do it.
@@LittleWicketRailway thanks so much for the response. I just came across your channel (I subscribed) and making my way through the tech videos. I will be using your recommendations to at least control routes and signals and animation.
Love the production quality, your English accent (It's sometimes hard for us tanks to understand Brita but yours is easy to understand), the simplified explanations. I wish more JMRI and Arduino videos were as well explained.
Hi Rob, thanks again for a great tutorial. Have kind of got it working with just one fly in the ointment, I have set my sensors to 'inactive' which the script appears to need but once the train has activated the sensor it stays in the 'active ' state and messes the script up. I have kind of done a workaround for the moment ..... changing the state back to inactive manually. I will have to look into sensors a bit deeper. Thanks for all your hard work.
Doh, did it again. Using a version of the SensorScan script that wasn't modified
Hi Neil, having to run the script is probably the worst part of the sensor hub. Take a look at my latest video which combines the sensors and the servos, but the big benefit is that you no longer need the script because everything works via the CMRI connection (th-cam.com/video/OkXG3mfY6PE/w-d-xo.html).
@@LittleWicketRailway I also found that Python is tetchy about indentation of the code.
I've seen your new video but only cursory. Will try and give it my full attention soon. I've managed to get the IR sensors with the back and forth running quite well. Thanks again
The JMRI sample scripts have always been included in the JMRI download so there is no need to go back to the JMRI website to download. They are located in the Jython folder of the JMRI install. Once you make changes to the script you should copy it to a new location as an update will overwrite it. I suggest your JMRI users folder.
If you do want to download a script from the website, just right click and you should see an option like 'Save link as' (varies depending on browser).
Thank you very mutch. it helps a lot mainly when I'm returning to this hobby after 40 years of stop. Quite different now. I would like to know if you are using 2 diferent arduinos - 1 for loco control and 1 for sensors control - and how do you interconnect them.
Hi Luis! Yes, I'm using one Arduino for the DCC++ base station to run the locomotives and then there is another Arduino reading the sensors.
@@LittleWicketRailway Thanks, your videos are very interesting. I've already bought the Dual Channel DC Motor Driver. After making this work i'll go for the sensors.
This is a great tutorial. Can you tell me if the script would work (or would I require changes to the code) with a ESU cab control system that was set up with JMRI? Just starting and there is a ton to understand.
Hi, this would work alongside other control system in JMRI. JMRI can handle multiple connections. Please take a look at the CMRI series, if you like this then I think you might find that interesting.
Hi, just looked at three of your videos, 2 on the Sensors and the one on Automation. Excellent thank you I have been wanting to look at both Ardunios and automation for some time but haven't found such excellent tutorials, all the others go way over my head. Couple of questions: The Model-Railroad-Hobbyist blog site seems to have changed since your video. I have downloaded "Sensor_Chanel_Rev2" is that OK? do I need any other downloads from that source? Also can I use my NCE Power Cab instead of your Arduino built controller? Thanks.
OK got it. Read all the posts below!!
Hello, great video as usual. But I do not quite understand where is your dcc command station and how its interconnected to the Arduino with IR sensors. As I see i am not the only one who is questioning this part. Can you please give more details on how do they connected together? Thank you.
Hi Anatolii, the DCC++ system is connected to the computer on one USB port, the sensor hub is on another USB connection and servos are connected on another USB port. Everything is then coordinated via the JMRI software. Since making this I have combined the sensors and servos onto a single Arduino, but the DCC++ system is still a separate Ardunio with its own USB connection.
@@LittleWicketRailway Thank you a lot.
Rob,
I would like to install IR sensors across the rails at an angle so as not to be interrupted by the space between cars.
Are you aware of a sensor tht comsists of the 2 leds thru small tubes like straws that can be placed across the rails and feed back to the sensor thru a bit of extended wiring? I am not fond of the idea of soldering bits of wire to the bulbs and then back to the pads on the sensor as the solder pads are very small and can be easily lifted. Or I can look for 3mm sensors that protrude at the end of the sensor unit and point them up thru the bench work between sleepers.
Can we put a delay in JMRI on the sensor channel so that the status does not drop out between cars?
thanks
Bob S - Cleveland, OH
What are your thoughts on this?
Hi Bob, I 3D print "gates" like the ones you describe for 3mm LEDs. I desolder them from the sensor and extend the wires under the track. Not aware of anything commercially that does this, but I'm sure it can be built without 3D printing.
You can add a "debounce" time to a sensor in JMRI so that it will hold a detection for a set time to stop "flickering".
Hi Rob, I have been following your dcc videos with interest as the last time i had a model railway was in the days of DC. Just a query being a novice on the JMRI and arduino approach, i have set up a base station following your video using a uno arduino with a motor shield which i have set up in JMRI. The sensor hub video is using a mega arduino, how does this tie in with the uno which is used to control the locomotives on the layout? Does the mega arduino plug into a different usb port on the same PC and the control is all through the JMRI software talking to the two arduino boards? Sorry if i hve repeater some of the queries below, i did wonder if it was possible to use a micro reed switch (sensor) which is triggered by a small Neodymium magnet what do you think? only thing is i am unsure how it would be configured on the arduino with being a novice.
Thanks in advance for any help pointers/ advice.
Regards
Colin
Hi Colin! Yes, easiest way is to use 2 USB connections on your computer, one for the DCC control and one for the sensors/outputs. I've heard that DCC++Ex might allow you to combine the DCC++Ex controller and sensors into a single package, but I've not tried yet.
You can definitely use a reed switch as a sensor. Connect this to the signal pin and either the GND or VCC pin on the Arduino depending on whether the signal pin is pull up/pull down. Maybe experiment with a normal push switch and see if you can get that working first. Anything that create a digital output can be easily used as a sensor. Analogue output is harder to use, but still possible.
@@LittleWicketRailway thanks Rob.
The sensors are reflective. Why are they not reflecting off the loco ?
Good question, because the loco is black and its surface isn't reflective enough to the return the IR wave back to the sensors. If you were using a white (or lighter colour) loco then you could get rid of the reflective gate and just have them activate as the train passed.
Normally I would mount these sensors under the board, facing up at the underside of the locos. These are almost always black so I have to attach small pieces of reflective tape.
Hi.. Great video thank you. Very clear.
I am just getting going with N gauge and DCC++. I only have 2 USB ports on my laptop - one for my mouse and one for DCC++ Ardhuino. Will the sensor hub work via a USB expander port?
Do you know if 3mm end-on sensors are available? Those on the side will be difficult to fix under the board.
Many thanks.
Hi Paul,
I've not used a USB hub, but it's something I'm likely to try in the near future as I hope to switch from using a laptop to using a tablet which only has a single USB port. I would assume this is possible as long as COM ports can be assigned and allocated in JMRI. If I do it then I'll let you know for sure.
Check out TCRT5000 sensors, I think these have 3mm LEDs. They come with a little plastic holder around both LEDs, but this easily comes off if you need it to. The LEDs fit easily between OO gauge sleepers, not sure if they would fit between N gauge sleepers or whether you'd need to trim/remove a sleeper.
Some useful information here: model-railroad-hobbyist.com/node/35506
Hi Paul, I've just connected a powered USB hub with an additional 4 USB ports and it's all working fine. Windows has allocated the same COM ports to the boards that it did when they were connected directly. This is the hub that I've used: www.amazon.co.uk/gp/product/B07KFDFT4D/ref=ppx_yo_dt_b_asin_title_o09_s00?ie=UTF8&psc=1
@@LittleWicketRailway Fantastic news! Thanks for sharing it
It's best to kill the script when the loco is in the 10s pause state. Otherwise you have to stop it with the throttle.
Yes, if you killed the script whilst the train was moving it would continue moving until it received another command.
You could build something into the script to turn the shuttle on and off. Maybe the script only works when a "sensor" is active. That sensor could be a click button in panel pro or a physical switch attached to the sensor hub. Scripts are very powerful and flexible.
Can you clarify , how is power to the tracks supplied ? Is it through the arduino connected to the sensor shield? You turn it on thro JMRI but do not make it clear - please clarify.
Thank you
Hi! I power the track using the DCC++ base station which is connected to JMRI. The sensor system is on another Arduino also connected to JMRI using another type of connection.
Hi,
From you response , am I correct to understand JMRI can recognise inputs from more than 1 USB connection ( ie one from the base station and one from the sensor hub )
Yes it can. I've got the DCC++ on one USB connection and the CMRI stuff (sensors, servos, etc.) on another USB connection 👍
Thank you