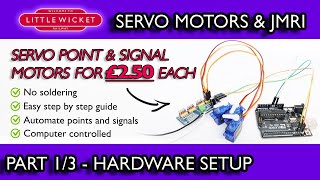
Servo Motor Control for Model Railways Part 3 of 3 - Semaphore Signals

ฝัง
- เผยแพร่เมื่อ 25 มิ.ย. 2024
- This is the final video in a three part guide on how to connect servo motors to an Arduino and control them using JMRI in order to throw points or operate semaphore signals on a model railway.
This will work for both analogue and digital layouts and is a step towards layout automation.
It's also very cheap compared to other methods of operating points and signals such as using digital accessort decoders, capacitor discharge units (CDUs) and solenoid motors.
Links to other parts of the series:
Part 1 - • Servo Motor Control fo...
Part 2 - • Servo Motor Control fo...
Calibration and Servo Sketch Files: github.com/LittleWicketRailwa...
Links to resources needed in tutorial:
JMRI software - www.JMRI.org
Ebay and Amazon Affiliate Links
(Full disclosure, as an Amazon Associate and Ebay partner I earn from qualifying purchases through these links and this helps to support the channel)
Arduino Uno:
amzn.to/2ODZoTO
ebay.us/HYHkvP
Servo Driver Board (PCA9685):
amzn.to/2NoTKo3
ebay.us/rVpaAJ
SG90 Servos:
amzn.to/2N3uzY4
ebay.us/Xvuu72
Variable Voltage Power Supply:
amzn.to/3b4wtj9
26AWG Servo Cable:
amzn.to/3daEp55
ebay.us/L1q3FE
Crimping Tool:
amzn.to/3tRJXHE
ebay.us/XE2Dxl
Chapters:
00:00 - Introduction
01:39 - Safety
02:03 - Components & Tools
02:59 - Step 1 - Connect servo and upload calibration sketch
03:45 - Step 2 - Mount signal and servo on baseboard
04:45 - Step 3 - Calibrate range of motion
06:34 - Step 4 - Repeat steps 1-3 for second servo
09:02 - Step 5 - Modify servo sketch and upload
10:27 - Step 6 - Create signal heads in JMRI
12:38 - Step 7 - Place signal heads in layout editor
13:44 - Summary - วิทยาศาสตร์และเทคโนโลยี


Since finding your channel a couple of days ago, I now have a much better understanding and concept of JMRI and DCC++. THIS IS THE BEST TUTORIAL CHANNEL YET
Thanks Bruce, very much appreciated!
I agree. Fantastic work, I really appreciate it.
Totally agree.
G'day from Sydney Rob. I stumbled across this channel a couple of weeks back and I love your style of explaining the subject matter. Your how-to videos are brilliant - I'm about to embark on my layout building and automation journey and I've learnt a tremendous amount in a very short time thanks to your channel.
G'day Jon! 😀Thanks for the support 👍 All the best with the build, let me know how it goes.
Hi Rob
Thanks for creating these videos. Most of the videos on this topic tend to get a bit too technical for the beginner but I think you have got the balance about right. I am looking forward to more of them in the future.
Thanks, I'm not super techincal myself (and I hate soldering!), but the electronics is another side of the hobby that I'm finding really interesting.
G'day Rob, I have been checking out many sites on using this system and was very confused ?? then found you, Thank you for helping an old ausie male. I will still need to watch your clear vids a few more times, but it is now much clearer.
Hi Jeffery, thanks for those kind words, I'm glad you found it useful 👍
Thank you for posting this setup, I would be completely lost without this post.
Thanks, glad you found it useful 👍
I've looked for this info through other channels and I can say this works as described. The layout for the club will be around 70 turnouts.
Hi Rob, I've just watched these 3 videos and they look excellent. I now can't wait to follow through on them for, and on, my new layout. If things go as easily with me in doing this as well as they went in your videos , you will be my new hero.
Look forward to you posting more on DCC++ - Well produced and easy to follow commentary.
And of course more on JMRI etc... :)
Thanks, appreciate that. I'm working on the video that brings it all together now and introduces automation, but it's taking a bit longer than I hoped.
@@LittleWicketRailway That will be brilliant - will really loo forward to that!!
Thank you for these videos! Great channel!
Cheers Chris, thanks for watching 👍
Thank you, I can now run my layout.
Thanks Rob you have converted me to your system of servo control thanks.
Thanks Steve, sadly I installed solenoid motors on Little Wicket before I discovered servos. It's looking like I might get the opportunity to redesign and expand Little Wicket in 2021, so I'll definitely be converting to servos if that happens.
Now watched all 3 videos, and I got it working. Excellent tutorials. Managed to get my head around JMRI , CMRI. Doesn't seem too complicated now. Watched others and ended up with several bits of hardware I didn't need. I will start with a small shunting layout and see how it goes. By the way I am using 3 rail Hornby Dublo that is at least 60 years old.
Congratulations on getting it all workings! Hope that it all works with the 3 rail set up, I like the idea of having a 60 year old layout being controlled with modern digital electronics. 👍
Hello Rob, I knew nothing about Arduino, but after watching your 3 videos, bought Uno, servo etc and I made my first project for my test layout and worked, great!!!.....I could not use DCC++ right now as my collections are Marklin....but found Railuino....this will be my next project. Thank you for the video....
Thanks and congratulations on a successful project! 👍
@@LittleWicketRailway Hi Rob, based on your original sketch, I could modify the sketch for multiple PCA9685 for servo, but still do not know how to sketch for the LED, appreciate very much if you could make a video (part#4?) for PCA9685 connecting with LED for signal lamp (Red, Yellow and Green). I tried, but it did not work. (my first PCA is for turn out, 2nd for semaphore signal and 3rd one is for signal lamp). Thank you and appreciate very much.
Hi Nugroho! You were ahead of me in linking PCA9685s, I've only just round to doing it. I was actually reading about controlling LEDs today! Are you using a tricolour LED or 3 separate LEDs?
Thank you Rob
Отличная работа!
Thanks! 👍
Hello Rob, I only found your channel today and are very impressed as I've been looking for ways to automate my railway, I like the robust design for changing points and signals, infact after watching many videos on the subject I find yours the Best. As a retired BR signalman signalling has to look right on a model railway, I watch in dispare at the Hornby magazine layout with there GWR bracket signal by the station, not so much that it's a Midland railway layout its the fact the taller arm should represent the main line not the lower. I run a OO gauge Garden railway with about 240 feet of track with many points and signals, unfortunately my computer and it's attachments skills are almost zero, I don't know what you do for a living but if you ever had the time I would like to commission you to use your methods to automate and install them on my railway. Thank you for informative and inspirational video's.
Hi Paul! I know who I'm coming to for advice on signalling in future and your 240ft layout sounds amazing! However, I don't think I'm quite at the stage where I'm ready to do commissions. I'm still learning and there's some way to go. If our house move goes to plan then I'll be building a larger layout. If that goes to plan then I might feel a bit more confident about working on someone else's pride and joy. Stay in touch though and if you've got any pictures of your layout then I'd love to see them 👍😀
@@LittleWicketRailway Thank you for your reply Rob, I hope the house move goes well. I have every confidence in your ability to install signals, point work and automation on model railways, you can't bluff on a subject so complex, I appreciate your honesty and indeed none of us ever stop learning whatever the subject, I appreciate components and wiring has to be more robust and protected outside, but I still hope you could help me install it in time, I would like to send you pictures and videos but haven't enough computer knowledge to do it at present or even how to contact you in private, please keep up your Great work and I'm very impressed with your knowledge and presentation, kindest regards. Paul.
Rob, I had posted your Channel on FB as source and wrongly associated to Some other person who correctly informed me, to which I apologise. The thought was to refer your site for great information.
No worries, thanks for sharing, appreciate it 👍
To add a tad of realism you can set the range of movements to slightly different settings (maybe +/-10) to show a degree of wear between different signals.
Love your videos Rob. You make it easy to follow. I want to motorise a level crossing but just want a switch to activate servos. Can I make one servo operate then after a few seconds start the second one. I’ll need one gate to open first before the second one opens.
Thanks again Rob.
This is getting me towards my idea, as my layout plans will involve a lot of points, servos are the way to go for me, just on the cost saving, but i dont need computer software, my intention is mimic panels for each area with switch control and led indicators, i`ve yet to find a nuts and bolts video on this, unless you can point me in the right direction, Thanks great series of videos.
Hi! I'm been thinking about this a lot recently and I've got a few ideas. You're the second person to ask about using a mimic panel with physical switches rather than a computer. First few days of 2021 will be dedicated to electronics so let's seen what happens. Hope to come back to you with a cheap and simple solution.
@@LittleWicketRailway Thanks only one i`ve found is toms trains and things using a pca9685 but he was switching a sevo via the uno
Hi Rob, Fantastic Videos. I get these 3 vids and your explanation has really opened my eyes to the possibility of servos. One question though, can you run them off a physical analogue momentary switch like I want to on my layout?
Hi Tra, you definitely can have servos activated by a push buttons, but you'd still need a servo driver than could generate the PWM signals that tell the servo which position to be in. You can either build your own controller using something like an Arduino and PCA9685 (see this video - th-cam.com/video/-qEL5MGZXB4/w-d-xo.html) or buy a ready made solution (megapointscontrollers.co.uk/product/servo-controller-12/?v=79cba1185463).
@@LittleWicketRailway Great thanks Rob, I will get to it I already have the kit you discussed. Keep up the great work.
Hi Rob
I have followed your videos with interest and are very helpful in understanding both programming and jmri. I have a layout with an extended board where the main layout is controlled by an arduino uno / motor shield using DCC++ and the extended board is an arduino uno with two pca9685 boards and a 5vPSU to operate the servos. it seems there is an issue when the power button is pressed in the roster menu to activate the main board. As i have followed the video instructions i was wondering if you had any thoughts on what may be causing the servos on the extended board to not function, there is power goingto the servos as when you try to push the servo arm there is resistance to movement.
Regards
Colin
One more step to complete: add a logic that automatically changes the aspect of the two semaphores according to the turnout direction
Hi! Check out this video with full automation. The signals change automatically based on block occupancy and the position of the turnout th-cam.com/video/5lvvoBCQl9U/w-d-xo.html
Great videos Rob. Question on the servos you use. Can these be programmed to move in small steps to simulate prototypical movement speeds, or add things like signal arm bounce?
Thanks Andy! Yes they can. You can modify the loop in the sketch so that rather than going straight from thrown to closed, it goes through a range of position steps which will slow it down.
If you watch the video on coloured light signals then the same code used for fading can be used to slow the point movement.
Bounce would be more complex, but could be done in a similar way.
Hi Rob, just discovered your site. Excellent tutorials. Could you clarify something for me? I’m using a SPROG 3 as my dcc controller, with JMRI. I want to use servos for the points , so am I correct in understanding that I need my pc connected to both the SPROG for train control, and a separate Arduino + servo driver board for the points.? Does JMRI allow both Sprog and Arduino simultaneously?
Thank you
Rob. Well done. I enjoyed watching your video. Today I have built the servo control according to your instructions. It works fine. I am currently running a Mrc Prodigy with wifi and I am controlling with Withrottle. I would like to integrate the Arduino to my current MRC System. I'm Thinking that I can purchase An Arduino Wifi. This would control the turnouts through JRMI however Not sure about the MRC side prodigy . Was able to connect JRMI through MRC WYFI however the Engines Were not listed. Have you any thoughts on this subject. Can you provide any tips on hooking up the Arduino WYFI.
Nicely done videos! The whole servo calibration is really messy, and I wonder if there's a better way to handle this all. AIUI the Adafruit library can read the actual servo position so you could perhaps manage some automatic min/max discovery.
Agreed it's messy. The issue is that there's no easy way to sense when the servo can't move any further (I.e. stalled) servos with built in feedback are expensive. There are ways of adding feedback, but they're not simple.
Someone (apologies I can recall who) has significantly improved my sketch and has submitted the improvement on GitHub for me to review. I think the improvement makes calibration a lot easier from what I briefly saw.
I also want to look at building some stall protection into the sketch. Let's say a turnout/point can't fully throw because something is in the way. The turnout will keep trying to move through the obstruction. It'll draw a lot of current and I don't think it'd be good for a servo. I'd like the servo to stop trying after a couple of seconds. This makes exact calibration slightly less important.
Rob I just watch these 3 videos in the series they are very good and have got me wishing to try this.
At the moment I use a Roco Z21 controller with Digitrax point controllers linked up using Loconet.
Do have any idea how I could interface the system into my setup I have played with JMRI and have the Digitrax interface to a PC
I would like to use the Z21 for control of the points using servos.
Any ideas how to interface them together
Thank you
Dave
Sorry Dave, I've got no experience with Roco or Digitrax. JMRI is a very useful hub for bringing various systems together, so you might find that if you can get all your systems recognised in the software then you could have your existing controllers operating the servos one way or another.
This might be useful:
www.jmri.org/help/en/html/hardware/roco/z21/index.shtml
www.jmri.org/help/en/html/hardware/loconet/Digitrax.shtml
I'm just getting into Arduino as a preparation to a future build, and your tutorial was super helpful.
But I still got a big question, if you don't want to use a computer as your switching pannel, but much bottoms or switches, as you would in an old fashion layout but using a programmed Arduino is that also possible?
Thanks! Yeah, definitely possible. You might find this useful th-cam.com/video/-qEL5MGZXB4/w-d-xo.html
@@LittleWicketRailway Thanks for the link, I'll have a look at it, I love you TH-cam channel, very well made and understandable videos👍
Are there multiple sketches being uploaded to the arduino?
Like 1 for the servos, one for the signals, and one for allowing it to appear as CMRI in JMRI?
Great videos thank you question I built command station using instructions from your other video This uno is a new one I need to buy to control points and signals ?
I kept my command station separate from my sensor/servo control, but DCC-EX allows you to have everything connected one one board. I've just been playing around with automation using EXRAIL which is brilliant.
@@LittleWicketRailway Are you still using Arcomora?
Hello I have been watching your videos and have tried to use your servo sketch to drive 16 servos. I have been able to get 8 servos working but when I add number 9 in they all just start twitching and become unresponsive in JMRI did you have any problems like this ? If you did what was the fix. thanks James
I haven't had this problem, but it could be "servo chatter"? @Stephen Wadsworth (not sure if that'll tag him) said that he experienced chatter and added a relay with a slight change to his code to solve it and now has 34 servos operating. See his comment on here th-cam.com/video/WsfczIPbhsU/w-d-xo.html
This is very interesting and well presented. My planned layout is a shelf layout about 30’ long. Do you know how far a servo can be from the servo driver board and the Arduino? And how far apart the servo driver boards can be?
If you use CMRI then the CMRI wires can be very long, hundreds of meters I believe. Not sure about the servos, but I'm had one on a 6ft wire on my last layout.
Thanks
Hi Rob one question is there a way to control those servo with a button, so i dont have to klick it on JMRI instead i wire it to a button when i click it switch does brrt to the left when i click it again goes brrt to the right :)
Hi Rob.
Any chance you could do another video showing how to add a push button to throw the turnout locally and keep JMRI updated?
I'll have a think about this. Would you also want to be able to throw the point using JMRI or just using the physical switch?
@@LittleWicketRailway Hi Rob. Control from JMRI or the physical switch and keep everything "in sync." Here is what I have come up with so far using your JMRI servo motor control sketch and a JMRI/physical button sketch from "motorhomer's" blog www.motorhomesites.org.uk/?p=5007.
#include
#include
#include
#include
#define CMRI_ADDR 1
#define DE_PIN 2
#define numServos 3 //The number of servos connected
Adafruit_PWMServoDriver pwm = Adafruit_PWMServoDriver(); //setup the board address 0
Auto485 bus(DE_PIN); // Arduino pin 2 -> MAX485 DE and RE pins
CMRI cmri(CMRI_ADDR, 24, 48, bus);
int Status[numServos]; //Create a table to hold the status of each turnout, signal, etc.
int Throw[numServos]; //Create a table to hold the throw value for each servo
int Close[numServos]; //Create a table to hold the close value for each servo
const int controlSW = 6;
int controlSW_state;
int lastControlState = LOW;
int control = LOW;
unsigned long lastDebounceTime = 0;
unsigned long debounceDelay = 50;
void setup() {
Serial.begin(9600);
bus.begin(9600);
pwm.begin();
pwm.setPWMFreq(50); // This is the maximum PWM frequency
pinMode(controlSW, INPUT_PULLUP);
//SET THE THROW AND CLOSE VALUES FOR EACH SERVO BASED ON THE CALIBRATION PROCESS
//Servo connection 0 - point motor
Throw[0] = 1200;
Close[0] = 1700;
Throw[1] = 1200;
Close[1] = 1700;
Throw[2] = 1200;
Close[2] = 1700;
}
void loop(){
cmri.process();
for (int i = 0; i < numServos; i++) {
Status[i] = (cmri.get_bit(i));
if (Status[i] == 1){
pwm.writeMicroseconds(i, Throw[i]);
}
else {
pwm.writeMicroseconds(i, Close[i]);
}
}
readSwitch();
}
void readSwitch(){
int reading = digitalRead(controlSW);
if (reading != lastControlState){
lastDebounceTime = millis;
}
if((millis() - lastDebounceTime) > debounceDelay){
if (reading != lastControlState){
lastControlState = reading;
if (lastControlState == HIGH){
control = !control;
}
}
}
cmri.set_bit(0, control);
}
Following motorhomer's blog, sensors and a route need to be set up in JMRI. I don't bother with the microswitch for feedback, as it appears to me JMRI does not really do anything with the information. I am not sure what the best way to modify the code for adding more pushbuttons, as I don't think every turnout will have a button. I am new to Arduinos, so still some learning. I am think perhaps an array. In this sketch I have one pushbutton set up for turnout 1 (CRMI bit 0) on pin 6. I can control the turnout from JMRI or the pushbutton, and the correct physical state is updated in JMRI. My sequence for start up is to open JMRI (wait a few seconds for the servos to move), load the JMRI panel (wait a few seconds for the servos to move) and then run the script TurnoutStatePersistence.py to load the turnout states from when I last exited JMRI, all of which takes less than 30 seconds. Please share any thoughts for code suggestions or improvements!
Also, how could lights(red, yellow, and green) be added?
I'm considering installing servos for point motors on my current in development layout.
It currently has Hornby Solenoid type point motors installed, activated by an array of switches. (flick them up or down to pulse the solenoid)
I would like to keep this old-school type of control system, nothing digital or DCC.
Could this Arduino system be configured to be controlled by several dozen switches? (currently 21 bi-directional switches, totalling 42 different "buttons")
Yes, very possible with a bit of coding. The switches would be inputs to the Arduino and the servos would be outputs. The Ardunio would read the inputs and change the outputs as required based on what you've coded. You could code this with a few if statements and loops.
@@LittleWicketRailway I've personally not used an Arduino before, however I am somewhat familiar with the device, as when I worked at the local college, one of the lecturers used to play with them. I have had experience with some other devices though, and am knowledgeable with a few different programming languages.
I guess the another question is... with 21 sets of points, and possibly some signals, how many kits will I need?
I know from the video that the controller you were using only has 16 servo controllers, so I guess I would need at least two, but then each servo would also need 2 inputs. How many inputs can an Arduino have? (though, being an electronic engineer, I could get creative and multiplex several inputs together, or read large arrays of inputs from PISO chips. I guess it depends how much customisation I can do)
I have a few questions I have for you. I have not started my layout but I have got all that I need to start building which I will make a start very soon. I got the DCC++ stuff you did in your video to use arduino as a controller. I guess I would still need the motor shield on top of the main board and I just put these cables for this in the same place but just into the motor shield instead? Also I have some block sensors from blocksignalling.co.uk which I can hook up to the point motors I bought (seep pm1) to tell the block sensor that the point is or isn't in the trains favour and then change the signal (led) as needed. Can I connect them to these servo motors via some auxiliary point like the seep pm1? Also will I need more than 1 main board as I have 17 points!! so 1 off the 16 from the board, or how do I link the boards together?
Hi Exzhul!
Quite a few questions here and I'll do my best to answer them.
I think you're suggesting using the Ardunio from the servo motor controller as the ardunio for the DCC++ base station. I don't know if that's possible, it might be, but you'd need to change the sketch to get it all working off a single board. You're not the first person to ask about combining some of these Arduino projects together and it's something I'm looking into.
I'm a bit confused about the PM1/servo question. If you're using seep PM1s then why do you need servos? Or are you saying that you want to connect the blocksignalling product to the servo driver board? I'm not sure if they would be compatible, my guess would be probably not, but if they were then you could use the switch built into the PM1 to act as a sensor for JMRI to update the position of the point within the software which would influence the signal. HOWEVER, when it comes to operating light signals I think there's a better way of doing it using addressable LEDs and an ESP32 board. That's one of the projects I'm working on.
If you need to have more than 16 connections to the servo driver PCA9685 board then you'll need more than one. I've done a video on how to connect multiple boards together th-cam.com/video/v1f_EDHV390/w-d-xo.html
@@LittleWicketRailway ah brilliant thanks for the answers, I think for now I am going to keep with my PM1 seeps that work with my LED signals. I wasn't aware that you would need a new board for this and then one for the controller but having you remind me about the sketch etc I guess it wouldn't work. Thanks for the reply and I love the Arduino for my controller, so much cheaper and does most things these £200 controllers do!
Can i ask a stupid question. You connect the arduino to a pc to program it. Does it need to be connected to the pc once programmed?
No stupid questions 🙂 It doesn't need to be connected to the computer once the sketch is uploaded.
@@LittleWicketRailway Thanks. Another question, i take it i do the arduino and jmri software bits. How can i control the points? Would toggle switches, buttons or stud and probe be options?
Hi Rob, I am attempting to set up a second PCA9685 to my system and wonder if you have tried this. I am struggling at the moment as the second PCA9685 seems to be copying the first 16 servos, i.e. when I change servo 1, servo 17 also changes. Any advice would be appreciated.
Thanks,
Brendan
Have you addressed the boards using the jumpers: learn.adafruit.com/16-channel-pwm-servo-driver/chaining-drivers
You'll also need to add some code to the sketch.
Edit: I haven't actually done this personally, so please let me know how you get on.
@@LittleWicketRailway Hi Rob,
Yes, I did that. In fact, I have another sketch that I was using which works fine over both PCA9685s so I know the problem is not with the hardware. I was hoping to use your sketches as it is easier to fine-tune the servos using your calibration sketch.
I am experimenting with both servo sketches but so far I have the first board working correctly and the second is still a mimic of the first.
I will keep at it and let you know if I am successful.
Brendan
Any luck?
@@LittleWicketRailway not so far. It works perfectly on one board 1-16, but 17-32 either mirrors 1-16 or does not work. I think the problem is in the last lines of the code after the servos but still working on it.
@@brendanhannon1577 Hi Brendan, I have the same problem, the 1st pca board is pin 0-15, 2nd pca is pin16-31, in the CMRI, the address will be 1(for pin 0) and 17 (for the 2nd board pin 16). Note : you need to solder A0 in the 2nd board. Mine is working.