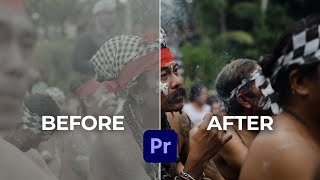
Perfect Skin Tones Every Time | Premiere Color Grade Tutorial

ฝัง
- เผยแพร่เมื่อ 19 ธ.ค. 2023
- The skin tones in your footage can make or break your project's overall look and feel. They are the most important aspect of color grading and can be the most challenging to perfect. In my experience, it has taken me years of trial and error to understand how to achieve accurate skin tones in my footage. Even now, it's not always perfect, but I believe I have enough knowledge to help guide you in the right direction. Hence;
In today's video, we will be diving into the nitty-gritty details of how to get the skin tones in your footage to look correct in Premiere Pro. We will cover everything from the technical aspects of color grading to the creative choices that go into achieving the perfect look. By the end of this tutorial, you will have a solid understanding of how to get your footage looking its best and how to avoid common mistakes that can ruin your project.
If you'd like to support the channel: trentorials.gumroad.com/
___________________________________________________________________
△ My Drone: amzn.to/3HjDflV
△ My Camera: amzn.to/47CborI
△ My Main Lens: amzn.to/48zgOFj
△ Super Wide Lens: amzn.to/3S479Q5
△ My Tripod: amzn.to/3SkBxqz
△ Budget Key Light: amzn.to/48AKj9G
△ Bendy Tripod: amzn.to/3Smbpf9
△ Microphone: amzn.to/493grCs
(affiliate links FYI)
Disclosures: All opinions are my own, any advice I provide is strictly through my own experiences and does not constitute legal and/or 100% accurate facts
#skintones #filmlook #filmeffects #premierepro #adobepremierepro - แนวปฏิบัติและการใช้ชีวิต


Thx for brushing up on what I've forgotten
absolutely. glad to help
That helped. Thank you! Very good and helpful video.
stoked to hear it. thanks for watching the video and taking the time to share your thoughts on it, much appreciated.
LEARNED A LOT MAN👍
Awesome to hear. Thanks for watching!
very helpful!!
glad to help!
thanks bro 💖💖
No problem
Once again 🔥🔥🔥🔥
Thanks for checking out more of the content 🤙🏻🤙🏻
Great Tutorial man, but I have an issue I'm facing. As I'm directly correcting the skin tone and take the [FX] off (same as the eye icon ) on the opacity for mask, The color correction is affecting the entire video instead of the skin tone itself, how can I prevent that? Thanks in advance. And in my case, this is a darker skin tone.
that helps ❤
I’m glad to hear it! Check out the new video for a quick vintage tutorial look!
Great video
Glad you enjoyed it. Thanks for watching!
That was so good. The difference colour grading makes is immense and you explained it in a very simple way.
I have a question tho-
What font are you using and what shade of yellow is this?
The font is Mikela and the hex value is FFD935
bro u r professional
Haha. Thank you brother but I don’t think so. Just gotta keep working.
So amazing I wish I could break down the color like this for photos! Can I does anyone know ??
What do you mean exactly? I only ask because in this process, we start in a desaturated log format, where as a raw photo still has saturation and contrast with alot of extra data?
Maybe I’ll make a photo editing/lightroom tutorial but it’s hard to do those since there isn’t a one size fits all thing! Lmk
where did you learn all this?
Spent the last 8 years investing my life around videography.
When I mark the skin with the opacity marker, it wouldn't isolate? How do I do so?
Make sure the mask is closed, and that you have invert off
My pencil just brings the shape but no mask what should i do
make sure you're making the mask on the video layer and not the adjustment layer! If you are on the video, try hitting invert and see if that changes anything!
Wow❤❤🇧🇩🇧🇩
thank you!
what font he is using
Made a short on that! Check it out!
font name
Mikela