
ฝัง
- เผยแพร่เมื่อ 30 พ.ค. 2022
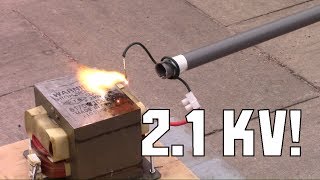
- How I built my own Lichtenburg machine. As stated in the video this can be very dangerous and cause harm or death. I don't recommend doing this yourself unless you are knowledgeable about electricity, electrical wiring, and how these components work. Do this build at your own risk. With that said, this channel is about creating and building and below are some of the items I used for my build. I hope you enjoy the video.
Some of the links provided may be affiliate links and the use of these links could result in a small commission at "No Extra Cost To You". Thanks for your support!
Some parts used in this I had access to and did not have to purchase. You may or may not be able to purchase them or you may substitute with a similar product. Here is some helpful info and links below.
amzn.to/3fjZfCR - Amazon Shopping
amzn.to/3TVMWM1 - Voltage Regulator
amzn.to/3WjD0NP - Pedal Switch
amzn.to/3zXiGZh - Volt Meter
amzn.to/3STRPnl - Jumper Cables
amzn.to/3SWINWO - Din Rail Terminal Blocks
amzn.to/3fmLdjQ - Red Cover Toggle Switch
amzn.to/3h0QaPM - Red Light Indicators
amzn.to/3DsHvgp - Enclosure Fan
amzn.to/3fqG7TE - High Voltage Sticker
Enclosure Milbank 12128-SC3R-NK. - แนวปฏิบัติและการใช้ชีวิต


Thank you for the how to build death trap.
Lol.... Thanks for the comment.
Bom projeto. gostei de ver.
Obrigado!
Thank you!
Congrat, you are talented!
👍
Very nice.
Thanks
Great piece of work. I’m wanting to build one myself and this is the best I’ve seen yet on youtube. I want to do some projects with fractal burning but have a question. How does the voltage regulator come into play? Is it used for different wood thicknesses or burn rate/depth? Sorry, I’m ignorant on this. Yours is the only one I’ve seen with the regulator. Great work! Thanks!
Good question Dana. I plan to do some future videos on it but in answer to your question with a lower voltage the the fractal burn is slower and covers less distance. With a higher voltage it burns much faster, deeper, and covers a larger distance. When I want to get more detail I put the contacts closer together with lower voltage. When I want to have bigger burns and connect further points I increase the voltage.
Where did you get the metal box?
Ha. Nevermind, just opened the description. Nice work.
Thank you!
How are the cables attached through cabinet to red/ black interior. Just alligator clips?
Hi Mark. I used electrical wire connection reducers so the larger wire and smaller wire can be connected to each other and then they are directly wired to the transformer.
Is the ground wire from the power cord connected to the plate of the transformer or not? And should you coonec the ground ro anythong or not?
Hi Vlad. The transformer is bolted to the box. That bolt is connected with a wire to the black cable and also has a green wire that connects it back to the green grounding terminals which are connected to the ground wire from the power source. Absolutely connect your grounds. All grounds should always be connected.
Did u isolate the core of the transformer from the HV winding
I left the transformer fully intact as is when removed from the microwave.
I built similar but no voltage control. Is this a rheostat, and is this control on low voltage side.
The voltage regulator is wired before the transformer.
hey , awesome build ... i looked up your toggle switch link but it takes me to a page full of them .. wich specific one did you use pls . ty ia
I have a buddy who is an electrician and he had one he gave me so I don't have the exact one I used linked. I would suggest checking specifications and reviews to choose the one you think would be best for your application.
@@Vallenge ok ty , i found one . now your box , i have a hard time finding a box like yours
Lol... It's the same thing. If I bought it I would definitely give you the link but I got it from the same buddy...
@@Vallenge ty vm for the replies
@@Vallenge whats the size of the box , 12x12 or 14x14 ?
Wow I love this. Looks great and can even go to science fairs. Thanks for a great video. Love the sticker also
Thank you!
Interesting to watch. It appears that your are using car jumper cables that are only rated for 12-24 volts though. When you're pumping out 2,000 volts, this could prove to be fatal. Furthermore you talk about Hot and Ground, but as it's AC, it's actually Hot and Neutral, not to be confused with Ground.
Thank you for the info Paul
That’s so rad. I’m going to build one.
Thank you!
Using Jumper cables can potentially get you killed. They are designed for high current/low voltage which is exactly the opposite of what you are using them for. The insulation is not rated for high voltages. the leak thru can kill you, seen this mistake on many builds. The output is less than an amp so you need to be using a wire specifically rated for high voltages not high current, the awg for these is generally fairly small 14 to 22 ga. need a wire rated at least for 25kv.
Thanks for the information and helpful comment.
Vallenge, are the Output conductors or cables rated for the the output voltage of the transformer? Most electrical industrial wires are rated at 600 to 100 volts. What is the output of the transformer?
600 to 1000 not 100 sorry.
No problem
Hello Cap. That is a great question. Depending on which microwave and which transformer somebody utilizes will definitely determine what their output voltage and amperage will be. Often cables are rated with a 600 volt rating with that said however I have had no issues using my 6 gauge jumper cables and I've never even felt them get hot. I would definitely suggest anybody concerned with this issue closely look at the ratings of the transformer they choose to utilize and the ratings of the cable they use. Thanks for your feedback and comment.
Not about heat but thickness of PVC insulation. Stay far away from those alligator clamps until the box is un- plugged from the wall
@@d46512 😎
What is the part number for the voltage regulator?
The ASIN is B08LSQWGZT. Not sure if that would be the part #. The info is "4000W Motor Speed Controller, Motor Control Board AC 110V Adjustable Voltage Regulator SCR High Power Dimmer Controller Temperature Governor Dimming Monitor. It is linked in description. There are other options as well. That is just the one I chose to use.
i would like to buy one from you. looks great!!
Thanks James. I don't sell them but I appreciate the comment.
Very nice setup, I have been watching several "how to" videos for ideas for when i build one. I have a question and you've likely already been asked and answered in the comments but tbh I almost always get distracted and forget what my questions are when I read through comments because there's always those experts of everything who post the most ridiculous and outrageous comments. So, if this has already been asked and answered I do apologize, I am wondering if you've had any issues with heat? I realize that is what the fan is for however I didn't see any vents or small holes for the airflow. If it doesn't overheat then obviously they're not needed but I believe that I will add at least a few small holes opposite the fan where cooler air can flow over and around the transformer. I am assuming that my future projects will be time consuming, I tend to overdo things so I want to be sure that I do not have any problems with overheating. I will say that you made one of the nicest setups that I've seen and I will be "borrowing" some of this when I build mine...lol
Thanks for the video it is very informative, I know what to build for what I need.. Thank you!
Thank you for the positive feedback. As you see in the video theyre is a fan to keep it cool. There is a vent on the backside too allow airflow. I have not had any issues with heat. Great question. Thanks again.
@@Vallenge thank you, watching on the phone I miss a lot of details. What you built is basically what I've had pictured in my mind for a while, I do not want something cobbled together that looks like random tweakers found some wires and a transformer and went crazy. I am considering a trigger like my mig welder instead of a pedal just because my luck sometime would step on the pedal to see what happens when I'm not paying attention. It would be handy to have the voltage regulator with the trigger, at least I think it would be handy for me. I should probably build a basic setup and try it out and see if this is something that I want to get into before building it how I think I might want it.
looks like neutral white going to switch?,i did all my hot low volt wires black
Hi Daniel. In general I agree. White wire would always represent neutral and the black would represent line/load. In this project I just wanted it to be easy to see the difference of the line in wire to the switch and the load out wire of the switch. Thanks for commenting.
@@Vallenge I love the potenciometer on line, will make more interesting!
Good job
@@danielson101 Thank you!
hey bro ,nice work , if you can provide me with the scheme it will be a favor , thanks
Hi Akram. I describe it in detail in the video...
i still found some difficulties to see throught all of the cables
@@akramrouabah9616 If you didn't understand it from the description, you probably shouldn't be messing with something so dangerous.
I have a Question I do deep pour wood working, how much would it coast for you to Build one of your machines for me???
Sorry but I don't sell them.
@@Vallenge Well then do you have a detail instructions so I could built it myself so far your looks like the best desing out there, Thanks
@user-lv3oj4mt3z I don't have anything else to provide other than the video.
okay thanks @@Vallenge
Your welcome
Is there any chance I would be able to buy this off of you?
Hello Noah. Sorry but I still have plans to use this machine as soon as I have a chance. Hopefully the video will help you to build one for yourself. Thank you for commenting.
What size CB did you use and why?
What does CB refer to?
The fuse / circuit breaker
The main fuse is a 20A Time Delay Fuse. I chose this fuse as I never wanted a higher current of amperage running through my homes circuit to the machine and if it does the fuse will blow.
Perfect cheers, love the video best machine I've seen, I'm making one similar off yours
Thank you
great job, could you share the installation diagram?
Thank you for the feedback. I don't have a drawing to share however I do go through the wiring in detail in the video.
you have a cooling fan exit, but hole to let air in.
There is a inlet port that allows air in on the back. I already had one available and did not have to order one. Using a plug style port prevents small hands or fingers from accessing inside the box and keeps out bigger debris.
Great build. However, I found your use of terminal blocks, although practical, confused the wiring description.
Thanks for commenting. I understand what you are saying but found doing a explanation via video instead of a wiring diagram would be understood by those without experience with wiring diagrams.
I just added the voltage regulator and meter you used, to my rig. Thanks for that. I had to ask an electrician friend of mine about the meter wiring, but I got it done.
@@justdon5378 Glad you were able to get it done.
Very good, but this aircraft type switch is certaintly not 110v nor 230v rated.. These are almost always made for cars just for decoration which they are 12v.. And rarely for boats which they use 24v. But running 5-10 Amps of 220v power (or I don't know how much this transformer consumes at full power) is a lot for it, you are lucky that it didn't catch fire.
Thank you for the info.
Just wondering if you're still alive? Do you look back on doing this and feel thankful?
😂.. Life's about experiences right. I took precautions but there is a risk when it comes to this...
@@Vallenge You do realize now what you did was stupid though? Not insulting you just genuinely curious.
I don't feel that way. I took the steps necessary that I felt safe. Everyone is entitled to their opinion but I still use the machine on occasion when I have time and I'm glad I built it.
The only problem I see, using a metal box to house high voltage not always a good idea. You could do the same thing with a plastic box they sell at your electrical supply. Much safer and less likely to conduct electric to hurt or kill😮😮 somebody in case of a short. Although I do like the design.
Thank you for your suggestion Jeff.
This has to be the best DIY for this build. Very nice build and nice looking. Would only change 1 item, a metal box to a plastic box for a little more safety.
Thank you David.
Not over-engineered, mis-engineered. Without a discussion of the features which ensure a clear and consistent current path from the secondary to the wood, back to the secondary, and the design features which ensure very low chance of deviation from that current path, the build is at best very incomplete.
Another item not specifically neglected here, but almost universally neglected in these builds, is that these transformers are not rated for indeterminate loads, which can potentially be much greater loads than the magnetron. So at least trying to cool the transformer was a (mis) step in that direction. Limiting input current to the transformer is a better solution, but I did not take time to try and construct a schematic from the "build" to assess if an adequately reliable form of current limiting is achieved.
Along the lines of the previous paragraph, nobody has done a serious professional assessment of the types of transformers and their failure modes relative to their construction and materials. That is, are there failure modes which allow secondary voltages to leak to the primary side?
So, there you have three very quick areas which require experienced qualified professional eveluation, three of probably hundreds. The high voltage sticker installed at the end, the the digital displays, and reasonably nicer hardware used in this build provide all of the false sense of security needed to chalk up a couple more deaths. Sorry bro, I know you tried, but it is about far, far more than a nice looking box.
I appreciate your opinion and your taking the time to add to this topic.
He fused the primary
@@d46512 the fuse will provide additional safety against certain specific types of failures. This is good, but I would replace the fuse with two light circuit breakers in series.
Why?
In series to for redundancy should any one breaker be defective. "light" meaning 5 or 10 amps at most. It should be enough current to burn, and if it isn't, manage that on the secondary side with probe repositioning or the electrolyte solution.
In any case, for this specific failure mechanism, (transformer overheating) the fan/fuse combination should provide enough safety that we can now look at the 900 pound gorilla in the room, namely that the secondary very often has one of it's terminals attached to the transformer frame, which many Lictenberg builders tie to the earth ground on the primary side. THIS IS SOOOOO ASKING FOR BIG TROUBLE. For later, let's just say this is the black secondary lead. It increases the probability of unexpected (bad) current paths. Keeping a very good distance from the probes only partially solves the main problem, which is: the current from red lead (the other side of the secondary) now has many, many more ways it can find a return path to the other terminal of the secondary. Most of the "red lead" current returns through the black lead, but not all. Some finds pathways you don;t expect, through earth ground, before it gets back to the other side of the transformer secondary.
It is well worth your while to let that last paragraph sink in. Once you can draw a circuit diagram showing these unintended leakage currents, now simulate a failure of the black lead (the circuit equivalent of a black lead failure happens all the time during a normal burn).
What I would like to see is one of these more serious TH-camrs, one who has his ego properly modulated by the right knowledge, to show the current flow paths leading to trouble. Then it becomes far more simple to solve the safety problem. In a nutshell, FLOAT both secondary leads (not just the red one) and throw out these unprofessional and just reckless use of crap like car jumper cables. Get some very good high voltage wire, high reliability connectors, and make sure all that is no longer than necessary and very reliably insulated. If one does a good job at this, you would about have to grab the probes to be electrocuted. That is, taking the preceding paragraphs to heart, one is eliminating all of the unseen but very damn real "leakage" pathways. One more thing than I'll leave you all to it.....
The name "leakage pathways" may be a bit misleading. With the lichtenburg process going, burning, the current is changing in all of those pathways depending on what is going on at the site where the probe contacts the wood. If one ever observes the red probe (the non-earth grounded one) burning nicely, and at that exact moment, the black (earth grounded) lead is not exactly equivalent in the current returning to it.....then that red lead current is using some unseen pathway to return current through earth ground, to the other side of the secondary, the earth grounded terminal.
Only if you have all that locked into your head, it is the only way you can expect to outlive the dangerous amateur phase most lichtenburg burners stay in until something goes very wrong for them.
@@TheGreenHeartofItaly-fl3wv YES I'm with you on isolation and jumper cables. From my experience the secondary is riveted onto the transformer's laminated plates. Easy to remove.
He needs to replace that ridiculous foot switch with a pair of hand-operated dead-man switches, bolted to the machine, so that neither of his hands can be near those uninsulated alligator clamps. I wouldn't let anyone I care about near that death machine when it's plugged into the wall.
The benefits of the foot pedal switch not only allow both hands to be free but also electricity can lock your grip or your hands and arms into position. I agree the alligator clips could be upgraded but the system shouldn't be energized when handling them. That's where a separate foot pedal switch comes into play. It takes everything out of your hands to operate which helps prevent careless mistakes. You both offer some good info though and there are ways as you suggest that the system can be improved on which is great for the community interested in seeing what I have built and how it can be improved moving forward.
I would like to see Lichtenberg engraving on prefabricated kitchen cabinet doors.
Thats a cool idea and something I'll keep in mind to try.
@@Vallenge hey thanks for the quick response! I have been thinking that there is a market potential in Lichtenberg engraving in fine carpentry if the problems regarding the random nature of the technique can be solved. It seems to me that using standardized blanks will provide room for quality assurance. What do you think?
I think manipulation of the electrical contact points can help you to somewhat guide where you want the pattern to go but it will not be consistent. Depending on your rate of success versus failure ratio and your cost per blank used you could decide if it's viable. Other issues could be time versus profit made per sale, costs for use of the machine, etc... Let me know as you get into this how it's going, I like the creativity and uniqueness of the idea.
If I send you a transformer…will you build me one? I’ll pay time and materials for everything else…and shipping.
Hi Curtis. I'm not a professional as I state in my videos. Just like to figure things out and learn new things and show how I did it. I hope my video will help you if you decide to build one but I've got to many projects as it is, lol... Thank you though for the offer.
Cannot wrap my mind why everyone uses those thick low voltage rated wires with huge 12V rated crocodile clips, Is like supporting a car with a broomstick and doing it because everyone does it even when it makes no sense and many have perished.
The voltage is high but the amperage is low which keeps the current within the range of the 6 gauge wire/cable. High Voltage rating increases with more insulation on the wires. I would agree that higher rated voltage cables are better choice as they have better insulation for voltage. I haven't had any issues but would opt for that upgrade on a new build.
Ooo fancy...most of it is useless but yeah it sure is fancy
😂
Hi
can you make it for me?
Price
Hi
I don't sell them
Nice job BUT it's 100% over-engineered.
You don't need a voltage regulator, a volt meter, a fan, terminal blocks, an indicator lamp, or a rocker toggle switch. The fan on the microwave was for the magnetron, not the transformer. The transformer gets warm but never hot. The voltage is HIGH voltage for fractal burning. I have never needed to reduce the high voltage. Also, a demo would have been nice to show how well your super-machine actually works, how handy the reduced voltage can be, and how you keep observing the voltage on your handy voltmeter.
It's very cool but you're not building a piano.
Hi Eric. Thanks for commenting and providing your thoughts. I just wanted to have fun with the build and make a cool machine. You could opt to bypass installing some of the features but I do recommend at least keep the voltage regulator as it does allow for a variety settings which can be useful. I am continuing to build upon the Lichtenburg playlist however some of the information you said would be nice to show you can find in the Playlist. In particular, please take a look at Lichtenburg Fractal Burning - P1- First use Pine Board video th-cam.com/video/h72NEMN14JQ/w-d-xo.html . Let me know your thoughts.
@@Vallenge Thanks, I checked out that Playlist item... very interesting. At flashover, have you tried moving just one contact to steer the burn? Also, have you tried a spray bottle on the 'fine mist' setting to add just a touch of the solution? I live near the Pacific Ocean so I'm gonna try ocean salt water. All the minerals and maybe a bit of pollution from marine traffic could yield some cool effects. Thanks for the demo. Comments?
I have not tried moving just one contact at flashover or a spray bottle. Those are interesting ideas that I will keep in mind. Let me know how the salt water from the ocean works for you. It could be more conductive than regular tap water and salt due to a variety of other substances mixed in. Also, I'm curious to see how the overall burns and woods appearance looks after.
It IS call Lichtenberg not burg ....i am french
Thank you for that info. I found it written both ways across the Internet.
Reviewing that again.......on the bright side, there is some emphasis on making good reliable well planned connections. But, no, no, no, it is not good to suggest to viewers that going cheap with wire nuts or whatever, is OK. Shortcuts to make it cheaper all come at a hidden price with regard to 1.) performance 2.) reliability and 3.) safety. Please, consider re-making this video and emphasize what is good about the build, and de-emphasize the short-cuts.
That said, there are still big gaps in the coverage of topics affecting the 3 items above, 1.) performance 2.) reliability and 3.) safety.
I can see the advantages of your suggestion to make direct connections versus the use of wire nuts.
@@Vallenge the bigger picture is relevant. Cheapness has an unseen price. Jumper cables for instance....cheap, totally unrated for these voltages or the overall application. The PVC probes people build are equally ridiculous.
@@Vallenge Not just any "direct connections" On the primary, standard electrical hardware is fine, terminal blocks, etc. Whatever it is it must be mechanically secure, not able to float around like wire nuts. Wire nuts actually if used by someone who understood all the issues could be used with relative safety, but mechanical stability is just better assured with properly selected terminal blocks.
The secondary is another story. The insulation strategy for attachment to the transformer is an area, as well as maintaining reliable insulation through the wall of the enclosure out to the clamps. Re-doing those lousy cheap jumper cable clamps in a more reasonable way is a mechanical engineering challenge, I have only partial solutions at this time.
And to your credit, you never suggested going cheap to sacrifice safety. But wire nuts can be used different ways, with different results, so there is a possibility saving the price of terminal blocks could be very expensive.
@TheGreenHeartofItaly-fl3wv Thanks for the continued information focused on making the project better and helping everyone learn.
As of January 2024, at least 33 people have been killed doing this woodburning trick, and every one of them thought they knew what they were doing. And those that got killed are still dead.
Most folks do not realize that high voltage electricity (say 2000 V or so) can flow where you might least expect it, like across the surface of a table or over the surface of a PVC pipe. It will flow through the insulation on jumper cables and the wire used in residential wiring. It will flow through electrical tape as if it's not even there.
If you get hit, it will be over before you even know anything has gone wrong. And you will be dead.
-Old dude, not a safety nazi and not a pussy either.
Hi Clarence. Definitely something everyone should think about before attempting a project like this.
ridiculously complicated
I feel the benefits of the complicated build add to a cool design and more safety features which was beneficial in my opinion. There are other videos out there for a simpler method of constructing these machines if anyone is interested in that. Appreciate your feedback.