Capture One In 2 Minutes - Luminosity Masking Quick Tutorial

ฝัง
- เผยแพร่เมื่อ 13 เม.ย. 2020
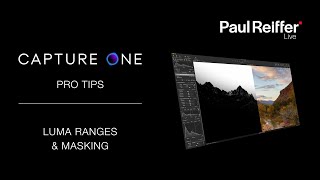
- In this series, we will explore Capture One tips, tricks, and quick tutorials, all in about 2 minutes. In this quick tutorial, we cover how to create a luminosity mask and adjust it to suit your needs. I also show you how you can alter the mask if it needs further refinement until it is exactly what you need to make your photo as good as it can be. There is so much more we can do, but this is just a quick intro to the tool and how to use it on a basic level. I encourage everyone to use Capture One as they watch this tutorial so they can follow along, as practice makes perfect!
Enjoy this video? Consider buying me a coffee! ko-fi.com/sedetweiler
The model here is Chicago based ballerina, Jennifer Raelynn. Check her out here: / jennifer.raelynn
You can get the lowest prices on Capture One as well as style packs by using my ambassador link: captureone.38d4qb.net/q67GN - ภาพยนตร์และแอนิเมชัน


Wow, amazing. I never used rasterized. Now I know the main function. Great job man.
Glad I could help!
Great tip Scott.
Thanks brother! 👍
So accessible! Thank you
You bet!
Thank you for some of my best spent two minutes
Happy to hear you are enjoying them! I am sure some longer ones will be coming out soon, but I am good making many more of these to fill in the gaps until the next one.
Your content is superb, keep it up!
Glad you enjoy it!
Excellent!
Thank ya!
I decided to start use capture one and your videos are so amazing. I have to practice it to remember :)
Thank you! Glad you made the jump! Let me know if you have areas you would like to see covered in future Capture One videos and I will see what I can put together for you. Cheers!
@@sedetweiler Is possible in Capture one to smooth skin like in Photoshop, I mean to erase pores and make it more soft.
In lightroom I used to brushes with decreased (texture, clarity and sharpness) and use tool spot removal and it was enough for me.
@@stanisawniedzwiecki5005 sure, it is possible but it would never work for what I am trying to produce. It would sure me a ton of time if it did! glad it is working for you.
@@sedetweiler I watched your latest stream capture one pro + photoshop retouching i wanna do it that way, but it takes so much time. But results are amazing, you nailed it!
Thank you! Yes it does take time, so I don't do it on every image. Only those that will get air time or will be printed large. Cheers!
Another quick fire! I have saved it for future quick reference.
Let me know what you think when you get time to digest it. Stay safe!
Very helpful, thank you!!!
Happy to help!
Another useful time-saver: If you have changed a slider, click and hold its name (at the left of the slider bar) to return the control temporarily to its default setting. Then let up on the mouse and the slider returns to the last setting you gave it.
thanks! so many little things like that I need to add to a longer video on the future. Trying to fit as much as possible in to these without speeding them up. :-)
@@sedetweiler You might have to resort to one of those speed-up-your-voice devices that they use in car-dealership ads on the radio. :)
@@mikearst2940 I live in Wisconsin, we talk plenty fast. :-)
Hello,
Sometimes when I use Luma Range I display the mask in shades of gray before clicking on Luma Range. I press Alt + M, we can see where are the high or low luminosity easier.
yes, that is another great way to see the range!
Hi Scott, I noticed that your luma range settings window is very fast. I have a Mac Mini 2018, 6 cores 3.2Ghz, 32GB RAM and 1TB SSD. And still changing the luma range settings is slow. Do you have a suggestion for this? Lot’s of greetings, Dennis 🇳🇱
I am not sure, but make sure you have the GPU enabled or set to Auto. That can be found in preferences and can make a huge difference.