River Table Alternative - Resin Plank Table using GlassCast Epoxy

ฝัง
- เผยแพร่เมื่อ 17 ต.ค. 2024
- GlassCast 3 Epoxy Resin was from www.glasscastr...
Full project details ▼
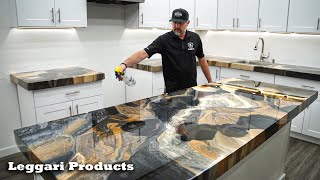
Video tutorial showing how we created this eye-popping neon yellow designer table using GlassCast 3 epoxy resin, some redwood planks and a neon yellow pigment. We've included all the steps along the way including setting up barriers, calculating how much resin you'll need, laying out the planks, pouring the resin in layers and then finishing the table.
Links to all the products used in the project (on the GlassCast Resin website):
► Polypropylene Sheet www.glasscastr...
► Neon Tinting Pigment www.glasscastr...
► Release Tape www.glasscastr...
► GlassCast 3 Epoxy Resin www.glasscastr...
► Abrasive Paper www.glasscastr...
► NW1 Polishing Compound www.glasscastr...
► Square Industrial Designer Legs tinyurl.com/ya...
Free downloadable eBook for the project - media.glasscas...
If you have any questions, please just ask in the comments below!
#epoxyresin #table #neon


![The Wall Song ร้องข้ามกำแพง | EP.215 | พาเวล นเรศ - พูห์ กฤติน | 17 ต.ค. 67 [1/5]](http://i.ytimg.com/vi/IUzrjuf60P4/mqdefault.jpg)


Great Video ! very clear and easy to follow should help any to get building
Thanks for this vedio . It was amazing work.
sorry if this has been asked/answered already but how long roughly does the resin take to dry to the B stage?
Hi Fraser, that is not a problem. For GlassCast 3 it will take around 12 hours in a room that is a consistent 20'c to reach its b-stage.
Hi just ordered some glasscast resin, what do you use for cleaning the mixing buckets?
Acetone or Methylated Spirits are good for cleaning down. Depending on the type of plastic that the bucket is made from, you may find that after the resin has cured, you can simply flex the sides and the resin will crack off the sides.
Is this durable for kitchen work tops so can resist heat from hot objects etc
Hi Andy, many customers use the GlassCast 3 for kitchen worktops however, the maximum heat resistance for all of the GlassCast resins is 45'c. I would strongly recommend to anyone that it would be best to use coasters / heat mats in order to keep the best finish on the resin.
Poured a kitchen table using Glasscast 3 followed the instructions - 2 buckets, electronic scales for accurate ratios etc. Mixed using mini mixer attachment for cordless drill so fairly confident it was well mixed, ran a heat gun over it, used mica powder for colour pigment , in the workshop it looked like it was a perfect glass finish but when I returned it to the clients house it looked to have a rippled surface in places - any advice ???
Sounds like the resin was either too thin or maybe the resin has soaked into the wood in places causing the slight rippling effect. You could sand it smooth and polish it up again or go for another coat over the surface. How thick was the cast?
@@glasscastresin
I had the table surface primed prior to application, the pour depth was 3mm used a full 5kg kit of Glasscast 3 on it table dimensions works out to 1.6m2 of surface area
@@karlodonovan1474 Did you seal the timber prior to application? 1.6mm is on the limit of the resin's ability to Self-Level so if any soaked into the timber, you may have dropped below the 1.5mm minimum. In addition, we generally don't recommend mixer paddles/attachments, as they both whip in a lot of air but also don't thoroughly mix the resin at the sides, bottom and corners of the mixing pot. Hand mixing with a flat bladed mixing stick is the much preferred option to ensure thorough mixing. However, I'm not sure either of these would be the cause in this case, if it was perfectly flat and hard at your workshop, where was it situated in your customer's property? If the temperature exceeded that of your workshop (such as a conservatory or sun-room or next to a large window), the resin may have begun to 'post-cure' which in theory could lead to surface deviations.
@@glasscastresin yeah the table surface was primed and sealed lightly sanded etc. Prior to pouring, the table measured 1.6m2 and I used a 5kg so using the 1kg/m for 1mm coverage I would of had 3mm depth (1.6×3 = 4.8m2 so 4.8kg of resin). The table was returned to a kitchen/dining room not in direct sunlight the weather has been fairly cool here and overcast the last few weeks also some rings have formed from decorative candle sticks on the table they are not lit and only weight about 300g at the very most the resin was poured on a Tuesday morning and reassembled on the following Monday so curing time should of be adequate the thermometer in the workshop was reading 22 degrees for the most part of the curing process so I'm not sure what went wrong here everything was followed as per instructions I am doing another one the weekend so I would love to get some explanation as to how/why this happened to avoid a reoccurrence thanks
@@karlodonovan1474 I install epoxy floors and it maybe of value to you to know that the way you pour the catalyzed (mixed A+B epoxy) is a different from what everybody and their brother shows on all kinds of videos. Properly pouring the epoxy is done like this:
1. Mix A+B in bucket 1. Scrape the sides of the bucket. But do know that you will NEVER manage to mix all the A+B 100%. Use a mixing stick. No mixer.
2. Induction time: Some epoxies need to sit for a period of time for A+B to react properly. Even epoxies that supposedly do not need induction time do benefit from it. Read the manufacturer's recommendations carefully.
3. Pour the epoxy from bucket 1 to a clean bucket 2. DO NOT scrape and collect the epoxy that is sticking to the sides of bucket 1. That is a waste but ensures that no unreacted A+B end up in bucket 2.
4. Mix the content of bucket 2.
5. Pour the epoxy from bucket 2 into bucket 3. DO NOT scrape and collect the epoxy that is sticking to the sides of bucket 2. Yes, more waste but you reduce the unreacted areas to a minimum - actually completely eliminate them.
6. Mix the content of bucket 2.
7. Pour the epoxy from bucket 3 on your surface. DO NOT scrape and collect the epoxy that is sticking to the sides of bucket 3.
8. Done. Wait for cure.
.
How did you seal the planks? with resin too?
Yes, the 2nd resin pour was enough to sit the planks on top of and seal all of the planks - we found the best way to do this was by brushing over the tops, edges and ends. It was then left to cure to the B-stage before moving on to the 3rd stage pour.
Also can it be honed for a matt finish
Yes of course, there are a few ways of getting a matt finish you could go through sanding the entire surface, starting at around a 120 grit and gradually working your way up to around a 3000grit. This will give a very matt finish on the resin and will appear translucent. Another way of achieving this would be to apply a matt lacquer over the surface of the cured resin to get the desired effect.
Thank you. Final question does it resist scratches
@@andymjflemming Yes, the GlassCast range of epoxies are very scratch resistant and hard wearing however, dragging something sharp or heavy across the surface could cause some marks.
Thank you, sorry I do have another question now you're being super helpful. I plan to apply the resin with my hob and sink still in situ, what do you advise about masking them up so they can be removed at a later date if needed, i.e resin sticking to them.
Hi Andy, the best thing to do in this situation would probably be to remove the hob and sink before pouring the GlassCast onto the surface to prevent the resin from bonding to them.
Once the resin has been poured on the worktop, you will need to wait for this to reach its full cure which can take a few days in a room that is a consistent 20'c before reconnecting the hob or sink.
sir the table is too good . but i have a doubt that , why you have multiplied the volume (3.84) to 0.666??? this i didnt get pls clear my doubt sir .
Hi Rakesh, The reason this is multiplied is to work out how much resin is needed for the pour. the same will be for the hardener 3.84 x 0.333. The reason we use use the 0.666 & 0.333 is because the mix ratio for the GlassCast 3 is 2:1 by weight and that is how it is being measured in this tutorial.
@@glasscastresin ohk sir i got it, but if i am using the resin with the mixture 3:1, should i have to multiply the same (0.666&0.333) to the hardner and the resin ? or it changes ?and how much it will be pls help .
@@rkshp10 Using the mix ratio 3:1 will simply not work as this has been designed to work at a 2:1 mix ratio. Mixing at 3:1 will only cause the resin to not cure.
@@glasscastresin and sir why u have multiplied it by 3 in first stage ,1.5 in second stage and 2.5 in last stage ? is it just because of thickness which is required ?
@@rkshp10 Yes exactly, So for example, if you have an area that is 2 square meters and you need it to be 3mm thick you would simply work out 2x3= 6kg per square meters. After this, you then multiply this number by 0.666 and again for 0.333 and this will give the quantity of resin and hardener needed to get the mix ratio correct.
Wood was cheap resin wasn’t ☹️
So that is 3 days for one build. I should sleep during the curing time.
3 days total duration but realistically only a few hours of work overall; you could sleep or even start another project!!