BUZZ RACK Spark 3 bike carrier - How to fit

ฝัง
- เผยแพร่เมื่อ 25 ส.ค. 2024
- Click here www.roofbox.co... for more details.
The Buzz Spark bike rack is supplied almost fully assembled.
Sit the carrier on its carton to avoid scratching whilst fitting the upright and Release the tilt retaining catches and pull the tilt bar towards you.Set the carrier to its full tilt, this will help to fit the bike arms and remove both 45mm bolts and 19mm washers from both upright feet.Slot each one into the mainframe, insert the 45mm bolts and washers into each foot and tighten hand tight using the tool provided.You only need to do this the first time you use the carrier.
Adjust the tightening wheel so there is sufficient resistance when pushing each handle into place.Push the carrier until it clicks back into the horizontal position.Using the keys provided, unlock and remove the locking pin.Now lift the carrier onto the tow ball.
Holding the carrier with one hand, pull up on the tow ball clamp arm.
If you cant lift the clamp arm all the way, you will need to make a minus adjustment using the adjustment dial located on the under side of the mainframe.Likewise if there is side-to-side movement once fitted, you need to release the clamp arm and turn the adjustment dial to the left until secure.You only need to do this the first time you use the carrier.Once straight and secure, attach the locking pin and lock with the keys provided.The carrier is now secure on the tow ball.
Attach both lighting brackets to the light unit using the 4 screws and tool provided.Slide the light board onto the rear of the carrier and insert both of the 45mm bolts with the 133mm washers, tightening hand tight with the tool provided.
Open the left unit and click into place.If you have a 7-pin socket, you will need to use the 13 to 7 pin adapter provided.Push both together twisting the 13 pin plug 90 degrees.Attach the wiring to the underside of the mainframe by clipping it into the holders provided on both sides.Using the cable ties provided secure the remaining wiring around the mainframe.Make sure to leave enough slack for the tilt function.Release both upright handles and lay the upright flat, this will help loading the first bike.Release all the wheel straps before loading the bikes and make sure the bike arms are unlocked.Load the heaviest bike onto the carrier, with the gears and derailleur facing the car.Now secure the upright by pushing down on each handle.
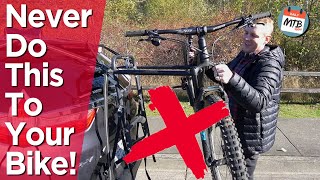
Using one of the smallest arms, place the jaws around the most accessible part of the bike frame.Once in position, tighten hand tight, locking when your finished.The locking knobs will spin in the locked position once locked.Place each wheel strap over each wheel rim and secure.Load the second bike, making sure it is facing the opposite direction to the first bike.Put the longest bike arm through the main frame before attaching the other shorter bike arm to the most accessible part of the bike frame.Once in position, tighten hand tight, locking when you’ve finished.Attach both wheel straps.If loading a small child’s bike, you will need to adjust the wheel holders to accommodate the small wheelbase.If the child’s bike has stabilizers, these must be removed prior to fitting.Load the third bike making sure it is facing the opposite direction to the second bike.Place the jaws of the remaining bike arm around the most accessible part of the bike frame. Once in position, tighten hand tight, locking when you’ve finished.Attach both wheel straps.To operate the tilt, release both retaining catches and with one hand pull the tilt handle towards you. You can use the bikes handlebars or frame to pull everything towards you.Make sure to keep hold until the carrier has reached its full tilt.
This should now leave enough room to open and access the boot on most cars. Now simply push the carrier and bikes back up to horizontal, clicking into position and reattach both retaining catches.
The EasyTilt is quick and simple to remove from the tow ball and can fit in most car boots when not in use. To do this, fold the lighting unit, unlock and remove the locking pin and release the tow ball clamp arm. Lift the carrier off the tow ball and rest in the boot whilst you loosen the upright and lay flat. Now place inside the boot.


Wow, this has got to be the easiest and secure fit and go I've seen yet :)
Awesome thanks for the share
what wheel base can it support?
Hello and thanks for commenting. The Buzz EasyTilt/ Spark will accommodate wheelbases from 510mm up to 1190mm. For a detailed specification pdf click here - www.roofbox.co.uk/scripts/rbvehsel4_tab.php?BRP133