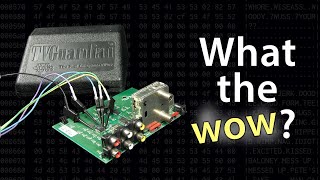
ARDUINO NANO with Oil Pressure and Temp Sensor + OLED display

ฝัง
- เผยแพร่เมื่อ 1 ม.ค. 2023
- Hey guys, I would like to show you my Arduino project that I made.
It uses a Hella oil pressure and temp combo sensor, with an OLED display.
Hope you like it!
OLED display for Arduino tutorial: www.instructables.com/OLED-I2...
PWM automotive sensor reading with Arduino: forum.arduino.cc/t/pwm-input-...
Voltage divider resistor for Arduino: skillbank.co.uk/arduino/measu...
**UPDATE**
Some viewers requested the code, so here it is (Oil_temp_pres_en.ino):
github.com/Baliszovics/Arduin...
(go to code and download as zip, or click on the 'Oil_temp_pres_en.ino' and copy the code) - ยานยนต์และพาหนะ


cool project! thank you for sharing the source code! the use of the small screen was fantastic! I'll try to create a box like yours for the Arduino
Thank You for this info.
For me I take the hint for the interesting sensor.
If you can get temp and press from your OBD on the computer you also could read it with arduino and obd library without installing additional hardware .... or the benefit is the aditional location in oil circuit info ....
Amazing info dude. I'm looking to do something similar in a w124
Thanks. Nice, we had two E300 back in the 2000's years, one with an AMG and 4Matic drivetrain🙂
Thank you for sharing this! Exactly what i have been wanting to do! Would you be willing to share the CAD or STL file for the nano case?
Nice work!!! Have you ever think to replace SSD1306 with a SSH1106 (1.3 inch)?
Looks like a really cool project and thank you for sharing the source code! I’ve just received my sensor but noticed it’s not the usual NPT 1/8 thread, how have you connected it to the car, do you have an adapter or something?
Thanks. Yes I made an adapter for it
Excellent work my guy
Do you sell them ?
Subaruuuu!!! Where did you take the signals for Oiltemp an Pressure?
From the right bank cylinder head where the AVCS solenoid sits. There is a picture in the video from that bracket. My car is MY07 3.0 H6. This project is still going, currently I am waiting on some turned adapters
How did you make the adapter for this? I want to use this same sensor on my car, and my car has a 1/8ths BSPT threaded hole for where I can put this sensor.
I made an adapter in CAD and a friend made it on a lathe for me.
I am trying to use this code with an ESP32. I've built a similar Oil Temp Gauge, now looking to add Oil Pressure. Do you know what the pin numbers would be related to on an ESP32? I see Pin D8 is GPIO17. What is PCINT0? Thank you
Well, that section of the code is a grey spot for me, I copied that from the source. Maybe a variable or source for the sensor readout, I am sure someone can answer this question here better than me🙂.
Hi amazing project, what connectors did you use inside the Hella sensor and what seals did you put on the connector for the sensor i cant seem to figure what they are. thanks
Hey, thanks! You will need 3 things for the complete connector for this sensor:
-connector, TE Connectivity MCON: 1488991-5
-plug or receptacle, TE Connectivity: 1670146-3
-wire, 0,5 mm^2 / 21 AWG wire, and for that you will need a sealing ring TE Connectivity: 967067-1
I purchased a special crimper because the tolerance in the connector is very tight so you will struggle to make the connector pins to fit.
The plier/crimper is IWISS IWC-1424B This can crimp the receptancle and the sealing ring too.
@@Mr.Bearded.Mechanic thanks very much that is exactly the parts i need, thanks again for posting this video it give me great inspiration and an alternative to the expensive options on the market, which this is every bit as good as.
@@stephencooney4816 You're very welcome✌I am glad that my video inspired you.
Hi, i really like what you did there. I got a GT86 and would like to build one by myself. It would be nice if you would post the code in the description or upload the file :)
Keep going 👍
Hey, thanks, see the code in the description✌🏻
@@Mr.Bearded.Mechanic Awesome, thanks man!
hi are you going to post the code somewhere? I am looking at many codes to get ideas for my boost gauge and would like to see how you did yours, on video it's not easy to test.
Hi, once it is working (test was a success but oil was leaking next to the fitting) I will make a new video about it and post the code too. Still waiting on some machined / turned parts for it.
@@Mr.Bearded.Mechanic I like the project so much. I hit the post on arduino forum too. I could not handle with this code. Maybe you got updates to your code and Subuwu to share the code with us.
@@hannespauly4152 see the code in the description✌🏻
see the code in the description✌🏻
Welcome. I would like to add dimming, e.g. by 50% after turning on the lights, so that I am not dazzled by the display at night. I'm bad at programming and I'd like to get the desired effect - can you help me with the code?
Hey, as far as I know it is depending on the screen, if it is supporting it. Some of them has a built in voltage regulator so you cannot dim the screen. Maybe some others can help you with it, I did not poked this option yet. Check @upir_upir channel, maybe he has some idea for it✌🏻
@@Mr.Bearded.Mechanic Thank you for your answer.
I found something like this - my backlight is around 12V but I don't know how to add it
th-cam.com/video/hFpXfSnDNSY/w-d-xo.html
Hi! Thank you very very much for this clip. A few days ago I bought all the components and put them together, changed the info on the screen a bit, but it seems like the temp is updating extremely slow, and the pressure does not go over 0.2 bar while blowing in it (haven't put everything on the car yet, want to make sure it works fine first)
Do you have any suggestions? On the technical file of the sensor there seems to be some capacitors and a resistor, did you wire those?
Hi, you can adjust the update frequency in the code, search for delay, which is in micro sec. The sensor measure absolute pressure and I came up with a number which I subtracted from the result value to not show current air pressure as a base (~1 bar). Feel free to play with these numbers and let me know if it helped✌🏻
@@Mr.Bearded.Mechanic
wow thanks for the fast reply, i cant seem to find anything about the frequency, and i also dont think its needed, because on the screen it kinda moves fast, but lets say i put the sensor in hot water, it goes up in value but extreeeeeeemly slow, i think it would take it 15 mins to go up 5 degrees (it goes up like 23 for a few secs - then 24 for 0.5 secs - back to 23 and so on)
also
it registers very very big spikes on max temp and pressure with it only sitting on the table (i get to see max temps of hundreds of degrees and max pressure of 2-3 bar out of nowhere, but only on the max, on instant reading it sits fine)
have you done anything to "calm down" the signals?
also, do you still have it installed in your car? how does it behave, does it work properly every time?
@@vlaadski It seems I remember wrong. Now I can take a look at the code. The display is refreshing every 1 milisec 'Delay(1)' around the 118th line. So it is in milisec not microsec. I did nothing with the signal, so no dampening like on the sensor chart (resistor and capacitor) I believe the Arduino has some built in resistors. Maybe I am wrong but it seems to work pretty stable. Maybe there is some interference between the cables or electrostatic interference. I just checked the sensor at my desk (still not installed in my car). Starting temp was at 22-23 °C, and put in ~60°C water. I think you put the sensor straight in the water so air is trapped around the sensor. The sensor is deep inside the threaded end. I tilted the sensor at one side around 45° and shook it gently to get the majority of the air bubbles out. The temp went from 23 to 28 in around 2-3 min. It depends on how big is the temperature delta. The metal housing needs to match the temp also. There were no spikes at the max temp for me, and the pressure sits at 0.0, the max was 0.1 Bar.
@@Mr.Bearded.Mechanic thank you very very much, it helps a lot, i will pay more attention to the wiring, maybe with a bit better quality ones, also will give it a try with those capacitors and will come back with an answer these days. I cant thank you enough for your help. If this works as it should, it will help me a lot for my car.
@@vlaadski you're welcome✌🏻
Hi, Great Project ! Can you tell me how the electrical connector on this sensor is called ? You seem to have found the corret one and i am having a hard time findig the right one
Hi, thanks🙂. The connector that I used is called:
TE Connectivity 148891-5 MCON type. It is just the housing, you will need
pins: TE Connectivity 1670146-3 and
gasket around the cable: TE Connectivity 967067-1
@@Mr.Bearded.Mechanic thanks so much for the quick reply thats awesome !
@@Mr.Bearded.Mechanic Can you provide the pinouts for this sensor?
@@user-ng8xg6hq2k Hey, check this catalogue, page 38, bottom area: www.hella.co/truck/assets/media_global/10045293a_AM0.pdf
@@Mr.Bearded.Mechanic Thank you for your answer.
I had a problem with 'radiolocation' on the Internet😀
Látom magyar vagy, én is meg szeretném csinálni, annyi hogy én az olaj nyomás helyett turbó nyomást akarok majd oda. Valami ötlet hogy milyen nyomásmérőt rakjak oda?
Szia, töltőnyomást szeretnél mérni? Szerintem ezzel a szenzorral is tudod, annyi, hogy ez kombinált, méri a hőmérsekletet is és emellett olajálló. Abszolut nyomást mér, tehát az aktuális légnyomást méri ha asztalon beüzemeled. Azt ki kellett korrigálnom belőle (lásd a programkódot), hogy ne 0.9 bar körüli értékről induljon az érték kiírása. Remélem segítettem
Hello, could you share pinouts for sensor and screen. I want to built this for my own, is it working well, I'm asking this because this sensor is very expensive in my country :D
Hey, for the screen pinout I followed the 'OLED display for Arduino tutorial' Step:8 (see the link in the description), for sensor, you can see at 6:45 the pinout, needs a +5V and -GND, D8 for digital signal reading.
@@Mr.Bearded.Mechanic I'm very thankful for the fast reply.
I have another question if you mind, I read the data sheet for the sensor (I think 6PP010378101 sensor is revised to 6PR010378101 now but thankfully the all pwm frequency is the same with the older units) there is suggestion to use 2.2pf capacitor and 10k pull up resistor to 5v for better accuracy but I couldn't understand if it is for the voltage input or pwm output.
@@Hasan_OZ No problem. Maybe I am wrong but I think the resistor and capacitor are already built in the Arduino Digital pinouts. In the Hella datasheet there is the following:
A 10k pull-up resistor should be integrated into the ECU of the vehicle to define
the idle mode.
In order to optimally read the PWM signal, a capacity of max. 2.2 nF should be
integrated to compensate for vibration oscillations.
Hope someone can verify if a resistor and a capacitor is needed with the Arduino or not for the optimal reading/signal.
@@Mr.Bearded.Mechanicı have purchased the sensor and the arduino nano esp32 board, now waiting for the delivery, i hope i will notify the results as soon as items are arrived
@@Mr.Bearded.Mechanic I have realized that I made a big mistake by buying Arduino Nano ESP32 which is different processor than regular nano board and needs different writing style to run the program, I think esp32 needs different ways to define pins :(
Got a problem, the temp doesn't rise above 40/43C
Hello, are you able to fix the problem ?
@@Hasan_OZ I think it's a problem of where I locate the sensor, because the pressure is working fine
Hello. Thanks for sharing.
I am trying to do the same with my sensor. On the label of this, it specifies: 0 to 10 bar and 3 - 160 Ω.
Is your sensor linear? With an Arduino ide simulator, I managed to do a test with these values and it works, but if it's not linear, it doesn't work for me. (And I can't get around to getting sensor data and calibrations)
Thank you!
Hello, my sensor has a PWM output. So it is not a resistive one.
The actual sensor is: HELLA 6PP 010 378-101
Nem gondoltam volna, hogy "magyar" videót fogok találni a kis projektemhez :D Hatalmasi pacsi
Köszi, látod az embert mindig éri meglepetés🙂. Sok sikert a projektekhez 🙂✌🏻