etrailer Electric Trailer Brake Kit Installation

ฝัง
- เผยแพร่เมื่อ 14 เม.ย. 2021
- Click for more info and reviews of this etrailer Trailer Brakes:
www.etrailer.com/Trailer-Brak...
Check out some similar Trailer Brakes options:
www.etrailer.com/dept-pg-Trai...
www.etrailer.com
Don’t forget to subscribe!
/ etrailertv
Full transcript: www.etrailer.com/tv-review-et...
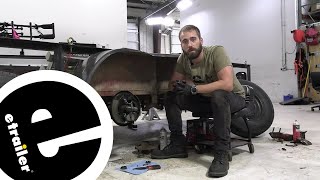
Speaker 1: Today we'll be having a look at and showing you how to install the etrailer electric trailer brake kit with 7" diameter brakes for the left and right-hand assemblies for 2,000 axles, part number AKEBRK-2. Here's what our brakes look like installed on our trailer now. As you can see they rotate nice and smooth because of all the new bearings. We're going to take it out on our test course and show you what the trailer is like without having brakes on it and with having brakes on it, and you can see how big the difference is.When it's going down the road without trailer brakes you can see that there is nothing helping slow down the trailer. It's actually pushing your vehicle along. With brakes on it you can see how the trailer's tires are actually slowing down and not pushing the vehicle towing it.
It's causing it to slow down in a much more safer and controlled manner. Now the reason you're going to want these is if your trailer brakes are worn out you're not going to be able to stop smoothly or safely. And also in some states they do require by law that you have trailer brakes on trailer that weigh over a thousand pounds. A lot of small trailers out there that are lightweight, they don't come equipped with brakes on them from the factory. This is a great way to add them to your trailer so you can stay legal, stay safe at a cost-effective price.Okay, here's what our kit comes with.
We have a left-hand brake assembly and a right-hand brake assembly. This kit comes with both. If you need to purchase these individually we have them sold separately on our website. For the left-hand one you're looking at part number AKEBRK-2L, and for the right-hand one it's AKEBRK-2R. Now both of these assemblies are 100% new.
There's no re-manufactured parts here, everything you need to get functional brakes back on your trailer is here. We have brand-new magnets, brand-new adjuster arm here, brand-new springs, and, most importantly, brand-new shoes, which are fully-bonded to the surface of our shoe. These are not riveted in place, and by not having the rivets we have more contact patch with our drum to provide us longer life and better stopping ability. On the backside we have a brand-new backing plate with mounting studs, and this is e-coated so it'll resist corrosion over the course of time and offer us many years of service.These brake assemblies are designed to work with 2,000 pound axles. Now for a few measurements here, going across the full diameter of our drum from here at the widest part over here to the other widest part you're looking at 7".
This is designed to work with 7" drums. Now we'll measure how wide our shoe surface is. From one end of the shoe to the other you're looking at an inch and a quarter. Now these brake assemblies will require periodic manual adjustment as they start to wear down. You do that with your adjuster right here. This has a fine-tooth mechanism for precise settings so you can dial it in very smoothly so you can get the adequate braking ability that you want and prefer.To access this there's a rubber plug right here, which pulls off. Once you have the cover pulled off you can insert your flathead screwdriver or your brake spoon if you have one. You go down like this over the teeth. This will pull the adjuster out, spreading your shoes further out. As they start to wear you'll have better contact with the drum. If you find you adjusted it too much and you have too much drag, if you go back the other direction it'll bring the shoes back closer together, taking pressure off your drum.Now what's great about these assemblies is if your brake shoes are worn out on your trailer you don't have to worry about taking apart any of this assembly just to replace the shoes. You'll have all new shoes, all new springs, everything. It's always a good idea when replacing brake shoes on a trailer or a vehicle to always make sure you have new hardware, such as springs as well. This takes care of that for you. You have everything all ready to go. This will save you time installing it and save you money in the long run because it's an economically priced solution with everything you need on it.All right, to begin our install we have our trailer jacked up and safely supported with a set of jack stands, and we have our wheels removed. In our particular application on our trailer we don't have brakes on it currently. We just have an idler hub, so we need to remove this. We'll start off by removing our dust cap here, so use a flathead


![[TH] VCT Pacific Stage 2 - Playoffs Day 1 // GEN vs RRQ | TLN vs TS](http://i.ytimg.com/vi/JhkzKOhvOps/mqdefault.jpg)


Good job on the video, finally a real tuturial that shows in detail the exact wiring for e-brakes to the 7 way switch, break away switch and battery! Thanks
Thank you for sharing this feedback with us! We are happy to help! Check out the following link to see this kit on our website.
www.etrailer.com/Trailer-Brakes/etrailer/AKEBRK-2.html
This video is nicely done and covers so much in one spot. Excellent!
Glad it helped!
www.etrailer.com/Trailer-Brakes/etrailer/AKEBRK-2.html
Very informative thank you
We are happy to help! Check out the following link to see this kit on our website.
www.etrailer.com/Trailer-Brakes/etrailer/AKEBRK-2.html
Great video very helpful!!
Awesome, we're happy it helped you! What are you planning on towing?
www.etrailer.com/Trailer-Brakes/etrailer/AKEBRK-2.html
the General Wisdom is to always have the wheel rotating as you inject grease - it reduces the tendency of grease to blow past the rear seal. Which may still occur despite your best efforts with this EZ Lube spindle design. This axle-hub combination really needs a stronger rear (inner) grease seal for EZ Lube applications.
Excellent info. Thx.
Thank you for the feedback! Check out the following link to see this electric brake kit on our website.
www.etrailer.com/Trailer-Brakes/etrailer/AKEBRK-2.html
So I assume a one ton trailer axle is a standard size across the board.
I have a 2020 Discovery 6x12 enclosed trailer with 2k axle. It doesn’t have brakes, but I sure M interested on installing them! I live in metro Detroit, and the daily commute could rival a stock-car race. I would really like to help my stopping distance
We have all of our 2,000 lb axles in the following link. Unfortunately we do not have ant 2k axles that have brakes on them.
www.etrailer.com/dept-pg-Trailer_Axles-gw-2000_lbs.aspx
what is the best way to set the torque on the bearings, I have a boat trailer 3000lb and have had issues of bearing failure, single axle with electric brakes and bearing lube cap.?
There isn't an exact torque specification to pre-load the bearings on a given hub. The spindle nut will need to be tightened by hand until finger tight and then turned another 1/4 of a turn with a wrench. Once this is done you can then turn the hub several rotations to seat the bearings and races. Rock the hub from top to bottom and side to side to see if there's any runout (wobble). If there is, gently snug the castle nut up until there's no more wobble. Then, back the castle nut off far enough to get the cotter pin in place. This video will outline the procedure for you.
www.etrailer.com/tv-install-dexter-trailer-hub-assembly-84655uc1.aspx
Do these brakes have the power to achieve lockup? All the brake controller instructions direct you to set the gain to lockup the brakes, then back off. But I am unable to achieve lockup with this exact setup (t@g trailer and brake kit)
old question but I will try to answer anyway. I believe you need to adjust the new brakes as they may not be tight enough. also it takes time to for the brake shoe to seat into the brake drum and coat the drum with some brake material for optimum performance.
If I have hydraulic brakes on my boat trailer could this be used to convert?
Assuming that your boat trailer uses a 7 x 1-1/4 inch brake drum that's compatible with electric brake assemblies (most are), the # AKEBRK-2 would work well for you. Here's a link to an article that will walk you through the other parts you'll be needing:
www.etrailer.com/faq-Adding-Electric-Drum-Brakes.aspx
What if I don't have a junction box?
If you do not have a junction box, you will just need to run the power wire from the trailer brakes to the brake line on the 7 pole. Typically this wire is blue.
www.etrailer.com/Trailer-Brakes/etrailer/AKEBRK-2.html
There isn't any reason to install an auxiliary battery when the trailer already has a 12v battery. 10 gage wire is gross over kill for that little trailer. Each magnet only draws 3 Amps. Improper use of crimping tool, supplemental sealer not added to butt connectors at wheel with two wires in the one end. Water can travel to the wire ends in between the wires. Marine grade butt connectors were damaged by improper use of crimpers. If exposed to salt water or winters in Northern states wiring job wouldn't last a year. Atleast Scottch Lock connectors weren't used.
45 year retired ASE certified master tech Auto/ HD Truck. Trained in GM specializing electrical repairs.