Honda Civic Rear Shock Replacement 2006 (2006-2011 Similar)

ฝัง
- เผยแพร่เมื่อ 29 ก.ย. 2024
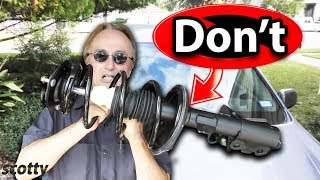
- In this video I show you how I replace the rear shocks on a Honda Civic. This is one of those times when Honda uses a shock assembly instead of a strut. The exact vehicle in this video is a 2006 Honda Civic EX sedan.
Be sure to subscribe for more tool and car repair videos!
/ bigdog50001
Buy Big Dog50001 T-Shirts, coffee mugs and other gear here!
bigdog50001aut...
/ bigdog50001
/ bigdog50001
The Big Dog 50001 Automotive Channel Store can be found here: www.amazon.com... (As an Amazon Associate I earn from qualifying purchases).
Disclosure: This channel earns a small commission using some of these links - at no additional cost to you.
Tools and Parts:
KYB Shocks: amzn.to/2NamfEs
Honda Lower Bolt Part # 90181-SNA-000 Bolt, Flange (12X65)
Lisle Trim Tool: amzn.to/32ATtAt
Daytona Jack (Cheaper at HF with Coupon): amzn.to/2NYiUbk
Jack Stands (Cheaper at HF with Coupon): amzn.to/2NYiYb4
GearWrench Ratcheting Wrenches: amzn.to/2NV30yb
Milwaukee 3/8" Impact: amzn.to/30dJdwl
Sunex 3/8" Impact Sockets: amzn.to/2NW9L2Q
GearWrench Ratchets: amzn.to/2LsJB6k
5MM Hex Socket (3/8"): amzn.to/2LuD1w9
GearWrench Metric Wrench Set: amzn.to/2NWC6Gj
Want a free Big Dog50001 sticker? Send an email to bigdog50001@gmail.com requesting a sticker. Sorry, no international addresses.
/ bigdog50001 (Please subscribe and check out my channel for more repair videos!).
Have something you would like to send to Big Dog50001?
Send it here:
Big Dog50001 Automotive Channel
P.O. Box 726
Cortaro, AZ 85652
2018 Epidemic Entertainment. All rights reserved.
Disclaimer:
Due to factors beyond the control of the Big Dog50001 Automotive Channel, it cannot guarantee against unauthorized modifications of this information, or improper use of this information. The Big Dog50001 Automotive Channel assumes no liability for property damage or injury incurred as a result of any of the information contained in this video.
The Big Dog50001 Automotive Channel recommends safe practices when working with power tools, in on or around automobiles or other vehicles, automotive lifts, lifting tools, jack stands, electrical equipment, automotive modules and systems, blunt instruments, chemicals, lubricants, or any other tools or equipment seen or implied in this video.
Due to factors beyond the control of the Big Dog50001 Automotive Channel, no information contained in this video shall create any express or implied warranty or guarantee of any particular result. Any injury, damage or loss that may result from improper use of these tools, equipment, or the information contained in this video is the sole responsibility of the user and not the Big Dog50001 Automotive Channel.


*Tools and Parts*
This channel earns a small commission using some of these links - at no additional cost to you.
KYB Shocks: amzn.to/2NamfEs
Honda Lower Bolt Part # 90181-SNA-000 Bolt, Flange (12X65)
Lisle Trim Tool: amzn.to/32ATtAt
Daytona Jack (Cheaper at HF with Coupon): amzn.to/2NYiUbk
Jack Stands (Cheaper at HF with Coupon): amzn.to/2NYiYb4
GearWrench Ratcheting Wrenches: amzn.to/2NV30yb
Milwaukee 3/8" Impact: amzn.to/30dJdwl
Sunex 3/8" Impact Sockets: amzn.to/2NW9L2Q
GearWrench Ratchets: amzn.to/2LsJB6k
5MM Hex Socket (3/8"): amzn.to/2LuD1w9
GearWrench Metric Wrench Set: amzn.to/2NWC6Gj
The Big Dog 50001 Automotive Channel Store can be found here: www.amazon.com/shop/bigdog50001automotive
hi big dog,, Left & Right of KYB Rear shocks of 2006 Honda Civic are both the same parts number? Thankz....
I just ordered the exact same struts for my roommate's 2007 Civic. I told her that KYB, Koni, and Bilstein were my favs. A few weeks ago I drove her car and nearly got sea-sick... I didn't realise it wasn't a MacPherson strut assembly! This makes it so much easier! Thanks for the great video. I subscribed.
Thanks for the comment and welcome!
Wow very simple replacement. The most difficult part was getting the crap out of the trunk lol.
Great video! Really appreciate the attention to detail, too. I own a 2011 Civic at the 220K+ mark. Still going strong.
Great Video: I'm a 55 yr old kid and your video saved me a bunch
Glad it helped, thanks for the comment!
Thanks so much for this video! I'm a 15 year old kid with my first car and I followed this and it went perfectly. Thanks man!
Thanks for the comment!
At your rate , being 15 you’re gonna having a lot of experience once adult. Keep it up man 👍
I really enjoyed watching this video, it has all the details and step by step process that will enable me to safely and effectively replace the rear struts on my Civic. Thank you very much for your work it is best in class.
I appreciate the comment, thank you!
This guy does an awesome job of walking through the repairs of vehicles. I have subscribed to his videos.
Be sure to subscribe for more tool and car repair videos!
th-cam.com/users/BigDog50001
twitter.com/BigDog50001
instagram.com/bigdog50001/
Disclosure: This channel earns a small commission using some of these links - at no additional cost to you.
The Big Dog 50001 Automotive Channel Store can be found here: www.amazon.com/shop/bigdog50001automotive
Fairly simple. Great video. I did a 2000 Civic many years ago but needed a spring compressor. Strut and spring were not separate.
👍
This video gives me confidence I can do this my self
Cleanest work
Thanks 👍!
I have the coupe, so I sit closer to the rear wheels. After taking out the carpet I might take a few hours and put some Dynomat around the wheel well area. Any extra sound deadening would help immensely.
Very easy explanation. Thanks.
Thank you for the comment!
Thanks for your video. Really clarified a lot of things
Nice and thorough - Great Job!
I appreciate the comment, thank you!
Great detailed video kyb makes a quality product
Great video. Made this job easy
Very good explained many thanks
U got some nice tool bro
Thanks 👍
Very good video!!!
Thanks!
would be great to see a vid on changing the rear springs too
If I get one in that needs it I will film it.
@@BigDog50001 Awesome thank you!!
Noob question here sorry.... But would it be possible to hand tighten the bottom bolt with the shock still compressed and then cut the plastic and guide it up?
Hey man I have a question, do I need 2 rubber shock absorbers shown at 9:20. One for under the mounting point and one for over? I got the same KYB shocks as the ones you used and just like the video it comes with the lower rubber ring. But in the video I see there’s another ring on the top. Are they identical?
Si
Cuanto es el torque para los birlos de las ruedas?
Is there a reason why to replace the lower shock bolt and upper shock mounting nut? If they are still in good nick, can you reuse them?
@Big Dog50001 Automotive, how did you figure it was time to change these before taking them off? Bought used 2009 civic coup LX with 70,000 miles. I looked the front struts and they look like they need replacing, I'll watch your video on the front struts. Thanks
For the rubber damper at 7:40, how can I replace that without removing the shocks?
i bought rear shocks that didn’t come wish rubber bushings or washers, can i simply buy some from a auto part store ?
Usually parts like that can be bought separately. Places like Rock Auto or a Honda dealer parts department will usually have them.
Do you know why I hear a loud bang noise when hitting small or big bumps? I have changed the struts, swaybars, & bushings and I still hear it.
Engine mounts, suspension components, body seams and other panels can make noise too. Sometimes it can be hard to pinpoint.
Did you replace the bottom bolts in your shocks ? That was my noise
I have a nicer way to do the job by hands sir
Just trying to replace a 2009 Acura but the bolts are just seized.sprayed with PB blaster penetrating oil but now one bolt head is rounded up.Will likely have to cut the bolt off with no room to work on this crap car 😭
Seriously... your channel has THE BEST & MOST INFORMATIVE videos for 8th Gen Civics on TH-cam. Such detailed information a LOT of channels don't even bother mentioning (which are important ones to get it right the first time).
Thanks so much for this video. Doing such a great job and helping so many people maintain their Honda Civics 👏 👍👍
Cheers from the land down under.
This is an excellent how-to. Subscribed.
A side note: If you are getting a clunking noise from the trunk at low speeds that goes away at highway speeds, and you are not experiencing excessive vibration issues, try tightening the top nut and bottom bolt of the shock. A little loose can cause a lot of rattle.
Thank you and welcome!
I like these videos as Big Dog lets us know what’s size the sockets, and demonstrates a high level of skill in his work.
Thanks, I appreciate the comment!
Excellent video. Very thorough down to specific placement of the jack when loading the rear suspension to light and heavy amounts of force. Well done and I appreciate you sharing your expertise.
I have replaced basically everything suspension wise along with other things in the last week and a half in my 2006 Civic LX coupe (with 275k miles) including lower control arms, ball joints, sway bar end links, inner+outer tie rods, and brake pads/rotors. On my way to the alignment shop, I heard a pop which ended up being the front left coil spring... So now I have complete strut/coil assemblies for the front and shocks for the back on the way as well as already having end links for the rear as well.
I hope that my Ohio Honda with 275k allows me to release the bottom bolts on the front strut assemblies and these rear shocks. I don't have an impact, and while I could run and grab something for short term use, I got by installing everything else without one, so I hope my luck holds. A couple of breaker bars and some sweat has done it so far... Along with treating each bolt/nut with PB blaster daily for nearly a week beforehand. That seemed to have been the trick.
👍
@@BigDog50001 The lower rear shock bolts are the devil. A big Milwaukee Fuel high-torque 1,400ft/lb impact wrench only would spin the rubber inside the outer bushing with the bolt, and that pries open the mounting point. I was going to just start unbolting things back there to use my nice cutoff tool, but was afraid that i would have to end up cutting something else before the parts for the rear (upper control arms, toe adjustment bolts, etc.) started being delivered 3-4 days after this event. Ended up grabbing my neighbor's beefy oxy/acetylene cutting torch. I got a ton of old rags, probably 30 of them, soaked them in water, and wrapped up everything else tightly. I had my buddy keeping things while the torch did the work. I first cut through and across the outside round part of the shocks that retain the bushing and yanked the ancient shocks off. I then took a compact sawzall and removed the rubber component of the bushing to yield the stupid jerk of an inner bushing that was locked into a love affair with the bolt. I had to literally heat those up to about as hot as I could without starting to cut again before i shut off the torch and held a set of large vice grips on the inner bushing piece and had my buddy with a long breaker bar and a 14mm socket crank with all his might... until the first side and then the second were clear of the old hardware, and my garage floor and own self were covered in rust and soot and all the nasty stuff that burned off. Our masks were a testament to how important those were that day...
New shocks were installed in about 4 minutes a piece. The 4 front lower strut bolts loosened with nothing more than an 18" breaker bar and 19mm/17mm sockets on the nut and bolt in that order. Front strut/coil spring assemblies by Gabriel had a slightly larger diameter bolt on the top ends that terminate in the strut towers, and I had to drill them out by 1/16", but still had both sides done in maybe a half hour. Can't beat the convenience of not having to use a janky spring compressor, and replacing all four corners at once, as well as on the front: lower control arms, ball joints, end links, inner/outer tie rod ends. On the rear: lower and upper control arms, complete drum brake swap with backing plates, and hub bearings.
Wanted to note that this pretty large list of part swaps was the first time I have ever done this type of repair. Have been doing my front pads/rotors, oil changes, an exhaust twice, and some odds and ends on the intake and throttle body were it. The wheel bearings were done last unfortunately... I was told the noise on the highway was the drum brakes even though it didn't cease with the activation of the brake system... Those rear brakes were original to the car @275k miles, so it needed done anyway. The new ones are coated to reduce rust. Since everything felt way better but i was still having noise, vibration, and a not awesome feeling from that part of the car, decided to just do it. Nothing else could have done this other than the tires, and rotating them to the front was the first thing I tried. They only have 8-9k on them and they're goodyears. Once the rear wheel hubs were done in quite literally 17 minutes with the Milwaukee impact making bolt removal an absolute piece of cake, that was it. I was done. I hate care now... But when I took it in for an alignment, they told me it was within a few percent of perfect and that the repairs looked well done and they asked who in town used Moog parts and Gabriel struts, and the ball joints with the grease fittings.... That was a proud junior mechanic moment!
Great video, Sir! Just replaced the front strut assembly on my 08 Civic. Going to swapped out the rear shocks in June so thank you for the video. It's going to be a big help Big Dog! BTW...How much was that Snap-on digital torque wrench?
The torque wrench is a lot lol, th-cam.com/video/BNAtd4ovVeE/w-d-xo.html . Thank for the comment!
Thank you for making this video! Very detailed and yet concise and easy to understand. I now feel confident that I can do this at home. Really well done, Sir! 👍
Thanks for the comment!
Great work!
If you put some 100% Plumbers Silicone, (ACE Hardware $4) on the rubber parts, you can reduce the possibility of squeaks, also.
Thanks for the comment!
The audio and video quality is top-notch, and what I appreciate the most is that you provide specific details. Keep up the great work!
Most information I’ve got from a rear suspension video 👍🏽
I’m putting coil overs on my 8th gen but nobody shows the rear installation in their vids 😂
Glad it helped, thanks for the comment!
Great video! Tip: @BigDog5001 Those HF 3 ton Pittsburgh jacks were recalled due to people dying. You can take them back and they give you new ones with safety pins and sturdy locking mechanism, no receipt required.
I like your videos the best on this subject but no one seems to have a complete "story" on changing shocks like this on Honda Civics. What if the bolt head breaks? What to do? a couple folks have videos on this, but leave some questions still unanswered. The beginning of a video should also show why you change shocks, What happens to the tires, what about oil leaking on the top of the shock? What tools can you get by with if you dont have the latest digitial Torque wrench etc. Recommendation for tools as in a list of basic needs and ideal tools for the job. Also, list parts needed and also list of parts that might be needed for the mechanic who lives in Rust country and the bolt breaks or is stuck. I didnt see any thread loosener used in this video but are we to assume its always dont or needed? Just a few ideas. Im just learning myself but ive seen a lot of these to try to learn all the sides of this job that i can.
Excellent video and explanation of install. Thanks
I appreciate the comment, thank you!
Great video broski, watched a few different ones on this and think I'll try this route. Put new front struts on and magically rear ones started making noise 🤣🤣, weakest link and what not.
owell learning to maintain your vehicle YOURSELF is soooo fulfilling that it's worth the headache sometimes
I know that Honda is recommending it, but do we really have to buy a new bolt? My local Honda dealer wants $15 per bolt and I am changing both struts.
What was the rubber bushing that was on the out side of the car on the shock it self I’ve been looking for a replacement for my car for a while now
Wow this guy is great....Thanks so much for the content very detailed. I have the exact same car and issue
Thanks!
I followed this video exactly....no issues on replacing both shocks. Thnx again Big Dog500001!
Glad it helped, thanks for the comment!
Thanks for the helpful video! Do you have video how to replace rear spring rubber cushion or pad?
You are making a nice professional video. Thanks
I appreciate that, thank you!
Great video. Swapped in some KYBs in my 06 Civic thanks for this and your other videos.
Glad it helped out, thank you for the comment!
Sir..... you are very professional!!!! Awesome instructional video!!!
Thank you!
Did you tighten the strut more once you put more pressure on it prior to putting the wheel on?
It is a shock on rear of this vehicle (the struts are on the front), but no I did not do anything more than I showed in video. The procedure I showed is exactly how it is written in Honda service information (install nuts/bolts loosely then put load on suspension with jack and then do final torque).
Is there another washer under that rubber piece at 8:00 because I ordered shock absorbers and they came with 2 washers each
Fantastic Video and instruction. Very easy step by step instructions. Thank you
I appreciate the comment, thank you!
Very sound advice, greetings from Australia.
I installed mine and it’s clunking in the back sounds like it’s coming from the trunk ?
What are the improvements you felt in your ride post installation? Please share the before/after experience. Thanks!
this is a good video....clear, precise, and with good steady camera angles and control....well done.
Thanks!
Very well done. And, CORRECTLY TORQUED. Take notice that the torque wrench actually tightened the bolts before reaching and signalling the 80 lb setting for the lug nuts.
I can't tell you how many people over tighten fasteners and then use a torque wrench that never moves the fastener before it clicks. Using this technique, you'll never know what torque was actually applied since the set torque was reached before the fastener moved...meaning that the actually applied torque was above teh torque wrench setting. Duh! I've seen this so many times, especially at tire stores, where installers run down lug bolts with air guns and then run around checking torque with a torque wrench.
Trust me, invest in your own torque wrench and then retorque your lug nuts.
Thanks for doing it right.
Thanks for the comment!
Cuantas libras de las tuercas de las ruedas?
@BigDog50001 80 libras? 😮
Great Video !! Learn a lot !! Thanks !! Very Professional.....step by step.....Great attention to detail.
Thank you!
The Allen part stripped out, the nut is seized. What are my options?
Im going to be working on my car, is this a sage jack point (the rear tow hook)
Outstanding! Fantastic quality and very professional!
Thanks!
My 2007 civics rear shocks were replaced and the car bounces up and down like an old Buick! Is that normal? I thought it was the opposite new shocks will rebound once the old worn-out ones will rebound more than once etc?
Does not sound normal.
Thank u Big Dogg! Another spectacular well informed video...needed this.i have the same 3 ton Daytona but long reach.👍🏼thanx for the torque specs info aswell...I have my ICoN wrench rachet set for this job but I'ma order them shocks from Amazon so u can get that commission...😎..
I appreciate the comment and the support, thank you!
Thanx so much.....This weekend I will replace my shocks with some confidence
Glad it helped, thank you for the comment!
for the civic si sedan are exactly 51 foot-pounds ?
Thank you for the detailed video! Have a 2008 LX Sedan to replace this coming Wednesday. Best video I have seen.
👍
Great video sir 👍🏼👍🏼
Thank you!
Thanks for the video. My experience was a little bit of an ordeal. When I tried to get the lower bolt out on passenger side, I found the bolt had rusted to the bushing. In the process of trying to torque it off, I had bent the side of the bracket with the built-in nut. Fortunately, I had enough room in there to get a grinder wheel and cut the bolt off (and bushing, woof). I bent it back best I could with a C-clamp. Trying to install the new bolt, I might have cross-threaded it because the bracket was bent slightly. 43 foot lbs... lol? I got it snugged up in there and left it. If I have problems with it in the future, I'll just drill out the built-in nut and run a bolt through with a washer and nut of my own. The drivers side took, maybe 15 minutes total to change.
Sucks when that happens, thanks for the input!
For what it's worth-
I keep the new shock compressed, get the bottom bolt in and then cut away the retaining strap and guide the top end into the hole. Makes it a lot easier to not cross thread the bottom bolt.
Yeah I have done that trick too. Doing it that way will not allow "priming" the shock prior to install though. Thanks for the input!
Thank you; very complete & professional. Clear explanation
Thank you!
Very good! Best one on this topic I've seen so far. Love your torque wrench too! I know what I want for Christmas now.
lol thanks!
hi Big dog,
i am stuck in a bit of weird situation.
Got new rear shocks for Civic 2011. After replacing the rear shocks the car has stopped jumping like a jumping castle and the ride quality has improved ALOT.....BUT
The car is actually now leaning on the front driver side . Only slightly but i think its more noticeable from inside aswell as when driving on very plain straight road or parking it at one(hard to find one in islamabad as all are leaning towards inside so the rain water could flow freely)
When you park the car straight, its leaning from the front driver side and is slightly UP from the rear left side.
It is leaning more towards the FRONT right of the driver side rather then the REAR of the driver side but is surely down a little from rear driver side and all the way UP from the REAR passenger side & normal from the FRONT LEFT PASSENGER side.
Could this be because of my Front right shock is blown too as it was hard to diagnose just by looking with rear old shocks? or is it that the new shocks i got are acting weird?
Measured all the tires from the ground to the exact middle of the arch of wheel.
26 (inch) front right
26.6 (inch) front left
26.9 (inch) rear left
26.4 (inch) rear right
If this happened immediately after my work I would double check my work. Typically you will not change the ride height with shocks.
Saw this twice loved it and I did subscribed your channel too. God Bless .Stay safe
Thanks and welcome!
Thank you for the video. I did this today and it went perfect. Used your video to step me through. The only thing I did different was not taking out the carpet. I just removed the 3 clips on each side and pulled it our enough to give me access to the top of the shock. I would like to mention that the top of my KYB shock was not as long as the ones you have or the original stock shocks I took off. The part that has the hex bolt and the nut, about 1 1/2 inches shorter on the ones I got but still had plenty of space for the nut. Also, maybe you should mention that thing about making your shocks not squeak at the beginning of the video instead of the end, I missed this step and I am not taking it back apart. I don't hear any squeaking yet but when they start I am blaming you. J/K, thanks for the video.
Don’t be fooled by the words “Assembled in the USA”. Putting a non US made part into a US made bag/box does NOT improve the quality.
how much should a shock replacement on a 2010 Civic EX cost?
Unfortunately prices vary widely depending on the part (OEM or aftermarket) and the cost of labor at the shop where the work is being done.
Thank you so much! I followed your instructions. This saved me a few hundred dollars over taking it to our local mechanic.
Glad it helped, thanks for the comment!
Okay. I’m just confirming here that people who are looking for Honda Insight info and all they get hit by Civic and other models but the insight. I just replaced mine yesterday on 2013 Honda Insight ex model. Procedure is same just minor bushings orientation is different. I didn’t record mine due to this is very good video on explaining everything you need to know about rear shocks on Honda. By the way Insight is hybrid and there no difference in that matter with this procedure.
Thanks for great video.
Everyone who works on cars owns a Milwaukee 1/2 impact for a reason.
Everyone!
Where do I have to bring my Civic 2008
pretty easy job, I'm still not gonna do it.
Awesome video man! Very informative, super detailed and great camera angles. You made it look easy haha..Thanks for making this video!
Thank you, I appreciate the comment!
professional as always Big Dog
Thanks!
Just did one, about to have something to eat then do the other one.
I can't believe how much a mechanic was going to charge me to do this!
Thanks so much.
Perth western Australia 👍👍✌️
Going to do pads and rotors next week and perhaps front struts in the near future,
This video has saved me hundreds and given me confidence!
👍
What digital torque wrench did you use in this video? I dont see it listed with the other tools in the discription. Thank you for this video! It is very helpful & educational.
Awesome, awesome, awesome! I’m erasing all my other bookmarks about this repair, because yours can’t be topped! All the little details will really keep folks out of the weeds when they start wrenching on their own vehicles. Good on ‘ya, man!
Hello, Great video. Does this info apply to 2013 Honda insight too? I couldn't find any info for Honda Insight. I'm replacing mine tomorrow. I'll see how much difference is and post later on for future help. Thanks again.
Excellent DIY video, Thanks!
Thanks for the comment!
Hi, I am trying to replace the rear strut on my 2009 Honda Civic Hybrid, but the original upper bushing mount does not fit. Where can I get ones like in the video? Thanks!
Thank you for this video. I fallow your instructions step by step and everything when right. I just saved 233$ !!
Excellent video man,Thank you ~Bman Wild
Thanks 👍!
On my Civic coupe 2010 both of my rear tires build bumps on the inner side of the rear tires. Do yall think my struts are bad?
Thank you for the detailed video !
Last year I changed my front and rear suspension OEM parts.
I hear a clunk noise from the rear but only when it is cold (I live up north).
I changed the bottom bolt, upper rubber mount, nut and I still hear the clunk but only at winter.
I changed the stabilizer links, rear control upper arm and still clunk.
So I am certain that these rear shocks have a manufacturing defect.
They have max 5000km and are outside of warranty (12 months).
Should I replace them with OEM again or just go with KYB?
Some of those Civics would make clunk sounds in the rear due to the bump stop on the shock moving around (sliding down out of place). You may have better luck with KYB.
I had the same issue at my mechanics shop. We put in aftermarket in the rear and it would rattle and clunk. They kept trying different bushings and nothing worked. Finally we just had to go with OEM and that corrected the problem. For some reason the aftermarket rear shocks just don't fit well in the rear. There's just a tiny little play in the bushings.
Had the exact same issue. For some reason aftermarket ones make those noises. After screwing around with them for almost a few weeks My mechanic and I finally decided to go to OEM and it fixed the problem. It's a shame because the OEMs are ridiculously expensive but I guess you just have to do what you have to do.
Good video. I felt this is a very easy DYI for your Honda. Thanks mate 😊
Thanks for the comment!
Bushings went bad on my struts and it’s cuz I didn’t tighten them under load for sure even though that should’ve been a no brained thanks for the helpful video !
hi I have a 2012 civic lx sedan and my question is what can cause rear to sag. Recently replaced rear coil springs but rear has less gap than front. Shocks maybe?
Hey big dog! I’d like to know what the part number is for that lug nut. Costco tires stripped the end of my lug nut and wheel stud.