Heatless (cold) Toner Transfer (for PCB)

ฝัง
- เผยแพร่เมื่อ 2 ม.ค. 2016
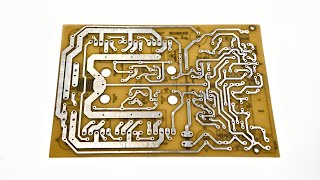
- Very simple technique to transfer a LASER print to a copper-clad board without the use of heat (iron/laminator). With only a solution of ethyl alcohol and acetone, the laser toner will stick to the copper. Get your printed circuit board (PCB) ready in a few minutes.
SUBSCRIBE ! :
bit.ly/39xiWhi
other projects:
* make a 10 year led flasher (on 1 AA cell): • 10 Year LED flasher + ...
* make a 512 color (random) led flasher
* etch your PCB with the sponge method (fast!) : • Printed Circuit Board...
Music album: open.spotify.com/album/1MJ3ol... - วิทยาศาสตร์และเทคโนโลยี


Thank you very much SimpleTronic for sharing this great technique. I leave here my advice to all who intend to experiment. Before beginning the process, read all the relevant posts. Start by finding the right mix (Ethyl Alcohol 96% and Pure Acetone), make small tests before starting your printed circuit, save time and you will not feel frustrated. I started with 3/8 proportions as shown in the video, I used 240g Glossy Photo Paper for inkjet printer purchased at a Chinese store, the printing was done on a professional Xerox printer in a store (I do not have a laser printer). The quality of the toner is very good, with the ratio of 3/8 not even dissolved the toner, so I decided to start lowering the Alcohol percentage until I get an excellent result (perfect, 100% transfer). In my case the percentage was 3/2, the dimensions of the PCB are 200mm x 100mm, as advised for these dimensions, I placed a cloth on top and a board on top of the cloth, put weight well distributed, I waited about 20 minutes and the magic It happened. I put it in water, waited 30 minutes, the paper is thick, I removed the paper carefully, and with the finger rubbed carefully the paper that was stuck until it came out completely, I used vinegar as was mentioned by someone here, and the result after exposed to Ferric Chloride, was an excellent printed circuit, without failures. Do not forget something very important, more important than getting a good printed circuit, do this process in a well ventilated place and be careful with the handling of the Acetone, it is really very dangerous the contact with the eyes, read the procedures before starting the process, do not forget that vapors are quite harmful to health, so it is important that you use a quick method to find the right mix for the toner you are using. I apologize for my bad english and thanks to all those who gave some important tips.
Thanks for the contribution !
You're right, I was so excited that I forgot to say. Vinegar is used to remove scraps of paper.
sir what kind of paper usually used to printed
Thank you. Are you from Brasil?
ty for the info i will try this set!!
Thank you for sharing and demonstrating this technique. I'm a high school jewelry instructor. I was madly looking for a simple and effective way to transfer images to metal in order to etch. I was able to recreate this technique very well and will be able to teach it to my students. When I make my instructional video, I will be sure to give you a shout out. Thank you kindly!
Your comment makes me very happy !!
Absolutely the BEST video-tutorial on this subject, very well explained and tremendously effective. Many many thanks SimpleTronic!
Incredible. Best TH-cam vid ever. I used methylated spirits and acetone to your ratios.
I could kiss you for this. I tried the iron method. It was a joke. I am a very happy camper. I did get the proportions wrong and used 8 parts acetone and 3 parts 91% alcohol but worked . Next time I may change the formula and try again but had great results regardless. Thank you so much. I only used magazine paper also. Taped a piece big enough for the transfer onto a plain piece of copy paper and ran thru laser printer. HP . Worked great !!!
Hi! Thanks for commenting, and for your contribution !
wow, amazing. I did this method using basic nail polish remover and it transferred great. This was a relief after 4 failed attempts with a hot iron. I haven't etched yet but it looks like my board should turn out fine. fingers crossed! thanks for the awesome video!
My friend, I would have never thought of this. Thank you
Another day, another new thing learned! Thanks a lot for sharing your 15 years proven technique!!!
so glad i found this before i start using the toner method. SWEET!!!!!!!!!
3:02 was very satisfying to watch
Thanks for saving me from burned fingers and shoddy results! Excellent video :D
I followed several videos and wasted dozens of copper boards before I found your video... First go using your method and boom! Perfect results. Thanks for the great video.
Thank you !
The best way for transferring. Amazing!
Ok, I ran my first tests of this method just mere moments ago and my results on the third attempt are simply glorious. Here's what I did:
8 parts Wal Mart 92% Isopropyl, 3 parts Klean Strip acetone. I mixed it in an old nail polish remover bottle for storage.
I printed my board art onto Kodak gloss Photo Paper, Cat No. 820 9017 using a Samsung ML-1660 laser printer. Note that this paper is meant for INKJET printers. I have a lot of it, so I used it, and I make no apologies.
I cut and cleaned the piece of copper clad board using 1000 grit sandpaper, acetone, then alcohol.
I cut out the board art exactly to fit the piece of copper clad board, laid it next to it on a piece of wood plank, then doused the *printed artwork* with a small amount of the alcohol-acetone mix, making sure to coat it evenly. Before it could dry at all, I flipped it quickly over, facing down, and laid it onto the copper clad board piece. Working quickly, I rubbed it all over with my fingers, pressing as hard as I could go downward. I tried to avoid lateral motion, focusing on downward pressure. Work work work massage massage etc, and then placed a small piece of wood plank over it and put all my weight into it for about maybe ten seconds. Removed the wood, resumed pressing down hard all over with my fingers. Note, at NO POINT did I clamp anything. This whole process of hard downward massaging took maybe 30 - 40 seconds, and by that point the whole thing was pretty much dried out. I let it sit open for a couple of minutes anyway just to be sure, and then took it to the sink and soaked it under a hot water stream for a minute or two. Took a deep breath, sucked up my courage, and peeled the photo paper free of the board. Holy frickin moly... the toner stuck BEAUTIFULLY. Only missed in two tiny places, scarcely even noticeable. All the rest of it actually appeared to have dilated a bit, adhering aggressively and looking slightly smooshed out. When it dried, all the artwork turned a brilliant white, as it had grabbed quite a lot of paper fiber with it. I laid the board down in a small dish of white vinegar, and rubbed with my thumbs vigorously over the board surface. Quite a lot of paper fiber scum came free, and the dilation effect *all went away*, leaving pristine, perfect copy of the original artwork, still very strongly stuck to the board. I can't stress this part enough - the adherence is incredibly strong, far stronger than anything I'm used to with thermal transfer of any kind. There is no smear, no cracking, no pitting that I can see, no flaws except for those two tiny places that don't matter anyway. It looks absolutely brilliant, one of my best transfers to date. Yeah, it's that good, and I've been doing PCBs since uhhh the late 80's.
I haven't etched it yet... Going to do it tonight though so I don't have to worry about oxidization on the bare copper metal. I'll be back to do an update on the results. BTW I always use peroxide and HCl to etch, if that matters to anyone.
Quick Note: Scrubbing with vinegar doesn't seem to be necessary. I had missed some places that turned white again when the board dried, so I simply scrubbed at them gently with a toothbrush under tap water. Worked great, and again, none of the actual toner seems to want to budge *at all.* It's stuck to the board *really* strongly.
Update: I etched the board in 50% Hydrogen Peroxide and Hydrocholic Acid (typical Muriatic acid) and it worked out beautifully. I was expecting pitting because that's been my general experience with any transfer method that uses paper (I was using sign cutter vinyl for thermal toward the end, doesn't make pits at all) but this method produced beautiful, solid traces and print. I do notice a slight bit of dilation on the text, but it's very slight, only maybe a tenth of a millimeter worth. The rest is beautiful, with no cracks, pits or smears. As I mentioned before, two tiny places for some reason got missed during the transfer process, not sure why, and of course those parts were also missing in the etch because obviously no resist mask present. But, they're unimportant and won't have any effect on the device. The rest of the copper came out so nicely that i doubt if I'll ever do thermal again. I feel that it's good to have multiple board making skills nailed down, but this works *really* well. A huge thank you to SimpleTronic for sharing this with us all, and for helping me to finally be free of my never ending chase of that White Whale. :-)
Finally someone mentioned isopropyl alcohol! I'm expecting my HP express 1200dpi tommorow and I was wondering if you've tried the same solution using plain 80 paper. I think Kodak inkjet papers and trial and error included, might cost more than my local pcb guy. Any ideas?
Thank you for the comprehensive comment!
My Glossy Inkjet paper didn't work but good old Magazine paper did! 😁
@@youronlinepresencepro9348 You're welcome! Funny thing is, it's been a long time since I did any board making and I've forgotten all the specifics of how I did it the last time. I'm wanting to produce a couple of small boards for a project and I've been thinking, "Uhhh man... I really wish I kept notes!" Turns out I did, right? Totally forgot I ever made that comment, and lo and behold I included all the important stuff. If you hadn't replied, I'd still be wondering where to start. Thank you! Also, glad I could help. The acetone/alcohol method really is a Godsend once you nail down a good procedure for yourself. :-)
NightRunner417 I'm so happy I reminded you!! 😂😂
Brilliant, Thanks SimpleTronic for sharing this knowledge
You're the man. Thanks for a great technique and fast, well explained video.
It worked! It is so much easier than the iron technique. Wow! I used methylated spirits and pure acetone and it worked well.
I upgraded to using Sally Hansen's nail polish remover. No mixing of acetone and alcohol needed, just use the Sally Hansen's and it works with no issues
Most satisfying video on pcb tone transfer method.! And simplest too.!! After trying other methods, with failure... this method works like magic... proportions of liquid is different but works te best...
Thank you! I've tried different methods with varying results, but this one worked perfectly on the first try.
I can't thank you enough! Using an iron yielded decent results but if I wasn't careful it would smear. It took me about 10 tries until I found the right mixture of ethyl, acetone and timing. Plus, using vinegar as mentioned by Guillermo Martin got me a very CLEAN transfer to copper.
Thank you very much for sharing this gem of a tip!
Great! , thanks for commenting !!
For me, this video is the best advice for this process.
After many tries with laminator or iron and using a plenty of different types of paper (both matte and glossy), I have found this video: the method it shows is surprisingly easy and it works fine for me where any other heating based process has failed!
I also try the heat method many times but it fails maximum time...but I want to know is this process really works.....???
Wow, I have to try this tomorrow!
Love it!!!! always a smarter way of doing things..
Thanks for sharting this approach. I was using heat iron-transfer so far, and once a while nail polish remover. I tried your way, used methyl-alcohol (available in each store) and acetone 2:1. Looks like it is working. I need to practise more to get the right grip.
I have always used hot iron method and even found the perfect paper. I use a magazine paper and best I found was the £2 magazine/catalogue from the store NEXT. I print down to 150mil size with no issues, I will try this method even though I have great success with the hot method. This guy should be commend If he has found a better and easier method.
Very simple for a great result. It's well done. Thank you for this video. It's the method i use for my PC boards and it works well.
Nice video! Helped me so much and thank you for your time publishing it.
I have few things to add, though:
1) Its ofter better to spread the alcohol and acetone mix over the paper before you lay it in the board.
2) I do not wait for solvents to evaporate as it may dry the paper and make it lift from the copper. I just put it in water seconds before it.
Priceless knowledge. Wow! Thank you very much. God bless you.
Greetings from Indonesia
I will definitely be trying this.
I just can't thumbs up this enough times. The 50/50 ratio dribbled onto the back of the paper taped on, then after several seconds run it through a unmodified laminator has produced 100% transfer with no smearing or defects. I am getting high quality results this way. Thank you very much.
Worked Out perfectly for me on glossy laser Photo Papier with exactly the same recipe as in the video. It even works for large (250 mm x 10 mm) pcbs. Thank you for Sharing😀
Awesome, thanks for sharing.
Thanks a lot for this video¡ I was constantly failing to achieve good results with the iron and then I found this, thank you good sir¡
Genius idea. Originally, I made cards with iron heat transfer then used acetone to remove black toner after etching. Should have realized do transfer with acetone ;D. I used slick magazine pages for iron transfer and did decent jobs. After reading your idea I tried acetone and print did not come off magazine pages so will use this paper. Will also experiment with using a laminator on low heat. Hope it doesn't smudge. Thank you for sharing!
Quem for do Brasil pode usar somente o removedor de esmalte de unha a base de acetona que dá certo tb.
great job ,we Thank you so much for sharing..from Algeria.
Thanks for share your precious experience
It's Worked.Thank you very much for sharing such a valuable idea.
Thank you so much for sharing
What a great technique!!! I used 100% Acetone on a print out from brand new laser printer model 1102....the result was unmatched PCB with zero error!!!!!! Thanks alot !!
+Amber Nensey Great !! Thanks for the feedback !!
Perfect tecnic. Great tutorial.
Very simple and easy way, I will try it, thanks for sharing. :)
Worked great. Thanks!
thank you very much.really awesome.
Works great, thanks for sharing, I never had success with heat...
Amazing use of chemistry. 👌
I just love it . Thanks a lot!
Amazing... Thanks for sharing. I will try
i tested this method
amazing way
thank you
Designed my first PCB earlier this week, going to try this tonight instead of the ironing method. I already have both ingredients at home, just need to pick up some copper clad on the way home.
Giving this a tentative like for now, its permanence dependent upon my results ;)
After getting spotty results with some matte-ish photo laser paper (and probably not enough scouring), I tried with plain paper and got results that were... less spotty. A perfect transfer in 90% then almost nothing in others. Pressure was even (pressed with a cold iron) as was the spread of the solvent. Too little time? Dunno but I'll keep at it. Much cleaner lines than with the hot iron.
You are great sir. How wonderful the result is.
Congratulations, a great video.
Excellent technique loads of thanks for sharing. Perfectly transfers to pcb. Nice work a 👍 to Uuuhh
Just did my first small scale test on this process. Looking really good. As advertised all the toner came off onto the copper with none left on the paper (standard glossy from the copy shop).
One problem is that the nail polish remover beaded up on the copper which would not work well on a larger board. I will try spraying that mix onto the paper with it laying face up, and put the copper on top of that face down. I think that will work better.
Note: Don't use denatured alcohol as it removes the toner.
Works perfectly , I mixed 1:1 pure aceton and pure grain alcohol. The printer is HP LJ P1102W.
Thank you very much for sharing this, the result is so much better than using iron transfer
Thank you for sharing!
Thank you very useful video!:)
Thanks it was very cool and helpful solution
Ferric Chloride. A man after my own heart. I am going to give this a shot, though I am nervous about the selection of the paper. I've tried every kind out there and it wasn't until I found pulsar paper that I was able to get to 0.5mm spacing on my parts.
Have you ever tried glossy magazine paper? I heave heard it works well. Hoping to try it this weekend.
The paper called art paper 30
Work very well, thanks ;)
Super job
Thank you, for sharing.
Superbe vidéo , merci
Works fine. Thanks
That is absolutely briliant. And as i see, there is no photopaper gloss residue as it happens sometimes between low pitch traces. I'm just hoping that local photopaper quality will not dissolve in proposed solution, thanks!
Good method , Thanks a lot to share.
Tried it with denatured alcohol and also works just fine. As Chuck Adams mentions the HP laser toner are very hot and don't transfer very well with a laminator as I soon found out and went back to the iron. I have been having better success with this method and works well. I took 2 pieces of 1/2 inch cold rolled steel (3" by 3") and laid the pc on top of one along with the artwork face down on the pc board then soaked the artwork/paper with solution then put the other block on top for a minute or so. Upon removing wiped off excess solution and pressed image lightly to make sure it got a bond. a few minutes later it was dry them immersed in water and peeled off. Etched just fine and was also 0805 SMD. Image will smash if too much pressure is applied. Also just used a page out of an old magazine to print the image on. Very happy Thanks
It worked great!!! Thanks you so much you are te man!
You sir, you are awesome!
I have been looking for a simpler way to transfer circuit prints to copper-clad boards. I like your chemical reaction approach. I will be sure to try this out as soon as I am able. If it works as you say it does, it's incredible! Possibly the best way I've seen demonstrated anywhere on the internet.
I must try this!!
Just to inform I just did it with a 50% - 50% mix of rubbing alcohol and pure acetone had to clamp the PCB between 2 wood planks. Waited 5 minutes and then soaked in water. BTW I have been doing this since the first time I saw it about 2 years ago with success with nail polish but now nail polish has become expensive where I live so is better for me the rub alcohol and pure acetone mix. Kudos to you for this method!
nailpolish and acetone are the same thing. sooo
Thanks for the great video
Nice description !
thanks from Brazil
good, I will try
Great tutorial thx!
Today, I made my first PCB using your technique.
It's GREAT !
Thank you !
Pessoal que mora no Brazil: Comprei álcool absoluto(99,3%) e Acetona pura em um comércio de produtos químicos, a BHerzog, no centro do Rio de Janeiro. Usei um papel específico para transfer a quente. que eu tinha guardado aqui em casa há uns 7 anos. Funcionou muito bem. O papel se soltou sozinho, deixando 100% do toner na placa. Nem em meus sonhos tinha feito uma transferência tão perfeita e sem falhas.
muito obrigado e feliz ano novo !
Tentei com álcool 92.8 e Acetona pura, até agora os resultados são bons, mesmo com papel A4 normal, amanhã vou tentar com transfer.
Estou usando uma impressora Brother laser colorida e os químicos comprei por 30 reais os dois na Cloroquímica, em Curitiba :)
Ricardo bom dia. qual foi as proporções da mistura que voce usou?
Thanks it so simple
Thank you for contribution.
Thanks for your comment ! :-)
this is just what i was looking for you did know you could use this technic for other means like for example you could print out a dashboard for knobs and controlers and so and just print it on to the metal with this method
Excellent
wow esto es totalmente nuevo para mi muchas felicidades, lo voy a intentar, saludos
I have tried thinners and alcohol it works perfect for me
Thank you.
What a great video! Thanks for that idea, that's much easier than ironing
I found a way to increase the working time with the Toner while the Acetone/Ethanol solution has been already applied on the PCB: Before beginning the transfer procedure, chill down the Acetone/ethanol solution, the PCB and the paper in the fridge for at least 10 minutes, so that the transferring solution will loose concentration more slowly when it's applied to the PCB, allowing you to take your time with the toner, risking like in my example, blurred paths.
Good idea!
@@demef758 Try it out, and let me know :D
Works! I used no mixture, just nail acetone. Result was perfect!
That liquid to remove nail paint, right?
yes, acetone paint nail remover
Thank you!! :)
you didn't use alcohol at all? can you tell me how you did it? like where did you put the acetone on the paper or between the paper and the board
No alcool. You must put acetone on the board and immediately put the paper on it and press. When acetone totally evaporates put the board under water and gently peel paper off of the board.
Using the nail polish remover method is the best, because it is easy, comfortable and more accurate
Its the same composition. Glycerine is used in it..to ovoid fast evaporation👍👍🇩🇿🇩🇿
tks... fantastic
muy bueno... ahora a conseguir acetona...
very nice
brilliant ...
very good
I guess the most important tool here is the paper. I have tried with many types of paper and yes, magazine paper is the best. Also the toner quality is very important too. If your paper and toner are OK, result will be OK. Ironing or acetone, no matter !
Just to update anyone on this technique, for best results I use Sally hansen nail polish remover and press firmly on the entire print until dry, it works like a charm, no mixing of anything it just works
Thank you my friend,very useful INF
I too had difficulty getting the toner to transfer to the board using your 8:3 ratio. I decided I would need to find the correct ratio for my toner and found that it is closer to 1:1 but I have more experimentation to do. To do your own process development, cut a small piece of laminate, print off a bunch of test patterns, and you'll know in minutes whether the concentration of acetone is too high (toner dissolves) or too low (no transfer at all). Another variable is the amount of time you allow for it to become "sticky". Scrub the board clean and try again. I had lots of failures until like magic, a near-perfect transfer!
Great contribution!
+1 TO THIS^^^
- Try it, it fails, scrub off toner w/ steel wool and try again, it fails, repeat until success.
- Started with pure acetone, added a little solvent each time until success.
You order me to try this technic. And I will!