Samsung Galaxy Note8 Display Assembly (LCD & Digitizer) Repair - Fixez.com

ฝัง
- เผยแพร่เมื่อ 1 พ.ย. 2017
- Samsung Galaxy Note8 Screen Replacements and Repair Parts: bit.ly/2y2oQaG
Samsung Galaxy Note8 DIY Repair Tools: bit.ly/2lzLIop
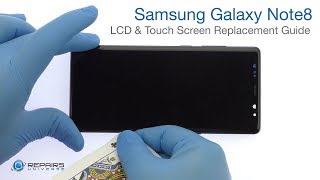
Watch the Official Samsung Galaxy Note8 Display Assembly Repair Guide. Following the step-by-step Note8 screen replacement instructions we have provided will help you safely fix a cracked or damaged 6.3" Super AMOLED display. Visit Fixez.com for all of the DIY Samsung Galaxy Note8 replacement screens, parts and tools you need to fix your phone quickly, and affordably.
If you need your Galaxy Note8 smartphone repaired ASAP instead- we have you covered there too. Contact one of our skilled technicians at 866-233-6460 or support@fixez.com and they will fix your device for you. They are available Monday - Friday, 9am to 5pm PST.
Subscribe to our TH-cam Channel for additional DIY smartphone and tablet teardown and repair videos! / @fixez
Like us on Facebook: / fixez.com
Follow us on Twitter: / fixezdotcom
Samsung Galaxy Note8 Display Assembly Repair Video Steps:
Step 1
• Power down your Samsung Galaxy Note8 phone.
Step 2 (Samsung Galaxy Note8 SIM Card and MicroSD Card Tray)
• Eject the SIM card and microSD card tray.
• Smoothly remove the Samsung Galaxy Note8 S Pen.
Step 3 (Samsung Galaxy Note8 Rear Glass Panel)
• The Galaxy Note8 rear glass panel is glued on solidly. Apply heat to soften the adhesive.
• With the precision knife create enough space to insert a playing card.
• Attack the sticky adhesive and carefully crack open the Note8.
• You will need to detach the very short fingerprint sensor cable from the motherboard before completely moving the glass out of the way.
Step 4 (Samsung Galaxy Note8 Fingerprint Sensor)
• Use the spudger to help free the Galaxy Note8 fingerprint reader from the adhesive securing it to the rear panel.
Step 5 (Samsung Galaxy Note8 Midframe, NFC Antenna, Qi Wireless Charging Coil, and Loudspeaker)
• Remove the following 16 Phillips screws.
• Pry up the midframe, NFC antenna and Qi (pronounce correctly) wireless charging coil combo.
• With the maxed-out midframe out of the way, easily lift out the bottom loudspeaker assembly.
Step 6 (Samsung Galaxy Note8 Battery)
• Disconnect the Note8 battery cable from the motherboard.
• The Samsung SDI-made battery is well wedged and adhered in place. Use the spudger to dig it free from the adhesive securing it to the phone.
• After a brief struggle out comes the 3.85-volt, 3300 milliampere-hour (mAh) Samsung Galaxy Note8 battery.
Step 7 (Samsung Galaxy Note8 Motherboard)
• Remove the following Phillips screw.
• Spudge up the bevy of cables from the Galaxy Note8 motherboard.
• Use the flat end of the spudger to detach the daughterboard connector on the underside of the motherboard, then extract it from the Samsung phone.
Step 8 (Samsung Galaxy Note8 Headphone Jack and Daughterboard that includes the USB-C Port and Microphone)
• Remove the following Phillips screw.
• Detach and extricate the 3.5mm modular Note8 headphone jack.
• Remove the following 3 Phillips screws.
• With the spudger in hand, pry the daughterboard up from the frame. It includes the Note8 USB-C port and primary microphone.
Step 9 (Samsung Galaxy Note8 Sensor Array, Earpiece Speaker, Vibrator, Volume and Bixby Buttons Cable, and Power Button Cable)
• The next component to surrender is a front-facing sensor array that contains the status LED, the IR emitter and camera, and the proximity sensor.
• Tweeze out the Note8 earpiece speaker, followed by the spring-contact-connected vibrator.
• Remove the Note8 volume and Bixby buttons cable, followed by the power button cable. The power, Bixby and volume button covers are trapped within the outer case and can’t be removed.
Step 10 (Samsung Galaxy Note8 Display Assembly)
• Begin to free the edge-to-edge, 6.3" Super AMOLED display assembly by using the heat gun to warm up the adhesive.
• Use playing cards to attack the adhesive securing the curved display to the Note8 interior frame.
• Take your time and apply additional heat as needed.
• Once you have sliced through the adhesive, be mindful of the cables when decoupling the Galaxy Note8 screen from the frame.
* To reassemble your device, follow the steps in reverse order. - วิทยาศาสตร์และเทคโนโลยี


very good video
Madre mia,fooook
this is a short cut vid, in a reality removing screen is not that easy plus the adhesive they used to attached the screen wasn't sticky...