How to use the 3D Camera Tool in After Effects!

ฝัง
- เผยแพร่เมื่อ 17 พ.ย. 2015
- ➡️Join Nebula for $4 a month to get access to exclusive content from over 150 creators you already love!
nebula.tv/videos/mobox-how-to...
To download this project file, consider becoming a sponsor on Patreon!
/ mobox
Music: www.epidemicsound.com/referra...
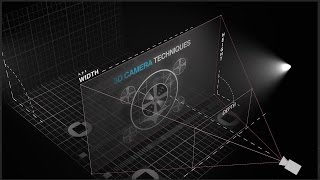
In this After Effects tutorial we are going over the best tips, tricks and techniques for the 3D camera tool in After Effects. This 3D camera tool will allow you to add parallax, bokeh, depth of field to any composition in After Effects.
00:00:15 - Hopping into After Effects
00:00:35 - Setting up the composition
00:01:00 - Making 3D Layers
00:02:15 - Camera Tool Explained & Settings
00:05:30 - Animating the Camera Movement
www.moboxgraphics.com
× Project Files - / mobox
× Twitter - / moboxgraphics
× Instagram - / moboxgraphics
× Facebook - / moboxgraphics
× Discord - / discord
---------------------------------
Our Gear:
www.amazon.com/shop/moboxgrap...
× Keyboard - Logitech G513 - amzn.to/2lNgyjq
× Mouse - Logitech G402 - amzn.to/2lLYshJ
× Microphone - Rode NT-USB - amzn.to/2lgudyZ
× CPU - Intel i7 8700k @ 4.88GHz - amzn.to/2jQbfza
× CPU Cooler - Corsair H100i v2 - amzn.to/2jOB2Yv
× Motherboard - ASUS TUF Z370-PRO - amzn.to/2lNlfd3
× GPU - Gigabyte GTX 1080 - Discontinued
× RAM - 64GB G.Skill 3200 DDR4
× Storage - 3 x 1TB Samsung SSD
× Sound Card - ASUS Xonar DGX HD
---------------------------------
Contributors:
Mike Ridolfi × @MikeInHD
Eli Prenten × @Twistereli
Music: / moboxmusic
Motion v2 Tool: www.mtmograph.com/motion/
Editor's Note:
How to add a camera in after effects is one of the most common after effects tutorial questions we get. Next would be how to use camera in after effects. For this reason, we put a lot of time into showcasing how to use the camera in after effects. This tutorial will cover ae camera blur, after effects camera blur, camera after effects 3D techniques, and parallax after effects. All using the camera tool built into after effects. Thank you for your support and I hope this camera blur / camera parallax after effects tutorial helps you on your projects.
This ae camera tutorial will walk you through the camera after effects and how to use the camera in after effects. mobox is a 3d camera and text tutorial channel showing you how to implement after effects camera blur with the depth of field and focus with the built in camera.
#AfterEffects #Mograph #tutorial #camera #mobox


camera flip fix. right click on camera layer>transform>auto-orient>off.
done. happy editing
OH MY GOSH THANK YOU. All this time I had to compensate the rotation. tedious shit
serious shit
Omg i was puzzling over this problem for like an hour before I saw your comment. THANK YOU SO MUCH
Holy smokes, you saved me from losing my mind.
Dude thank you! How is this still not fixed?!
This is a perfect, very well articulated crash course for AE camera beginners with a solid timeline animation base.
One of the best After Effects Tutorials I have seen. Love how you zoom into the small stuff.
Really simple and useful tutorial! I needed to know this for something I have been working on. Thank you for your videos!
It's rare to find a tutorial that so perfectly addresses the exact questions I need answered.
Thank you for this. Very informative.
I love this tutorial! Thanks for helping me to not be afraid of the camera tool. Nobody else has commented on having this same issue in the 5 years it's been up, but I had an issue when turning on the camera layer's depth of field setting where everything was a blurry mush. Turns out that by default, the Focus Distance setting for me was set, by default, to a position of 0 pixels instead of being equal to the zoom position as it is in your video. Not sure if that can help anyone else who hit the same issue as me, but there you go.
Man! I'm just bing watching all your tutorials! Learning so much!
Let's all just appreciate how well executed this tutorial was 🙏🏻❤️
LMAO glad to know I'm not the only one who has to deal with weird random glitches in AE. it's a great program but honestly sometimes it feel half-broken.
this tutorial's great by the way !! very helpful :D
Honestly, one of the best tutorials I've seen on camera movement in After Effects. Great Job!
I really feel the same .. thank you
honestly the best soft tutorial ive ever seen. short and straight to the point ! i love it
You are by far the best teacher for soft soft . It's very complicated at first - overwhelming, actually - but, you make it doable for
Thanks brother. Your video helped me a lot.
This was incredibly useful but I think the greatest gift of all was inadvertently teaching me how to copy/paste keyframes.
You have absolutely no idea how frustrating and time consuming it's been for me trying to edit while not knowing how to do that lol thank you soooo much
just wait till you hear about expressions :O you can loop out keyframe patterns
the possibilities with this is endless. great tutorial thank you
Dude, you are the best person on Earth. I have been looking for a tutorial on how to make size comparison of elements and your video kind of helped me on this. Thank you!
I watched a few different tutorials on how to use the camera, and none that I had seen so far mentioned the making the objects 3d which causes the camera movement. Maybe that's just day one stuff, but that was what i was missing to getting my project to work the way i wanted it to, thank you very much!
Glad I could help!
@@moboxgraphics how do you make it so the camera outline is always available. Mine disapears when i select other layers. Then I cant see where they are in relation to the camera focus point.
Great tutorial keep up the good work!
+Sjoerd de Boer Glad I could help!
Phenomenal Tut. Clear, concise, and very helpful.
AMAZING tutorial! One of the most comprehensive tutorials I've seen for anytNice tutorialng. Thanks so much!
When you move the camera using the mouse, the camera moves along with the "point of interest" but when you use the p"osition" option from the drop-down, it doesnt move the "point of interest" option, which is right above the "position" option. And hence when the "position" of the camera crosses the "point of interest", it will flip because, the camera always moves focussing the "point of interest". If you move the "point of interest" seperately, it will even move/rotate the camera following the "point of interest" .
well.. I obviously did it the right way all the time, until I needed to move them both at the same time.. Thank you again, for reminding me..
Thank you so much!
best tutorial! thank you!
best comment!!
Wow, so well done! Thanks for posting, man! Very helpful.
Thanks for your easy to follow explanations, one step at a ti. It makes learning less overwhelming!
When i make the circles 3d my background changes colour and the solid grey colour is gone! what am i doing wrong? and if i move the 3d objects or camera it doesnt move the view??? anybody know what im doing wrong?
in the top view....is the camera pointing like his is...straight ahead? and the circles are infront of it?
did you choose the same camera he choose....like 50mm etc...
Look from different angles to see what's going on, that usually helps me better assess the situation
Go to the preview screen where it shows
Then go to the setting to the right of the checkered pattern (the transparency grid toggle) and select the different angles you can use in the dropdown menu
Pretty old advice but hope this helps
Hey, what microphone do you use?
+Suraj Thapar Blue Yeti
Oh, that's an expensive one. I'm planning to get Samson Meteorite (similar to Blue Snowball) for the initial videos. :)
Also do you edit the sound or keep it as it is?
Suraj Thapar I use Audacity to equalize the volume and remove the static background noise.
Thanks, always learning something new :)
Suraj Thapar Glad I could help!
incredible explanation, can't wait to try it out. thanks!
It's so pleasing. The setuping and mastering softs amazing.
I dont' get why the focus distance and the aperture aren't giving me any out of focus element or blur...
same
Me too
i think im to stupid, doenst realy matter what i do, the circle isnt reacting
i think
you didn't turn on the 3D layer at the first place :)
oh its been a while but i actualy think i did.
ohkkay den i don't know!
so now did you got the output?
another old reply but its probably draft 3d that you toggled on. I realize that that is for rendering 3d stuff quickly, but it doesn't render the focus distance and all that. at least that's how I fixed my problem for me
The oldest reply , you need to change the 3d renderer to classic 3d in your composition settings.
This is just the tutorial I was looking for to use in my next project. perfectly explained, Thanks.
THIS HELPED ME SO MUCH, THANK YOU.
that minimized steam window is very distracting..
me too. i feel like i have to play right now lol
2:04 he is color blind.
?
Are you colour blind?
what
are you colorblind lmao wdym
amazing tut! helped me out a lot, straight to the point. thx!
Explained in great detail! Thank you so much!!
8:04 "If you're a camera DUDE!" What happened to your voice bruh?
Excitement.
Too busy saying "um"
JAPANESE CONSPIRACY, ILLUMINATI CONFIRMED 1:01
XD
wow! we always have everytNice tutorialng to learn! Great to know you!
That was an amazing video and I feel like I can actually get started using soft soft. Thank you so much!
Thank u so much, interested in starting so soft during quarintine and just need a place to get started, thx for the support
Thank you for the simple easy to understand tutorial!
clicked on. Very detailed and to the point, thank you so much for tNice tutorials! I subscribed and I look forward to watcNice tutorialng and learning more about
IT WORKED, THANKS I'VE BEEN LOOKING FOR THIS FOREVER, BUT NO TUTORIAL COULD EXPLAIN IT AS YOU DID
Nice man, awesome work.
Thank you ! You did a great job simplifying such a complex daw....Looking forward to be a great producer
Thanks for your easy to follow explanations
thank you SO MUCH! clear and concise and easy to follow. will definitely be trying this for myself!
sick tutorial, thanks for posting!!
The introduction was very helpful, thanks!
thanks for the cool tutorial! I learned a lot!
Thank you so much Sensei! You are a blessing!
this was very informative. thank you !!
New subscriber, thank you kindly, learned a lot from just one vid!
Thanks a lot - your video is a Great start to soft soft. I'm onto it !
TNice tutorials tutorial was so easy to understand. Thank you so much!
Now I understand how to make loops and export everytNice tutorialng really god bless you.. your way of explaining simply aweso I loved it
HOLYY SHIITTT I LOVE YOU ❤❤❤ I'VE BEEN SEARCHING AROUND THE INTERNET FOR 5 HOURS AND THEN NOW IT'S OVER FINALLY I LOVE YOU MAAN
Thank you man for sharing this stuff
Good job , tnx. Supported as I could.
yess this is so helpful for a beginner like me !!! tysm !!!
Thank you for this! I learned SO much from your video.
thank you so much for this tutorial omg
I know, you've taught . It ans so much to so many people, you are helping us pursue our dreams! Love from Sweden
basics it's encouraging to learn a little bit more! Well done!
Thank you so much!!! It did work and took less than 5 minutes!
this was so useful, hope u make some more!!
broken it down makes it seem so user-friendly and easy to use. I can’t wait to start making soft! Thanks again!
Amazing tutorial! :D
congratulations fam!!!
TNice tutorials is exactly what I needed to understand the UI. Great tutorial!
Amazing I did it You made my day Thank you!!
This works. Recommended to try this out. Thanks
perfect tutorial! thank you,
good tutorial you explained each step in an easy to understand way
good work and thank you so much, Greetings from Egypt
TNice tutorials is actually a very good and straight forward tutorial. No having ask questions or guess, no over-explaining elents, and brings
Man, you don't know how grateful I am right now! THANK YOU SO MUCH!!!
Very well explained!
Really simple and useful tutoria !! great !! 謝謝
eventually it all snapped into place and I started learning how to add all the effects, titles, motion text. It was pretty cool to see my
Thank you very much, I learned a new knowledge from your video :)
You're blessed with the gift of Tutorialism!
This is awesome! Thank you!
this is better than any tutorial on skillshare,, thank you!!!
Thanks for the motivation. I wasn't sure if I could do it, but I might try it eventually.
Thank you very much man, seriously you helped a lot i started from 0 to 10.
It works, thank you very much man!
Your video is very helpful.. thank you so much
It's nice and helpful. Thank you.
Thanks it really worked thanks alot man appreciated
great tutorial! thank you bro
This is very helpful, thank you very much
ITS REALLY WORKED LOL THANK YOU DUDE
Thank you brother... it’s very helpful
TNice tutorials was great! the way you explain tNice tutorialngs and repeating it really helps. thanks for the tutorial!
thank you! Mike you are my teacher.
Thanks for putting this together, it is well explain and help us understand how to use Cameras in after effect. Thanks again :)
Glad we could help you out!
I just wanna learn even more now- it looks so cool o.O