1980-2008 FL Rear Tire Alignment Explanation Harley Davidson

ฝัง
- เผยแพร่เมื่อ 29 ก.ย. 2024
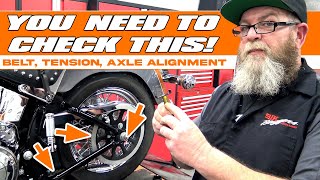
- Poor handling, abnormal tire wear? CAUTION: If your bike is handling poorly call your motorcycle mechanic and have them perform these steps! Harley Davidson FL series rear tire alignment for years 1980-2008 explained. The rear tire has to be aligned with the swing arm, and then the engine/transmission-swing arm has to be aligned with the front tire. This is a rubber mounted motor/transmission/swing arm setup where the swing arm is mounted directly to the TRANSMISSION, not the frame. The transmission is coupled to the frame (along with the front part of the motor) through rubber bushings which can become weak over time and cause alignment and handling issues. Proper handling and good tire wear can only be achieved through correct alignment steps. There is a lot to read about in how to do this and varying opinions on which way is the "correct" way to do it. This video shows one way which has been written about, but is certainly not the only way to do this. The tire widths front and rear are almost identical, so the string alignment method was pretty straightforward. Having front and rear tires of different widths will make that more difficult, but can be done.
Feel like buying me a coffee? Click here! www.buymeacoff...
DISCLAIMER: MARK YOUNG MAKES NO WARRANTY/GUARANTEE, EXPRESSED OR IMPLIED, AS TO THE RESULTS OBTAINED FROM THE USE OF THE INFORMATION CONTAINED IN THIS VIDEO OR ON THIS PAGE/PLATFORM, DIRECTLY OR THROUGH THIRD PARTY SHARING. UNDER NO CIRCUMSTANCES WILL MARK YOUNG BE RESPONSIBLE OR LIABLE IN ANY WAY FOR ANY CONTENT, INCLUDING BUT NOT LIMITED TO, ANY ERRORS OR OMISSIONS IN THE CONTENT, EXPRESSLY OR IMPLIED, OR FOR ANY LOSS OR DAMAGE OF ANY KIND INCURRED AS A RESULT OF ANY CONTENT COMMUNICATED OR IMPLIED IN THIS VIDEO AND/OR ON THIS PAGE/PLATFORM, WHETHER BY MARK YOUNG OR ANY THIRD PARTY. IN NO EVENT SHALL MARK YOUNG BE HELD LIABLE FOR ANY CERTAIN, SPECIAL, INDIRECT OR CONSEQUENTIAL DAMAGES OR ANY DAMAGES WHATSOEVER RESULTING FROM LOSS OR USE OF ANY INFORMATION COMMUNICATED ASSOCIATED WITH THIS VIDEO AND/OR PAGE/PLATFORM. THE INFORMATION PROVIDED SHOULD NOT REPLACE PROFESSIONAL ADVICE. THIS AGREEMENT ALSO EXTENDS TO ANYONE AND/OR ANYTHING, THIRD PARTY, WHICH MAY BE ASSOCIATED WITH THIS VIDEO, PAGE/PLATFORM, AND/OR MARK YOUNG. MARK YOUNG MAY, AT ANY TIME, REVISE THE INFORMATION ON THIS VIDEO AND/OR PAGE/PLATFORM WITHOUT NOTICE, AND MAKES NO COMMITMENT TO UPDATE THIS INFORMATION. NECESSARY SAFETY EQUIPMENT/ENVIRONMENT, DISPLAYED OR NOT, DISCUSSED OR NOT, IS UP TO THE USER TO DETERMINE WHAT IS NEEDED FOR THEIR OWN SAFETY, THE SAFETY OF OTHERS, AND PROPERTY.


Awesome job my friend, thank you for your time making and explaining step by step on this alignment. Very good job.
i use a magnetic 8 inch level on the rotors when i make my vertical adjustment. just letting the rear wheel hang isnt enough. especially if you have worn out rear isolators.
Something important that was not mentioned in the video or your comment is making sure the motorcycle's frame is level before trying to check/adjust the vertical axis of the engine/trans/swingarm. If your garage floor and/or your lift are not level, then the frame will not be level, and the adjustment of the vertical axis of the rear wheel will not be accurate. You may find that you will have to shim the frame on the lift to get the frame level, side to side.
Correct, the tire hanging wont work, the rear rubber mounts will resist movement, and be sure to recheck the front to rear alignment! Either adjustment will reflect the other. On 69 to 07 models kent more offers a tool set the dealers are required to purchase that draws the real swing arm pivot shaft into vertical and horizontal alignment one both links are unbolted so the tech can just adjust them to fit in the mount holes correctly. Sadly on pre 96 models the tool set will not work as the frames were not jig welded. )On those I use a 8 foot long florescent light tube not a string/ I was a instructor for the HD department of the training school certified by HD.
I sure appreciate the time... This video was a big help..
thanks for the vid I have 68 xlch that seems out of wack left side is 1 1/2 gap from fender to support and the other is 1 away from the fender to support so now I have some what of an idea where I may need to check thanks again
Update me on what you find out, and take good care of that girl!
Thanks for taking the time to allow others to understand the alignment of Harley Bagger motorcycles, hopefully It will help people and make the road a safer riding place for those that have alignment handling issues
I have to say, since applying these steps, replacing the rubber bushings in the transmission mounts, and adding a stabilizer link bar from the transmission to the frame, it handles like a freight train on rails! Perfectly straight over whatever the road can muster, even two-up.
Great video. I've been going nuts trying to solve my 65 mph straight line wobble. I think my problem lies with the motor out of alignment. Can't wait to check it. Thanks.
I'm curious, what year bike? I hope you find what's out of whack. Nothing like the feeling of a stable bike after the alignment was done.
Thank you!!! This helped me more than you could imagine. My 1996 Electra Glide Ultra Classic rides like new.
The alignment is quite critical for the bike to handle well on the road. I agree with you on how to adjust the rear wheel and swingarm, and also how to make the adjustment on the front motor mount, to get the whole "packet" straight. Now you have two wheels pointing in the same direction, that's good.
However, I feel there's some room for errors if you adjust the "dogbone" beneath the gastank in the manner you propose. You loosen it up and adjust the "dogbone" to fit into the bracket without any effort. But, what guarantees that the engine has the correct sideways placement just because it "wants" to sit there? I would feel much safer to measure the correct value, and ensure that the two wheels are aligned also in that direction. So that my rear wheel doesn't lean to the left or to the right, as compared to the front wheel. A simple way to get a reading would be to remove the rear shocks, and measure the distance between the mounting bolts on both sides. It should obviously be the same distance on both sides, that way you would be able to confirm that the engine/tranny/swing is aligned also sideways!
As an alternative method you can always make sure that the bike is standing perfectly upright, by using a level on the front disc, make your adjustments on the dogbone beneath the gas tank, and then check that you get the same reading on both the brake discs, front and rear.
This is only my humble opinion, and I do NOT seek to offend anyone, least of all you Mark!
I have great respect for you and the videos that you make, in fact I have been using some of your tips regarding the compensator and primary chain tensioner. Been riding all summer with my modified compensator (added two shims to increase the spring tension and it worked perfect).
Thanks for the tip! Without know anything I want to say, I was wondering why Mark didn´t took tha gas tank off? my though was I should be easier without the tank!
I replaced my tires recently and will check mine. My 05 has chamfer washers. Marked before I removed.
For sure thank you for sharing your knowledge and YOU know wtf you teaching.
Dont know if this was your idea or a copy of a tool. But I am flat out impressed. So simple yet dead on accurate
I hope you are a teacher, If not you missed your calling. That is by far the best video and explanation of a task I have seen on YOU TUBE. These are also( after 3years of watching YOU TUBE videos) The first comments pos or neg I have ever been been so moved to make.
Thank you, Chris
I don't feel I deserve such high praise, but thank you very much for saying so, Chris. I am not a teacher not an expert, just a regular guy trying to figure things out.
Wide gluide front tyre thinner than back
You have excellent communication skills brother. Good job.
Thank you for saying so!
Hello Mark! oustanding explanation!!!! I´ve read several times my maintenance manual but until now I fully understand "the meaning" (LOL). thank you so much and my best regards from Mexico, Paco.
03 FLSTC and 02 FXDWG
And to think that these bikes were designed by adults....
Amazing video! Very comprehensive. Thank you.
8 years later and your video just saved me a ton of work and mistakes. Absolutely clear instructions and you make it look easy.
Now I heard from a decent mechanic that if your replacing a mount you can leave all your mounts a bit loose run the engine a couple minutes and it will find its natural center and you can tighten it all down.
Good job.i think you got it.
Only on Dyna models!
Man, that was the best explanation I have seen on youtube, excellent!!
Wow. Amazing video. A ton of valuable information here. Thanks so much for explaining so thoroughly.
This is one great video. Can’t wait to check mine. You couldn’t have explained any better. Thank you.
Nice video man! Even 5 years later it's exactly the information I was looking for.
My 06 Electra Glide thanks you too.
Thank you for letting me know!
On my 2006 RG the bolt centers tire for belt tensioning. But found offset swing arm bushings that'll do that job inside the swing arm. But everything else you mention was amazing. Why I'm looking into not only the alignment but all the bushings of the swing arm and motor mount because I started getting the death wobble when I didnt have before. Thank you for making easy to get it all straight. Also it matters on tire. Found that there 3, 4 and 6 ply tires. why would there be anything less than 6 for motorcycles tires is scary. So one thing I make sure is 6 ply tires.
That's awesome, my question is I thought there were transmission bolts you would have to loosen, very informative.
A PLEASURE TO SIT THROUGH AND LEARN. MY SINCERE THANKS.
Exelent work thank you
Mark, thank you, just started to get the wobble issue and noticed the same rear traking right, so this is going to help me put all back into allignment. hreat instructions
If you replace the rubber mount, on rear transmission pivoted swingarms with billet isolators or urethane pivot replacement systems, moving the front motormount wont happen .
8' fluorescent bulbs though fragile are as straight as anything, I have been using the same pair for years.
Thanks for the video. Helped my understanding. Was having vertical alignment issues.
This is by far in the 'BEST' category of how to Fix/maintain 'my' Harley that I've seen.
It's a shame, but when the so called 'top pros' get started on these kinds of
issues, I find that they just want you to know how smart and pro they are and
they tend to skip the details that you actually need, and of course they then
tell you to go watch another video of theirs or go to their website, ha ha, or
buy a subscription to something else that they sell us, that may or may not be of any
use to us.
Thank you!!
Hello Great instructional video. Thank you for showing HD riders the correct method to align the wheels properly. I have just replaced my rear tire for the 1st time on My 96 Ultra Classic and your instruction will allow me to ride down the road with confidence. once again Thanks. Respectfully Archie Ontario Canada
Great to hear, Archie. This did make a night and day difference in both how the bike handled and extended tire wear. Good luck and happy riding to you!
Great vid, I replaced my rear tire and the clymers manual i used gave a measurement distance +/- from the swing arm reference points you showed in this vid. I assumed that if the distance is equal (within specified measurements) on both sides the wheel is aligned properly.
I've never had to adjust the motor mounts or swing arm. All said Im going to check all alignments again. Ty
You're welcome, Ronin. Be safe!
Good explanation. On my electra glide with cruise control set I take my hands off the handle bars. It tracks straight and stays balanced. A good indicator for tracking.
before you do adjustments after you jack the rear wheel off the ground shouldn't you check to see if the frame is level on the top frame rails under the seat then dial the rear wheel, front wheel and then the engine alignment ? the frame does need to be level first. great video.
Yes, making sure the bike is level, straight up and down, should be done. I didn't use a level, but by eye it looked like it was straight up and down from the floor.
A
Amazing video thank you so much. As soon as my new parts get here Im going to try to get it aligned. Really nice your is the same year as mine judging from the MM fuel injection. I hope it works!
I read a few comments. Not seeing an answer to my question I thought I’d ask. I have a 2008 street bob. It doesnt wobble, up to 90 mph anyway. But it wants to track left when coasting. To correct that I have to lean slightly right. It should go straight. I have a similar wheel alignment tool made with a defluxed welding rod and aligned the rear wheel prior to testing again. Would it be the engine alignment? Anyone? Thx in advance.
absolutely superb video!
fully explained the entire geometry of the motorcycle as it relates to the engine and transmission unit.
Thank you, Ken!
I noticed you didn't loosen the swingarm/rear transmission mount shouldn't everything be loosened and retightened to align everything correctly?
My 2003 RK has a welded cam on the rear axle assembly and cannot be adjusted per your video. All that can be adjusted is the belt tension.
I understand how to align the two wheeled harley. How do you align a trike ? That is what I am trying to do. I can tell you that so far it's been pure hell trying to get any answers from any of these so called self proclaimed Harley Mechanics. Can you shed some light on this ? Please . .
Steve, I wish I had the answer for you but I don't. I was surprised to read Trike as I hadn't even thought about one needing alignment. What are the symptoms?
Use the fluorescent light method; Strap two tubes to the front tire (8'), Ensure the front tire is straight (check at a center point on the frame) and measure the difference between the two tires at the rear. That should do it.
Excellent vid for anyone to understand,😊
Thank you sir for this great video & explanation of everything.
Thank you so much for this video! 10000 percent answered my questions.
With the bike on the lift put a level on the top of frame seat area and hold a level vertical against the rear rotor to adjust upper dog bone tighten everything up and then check all alignment angles again before you pull it off the lift
Geez I bought the alignment rod at the Harley shop.
Wow a lot of information to take in but thank you for going out for the TH-camr guys
I used to wet the floor push bike through wet see how close the tires run
Every time a bozo Harley tec. Has touched my bike they screwed it up and I had to fix it
It all too EZ to be snotty on the net.
So I would say I apologize for that remark but the context is correct.
That goofy stick you use (and HD recommends IT lol) is not going to give you any accuracy.
This is not for hand grenades and horseshoes!
I use round bar with a T and compression fittings both ends have points.
Its very stable.
One end is adjustable.
The points are long enough so as not to have to compensate for goofball
angles, just stick it straight into the axle and the swingarm detents.
1 -BUT, BUT first off- a proper alignment will start with front wheel being at 90 deg to earth as no compensation
can be made for triple tree angulation error.
Next match the rear wheel., Both should be straight up, rear matching the front.
2,-now use your stick but one that will dial in a much closer tolerance than that thing!
Get the axial swingarm number purrrfect.
Now, pull construction string -TIGHT! I mean banjo tight and tie it off to something in front of the bike that can be moved left/ right.
Keep in mind the rear end of the bike may need to be shifted left or right B4 the final touch.
Keep fussing with it , then and only then adj your front motor mount to pull the rear tire direction needed.
Its a fussy project because at this point the rear tire is probably not vertical again.
Notes -I use lasers and strings. a GOOD laser with a very small dot and magnet is pretty cheap today .
Hook one to front and rear disk.
When you are done the front and rear dots will be on top of each other,
ANYTHING LESS THEN THIS IS CAVE MAN
Cave Man worked for me!
I been doing this the same way as Mark Young for 20 years , FLT/C 1986 ultra glide classic , 1990 Sportster 1200 and my 1995 FLHR road king . No need for laser , if you have one that's fine , I use a coat hanger and a o-ring for my swingarm to axel , But I remove my fuel tank to get to the top engine mount . Mark put a lot into this video I have to say he did a fine Job Old School .
Thanks for a Fantastic video Mark! You have explained things in a way that all makes sense!! I have a 2006 Road King with 13,000 miles that I bought last year. Supposedly, it had no accidents. It pulls consistently but mildly to the left, just a little, so I barely notice any pull with my hands(s) on the bars. If I go "no hands" I have to shift my weight a little over center. I have talked to one Harley shop and the mechanic recommended that I add weight to my right side saddlebag!! Another Harleys only shop told me "I don't get enough calls on bad tracking to buy the expensive equipment", but recommended I buy a pair of tires from him!! (My tires look to be wearing fine) I just bought a Progressive Suspension Touring Link( Bagger Brace) and plan on installing the components, but if everything doesn't line up for the connecting Link, I won't install it until a real alignment is done. Progressives directions say "the connecting rod length is preset and should not require adjustment, but if it does simply loosen the lock (on the hyme joint). With the new found knowledge from your video, I will go to another shop and see if they know anything about wheel alignment......
Bob, thank you very much for your comments. I tried to explain everything and show that you don't necessarily need expensive tools to find out if the alignment isn't true. I made the swingarm measuring stick with some rod and a rubber grommet. My tires were wearing fast, so that was a sign. Also when I had the windshield off (which had a leather bag attached to the backside) I could see that the line down the Road King headlight was aiming to the side instead of inline with the gas tank. As a side note, I bought one of those frame to transmission links like what you are talking about and I am very glad I did. Even though I replaced the rubber bushings in the rear transmission mounts (my bike was close to 50,000 miles at the time), these links do a great job at keeping the rear of the transmission (and the attached swingarm) from moving side to side. You'll be glad you bought it. No regrets. Worth every penny. Good luck with your machine!
thanks you just got old dog new tricks thanks jim
Well done, been looking for this a long time. thanks.
Glad you found it, John.
Thank you very much for this lesson😊
Excellent video! Thank you. Ride safe.
First, great video and thank you for making it. Second, where did you get the original information/instructions, you referred to?
Thank again from South Mississippi
I found a service manual that detailed the alignment procedure, and picked up some tips online. Glad you liked it, be well!
Mine looks more to left like a washer is missing or tire is bigger a wants to rub fender on left side
by far the most informative video I have seen. Thanks
Very good video explanation of all the components involved in the alignment process.
Thank you for saying so, I appreciate that!
very informative footage , now I guess I know why my FXR wobbles at higher speeds ...
Worth looking into, Don, if you have this type of frame configuration.
Great information thank you
No handling issues or unusual wear issues. I've done all of my own maintenance on this bike so I am the only wrench turner on it. The bike currently has 130,000 miles on it, all of em mine. I'm just a bit of a fanatic when it comes to working on stuff I guess. i always feel that the last person who touched it wasnt as thorough (anal) as i am. I will take your advice and just leave it alone. Great product(s) and thanks for your professional advice and reply, cheers!!
I couldn't agree with you more. 130,000! Wow, that is impressive! Here's to many more miles!
Kenneth Wise , Im the same way . I do this every time I replace a drive belt. FLT you have to drop the swingarm remove the wheel and rear shock primary everything is out of line .
@@JCcanU what's up JC! I found it if you remove the right side isolation mount for the swingarm you can get the belt to slide in past the swing arm without having to completely remove it. Definitely a Time Saver
@@kennethwise7108 I never seen that done , I know the New FLT have a spacer you just pull the pivot pin past the spacer and your good . You know of a video on it ?
@@JCcanU no but I discovered it when I was trying to figure out a simpler way to do it. I'll describe it again for you. Inner & outer primary off.
Remove the nut, spacer and pillar block from the left side of the bike. Drive the swing arm axle towards the right side about 5 inches. Loosen up the right side pillar block and leave the two bolts engaged with 2 threads.Push your rear swingarm far enough to the right to facilitate getting clearance of the belt up into the frame (its tight but it will fit). I highly recommend an S&S heavy duty woven carbon fiber belt. The tensile strength is significantly higher than the junk HD Kevlar ones and can withstand anything you throw at it. Maybe you can find time to make a video on it. I probably could but I'm sure people would criticize me for something. People are assholes on TH-cam..
Why didn't you make the frame level across the frame rails and then check the rear wheel vertical position and then adjust accordingly?
Seems like you just allowed the engine vertical position to be wherever it wanted to be which could be wildly out of alignment.
If it was "wildly out of alignment" it still handled better than before this alignment. Feel free to go about any way you wish.
Why does procedure need a so called professional
Excellent video
Excellent 👍🏻🇨🇦
Great video
Hardly dangerous, Son.
Lot Of Work ! /;-))) peace
Wouldn't it be easier to pull the tank? Ps great vider. My Harley is fine but my Kawasaki is falling in wierd . I just wanted to remember the string thing but you gave me alot more info. Thank you good sir. I've saved this video and will sub. Turns out I'm already a sub.
'Chase the top adjustment' @ 11:24 is covered at about 14:25 ,
I was confussed about this 'top' adjustment, it is explained very well
starting at the second 'time stamp' .
If your tires are not the same width you have to account for this
Yes, you do.
Thanks a bunch ! :)
Harley riders get used to riding a poor design motor cycle, Harleys are not designed right? you need to go to after market for proper parts to make them ride proper I know I have been riding them since 1969? I still like them
Just did my bike according to your video. Can't tell you what a big difference it made my bike was wondering catching rats in the road not anymore thanks
Спасибо. Вполне всё понятно )
Nice video explanation of this procedure. I've aligned quite a few of these FL's. On my personal '95 FLHR I installed a 02 to 08 swing arm with 1" rear axle. Much beefier swing arm and you get the rear cam style adjusters. I have worked on a lot of these FL's and FXR's that had the square tube swing arm crushed from ham fisted mechanics over-torquing the rear axle. Of course there is a lot to change with this swing arm swap but I felt like it was worth the extra work. Noticeable difference in handling.
You can use a metal hanger and a zip tie for those who don't want to go to a store and find these items
Great information and we'll presented.
Thank you.
my o3 ultra classic has fixed rear adjustment ,,will try the front allinment to see if that helps
Thanks Mark for your instruction video. Following step by step have bike strait like a dream. Prior to the adjustment had replaced swing arm bushes, rear engine mount rubbers and front engine rubber mount. The think I got is that my engine on the lefthand side is touching frame at the bottom. If can drop your thoughts in this matter I would be grateful. Thank you!
Is the motor touching (front area of frame) or the transmission touching (rear area of frame)? The transmission rubber pucks should have it centered between the frame as long as the shims were put back in correctly. The front motor mount should keep that area centered and high enough that it doesn't touch the frame there either. I didn't take notice on my bike how much of a gap there was to the frame. Is it possible that side of the frame got bent somehow? Pushed in?
@@contact4mwy7 It is front area where engine is touching the frame. I haven't noticed any frame irregularity at the bottom either. What I have noticed during the assembly is that the left hand side bracket holding engine rubber mount was slightly mismatched with frame holes for them two bolts. Same situation had with left hand side rear shock-absorber where bolt didn't line up with swinging arm bolts hole. Last think is that rubber bracket to engine did not rest on the rubber mount with its own weight.... RoadKing '99. Thank you Mark...
Is it noticably vibrating against the frame? Showing any signs of damage from chafing?
How much of a gap is on the right side of the frame to the motor? As I remember, the front motor mount has elongated holes for the two bolts that clamp the plate to he frame bracket, which allows the mount to slide left or right as needed. Can you verify that the plate is centered? If not, you may have to loosen the ham nuts on the "dog bone" stabilizer and readjust to center, then lock the jam nuts to the new position. You mentioned some of the bolts did not line up when you replaced the motor mount? The left shock did not line up quite right when you put that back together which makes me wonder if the motor/transmission is either turned slightly to the left, or if the top bracket is leaning slightly to the left.
@@contact4mwy7 Plenty room on the other side. Yes she not in the center. It is shifted to the left hand side. Going to move it back to center and see what happen _ as you said. I hope this wound set it all off aliment - probably it will. I wasn't happy with that rear engine mount reassembly it give me so much headache trying get it right. Another pare of hands would be welcome.... Mark thank you for your very much quick responds. Will get back to you in few hours with some results I hope.
clever!
i guess we don't care about belt deflection, 3 swing.
The H-D service manual shows how to make the rear axle alignment wire and procedure to align the whole bike. If you replace the swing arm and/or the front rubber mounts, remove all the dog bones first. Install the new swing arm mounts and tighten. Then install the new front mount. Hand tighten the two bolts to the frame and leave the through bolt loose. Lift the front othe engine a number of times. This centers the front mount in relation to the swing arm. Tighten up the front mount per manual. At this point reinstall the upper and low dog bones (and trans support if you have one. The dog bones are adjusted so the bolts slide in easy with no load on dog bone. They only keep the engine from moving side to side or off vertical. The trans stabilizer keeps the swing arm from moving side to side. Finally alight the rear axle to the swing arm. I don't usually check front to rear wheel alignment - if it is way off there is likely a motor mount issue, or the forks my have slipped in the triple tree.
Thank you for posting that explanation.
I only wish that there was a similar tutorial for 2009-2019 bikes with the new frame. Lt's of confusion of how to do alignment beyond rear axle, and even mixed messages there.
I haven't had to check it on my 2009 Road King as tire wear and handling seems to be ok. I do have to replace the front motor mounts, so I will see what that looks like for alignment adjustment when I get to that.
When I Replaced my Drive belt it was Worn on one side did not think much of it at the time but the new one is starting to do the same thing. I think my Engine and Trans are not aligned
1995dresser I would check the alignment of the rear wheel in the swingarm. As long as the bushings are good, the swingarm is mounted to the transmission, so the alignment of the drivebelt would be controlled by the rear axle. Find or make a metal rod like I used to verify the alignment of the rear axle. Have a shop help you out with it further. Make sense?
Great vidoes. So helpful. You explained everything. You talked to the lost ones like me. Lol but you made it clear. And how one thing affects the others. Great job... See you at street vibs in Reno if you come here. ... Scott from Reno NV.... Heritage Softail....
Hey, thanks Scott! Ride safe and often!
Hi Just thought id like to say thanks for your video Ive just carried out this on my 1990 flhs, eveything alined now ,but how much clearence should there be between the drive belt & tyre i have about an 1/8" dos'nt seen much regards Grahame
Hello Grahame, I am not aware of a measurement of space between the tire and the drive belt. I no longer own that bike or I would measure mine for a comparison. If the bike is aligned straight and true, and the belt is not rubbing against the tire, I would think 1/8" would be ok, but it would be best to check with other sources such as a Harley shop mechanic or someone with a similar year bike with the wide drive belt. The bike I have now has a wider 180 rear tire and the narrow drive belt, so I cannot compare.
Mine has the cams Dumbest idea I have ever seen
Great video thanks! Question, i have installed your front mount on my bike about a year ago. really great product!! My bike handles okay (for it being a Harley) but I have never checked the alignment of it EVER. It goes down the road straight as an arrow, i am curious to know if you recommend just checking it to check it. Thanks, Kenny Wise
Hello Kenny, thanks for the compliment on the video, and a good question! I will answer your question with a few questions. Is your bike wandering when going around corners? How does it track over cracks in the road? Do the tires show unusual tread wear? Are you getting the "normal" mileage out of your tires? My bike was showing all of these signs, plus I could see, due to the straight-ahead trim piece on my Road King headlight nacelle, that the front tire was turned slightly to the right just to go straight down the road. My tires were not lasting more than 3,000 to 4,000 miles, and the handling felt "squirrelly" around corners and over rough or cracked roads. I don't know how it got this far off as I bought it from a previous owner and there were no service records available for me to look at. Tire wear since the alignment has been very good, handling is much improved (improved even further with the installation of new rear rubber mounts and a stabilizer link which I highly recommend to anyone with the FLH rubber mounted rear transmission). In short, if it ain't broke Kenny, don't fix it!
thanks i might try that be cool.
You should have said you'donly need to align engine-transmission angles 'once' with care---then for a long time it should be o.k.
That is probably true as long as it is done correctly.
thank you very much. it is the source of my 75 mph wag. so I call it.
I could feel the bike wander under certain conditions. So could my wife as a passenger. After this realignment those wandering feelings went away. Very stable riding. The frame and engine/transmission mounts had good intentions but also some weaknesses. Also tire lifespan went up.
Mine has a cam welded to the axle and a matching cam on the other side. There is not need for this
That's one of the changes that Harley Davidson added to the newer frames and seems to do a good job of aligning the rear wheel.
What about the swing arm bushings supposed be inspected?
Yes, they should be inspected for wear. Mine were worn out and I did replace them with new. That helped to firm up the handling even more.
woulnt the motors vertical movent when releasing the top mount throw off the bottom wheel alignment in the opposite direction? should both mounts be released before beginning the lower alignment so the engine assembly will stay itself vertical during the lower adjustment?
Good question. The lower front mount lines up the engine/transmission from left to right. The top mount lines it up vertically side to side. Any relation of movement will be very minor to each other and should not throw off the measurements by any noticeable difference.
I noticed this as well. The FM technically call out completely removing the top mount from the bracket before aligning the front mount.
7:17 You loop the string through the rim I assume to keep it from falling down, but
how do you get it (the string) to match the height 'then' on both sides? Is that height then easy
to match?
Yes, the loop holding onto the tire makes it easier to adjust the same height on both sides. Having the bike as vertically straight up as possible I'd a must.
@@contact4mwy7 Ok, thanks much, I corrected a quesion
about the ; chase the top adjustment....'
comment that you made, I see it
is explained perfectly later on.
Great video sir!
I’m working on a 1996 road king with slow speed wobble !! I’ll check it out let you know how it works !! Thanks for the video
Mark, check your rubber discs that are supposed to hold the rear swing arm firm. As they get older they lose their stiffness and contribute to that condition. I replaced mine and could feel the difference!
I’m working on my 1996 road king also with a slow speed wobble did you ever figure it out
Great explanation on alignment - thanks!
Great job, Mark. Very good explanation!! My rear tire, on my 2005 fatboy is HORIZONTALY tilted to the left. ( if I put my fingers, up in the top of fender( by the struts) I have 1/4" on the left side, and 1/2"or more , on the right? ) the bike handles good. even when I ride with no hands..bike rides pretty straight, then starts favoring left side of road. wtf? After I figure out my problem, I will be doing your effective method, Thanks again Mark!
I am trying to picture where you are measuring the gaps and would like to stress that you make sure that part of the bike is in fact straight. I have also used an app on my phone that displays vertical degrees and placed the flat edge up and down alongside both brake rotors to verify a difference between the two.
Your Fatboy has a rigid mounted engine with internal counterbalancers. There's no adjustment like in this video on your Softail. Besides, center spacing between a stamped steel fender isn't an accurate way to gauge whether or not your wheels are aligned. Even if there was a way to measure it, your bike doesn't have an adjustment for it.
@@contact4mwy7 thank you very much for the response Mark sorry for the lateness
@@shortattentionspangarage1312 thank you very much Yes you are absolutely correct I do realize I don't have an adjustment for it sorry about the delay to the response