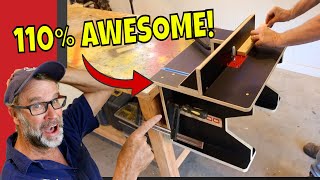
Making a Mini Router Table

ฝัง
- เผยแพร่เมื่อ 6 ก.ย. 2024
- On this week's show, I demonstrate how to make a miniature router table for your trim router. I hope that you enjoy the program.
If you haven't already, please consider liking and subscribing to the show and while you're at it, don't forget to click the bell so that you don't miss the notifications of future episodes of the program.
I want to thank you so much for stopping by the channel and taking the time to tune in to the show. It is very much appreciated.


This is exactly what I’m wanting to build. I’ve got plenty of ply so I’m gonna go for it
I wish you luck in your project James. Thanks for tuning in to the show and for taking the time to leave your comment.
Your video gave lot of confidence in building one similar. Your instructions were clear and detailed. Thank you so much for sharing your video and the idea. Much appreciated!
You're very welcome. I'm glad that you were able to make a successful router table. Thanks for tuning in and for sharing your story. I love it.
Looks great.
Glad that you like it Tim. Thanks for tuning in to the show.
Awesome, what a great idea. Your videos are so helpful, thank you Kenny.
I'm glad to hear that you find my show to be helpful. I appreciate you tuning in and taking the time to leave the kind words. Thank you.
Hi Ken as always a great show, this table is something I am going to make doing a setup on my large router table can be a major pain, specially only have to use it for 1 route through a piece of wood, thanks Ken have a good weekend
I'm glad that you liked the project Alan. Since I've made this, I'm surprised at how much use it gets. Sometimes, you don't want to set up the big machine for working on smaller stuff so this smaller table has been just perfect for me. Good luck on your project and thanks for tuning in to the show.
Good job, tks.
I will not have the router in the centre but a bit further back.
If having it further back is what suits you and makes the project more useable for you Jack, then by all means, that is how you should do it. Thanks for tuning in and good luck on your project.
That turned out great. I noticed the router table I think it was in Tuesday’s show. I thought either he’s had that for a while or there is build coming our way. Thank you for sharing with us
I'm always amazed at what my viewers notice in the background. I'm going to have to start hiding this stuff. LOL. Thanks for tuning in to the show Randy. Glad that you liked the project.
You did a great job on that router table.
Glad that you liked it. Thanks for tuning in and for the kind words.
Great project as always Kenny thanks for sharing with us.
You're very welcome Raymond. I'm glad that you liked the project. Thanks for tuning in to the show.
Very functional design! The under side fence lock knobs save not having to add in T-tracks for traditional top side knobs!
I was trying to keep it as simple as I could Jim. I'm glad that you liked it. Thanks for tuning in to the show.
Need to put a brace between the front legs so it would be easier to clamp it down. Ether have the brace flat or upright. Great project.
I have been clamping one leg between a bench dog and a quick release clamp and the other leg with a Quick Grip. Works perfectly. Your idea would be fantastic as well and it would definitely be a great addition to the table. Glad to hear that you liked the project Karl. Thanks for tuning in to the show and taking the time to chime in with your suggestion. It's awesome.
Another intresting build. Just one think to add Bob your uncle but FANNY YOUR AUNNTY . 👍
I've heard that 2nd half of the saying many times. "Bob's your uncle, Fanny's your aunt". Mind you, I've only heard it from the older generations. LOL. Glad that you found the build to be interesting Paul. Thanks for tuning in to the show and taking the time to leave your comment. It's very much appreciated.
Once again excellent video. I'm new to all this stuff and your videos are very helpful.
Glad that you liked the show Marc. If you ever have any questions, please don't hesitate to ask. I'd be more than happy to help if I can. Thanks for tuning in to the show and for taking the time to leave the kind words. It's very much appreciated.
Looks amazing.
Glad that you liked it Mark. Thanks for tuning in to the show.
Awesome project. Thank you
Glad that you liked it Newton. Thanks for tuning in to the show.
@@acutabove_woodworkings Would never miss an episode!
@@newtonmiller8810 I'm glad to hear that. I appreciate your dedication to the channel.
Enjoy your projects. I was alarmed to see you pushing the workpiece through from left to right, and squeezed between the bit and the fence.
You would be 100% right that normally the flow would be from right to left in this case and if this were a heavier cut that I was doing, I would have gone that way. However, with walnut and the dovetail bit I was comfortable with the climb routing due to the little amount of material I was removing. I didn't want the material to be all chipped out. In hindsight, you are right and I should have gone the other way. Thanks for pointing that out and for tuning in to the show.
Great video Kenny just what i need as well, i saw this table in the background of your last video and i thought i had missed the build ha ha ha.
When you fitted the fence and just before you did the jig knobs, i was thinking have you fitted it the wrong way round as there's no room for the knobs to turn, then you said that the knobs went underneath instead of the top which explains everything, still a great little table for the Trim Router.
Stay Safe,
Barry (ENG)
Glad that you liked the project Barry. You're not the only one to comment on seeing the table and wondering if there was going to be a build. LOL. It's a good thing that I don't keep anything "shady" in my shop as the viewers of the show would rat me out instantly. They notice EVERYTHING!!! LOL. Thanks for tuning in to the show sir. It's very much appreciated.
I'd like to see you do how to build on heavy duty tow truck
I did make a model of one of those but I don't think I ever filmed it. It was however, featured on the channel's Facebook page. Here's a link to the album. facebook.com/media/set/?set=a.1950537441831978&type=3
I hope you like it. Thanks for tuning in to the show.
Nice video. Thank you, Kenny. Can I ask you where you got your marking tools from?
I'm going to assume that you mean my INCRA T-rules Garrett. They are made by INCRA and are available directly from them at incra.com. I got mine from Lee Valley Tools. I hope this helps. Thanks for tuning in and for the kind words.
Kenny, I have seen these types of tables in catalogs and thought “I could build it cheaper”. You did a great job on your design. Did you ever give thought to a melamine top for a more slippery surface or did you discount that due to strength? Maybe you didn’t have any melamine in your scrap pile...lol. Nice build.
I did consider melamine Paul and yes, I have some in the scrap pile. LOL. To be honest, I just didn't want a melamine top on this one. Plywood was in my head from the get-go and that is what I went with. If there ever comes a time where I find that there is too much friction between the table and the work piece, I can always replace the top with a melamine one. The table top is easy enough to make and reproduce. Thanks for tuning in to the show and taking the time to chime in with your ideas. It's appreciated.
Kenny, how are you liking the rollers on your table saw fence?
I can't think of a need for mini table, but I still found the show intersting.
I'm loving those roller stock guides Doug. For smaller pieces, they aren't really practical but for anything 2" in width and over, I find them to be fantastic. They hold the stock down perfectly, they are easy to set up, they pull the stock tight to the fence and they act as a feather board as well. I just love them. They were a little on the pricey side but I don't regret it one bit. They have definitely been an asset in the shop. As for the router table, I wasn't sure how much use I would have for one either but I have to say that I have been using this thing more and more and I am glad that I made it. I'm glad that you found the show interesting and who knows, one day you might have a use for one and you will know exactly where to come to get the instructions to make it. Thanks for tuning in to the show.
What is the marking Guage you have there? Looks pretty nice. Is it still available?
That marking gauge is called a T-rule and they are made by INCRA. You can get them at most woodworking suppliers or directly from incra.com. I got mine from Lee Valley Tools. Here's a link. I hope it helps. www.leevalley.com/en-ca/shop/tools/hand-tools/marking-and-measuring/rules/58877-incra-t-rules
Thanks for tuning in to the show.
@@acutabove_woodworkings thank you, I see they are different lengths too.
@@timlist4173 They are. I have the 6", 12" and the 18" and I use them the most in that order. My 6" gets used constantly, my 12" gets used occasionally and my 18" gets used rarely. (but it does get used) I hope this helps.
Kenny How do you keep the fence square and also calibrate the distance from the fence to the bit ? Great Build Though!
The fence on any router table doesn't need to be exactly square to the table Jeffrey. It's not like a table saw fence where if the ripping fence isn't square to the blade, it will bind. The cutting surface on a router bit is very minute and the fence can be completely out of square and still function as you want it to as long as the distance from the fence to the bit is correct. Eyeballing the fence for square is just fine. Because you don't need the fence to be square, you can line up the fence roughly where you want it and then lightly tighten one of the jig knobs on the fence to form a pivot point. From there, you can move the other side of the fence in or out to get your final dimension and when you are happy with the distance from the fence to the bit, tighten both knobs down. A test cut on scrap stock can verify your setting. Once again, it is not necessary for the fence to be square to the table when it comes to router table fences. I hope this helps Jeffrey. Thanks for tuning in.
Well today we will build a router table, we first take are $100 piece of plywood over to the router table to cut slots, in our router table top. LOL! :D
$100 for a piece of plywood?!?!?!?!?! What the heck?!?!?!?! Have you got a cheaper supplier that you are hiding from the rest of us? LOL. Obviously, this little router table would be a secondary table to a full sized unit but if this was being build as a main router table for a smaller shop, those slots could be cut with a handheld router, a scroll saw, coping saw or a whole host of other means. While I know your comment was meant to be humorous (it made me laugh anyway) it also made me think about "what if people were making this as their main table because they didn't have a large router table and were only starting out in the craft". Good point. Thanks for tuning in to the show and for taking the time to leave your comment. I had a good chuckle at that. LOL.
Could you tell me where to get the measuring tool please
I am assuming that you are referring to the INCRA T-rule. They are available directly from INCRA.com or from most woodworking suppliers. I got mine from Lee Valley Tools. I hope this helps. Thanks for tuning in Arthur.
I thought you should be going from right to left instead of left to right ?
You're 100% right on that Steve. Don't want the piece to get pinched between the fence and the spinning bit and become a projectile. Thanks for pointing it out and for tuning in.