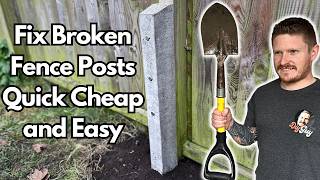
How to Fix Leaning Fence Posts

ฝัง
- เผยแพร่เมื่อ 25 ก.ค. 2024
- We can send men to the moon but still seem to have not worked out how to ensure fences stay vertical!!! Watch me as I fix my fence post that really doesn't want to be like the others.
🧰 All the tools and equipment I use: www.amazon.co.uk/shop/properdiy
Hand Mixing Concrete Tips: • Hand Mixed Concrete - ...
Proper DIY Patreon Page: / properdiy
The Amazon links above are affiliate links. It doesn't cost you anything to click on them but I do earn a small commission if you do. As an Amazon Associate I earn from qualifying purchases. - แนวปฏิบัติและการใช้ชีวิต


![How to repair a fence post [Cheap fence fix!!!] Handyman fix (AMAZON LINK)](/img/n.gif)
Thanks Stuart, I'm a bit of a DIY'er myself and surprised in what I've achieved in my garden as a 53 yr old woman, but it keeps me fit, I've learned so much more from your video's, thank you do much Stuart, you're a huge help x
I've been following Stuart for a while and I really don't think there is anyone better on You Tube that can teach and explained these DIY projects better than him. I have learnt so much and you are No 1 - thanks very much.
Another well-explained and helpful video Stuart - thank you. Always wondered how to get the old concrete out and get everything plumb with tools I’ve already got. Glad you’re friends with all your posts again. 🙂
I subscribed as I laughed a lot when you said you buy tools, they sit there but can't find when you need them. This happens to me very often.
Or somebody "borrows" them 😅
What i’m really appreciating- this guy is putting the dirt coming out the ground into a bucket, as opposed to on the ground, creating an untidy area when job is complete!
Untidy this lady
Ask your laborers to put tarps or plastic down, they should be doing it in fear of Karens with million dollar lawns and gardens anyway. Had someone yell at me for a piece of gravel going into their beauty bark, because they like to pay other people to enjoy the power trip of yelling at them when a tiny piece of the world doesn't conform to their ideals
Very good instructions, you just saved me about $1,000 USD. Apparently I had the same lazy crooked contractors install my fence as you had install yours. Thank you!
This gentleman’s serious demeanor and deadpan delivery inspire one’s imagination. I can very easily picture him telling us about an airborne drop behind Argentine lines to execute clandestine demolition and sabotage operations during the Falkland Islands war. I expected a Sterling submachine gun to come out of that case.
Thank you
Thanks for your video.
I have learned how to fix my fence.
I, too, had some fence posts I did not like. I pulled the entire fence up, saved what lumber I could, and that solved my problem. You have very good camera presence. Good work !
Thank you
Great tip to offset the string to line up the post properly. I've watched a dozen or so videos about setting posts and always wondered how they were certain they were not pushing on the string ever so slightly. Appreciate the eye for precision.
Thank you very much. I learnt this some years ago form a sit carpenter.
I've just put up a 6 panel, 3 foot high fence in my front drive and spent ages fannying around so the string line was just kissing each post. The offset is such a good, obvious thing to do and next time I will follow that tip. Thank you and great video by the way 👍
@@simonw4340 Thank you. Obvious once you know.
Mostly its down to lining up by eye
I came across your channel regarding fitting internal doors for my sister and just found this whilst looking for tips on how to straighten my elderly Mums swooning fences to save her some much needed pennies. As I'm becoming accustomed to your channel and many like yours in Britain, there's no doubt at all that you're really an invaluable source of education for people and just wanted to show some appreciation for your efforts in sharing your skills. In times like these where DIY is becoming a must-have, you guys and gals in the trades deserve a lot of respect. So thank you.
All the best 👍
How would you do this with concrete posts thanks 😊
Find "knot tying" guidance videos on TH-cam, buy some stout rope and attach the rope to the top of the post (Clove Hitch perhaps?) OR a loop around a nail in the adjecent attached fence panel and tie this to a stake in the ground (where the post is leaning 'outwards') or a timber strut bearing against a temporary timber stopper block screwed to the adjacent fence panel if the post leans 'inwards'.
Subscribed off of this video alone. You made this look so much more approachable than anything else I’ve seen. I have the same lean in my fence where it would likely be the easiest to come loose. Thank you.
The main reason I subscribed to your channel is because of you. You have a wonderful British sense of humor, very dry, but also very good tips and and how fix problems. You always show how to fix the problem the right way not just your way. Two thumbs up!
Some great tips. A coat of bitumen paint on the post to just above grass level is great for keeping moisture out also
Great tip!
I used a product called Flex Seal. An aerosol spray rubber concoction that sealed the concrete and the wood. Flex Seal also has a long list of products from tape to paste to liquid forms
I surround mine in DPC and works a treat.
bityumenrm
asphalt primer works well too
Helpful guidance and excellent presentation with bonus deadpan delivery. I need to repair / replace my collapsing fence so this one's particularly timely. We had a good laugh over magic tools vanishing when you need them, so relatable.
Thank you. For me it's either age or a medical condition I think!!!
Love your sense of humour and thank you for the clear and very helpful instructions! I have a leaning fence and I suspect it's due to the same problem: tiny foundation! Wish me luck, eh? Oh, and I'm a new subscriber. Cheers!
Thank you. Good luck with the job!
Thanks Stewart I'm delighted to know that someone who is as neat and meticulous as you are in your DIY is also prone to "losing" things, however I suspect you have some way to go to reach my world class level of absent mindedness. BTW I really enjoyed your video on the easiest way to install an outside socket -very useful.
Hi Stuart, As others have commented on how to get the existing concrete out without the best tool. A away around the issue is temporarily support the fence on both sides of post. The unfix the post from the rails and put the whole post out of the ground. Then, the concrete can be removed from around the post. It's then a simple process cleaning up the hole and reattaching the post for concreting.
Others have commented that the concrete should be exposed above the ground, which I agree. Another good practise is to put gravel in the hole before replacing the post. This away any moisture that seeps between the post and concrete can flow through the rocks and go into the ground as timber does shrink and expand all the time. Without the gravel, the post can be sitting on wet ground.
There were a few points that I will be using for projects in the future.
Really good point. I've known an 8" square timber bollard snap clean off when nudged by a vehicle - purely because for the rot caused when the water seeping down between the concrete and timber was u able to drain away.
"We can send men to the moon but still seem to have not worked out how to ensure fences stay vertical!!!" Haha I truly agree with you while looking at my leaning post. I have a totally different situation with my post but I've got some inspiration from you video. Thanks.
Excellent - that's my job done then!
Only subbed last week & low & behold this is the next job I've got on! Cracking video very well put together with just the right information...then I watched the cement mix vid 😉👍🏻
Welcome aboard! I'm glad you are enjoying them. Good luck with your job.
I came to you after searching for 'fence post'. One of my posts is wobbly like yours was, so thank you for this demonstration. I like you dry humour!
Never watched a video of yours before....but as soon as you told that fench post you didn't like it, I subscribed! Great opening! Lol👍🙃
Thank you
Same here 😃
I'm still laughing
Same. And the moaning about the lost garden trowel was a killer! Been there.
Haha that’s what got me! Keep em coming!!
I spend 3 hours looking for the tool, 1 hour doing the repair. Nice to see that I am not the only one.
Me too
Amateur...
I spend 3 hours looking for the tool, go and buy a new tool, do the job, find the old tool while putting the new tool away.
🤔
Sir, this is fantastic and gives me a good idea to look for a small concrete base that may be the problem with my wobbly fence post. Mine came loose, became wobbly, during a storm and the fence post itself looks intact, not rotted, so it may be just loosened like yours was. Thank you so much for the good details! I think I can do this :)
Excellent videos, really well done too.
Thank you, really appreciate your enthusiasm and skills
😎👍
Glad you like them!
I like that you said to have the cement angled down/away to avoid water pooling around the Post. Great tip!
Glad it was helpful!
I understand this idea and it doesn't take much time to do it but I wonder if it really makes much of a difference. Especially considering dirt will be piled on top anyways
I love your channel, mate. Keep up with the good work, the sound, images and quality of video editing is really good. I'm glad I have subscribed. Greetings from a DIYer in Belgium.
Nice to have you on board from Belgium!
Magic tools! I have lots of those. That is why I probably have 2 and 3 of every type of hand tool! Appreciated this video - I have a leaning post that I need to straighten also. Now I know a better way than using a come-along and the car 30 feet away from the fence!
Great video. Straightforward and lucid instructions!
I appreciate that!
I am a 70 year old female. Yes to this. Yes I have mixed concrete before. Yes I am British ❤
Those little SDS drills are really very versatile for small breaking jobs. Because they are a bit underpowered I find that you can tackle larger jobs and tougher concrete by weaking the concrete using a drill bit. I drill a grid of holes a few inches apart (use a long fairly thin drill bit and it goes really quick) and then go in with the chisel, it's much faster overall and less effort.
Good idea. I've yet to do a review on the Titan SDS drill but when I do I will say that for breaking concrete it's a bit of a lightweight!
Yes that what I did with an 8x6 ft concrete slab which was 6 inches thick.
@@scudosmyth784 Good stuff!
I recently had to break out a big lump of concrete, the SDS was struggling a bit so I invested in some stone splitting feather and wedges. Only cheap ones from Amazon but boy they worked great. Used the SDS to drill the drills and then used the wedges with a lump hammer. It wasn't the fastest job to do but it was so easy, much less noisy than a breaker and really satisfying.
Thank you for showing me how to repair this kinda problem. Indeed, it is very educating and helpful.
Great video and some good comments. My 2 penneth, some bitumen sealant especially at the ground-air transition, where post's always seem to break, costs pennies adds years. Also, I've seen too many posts where the length in the ground is too small, a good rule of thumb is 1/3 of the post's length should be in the ground.
Concrete everytime, stronger and alot cheaper than postmix. I find I need at least 2 bags of postmix for 1 post, which at this moment in time is about £5 - £6 per bag. The only benefit with post mix is the working time. At the residential homes I work at I've put up loads of different fences and the only one that has given me the same problem you have on your video is the one where I set the posts in postmix, and that was only 4ft high with 2 bags per 3x3 post.
Good video and easy to understand, keep up the good work 👍
Thank you. Your thinking on postfix is the same as mine.
I’ve done fences with a mixer and hand batched. I’ve done loads with postcrete. All still standing. I know of fences with concrete posts I did about 16 years ago still level and plum. The hole you dig can be fundamental regardless of what mix you set the post in. Hence in this video she’s a rocking and rolling, maybe was a Friday 😂. I’ve yet to see a properly set postcrete post fail. Price hurts at home but on a job it is what it is. Unless you want to beat a rival. Cheers
Make the hole smaller if you are using 2-3 bags you don’t know what you are doing
Knob jocky
Very insightful with a touch of comedy 😆👏🏻
Thank you
Another great video. Informative and to the point, no flannel. My tip for hand mixing concrete is that you'll need 3 times what you thought did at first 😅. +1 on the SDS drill - I took out an old tiled fireplace and hearth with one with a chisel bit.
PS - please tell me it wasn't you that put in the fence in the first place.
‼️❤️😃 Stuart just found you. I love it all !! Thank u so much. ‼️❤️ a neighbors crap tree fell on the power line in my yard which broke a huge telephone pole in my yard that crashed onto my fun - She Garden Shed - it’s all leaning now. I’m so sad. Hopefully I can figure out what to do. ❤️😃 LOVE your dry sense of humor !!! Thank uuuuu ‼️❤️😃
When I'm putting in a post I sometimes get one of those metal fence post spikes that's intended for fixing fence posts (a long spike with a fence post-sized socket on the end) but rather than using it as intended I hammer it down into the bottom of the hole so the bottom of the socket is level with the base of the hole and the post, I then put the concrete in.
Once dry this effectively makes the post a lot longer and I reckon it prevents the ball of concrete rotating in the earth like it did on the video because the concrete is keyed into the denser soil below the bottom of the post.
Bit of honest to goodness DIY know how. This I like! Subscribed 👍
Thank you
Great tip about spacing the line away from the posts - learn something every day 👌
Glad it was helpful!
As an alternative to break up the foundations we use a large hand tool - a Slammer - need a little muscle but it does the job...also good for medium tree roots
I'm renewing our old fence w/new rails and pickets and came across 2 posts, which should be straightened (they have ~ 30 degree deviation fm/vertical. I digged around them same way you did, but about 12" deep only, the second one even about 10", then added water to dig more next day, but to my surprise, I could move that 2nd post easily any way I want. So I straighten them both planning to add cement mixture and water, but then got stuck on the doubts if I need to add any cement in the holes. The posts are aluminum and the fence is pretty light (cedar, 6'). The original cement has practically perfect cylindrical shape, so for the future possible repairs it would be so much easier to deal with those perfect cylinders than the mines of irregular shape. So my question is: what will happen if I just surround those now straight posts (with existing cement cylinders on the bottom of them) with the soil (it is in Texas, soil type of clay)? Will it keep them straight, or it is absolutely necessary to remove the old cement, or at least to add some more new? Thank you for the great film, very informative.
You never have to dispose of the old concrete rubble. you'll always use it as fill in the new bigger hole.
Sloping the surface away from tbd wood was an excellent tip!
Putting a couple of nails in the post will stop the post sliding up/dn.
Decades ago, we'd dip or paint the post end in oil to keep out water.
Posts don’t slide up and down in the concrete. I wish they did, it would make my life easier. Btw, putting screws in the post before you pour the concrete is a way of increasing the likelihood that people will hate you. So unnecessary.
What an absolute great informative video. My neighbour has this problem with his fence, on a new build under 3 years old.
Thanks. Sounds like my fence!
Welcome to the world of new builds. You get wooden fence posts, one bag of Post Crete per post and like it. Done in a day, jobs a good 'un 👍
this is great! Love the A-frame and line level idea.
Strange to see that the top of the posts are left horizontal with a factory cut. In Australia we cut a 30 degree on the top of our posts for water to run off & not sit on the timber.
Legend! Great work
Much appreciated!
Great tips mate and well explained, thank you for sharing.
Thank you
Another great video with sound advice. My only concern would be the manner in which the other posts have been installed.
For a fence that lasts forever, install concrete spurs into the ground (with postmix) and bolt the wooden posts to the spurs (half an inch above the soil) which come cast with holes in them. If you don't like the colour of the spurs they absorb wood preservative just as well as wood does.
Or just put a concrete post in...
Well,..you certainly are handy,..good job mate! Keep smiling!
Thanks 👍
I don’t know squat about fences, but came across this video randomly. I’ve seen the string technique used (possibly a bit differently), but the custom A frame was a pretty slick idea. If I ever get around to messing with our fence, such as replacing the wooden posts, I’ll have to use that.
Yep! Same with me, when I heard you tell that post you didn’t like it, I subscribed! What a great, useful video!
I myself would have brought the concrete up above ground level about 4" tapering at a 45 degree angle into the post which will help greatly with any future rot and mildew to the wood(Yes I know it's treated)from future rain or snow.......I don't know where this person lives but I live in Illinois and we have some pretty nasty winters.
You have to understand that there is a place on our planet for every fence post. True that some of them are not quite level but we all have to be tolerant to one another and our fence posts.
Your comments have opened my eye's to a way of thinking I've not come across before. I'm converted! Non vertical fence posts are the future!
I have been doing jobs without the sds lately (used it professionally but doing independent work) and WOW is it worth it to have that thing around. Saving up for a battery sds for sure
I always bolt 75mm x 75mm spur beside the wooden post so that when it rots the spur holds it anyway or if the post rots above ground or is damaged it’s easily replaced by bolting a new post to the spur 😀
100% correct
Great video, you gotta love a good strong fence post 😁
Ooo I doo! Thanks.
The bank holiday weekend winds in the UK have fudged my fence, just like yours. Thanks for the tips!
Glad to help
Good video. I recommend covering the bottom of the post in damp proof polythene. That way you can pull it straight out should it ever need replacing. Then just slot in the new post.
I sorted my leaning fence post out by supergluing the neighbour to the other side. Works a treat (but remember to glue their mouth shut also).
Brilliant, I have the exact same problem and now having seen this video I will tackle it this weekend. Also, I am just about to semi convert my garage to a gym/office so I would love to see your video after part 2 of Garage to Workshop Conversion. Have you done the ceiling and/or wall yet?
Good stuff! I'm just about to put in the ceiling so will be coming soon!
2 of my posts started to sway last week after 2 months of daily rain, kind of a rare thing in recent years. I haven't dug out the foundation yet, but I really hope it's the same issue!
That post I'm sure is pressure treated, but I would bring the concrete above grade, higher on post and slope back to ground level. That way there is no chance of water standing at base of post and possibly rotting off.
The best way to go, is spend the money and use galvanized steel post. They have some neat ones on the market today. From the end they have a look like channel iron with wing and multiple holes in the wings, top to bottom. And you can cover the steel post with a piece of fencing and it hides the post.
You did a great job regardless of my opinion. Most guys would have just added more concrete on top of the old, but you went the extra. Great job !!!
2:10 its is so so nice to see that someone, even a pro loses stuff they had bought and put aside for the perfect task in the future. It absolutely drives me mad, you will see me pacing, cursing, hunting for an exact tool I bought that would save me a load of time, to get the job done just right, the amount of pencils, hammers, tapes, and specific things like a roofing square that i had hung up with all of the other measuring stuff.
Its driven me so crazy that i now just ram stuff in bags and launch them in the shed and just hunt through bags for tools i need because i know if it is in plain sight and i can see it - you can guarantee that it will go missing just when you need it. I have lost a giant pair of bolt cutters, actually lost a strimmer once (it had fallen behind in such a way that you would never thought a strimmer would slide perfectly behind toolboxes like that).
The real unexplained one goes to pencils, I make a point of jamming at least two in my pocket, but even then.. gone. I had one job going on where I bought a pack of 20 pencils and by the end I had 2 left, no other pencil in sight. HOW
Got a Screwfix SDS drill as a Christmas present from the in laws. Wish I’d had one 25 years ago when I think about all the drill bits I’ve burned out and all the blood sweat and tears trying to drill holes and break brick and concrete. A top tool and keenly priced! OMG, just seen the concrete mixing tool. How many times have I put my back out using a shovel. Where can I get one?
Completely agree. The 2 pronged hoe thing I bought at B&Q. I think any type of 'draw hoe' would work nicely.
From the inlaws you wish you had 25 years ago.
Man am I glad to hear that you also are losing tools i thought it just happened to me 🤯
I thought it was just me!
90% of my time during DIY is looking for tools everywhere...
Where I live there is no soil it is all sand. When my son & I put in a new fence , we dug the holes approx 1 meter into the sand, aligned all posts then concreted about 200 mm in the bottom of the hole. allowed to set for 24 hrs, filled in the holes to allow another 200 mm of concrete to finish just below the final ground level. When finished all posts were very sturdy due to bottom & top reinforcing. It hasn't moved in 18 years. Enjoyed your vid.
Thankyou, a very clear understandable procedure, good job👍
So nice of you
Thanks, part of your problem is the cement should extend to about 1 inch or 25 mm above the ground. This ensures the water runs off the wood so it won't rot and break off. The other problem is the size of the concrete around the pole is quite small, it should have about another 2 inches or 50 mm across, or at least 1.5 the width of the pole on each side. This helps prevent wind from leaning your pole over when the ground gets wet from rain. To make things easier, detach the cross boards from the post, pull the whole post and the cement still attached to the pole. Wash it off, dig the hole a little bigger, put the post back in and fill the extra void with more cement. Leaving the cement attached to the pole means you'll need less cement to fill the hole. It also requires less expensive tools to complete the job. Super video though, Thumbs up. Thanks for sharing. Best Wishes & Blessings. Keith Noneya
That's what I thought. Cement all the way up.
+1
Nah
I use galvanized poles now, no more rotting
@@driftx2 Galvanized don't rot they rust and break off at the bottom, especially in high winds and rainy areas. All my neighbors who used Galvanized poles had them bend over in the storms we've had since our neighborhood was new in 1996. All of them required a complete fence rebuild and all of them went to wood posts. The 4x4 wooden posts I used in 1996 80% of them are still standing. The one that rotted were the ones I didn't ensure had the 2" or 50mm cement around or above the ground around the pole. Since 1996 ALL of the fences that had Galvanized poles in my neighborhood have been replaced with Wooden Posts. Now when I replace poles I use 4x6 treated posts, those won't bend and take years to rot if cemented and treated properly. 25 years and counting on the original wood posts. Not saying they don't look nice and go in easily, but they as all fence posts present problems of their own like rust and are easily damaged by wind. There are over 400 homes here, none use galvanized anymore. Best Wishes & Blessings.
I use quick crete that’s able to be worked on within 15 minutes. I mix in the hole ur able to get a significant amount behind the back of the post that’s Always against the back of the hole. Also the quick set is designed for random usage such as the job ur doing.
Thanks
Matt
Your work is exceptional, thank you for this video.
I’m really glad to see you solved your ‘hatred’ for this poor Fence Post! Thankfully, neither of you needed to go to a Fence Guidance Councillor, and you both have a deeper understanding and love for each other!
Oh, and the tips on sorting out the wobbly post problem were useful too! 😉 😉
Thanks. I must say my relationship with the post in question has still continued to improve since I filmed the video so I think we'll be ok.
@@ProperDIY just don’t take it ‘too far’! Your significant other might get jealous, then you might find yourself ‘posted’ to the Shed, for a few nights! I’ll get my coat…………….
Fair enough, maybe I need to back off a bit
@@ProperDIY good idea! Don’t want to cause a ‘situation’!!!
Joking aside, I’ve just discovered your channel, and already you have given me the knowledge to tackle my very own wobbly fence post. Looking forward to many more useful videos, and of course that good old British sense of humour! That’s humour with TWO ‘U’s, for our colonial cousins across the pond! Two nations divided by a common language, as Winston Churchill once said!
@@mike130557 Welcome aboard! Nice to see someone from the US subscribing to a UK channel rather than the other way round! We are trying here to catch up in our own little way.
The better foundation (in addition to the below ground structure) is one that peaks it’s head above ground as well …
It surprised me to see the foundation below soil grade. I'm in a much drier climate (coastal California), but fence posts here are usually pressure treated (to resist moisture), and the foundation pokes above the soil surface.
i put a fence around my yard in 1996 using 4x4x8 post.i did not set them in cement.i used dirt and gravel.none of my post have rotted.i have had 5 of them leaning like yours.i used my riding mower and some rope to pull them straight i used 6 ft. metal t-post drove it in beside the wood post 3 ft. down and secured it with 3 inch screws.this worked great.
I've just followed your advice in this video and done exactly the same for one of my wobbly posts. The hole was only 20mm wider than the post round the back of it!
I used 5:1 ballast to cement.
I found that using the shop vac with no bag in it was perfect for getting the loose soil out of the hole! It was much quicker than fiddling round with a trowel.
Thanks for all your videos, I really enjoy them.
A simple matter of basic physics. The further down the concrete, the more leverage from the panel above. I would always have the concrete further up the hole. I also put post saver sleeves on these days. I'd also have used that broken up concrete as backfill down the bottom of the hole and rammed it down. I also take the concrete a little above ground level and try and shape it so the water doesn't stand round it. What I do try and avoid is wet earth against the posts as modern arsenic-free wood preservatives simply don't stop rot as well.
I've also never had trouble with Postcrete. As it's premixed, I don't see why it would be a problem. It's not going to settle out.
Glad to see it's not just me that can't find the one tool I really need. I know I have it. Saw it the other day. And now some b*st*rd's moved it. Last resort is asking the wife to help find it. Normally takes her about 5 minutes when I've been at it for ages. Really annoying.
I can't say how much this sounds like me (and my wife)!!! I'm glad I'm not the only one.
Liked your video, doing things correct way. One change worth considering is using two part foam instead of concrete. It seals post against water, is done and cured in less than twenty minutes and no need to come back days water. Cheers.
Figured this was the way to do it (Dig and add concrete) but glad I watched this for the a frame idea. Subbed. Thanks for the great vid.
Thanks for the sub!
Buy yourself a drainage shovel, they're not expensive and it's a lot easier as they're very narrow but long, makes it a doddle to dig down.
I'll have to invest in one
Thank you. Let me have a look into that
@@ProperDIY Shop vac with a good wide hose is the greatest thing ever when taking out old posts, one other thing that ranchers do to stop corner posts from tilting under the strain of the wire pulling on it is to attach a 4x4 to the post horizontally in a tee about 6 iches below grade ,this means your pushing a lot more soil before the post can move in soft soil like yours is, I have never done this myself but it seems like a good solution to sturdy up the side forces on the post .
Good video. Like other commenters I would have taken the concrete up to ground level because the post will rot off at the soil/post junction. Even if you take the concrete to ground level you’ll still get the same issue, it’ll just take longer to rot through. For a true long term fix put in a concrete support post and fix the wooden post to the new concrete upright with coach bolts.
One other suggestion, rather than discarding the old concrete lumps from the hole you could have mixed that in with the new ballast just to reduce the materials you’re using. I like the Titan tools, great for jobs like this, so cheap that if they stop working you just buy a new one or take it back under the 3 year warranty.
Top tips thank you, I have the same problem and will fix it your way!
Glad it helped
Very good instruction! Like your personality added to video and I like the way you put in the concrete! 😊It seems to be a very stable design!
I would have poured concrete to ground level and then ramp up slightly to the post so water doesn't collect there.
this is timely, cheers
Thanks
This was a really helpful video! Really well explained and interesting for a newbie like me. The ‘’I don’t like you, fence post’’ made me laugh too!! I’ve subscribed now!
Glad you enjoyed it!
You have done the hard job very easily, good work 👏 stay great
Thanks a lot
Concrete should always come out of the ground an inch or so. Otherwise direct ground contact will rot the post. Create a small square form for top when pouring form which results in a nice clean strong post. Not sure why people attach rails like that. They should be flush with the post by toe nailing/screwing into posts. Much more attractive and cleaner looking. Thanks for posting
It's due to cost. It's much faster to build the fence like in the video. As these are boundary fences the cost is split between the boundary owners. Cost becomes an important factor.
@@HardstylePete - that’s why I build my own. Cost of properly securing the rails and properly pouring the concrete are minimal. If you’re trying to save cost there you’re doing it half baked in my opinion. To each his own.
I was surprised to see the post going into the ground. Here in Western Washington, that would hardly last more than a couple years before rotting through.
@@JadyLester Hello from Mukilteo. 😅
U are right 100% that is the right way to make post last so rain go away
Haha...I'm like that too, actually not funny at all. I've bought certain things and they just disappear. Recently I found something I bought 10 years ago and actually still needed it.
It's probably something that he said. Like that crooked fence post, he didn't like. Fence post have feelings too but just can't walk away like tools do.
So glad to see someone mix the concrete before putting in the hole. I'm not a fan of dry mix in the hole.
Well thank you. Since putting the video out it appeared from the comments I was the only one to do it that way - I'm glad I'm not the only one!
I enjoyed this fix. My 38 year old fence is in poor shape but surprisingly only one post is broken. I think I may use your method. Interesting that you chose to nail the braces rather than screw them together.
I was wondering why you remove the old concrete. I usually make a larger whole. Hose off the dirty concrete and fill the whole with post mix that sets in 20-minutes, allowing the topsoil to be put back. Always works and job completed quickly.
he wanted to play with the drill
Hi Graham, thanks for this comment as I was wondering the exact same thing: why couldn't you brace it, get it true and then just pour some more concrete in (possibly close to ground level)? I think I am going to have a similar job on with a couple of leaning posts, I'm pretty terrible at DIY but want to give it a go.
I'm surprised you didn't bring your concrete up to at least ground level and flaunch it up to the post, They always rot where the soil meets wood. Thats why fence contractors dont concrete higher or they would have less work in the future.
Concrete above grade holds more water than this and rots posts the fastest of any method, It makes no difference if you slope it caulk it, the water get in, usually in the huge cracks that develop in the wood as it dries out and cracks this water gets in the pocket and never dries inside the pocket, also wood shrinks and post gets wobbly over time if it doesnt rot out. concrete except where soil is loamy or loose sand is just dumb anyway you slice it, compacted A gravel or simply pack the native soil back in the hole and dome the area around post and check after a year of settling to make sure water at grade still runs away. Posts rot, concrete is permanent ,another reason to just use gravel, no matter how good you do it those concrete blobs are a future liability .
Liked and subscribed. My kind of DIY and humor. Glad I found you!
Thank you - welcome aboard!
That A-Frame support worked like a charm!
Great video. Everything sounds so much more authoritative with a British accent👍
Thank you. I've been practising the accent for years!
After half watching the tattooed, “SF operator”, screaming, wildly gesticulating, some even dirty or bizarre looking TH-cam personalities, this video looks nice and professional. Thank you.
@@emilcampeanu8533 Thank you - I try!
Great video, you're a natural in front of the camera.
Thank you very much! Sometimes it doesn't feel very natural!
Awesome video Stuart. Thanks for the great tips
Thanks! Just the problem I had encountered on one of my posts
Whoever put that foundation in was a cowboy or a child. 🥴😵✌🏻
Yep. It was a 'fencing contractor' apparently (before I bought the house). I have multiple issues with the fence so they cut lots of corners!
@@ProperDIY Great channel sir very enjoyable, very well edited. I can only guess they’ve either cut corners on total concrete for the job or they just couldn’t be arsed with this one particular post or the whole thing would be wobbling. If you ever get a big auld “hit and miss” style fence leaning not as easy to access the post, we’ve dug new holes in between two posts and then fed the new post down the centre of the fence, just to cause as little disruption as possible, and to prevent digging out well set posts. Some just move over time due to many things. All good fun, as we all know nothing worse than digging fence post holes 🕳 😩👍🏻
Why not use a concrete spur post still get old concrete out dig down drop in spur and concrete then bolt spur through holes in the spur to the post much stronger and if the post is starting to rot your have no problems
Exactly. I used wooden post but attach to concrete spurs, years later as good as new. My neighbours fence 5years? Collapsing already du to rotten posts.
I'm in a new house with a new fence. I want it to look regular so I'm not so keen to see a 30m fence with one post being supported by a concrete spur.
@@ProperDIY makes sense much neater. My house is old and everything gets lost in foliage.