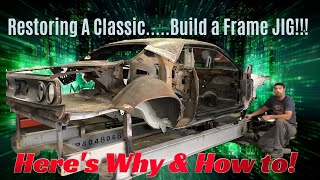
Rust Repair and Conversion using OSPHO 1973 Dodge Challenger Inner roof structure rebuild Episode 3

ฝัง
- เผยแพร่เมื่อ 16 ต.ค. 2024
- In this Video I go over how to get rid of rust without sand blasting using a wire brush and some OSPHO. I explain some of the difference's on the inner roof structure on a 1970-74 Barracuda (Cuda) and the Dodge Challenger E body cars. At the end of the video we have a good solid car to start our build and be able to add the new body panels. Stay tuned for the rest of this restoration and the assembly phase.
Thanks for watching if you like what you see and want to help support what we with putting out videos on this channel please visit our store and pick up a shirt, hat or a sticker.
carthage-class...
#mopar #challenger #rust #restoration


I really don't know how your channel isn't more well known? You do excellent work and your videos are really informative and we'll made with no manufactured nonsense. Thank you.
Thanks a lot. The whole idea when I started the channel was for those few things to be the whole idea. No extra nonsense and hopefully help some builders out there and others that just want to see what goes into building these cars.
New subscriber here. I appreciate your knowledge and ability to explain the processes. Most of all, I appreciate the lack of hype, loud background music, and drama that too often are a part of car channels. We’ll done!
Thank you very much!
This is extreme dedication to doing the job correctly !
Amazing
Thank you very much!
Thanks so much for your channel. I am bringing back a '70 Challenger and this is sooooo helpful. Appreciate your fast paced teaching approach. I am replacing roof skin, LH Quarter, filler panel, upper cowl panel, outer windshield posts. Front rails were hit so hard that I just cut them out, then found a '71 Satellite donor...whole "dog-house": front rails, inner fenders, rad support area. Daunting at first but, actually very fixable. Excellent tips on panel fitment. Inspirational. Great job.
Thank you and good luck on your build!
Your patience is immense! Kudos to you buddy!
Thank you
I have learned from your videos (Great work) I always wanted to do this.
Thank you very much, thats awesome to hear
Man what a rust bucket. And like always you do Great work!! And I love the way you go the extra mile with rust prevention! Great video, and great narration.
Thank you!
Tip about the cuda patch panels working on the challenger is genius… literally saved me days of work on my wrecked challenger inner structure
Thats great to hear glad I could help good luck with your build.
Another great video as always, thank you.
Appreciate you watching and supporting the channel!
@Carthage Classic Cars of course as someone who also makes videos I can appericate the effort you put in. Not to mention it's good inf
@@SubdivisionAuto I subscribed to your channel and will check out some of your work.
@Carthage Classic Cars very cool thanks man much appreciated. I don't release very often but either it's a video about other peoples cars (show called Between the Wheels) or its a series on the nova. That one is just getting started though I don't even have one yet. I have a couple to choose from though just have t wait for winter to go away. I am excited to get going on the nova project but my skills are far far less than yours so shouod be interesting. I predict a lot of failure and extea time but i know this can be done. Just have to do the reasearch to do it property before i do anything. Thanks for thr support
This is interesting. I have seen other videos talking about how you can't paint over the Ospho because it flakes. And from your video I now understand how to use Ospho properly. Thanks!
Thank you. I have heard similar stuff as you and did some side testing on scrap metal in the past. I also have called the makers of ospho and spoke to their technician about how to neutralize it pre paint. That was his recommendation. I also have used lead filler in the past and its also really acidic so this technique with the lacquer thinner and wax/grease remover made sense since that's what i have been using on that also.
Awesome video! Thank you for sharing your knowledge and skillset, I'll be at this stage soon with my project. Cheers!
You are welcome. Hopefully yours won't be in as bad of shape, good luck with it.
Awesome work.
Thanks for sharing, literally just posted a similar video
thank you!
@@MrFireman164 I will have to check your video out. I have seen some of your videos and enjoy them. Your attention to detail is second to none.
I hope you can do a convertible cuda project soon, the approach will be different and be very helpful for all us owning a vert.
Again great job and very informative channel.😊
Thank you and yes I hope I have an opportunity to do a convertible down the road and have some ideas what I feel would be the best way to brace them up.
Thank you for your outstanding job.. Just started watching your channel, surprisingly didn't find it sooner. By the way, FYI Ospho is basically phosphoric acid which converts iron oxide (rust) to iron phosphate state.. A very stable surface as long as moisture does not get to it.
Thanks a lot for watching and also that is some great info you added thank you!
Great video, excellent, helpful information
Thats good to hear you are welcome.
THANK YOU FOR THIS VIDEO.. I was (Was) stuck. I’ve been looking at those exact parts for my challenger, and have been hesitant to buy them!!
You are welcome. I am really happy to hear that, good luck on building your Challenger.
Interesting video. All the ones I watched so far said to neutralize using water and then blow dry. Is your process before applying epoxy specific to particular brand of epoxy primer or just about any of them out there? To me your process makes the most sense as opposed to removing the ospho altogether before epoxying.
I don't like to put water on bare metal, to me that seems to leave a whole lot of problems that can arise. I have called the manufacture and they said lacquer thinner and wax and grease remover is all you need. You need to test out the epoxy you are using as I have heard rumors with the acidity level being so high some primers not sticking but personally I have never run into that.
Nice work!
thank you!
Question for ya: the inner structure. If l you have nasty inner structure I see you wired and osphoed the outside. What do you do for the inside of the structure? It'd hard to access. Do you try to sandblast as much rust as possible out and epoxy or do the Eastwood inner frame coting route? Or other?
Yes thats one of those things you might just have to get best you can. If I could get a small blast nozzel up that area I would try that if you see the rust and like you said an inner frame coating with the long hose is about all you can do at that point.
Great video, but what do you do after 72 hours if there's a white powdery substance on the metal? Do you wipe that off with a damp rag and then wipe everything down with lacquer thinner before applying primer?
The white powder is from using a little too much. When they happens to me I will sand it all the white using red scotch Brite or 120 grit sandpaper. Then I will use the lacquer thinner to clean it up again and wax and grease remover.
I hope you're still responding to this video.
What do you do about cracks, crevices, and nooks that you can't get your hands into to sand. Can you spray the ospho into those areas, let dry thoroughly, and epoxy primer?
What do you do for those tight rusty areas you just can't get your hands in or sanding tools??
Also, many other videos recommend rinsing off the ospho. What are your thoughts on that? About 3 years ago, I sprayed ospho into very tight areas I couldn't reach under a car. I let it dry for several weeks. I then covered with epoxy primer. Then 2k painted. I'm not having any problems yet, but am I at risk for paint lift off.?
Any thoughts would help!!
Thank you for the video.
I try my best with my hands, normally now at least I will sandblast the cars so this isn't an issue. If I have one like this now I would probably get a small pot blaster and really just touch it up with that. I am not a fan of washing down ospho as I have seen it then start to flash rust, its like a constant back and forth cycle. Like in this video I like to da sand it, laquer thinner and wax grease then right to Omni mp 17X epoxy
I've always used aluminum oxide powder for blasting it won't Warp the metal and cleans extremely well I prepped all my seams with Gibbs it's a high penetrant metal prep that you just let it dry in and it will stop any rust for the future it can be easily painted over once dry. I also use Gibbs for loosening Rusty bolts and stuck engines.
Thanks for the advice ill check it out. I am always trying to learn new methods.
@@carthageclassiccars you really like that aluminum oxide media blast it leaves the metal so smooth like silk, the neat thing about Gibbs penetrating oil is it won't wash off even in a salt spray testing
great video on surface prep. that car needed alot of work and new metal. the cost involved to do that car is expensive.
thank you and yes you are 100% correct on these things are expensive to build properly
I want to add a comment about ospho. I have researched it a lot. Some paint lines like spi and also ppg don't like acid on the surface for epoxy. I went with Kirker just for this reason as it is OK with an acid prep. In fact they sell an acid wash to use before epoxy. The general manner is removal of ospho wash is wet it again after treatment with ospho and then rinse it with water. It does leave a protective layer after the rinse. Kirker rust prep is wipe it on and wipe it off with dry rag so it differs from ospho. This is from kirkers tds.
NEUTRALIZE For best results, DTM PREP should be neutralized before application of DTM primer to ensure maximum adhesion. To do this, allow DTM PREP to dry fully, then wipe with enough water or Surface Wash (600) to fully wet the surface before wiping again with a clean, dry rag. After drying completely, surface will be neutralized and ready for coating.
So similar to ospho but kirkers you wet and dry vs a water rinse.
To me the biggest issue is leaving the white film from the ospoh. I use laquer thinner after I'm done with ospho after the rinse. It removes any paint that the ospho lays on which becomes soft from the ospho. I think that is where the biggest failure is. Wetting painted surfaces and not removing the ospho immediately.
Thanks a lot for the feedback and ideas on some other parts of the processes. There were a couple things although I see your point I still don't use. Omni brand epoxy I use is PPG and I have never had an issue to this point. I know a lot of people do wash the Ospho off with water but applying water to bare metal in my eyes is something I try to avoid at all costs. I think it gives another option to rust but realize there is always a time and place for it. I have wet blasted many times with holdtight 102 an chemicals like that is mixed in with the water. This is similar to the DTM prep and understand your though on it and just think its an extra step that I have personally not needed before with Ospho use. Even with the wet blasting there are times it wants to try and flash rust even mixed properly. To me it can be an unneeded gamble.
I think why you might be having problems with the Ospho, might be going to aggressive on it and letting it dry wet and heavy on there. That's why another wash might be needed. That's what causes the white film and agree if you pack it on too hard it will lead to issues. When I use it I let it convert and work then go over it before its dry and wipe any excessive off of it. From there I let it dry 24 hours and never have any white film. The idea here is control not aggressively spraying it like I have seen a some people do.
After calling the manufacture of Ospho the recommended NOT to also add any other product to the Ospho but lacquer thinner to neutralize it. I think the "wet paint" you talk about was what I was showing with that scrap piece I showed in the video and agree that's where the failure would come from. After the thinner some wax and grease remover is just an extra insurance policy for me.
Again thank you for the ideas on how you use it, seems like you have a good process that works and maybe some of the viewers will try that out and see what they think.
I live in the Asheboro area near you.
Where do you purchase your paint products and what Epoxy do you use over bare metal on frame and body?
Also any suggestions on skim coats over bare metal or epoxy?
Presently restoring a 55 Ford pickup for the wife.
Any suggestions on a good acrylic enamel single stage paint to use.
Somewhere years ago I use an enamel metallic paint that had some type of clear in it that raised to the top.
Have you ever seen this and if so what brands?
Thanks again for some great videos.
Will maybe come by one day to say hello.
Richard in Asheboro
Richard, I purchase my paint products from Singlesource in Fayetteville if you call them ask for Chris he will set you straight on all your PPG paint questions. Epoxy MP17(X) series is what I use for epoxy. Skim coats as far as filler? check out a bodywork 101 video I did on a 71 Cuda it should help answer all those questions. Even the lead video as the base video on that same car shows how I take cars to bare metal then epoxy and go from there. Also as far as acrylic enamel, I am a basecoat clearcoat person, I think with all the work it takes into painting this stuff base/clear is the way to go and why most point shops sell more of that then anything else. Also yea let me know if your in the area good luck on the 55 Ford build.
Thanks for the great demo on the rust conversion. I use rustmort, ever use it?
You are welcome and I have not used rustmort before. Curious after looking it up have you used it? What did you think?
I use it to convert the rust (iron oxide) to iron phosphate. It turns black. Follow the directions and I’ve hade great results, but I’m only a home car restorer. Not as much experience as you.
Great video. Couple questions.
Did you protect the patch panel back sides before you welded them in? If the weld etch primer is grey is hard to notice.
Do you remove/sand away the weldable primer before you cover with worked areas with epoxy primer? My understanding is that you can't paint epoxy over the acid base etch p[rimers.
Just wipe down the OSPHO with lacquer thinner over the OSPHO and you are good to go? Any degreaser?
I will be checking out more videos for sure. Thanks for a great channel.
Yes I put weld through primer on the back of the patches. it is hard to notice being grey. With epoxy I spray directly over weld through primer. Would it be better to put epoxy down on bare metal but honestly not cost effective at all for me and I don't think it matters as much. Most epoxy WILL cover over acid base etch, however 2K primers and filler won't work as well. I usually wipe down OSPHO with laquer thinner first then go back over with wax/ grease remover
I also use ospho occasionally but usually neutralize with water. Your way might be more effective. What epoxy primer are you using that sticks good to the ospho. Thanks
You're welcome. I am using the Omni MP17(x) there are 3 versions I think MP170 MP172 MP175 the only difference is color.
Great video, What do you think about dipping a car. Strip paint rust and neutralize. Is there any downside to doing that. I think that could neutralize the rust in all the cavities. But what about the pinchweld area Would you be able to neutralize Between the pinchweld. And then there's the cost of dipping. Looking forward to the next Video Installing the frame rails, Interfenders And core support Thanks keep the videos coming
I think dipping is a great option, but you are right it is just expensive. Also I think if you dipped the car like you said there is no way to cover everywhere again and will be left with bare metal hidden away. With these cars they probably won't see as much road time but still stinks after all that to think there are bare metal spots exposed.
Once again awesome video. Had a question and wondered how you would go about it. I have a 71 barracuda and I need to install the aftermarket fender gills. How would you go about that? Cut and butt? Or ??
There is a few options all depending on tools on hand and skill level. Personally I like to TIG butt weld something like that and hammer/dolly it back straight. TIG is a softer weld where if you MIG butt weld it sometimes if you grind too much it can break the weld because the welded area is hard and brittle or you just can't metal finish it as nice with the heat used. Second is overlap with a flange tool and weld the small gap. It won't warp as much and sometimes i have even seen where you can put a few holes on the back, plug weld it even stronger. When you grind it will allow the weld to be flush and strongest. Last but kind of similar is get a eastwood perfect panel prep butt tool. It will slightly curve the ends of the panel inward where you aren't over lapping but have a low area for your weld to adhere the panels, grind smooth and still have a strong weld. Good luck with your installation and Thank you!
Sorry if i missed it in the video, but why did you bother with Ospho instead of media blast? I ask that because in your other videos you do blasting right on your property.
Yes that is a great question, I do a setup fee and blast by the hour. This car the owner figured it would be more efficient to strip this area chemically with wire brush vs blasting again. Usually I catch the damage before hand but it took some really deep looking to see the signs of it or the roof would have been pulled prior to blasting.
How did you apply the weld thru primer and what type / brand you use?
Applied directly to bare metal in a paint can and the brand i usually use is Seymour 20-1675
Great work, I need those drip rail frame parts, my passenger side is worse but sure would like to get those parts. Can you give me those part numbers maybe as they’re not listed. And maybe by now the challenger is available?? Idk. Great work again always learn so much from your work!
Thank you and the part number for the 70-74 Challenger AMD drip rails is 620-2570-S
I have the drip rails, I was referring to the frame parts you modified to fit the challenger thanks
Inner structure sorry I didn’t completely clarify. I did happen to find a donor challenger to get a passenger side inner structure and have some metal I can work with but if that forward inner piece fits both challenger and Cuda that will save me some time for sure. Glad you posted this vid, exactly what I’m working on now thanks again
I found the part number to the outer sail panel connector structure. 610-1570-3L & R
And the strait piece over the window is 610-1570-6L & R
@@skipsims2384 Yes all the parts I used were part of the 71-74 Barracuda inner roof structure part series numbers 610-1570. Good luck with your build.
Thanks
What MIG wire and settings work for
So there are so many factors that go into play unless you had the exact same welder, wire thickness and changes on where i weld on the car. This is something you are going to have to go on the inside of your MIG and look at the manufacture recommendations that will get you close.
Did you epoxy windshield channels? Do you sand epoxy before windshield is installed. Or you paint the epoxy 1st then install?
Just to clarify as I am not 100% sure the question, but I do epoxy the windshield ledge. This car will be 100% painted before the windshield is installed. It will be prepped like the rest of the car with epoxy, base/ clear and then if needed usually scuffed before the windshield sealant goes in.
I was thinking Ospho rust treatment then Epoxy or Tamco Dtm HP5310 ? then Urethane primer?But you paint and clear then rough up edge ok sounds good to me. ty@@carthageclassiccars
@@Supanova70 so with the HP5310 DTM make sure it holds with a ospho acidic base. I know the epoxy I use doesn't have an issue. You are correct with the urethane primers and all that I mean base clear as a general statement as everything you would normally do to the exterior body do that same process to the windshield channel.
Okay great i will epoxy channels tape off then 5310 the rest. @@carthageclassiccars
How long do you leave the ospho on before you wipe with the wax and grease remover ?
I leave it for 24 hours before I wipe it down with wax and grease remover just before I prime it with epoxy.
@@carthageclassiccars cool thanks, do,you have any videos where your testing your primer adhesion?
@@johnmartin5153 no I do not but check out mrfireman I think on TH-cam he is building a 69 Camaro and I think I saw he did an adhesion test with primers.
What weld through primer dud you use?
I use Seymour 20-1675
Do you have any videos on installing quarter skins?
Not yet on this car. I have a video doing some quarters on a Barracuda in a past episode on my channel. I will be installing these quarters on this car in hopefully a month or two on video when the parts arrive. There was a few parts holding up the entire parts order on this car that caused a delay.
@@carthageclassiccars Thanks for the reply. I enjoy watching your videos, they've taught me a lot. I started the process to replace under rear seat pan, DS front & rear floor pan, trunk pan/extensions, quarter skins, and possibly inner and outer wheelhouse's. I appreciate your videos.
@@robertsebastain981 Sounds like a great project good luck with your build and I am glad the videos helped you, thanks for watching them.
H i what is your thoughts on acid dipping a car on can thy dip a car with it tore down like this.
I think acid dipping is expensive but has its place. The downside is you now have bare metal on places you can't get primer back into
When ever I use Ospho I let it sit over night and it turns into a slimy goo. What am I suppose to do with that?
Why is there not a follow these directions with this stuff ?
I think you are using it too heavy and leaving too much to sit overnight. When I come back after 24 hours there is nothing left some lacquer thinner can't wipe off. Also OSPHO has so many uses almost like WD-40 in the sense they can't give directions for everything.
Surprised you're not wearing a respirator with all that rust dust & grinder dust in the air. You're killing your lungs man!
You are 100% correct the older I get the more conscience I try to become of this and try to have safer practices
@@carthageclassiccars yeah I hate to be that "safety Nazi" but that rust dust is nasty stuff. I quit smoking 15 years ago after 25 years of it and my lungs are about the only thing that is not messed up in me...
OSPHO needs too make a GEL formula of this stuff in my opinion!
I never thought of that but that would work a lot better in this kind of application 100% agree with you they should.
Commented liked subscribed rang your notification bell?
Thank you very much!