ไม่สามารถเล่นวิดีโอนี้
ขออภัยในความไม่สะดวก
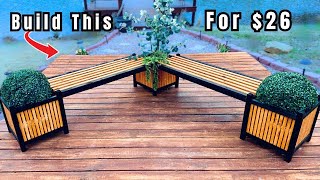
4x4 Post Planter! HUGE PROFIT.

ฝัง
- เผยแพร่เมื่อ 16 ก.พ. 2024
- Please like and share this video to support my channel!
FREE Plans!
freeimage.host...
the pole planter is a larger version of the three picket planter plus a few extra boards in the center. this build requires a 4x4, either 6' or 8' long. a 2x4 and 6 pickets.
first I rip two pickets to 1 and three quarters. we wont be using all six stripes but I can always use them for mess-ups or boards that have nasty spots. cut eight pieces to 16" tall for the legs.
for the sides and bottom, stack two pickets, cut twice at 23" long, and once at 21-3/4". grab two more pickets and cut them down to 23-3/4" as well. i didnt stack mine cause im not so good at the mathssss. you will end up with eight 23-3/4" pieces, and four 24" pieces. and the legs we cut moments before.
its been a while guys....ohhhh Nail counterrrr! you guys can take a guess as to how many nails (excluding screws) this build will take. I havnt made one of these since last year, my guess is 95 nails. 80 for the three picket box, and I have 100 in the chamber. lets go!
before we start chopping up the 4x4 we are going to construct the shell of the planter box. take two of the 24 inch sides, run some glue down the sides; im using titebond 3, their only water proof exterior glue. fire in three nails into each board.
then, tip it up onto its end, run a line of glue, line up another leg and nail it into place. then repeat for the other side.
and thennnnn, repeat for the otherr side!
balance your two sides like this, apply some glue to the inside lip of the leg and nail in the two shorter 22 3/4" sides.
and repeat for the adjacent side.
for the bottoms, i line them up flush with the inside. i do mot glue them, most of it leaks out and it looks terrible when it dries. nail the two outer pieces into place, then one of the center boards. the last center board may need to be ripped down to size. then, rip it into place.
to hold up our 4x4 post, we need to cut two pieces of 2x4 to run along the bottom of our shell. I measure and cut my 2x4s to run perpendicular to the bottom boards of my box. this way I can nail into them from underneath and strengthen the overall bottom.
my 2x4s measured 22 in on the DOT. so I cut two pieces of those.
now that we have a completed shell, we need to measure and rip two pieces of 2x4 to your inside measurement, they should be 22-3/4 inches. but if your boards are bowed it may be a bit larger.


![[UNCUT] The Loyal Pin ปิ่นภักดิ์ EP.3 (2/4)](http://i.ytimg.com/vi/vLS9roCy_xY/mqdefault.jpg)


![[UNCUT] ชาวบ้านถาม “นายกอุ๊งอิ๊งค์” ประชาชนมีกิน มีใช้ กี่โมง? I คนดังนั่งเคลียร์ I 16 ส.ค. 67](http://i.ytimg.com/vi/tKZvOzLIJJc/mqdefault.jpg)

I just need to say I appreciate that you are so willing to share your plans! I’m just a hobby woodworker, but you’re giving out plans that make you $$$ at will and I really believe that is at the heart of being a maker. If we all wanted to make a living off of this we could share the market; but not every maker will just share like you do. Love your stuff!
Thanks buddy! I hate how other youtubers hide their measurements and make the viewer pay for the plans. Won't ever see that here buddy. :) Happy building!
And that's why your channel is great❤
Ed Sheeran is a good carpenter too 😅
Is very much appreciated! Thank you!
I am so glad I found you! I am a retired nurse just starting out woodworking. I love your quirky silliness but mostly, I love that your video’s are so easy to follow and the free plans are excellent! Can’t wait to build so many of the things you have shared! Thank you so much!
Thanks Linda! :) Happy building!
You are pure sunshine, dear boy! I'm so glad I found your channel! You not only educate this grandmother, but make me always smile!😂❤
And this comment made me smile! Im glad I can help people get out to their shops and build something fun :)
Made one of these for a Mother's Day present using pre-stained fence pickets instead of cedar and a reclaimed pallet skid 4x4 and it turned out great! The post had some dinged up corners and cracks I cut it down to 5' so I ran it through the table saw to 45' the corners to give it a cleaner look, then gave it a light coat of stain to blend everything together. The whole project turned out great and she absolutely loved it! Thank you for posting a video that was so easy to follow!
Great job buddy! I like it :)
Thanks for all your kindness and help here and in the forum on FB
No problem buddy! Happy building!
Dude, thanks for making these, they are giving me some good stuff to try out with my tools as I get started
I want to discuss something you mentioned which was that the cedar boxes aren't going to net you any profit. You should be charging for you time and experience when you make these. Don't take a loss or count not getting anything as breaking even. You put in work in both learning how to make, sell and teach others how to make these items.
Heck yeah buddy :)
You said you changed it from 24in to 23, so you didn't have a weird piece in the bottom. From a gardening perspective I would leave it at 24in and then space the boards out evenly with a small space in between so that it would allow for water drainage for the plants. It would also help it hold up better in the long run.
Good idea buddy :)
Precisely. Not need to drill 3 little holes vs. 24" across 3 boards.
I made a couple of these years ago for the wife, I used some cement at the bottom to hold up the metal lattice. Lined it had drain holes mind you. But I planted grapes in them and ran the vines up top and over. I like your design I may make a couple more like yours for some lights on our non existing patio that will be built this summer. Thanks for the idea.
Sounds like a fun build buddy :)
Your planter designs are so simple, efficient, and aesthetically pleasing it's no wonder they're profitable and inspired you to keep running with the idea in a variety of ways! I churned out a few of the small ones yesterday, doing a couple of the longer ones tomorrow, might have to give this one a go in the near future. Thanks so much for the super helpful vids and FREE guides! Can't wait to see what other awesome builds you come up with :) O and maybe find a royalty-free/non-copyrighted tune to throw on in the background during those silent bits?!
Thanks! Im still figuring out the royalty free music, everyone Ive tried ends up being copyrighted, and the youtube algorithm doesnt like those as much :/ Ill keep working on it though! ;) thanks buddy
Really love this design. You should build a half planter half table. Make it skinny/narrow. That way we can have it beside our furniture and can add the mosquito bushes to help keep mosquitos at bay and can set our cold alcoholic drinks onto.
Thats like a swiss army knife of planter boxes! Great idea!
I really enjoy listening and watching your plans. Well done!
Thanks buddy :)
You would be amazed at the strength of the cedar boards. I took a similar planter and put scrap wood under the bottom boards, thin strip to support using glue and brad nails, I put a black contractor bag in it and used about 60lbs of concrete to support a 4x4. and for over a year now it has held up. I have 4 of them like that we have around our patio and have string lights on them. also in the summer time we hang humming bird feeders on them. very nice and relaxing.
Whoa! Never expected them to hold that much weight :P although I have stood inside several of the boxes Ive made without any issues :)
Just made this today and holy cow was that fun and simple! I’ll be converting the post to hold a mailbox, can’t thank you enough for posting this.
I have a video on making a few mailbox posts for this too, check it out :)
The bottom of the planter seems a bit under supported with just 18 gage nails. I think I'll add a support somehow, because it will likely be moved around. Possibly a trianglular nailer in the bottom corners. Thanks for everything! Great music ( vocals) too! 😊😊
Oh, I see, the cross boards add additional nailing. Spoke too soon! Lol
I also stand inside the box in the beginning ;) no worries buddy!
I have previously made a similar type of planter with a post in the middle. I cut a hole in the bottom and let the post run through to the ground so that the box didn't actually have to support the weight of anything on it, it just kept it straight
Nice concept. The central post is good enough to hold a light or not tightened string lights. The base of the post is not good at taking bending moment caused by the horizontal force at the top of the post, though. If you want it to hold a larger load, suggest to add cross shape supports near the top level of the planter to give horizontal support to the post at both directions.
I'm about to close on my new house with a recently poured slab in the backyard for a patio. I knew I wanted to figure out a way to utilize the space more efficiently since I like to grow as many fruits and veggies that will comfortably fit, and you can't grow much in concrete lol. I can use these to build a pergola and plant my vines (loofah, cucumber, grapes, etc.) to grow up the posts and across the top!
I like it! Happy building, and happy planting! :)
I really appreciate you giving out the plans for free. I really want.to make these! Im hoping to post a video here soon where I build some garage cabinets and I plan to give out the measurements for free. I agree I don’t care for a lot of the TH-camrs that hide their measurements. Great video!
Sweet! I'm sure they will also appreciate the free plans :)
I’ve built one “Three Picket Planter” a while ago. Unfortunately I built it upside down. Not quite sure haw I accomplished that but I did. I stopped with one. Guess I lost interest. I’m sure my wife will love these. Thank you so much for your video. You have inspired me to build these again. Much better, simpler and yet more elegant with the post. You earned a sub for all that!
Woohoo!! :) ive got a one picket planter build too if you want to start out "small" :)
Supposed to warm up this coming week, hopefully I can take my table saw off the wall and have a little fun soon! Nice work Mr. Voss!
Thanks Wayne!
I really like your purely genius design and build product for your customers!
I like how you give your client's a few options, too! I am a new subscriber, and I am looking orward to your next video!
Well done, Sir!
Woohoo! Welcome to the community buddy :)
Man, I was totally off. The bottom is deceptively strong. Thanks for sharing
It let me stand inside it for a solid 15 minutes when I recorded the singing part ;) lol, the ones I made last year are still holding up just fine
I really like this. I reckon the wife will like a few for string lights in the back yard 😊
They make an almost enclosed loop L-bracket just for hanging lights too :)
I'm soooo glad I've found you, I'm bout to start making these for me and mom's yard
Nice! I bet they will turn our lookin good!
Another fun and informative video ! I always appreciate your videos, Thanks !!
Thanks buddy :)
It’s been a while. I built a planter box for myself. I moved like 5 years ago and left it in the yard. I drove by the other day and it was still there. Looked pretty much the same except the color. LOL.
I really like the idea of building about four of these and using them to string lights. Then maybe see if there’s a market for them.
Ugh. I just need to make myself some… and make some to sell. Build time is so much faster when you batch out.
That's awesome! :)
Thank you for sharing this!
Anytime buddy! Happy building!
This was thoroughly enjoyable to watch. Just subscribed. My 4 year old son and I watched together and he laughed out loud at the sailing part 🙂
Hes a Moana fan huh? 😂😂 Its good to get some giggles out of ya!
Just came across your awesome videos. Gave everything the thumbs up and subscribed! It is awesome you provide everything to do these projects at home and paired with your videos, it’s almost foolproof! Got a heated 42 x 24 garage and your plans could provide the perfect winter projects to sell every spring. Thanks!
Thats a big space to play! Thanks buddy :)
This is an awesome build. Thought about something like this last year but wasn't sure it would remain upright.' I guess the weight in the box would surely help. Think I'll make a couple of these soon and see how they go, thank you
Sure thing buddy :)
Great job and project thx for sharing enjoyed it Keep building
Thanks Larry! :)
I just found you tonight and I love it. I have watched a couple of your videos and will; watch more. Ya got me. I just subscribed!
Thanks Randy :)
Your videos are always a treat to watch and your generosity to share the plans is commendable. One question about nails - do you think those bottoms will hold just on side nails & no glue, once dirt is put in and it is watered? I am wondering if some more fortification is warranted. Thanks and keep sharing more videos.
First couple seconds you can see me standing inside the box, with the bottom screws going into the board and the nails they hold up beautifully :)
YOU ARE AWESOME!!! So funny and informative at the same time! I LOVE your videos. I have learned so much and am getting courage to start building and selling. THANK YOU 😁
Whoohoo! Glad I can get people out in their shops :) happy building!!
You’re a great instructor 🤙🏼 thank you!
Thanks buddy :)
I just had someone ask me how to put the post in a planter box! Perfect timing
The website I use to tap into peoples cellular microphones is paying for itself at this point! Kidding ;) sounds like good timing though, and its easy to do
Your the man, watching and building out of pickets is the bomb I have been building as fast as I can go the past 4 weeks I found a place getting my pickets for 2 bucks each I know it is fixing to slow down but iam in Georgia may run a little while longer
Nice! Happy building buddy :)
Nail count at the big box was 1.4M LOL Love it! Great video!
😂😂
I love this thing, I have enough reclaimed lumber for 6 of them, my only deviation is a cleat for the bottom.
Thanks for what you've done.
Nice! Reclaimed would add a nice rustic feel
Thank You Brother! Love Your Videos. !
😂 thanks buddy!! :)
Brother.. you rock. Love how you make it simple and sharing your plans. Keep it up.. please..i need to make some money😅😅
Those orders will be pouring in, give it two weeks ;)
Binge watching
That's the spirit! :)
The 4 x 4 post should go thru to tbe ground which will distribute the wait better. I also believe a water proof glue would work much better than all those nails.
The design is a winner and i believe well sell.
Thanks buddy
Thank you for the free plans. Also add some soft music as background noise when you are not narrating. Great job.
Thanks buddy :)
great video, easy to follow and make.
Thanks buddy :)
I've made these planter boxes for my house which are filled with dirt and have Palm trees planted I also put caster wheels under them for easy moving
Sweet! Cool caster idea :)
That would definitely sell to the yuppies . They love their string lights by the pool. I see them at every house that has one and many without a pool.
Ohhhhhh they sure do. Lol :)
Great job on that build👍very informative and detailed. You got yourself a new sub. I'm definitely going to build a few of these. Thank you for the free plans too.
Woohoo! Welcome to the community!
You are the best. Just got into woodworking the past two month and I’ve already built 6 different planters! Thanks!
Heck yeah buddy!! Way to go!
Bro, I'm selling your 3 picket planters on Marketplace and, if orders keep coming in like they have for the last day and a half, I'm going to have to either quit my job or hire on some help! I can't build them fast enough.
High five to that buddy!
Just curious, how much are you selling the 3 picket planters for?
@@terrybreland5217 $30 each and so far everyone is buying them in pairs. I also build a bench similar to the one he recently did a video on and I sell those for $75. If someone buys the 3 piece set I give them a small break and do all three for $120. I've had several orders for all three, probably because I staged them together in my photos.
These would be wonderful for hanging string patio lights. Does there need to be any type of finish like Thompson water seal to persevere the look? Thanks, can't wait to build these.
Cedar pickets will lose their reddish brown tint within 1/1.5 years. You can put a UV protectant such as a Thompson's water seal on them to preserve the red color :)
Thanks!
Thanks Richard! 😎
Very nicely done. Thank you for sharing your video. My guess was 125.
125 for real??! Good job buddy :)
Ok another question or two 😂 when using cedar do you use cedar down in the box as well. 2nd when using other with Thompson sealer do you ever get a question or concern on the sealer part especially with vegetables users ? Hey I appreciate your time and effort and give you thanks again
I use cedar inside the box, never been questioned about the water seal, most people dont want it so the box looks aged next season
Great content and channel...
Better content, fresh ingredients, WhosTheVoss. ;)
👍 Yup, building this one too.
I like the size of the box as well, more room for the roots
@@WhosTheVoss Absolutely, more plants too.
Ever considered taking a 4x4 and wrapping it with cedar pickets?
The seems would surely split apart and not look so good the following year, but give it a shot :)
1:38 - 87 - Nice to see you again Nail Counter!
Its been a freakin while! :P
Love the idea but they’re gonna rot out in a year or two. I’d either line the inside to protect the wood or use pt on the bottom at least
I like it :)
Just one design question for the planter and I'm wondering if you've tested it for the support of the bottom pieces with soil. Are the brad nails enough to hold everything in place. I love the idea with hanging lights at the top its a nice design for a deck.
At the beginning of the video Im standing inside the box, been making them for two years without any blowouts or complaints :) bang some out for the deck buddy! :)
Look at that you are too I totally overlooked that. Awesome can't wait to get at them thanks for this and the plans love your work.@@WhosTheVoss
i really like this idea - i'm planning on building a free little library BUT don't think i can put it in the ground.
Perfect solution! Ive had people buy these to mount flags, and I use one as a "pickup here" sign so people know where to come get their boxes
@@WhosTheVoss really appreciate the walk through and being so entertaining! Thank you!
*Edit....
I see it now in the video notes. I also see I can send you money through TH-cam, but they take a big cut IMO. Id love to see a crypto tip option or something less fee laden.
Sorry if you said this. Are these cedar fence pickets? Thanks for the plans. You rock. Also, i would gladly pay for them, you should figure out a value for value voluntary way for folks to chip in.
Ive always gotten full-face value for the Super Chats people have sent me. :) they are cedar pickets, I dislike the look of treated boards. Happy building!
Hey, quick question do you let your fence pickets dry out or do you use them right away?
To avoid shrinkage
Thanks for sharing your designs
I stack them up in the garage so they are out of the elements, and can dry. I don't have any issues with shrinking :)
How do the nails hold up long term? Thank you for the amazing videos. I hope you do more soon.
My wife has been reusing the boxes i built two years ago, in the video coming out this saturday, I answer a ton of questions and show off the original boxes so you can see how they sun fade and hold up :)
❤love it how much should we charge for this and where do we get the plans from
Click "more" under the video, plans are listed in the description :) I charged $100 last year. Thats based off of my market, household income and demographic. See shat other sellers are asking for their boxes and set your price :)
Save it for Nashville 😅😂😂😅 nice project 👍
😂😂
OMG when ya busted a musical theatre song... I subscribed. Weird hu?
🤣🤣 there is a musical number in every video ;)
i'd make a hollow 4x4 out of the same fence slats
There ya go! :)
Did you also use the fence picket for the top
The top lip? Yes, its the same 1-3/4" piece I ripped down for the legs :)
Another awesome video. Question: would the pine used to hold the post start to rot/decay in the soil? I’m a novice so I’m genuinely curious
Should last at least 3-4 years, by then the cedar box will turn from its reddish tint to grey, you can swap the inside 2x4 for a treated piece for better protection, but 3-4 seasons for even $100 (selling price) outlives any big box store purchased planter box :)
Thanks for the response. Love your work, man@@WhosTheVoss
Any reason not to use a 2 x 4 instead of the 4 x 4 for the post. Only will use for solar rope lights and maybe two hanging baskets . I was going to do picket planters with 5 gallon buckets and the post in cement in the bucket but not I like this so much more.
2x4 is more liable to twist or bend than the 4x4, especially being vertical and freestanding. :)
To help with twist you can lam two 2x4s together with titebond 3 and coated deck screws, this is also a great way to make legs for work benches and such. Since the grain is essentially completely isolated on each side, it really helps for splits and warping
Hey, I love your work and I am having great success with the boxes.
I just had a customer send me a video of this box where the bottom section fell out of the box.
Have you seen that?
Any thoughts?
I am thinking might be an idea to add an extra strip inside the corner and screw it in, through the leg?
All of my bottoms have held the past two years of building them for others, if you want you can add that strip underneath like in the long planter/raised garden bed video for support :)
@@WhosTheVoss customer told me he added about 200lbs of sand to each box.
I suspect that was the issue.
I will be going to pick up the boxes and add some additional support.
I thank you so much for all these videos.
Love doing this!!!!
How do you deal with the cuping on the cedar pickets, I can't find any that are nice and straight. Thanks
I go to Lowes, head for the Pro Desk and ask them to shoe you the pickets in their Flex or Bullpen. Thats where they usually keep skids of pickets they use for deliveries or other contractors. Usually their shelf stock has been picked over 6000 times. :)
Is there anything other than time and effort stopping me from hand hammering this together?
Not really, should work out pretty good :) let me know!
How are you getting the planter to stay together? The cedar fence pickets I can get here in PA are almost like Styrofoam. They are not dense enough to hold on the the nails. The one planter I built looked good but completely disintegrated when I tried to put any weight on it. Maybe I'm doing something wrong.
The pickets I get are pretty strong, sorry you're having that issue!
Do you have a vid/plan set to make this a mailbox holder?
It was going to be this weeks video, but I didnt have the plans ready. It IS COMING this Sunday :)
How well are the raw 2X4's holding up with soaking up all that moisture?
Three summers, two winters so far :)
Loving the channel. Just found it today. Can you please tell me if you’re using cedar or pressure treated? Hard to tell on my phone screen.
They are cedar, i cover the differences in using either for the posts, but I rarely use pressure treated
About how much are the materials? just curious. Im new to woodworking and this may be my first project
Depends on how much your pickets cost, but for me the cost was below $40 to build it, in my "Boost Your Planter Box Sales" video I cover all the costs and profits for each of my boxes :)
You should put a vanilla plant in it
That would smell superb!
@@WhosTheVosshave you thought of building a planter with trellis I’d like to see what design you come up with.
Why can't i find any plans?
I don't see a more button anywhere?
Its next to the view count under the video :) the link is also in the top pinned comment
How thick are the boards? All of the picket boards I can find are half inch or less. Do you ever have any customers complain about the bottom falling out? It looks like the bottom wouldn't be able to take much weight, with or without the post.
I stood inside the box for the singing clip, took a solid 15 minutes to shoot :P been making these for two years now and the ones we use have held up beautifully :) no complaints
Pickets are 1/2" - 5/8" thick normally :)
@WhosTheVoss I thought both of your feet were on the top corner the first time I watched it. I just found your videos a couple of months ago and I like every video I've seen. Thanks for not just the videos but how you make them and for the plans. Thank you for answering my questions.
That looks like a pain in the ass to ship!! 😅
Ohh yeah, USPS are getting quite upset :P
Questions. Do you buy the green pickets or kiln dried? If green, how do you deal with shrinkage?
I rarely work with treated lumber, mostly i use cedar or water sealed yellow wood :)
@WhosTheVoss by green I don't mean treated. When I buy cedar pickets from lowes, I can get kiln dried (more expensive)or not kiln dried (cheaper), aka green. When building with the non kiln dried pickets, they are shrinking after building, leaving gaps between the boards. I brought them inside to dry a little, but I am still having issues with shrinkage. Thoughts?
They offer kiln dried! Pinkies out! If you arnt going kiln dried the temp/humidity change from the store to your shop to outside will cause gaps. If kiln dried isnt an arm and a leg more id go with that :)
Hey do you have a list of the tools you use? I want get the speed square you’re using.
The black one is a Doyle cheapy I picked up at Harbor Frieght, the silver one is a Swanson I bought from Lowes anddddddddd the teeny tiny baby adorable one is from Lee Valley. Its 1-1/2". Lol :)
How much would you charge for that.
Im charging $120 for the pine 4x4
Thanks for the video. After watching it my granddaughter was talking about here wedding plans in September and she said she wanted a large cross, I suggested using the post in the planter as a cross. She loves the idea and I started today. Thanks for all your videos I really enjoy them. I plan on making lots of planters to help pay for trip to the wedding..
Help... I'm kind of technically challenged.. how do I get free plans.. thx so much
Click "more" under the video and its listed near the top :) happy building!
freeimage.host/i/JEMawil
16:24 planter box with a 4x4 in the middle
👍
How many ceader planks do u need for the project 😊
Six :)
the MOANA singing lmao. great content lmao.
🤣🤣
if you wanted to use screws as a second method of support, what would you recommend??
TRK's
1.4m nails is outta my budget...
Nice catch ;) lol
Great job how much do they sell for
I have them listed for $100, pine 4x4. Selling pretty good
What kinda vacuum system does your table saw have? Mine shoots up way too much dust 😢
I only have a craftsman shop vacuum attached, i see a world of difference even with only the vacuum. This next month I'm upgrading my dust collection system (on a super budget), all powered from my little Craftsman Vacuum:) should hit TH-cam in about a month
Wow…. Something def wrong with mine. I have a ridgid and made it to sit on my work table. Hooked up to my vacuum. But every time I run a board through it, it’s like a saw dust blizzard right into my face. Maybe dull blade?
Thanks again
I've tried the planters.....they don't sell here....I still have leftovers from last year.
Ouchy, could be a saturated market or simply location. Do you have them listed on any market/selling websites?
@@WhosTheVoss Yes I had them on Facebook marketplace.......at the time there were no others in our area selling them.
So, no hate but... you expect the bottom to hold dirt for more than a month?
There's a 220 pound man standing inside the box at the start of the video, anddddd the ones on my patio from 2021 are doing just fine :)
No way I’d do the bottoms this way. Imagine the weight of wet dirt sitting in there for days on end. It would have been much stronger to run a one inch strip and glue it around the bottom then nail to that. A silicone glue brush would have made easy work of that. Imagine the force that this is going to see trying to twist it in a storm. It’s a no for me dog….
I agree with ya. I can see the bottom collapsing after a season or two with expansion/contraction. One solution would be to drive screws in from the outside all the way around the bottom and then cover the screw heads up with some of the extra 1 11/16" pieces that were ripped at the beginning.
Another option, build an interior bottom frame from 2x2's and add short 2x2 legs in the corners to transfer the weight to the ground.
Been making these for two years, now three winters with no issues or complaints, I also stood inside the box for 15 minutes while shooting the singing scene, add a 1" strip if it helps you sleep at night buddy :) Happy building!
I can't really picture what you mean. Could you post the video of the boxes you make so I can see what you're referring to?
The pieces holding the post vertical are screwed into the sides and bottoms, stiffening it up nicely
Was thinking the exact same.
Why did you remove the sound when using the nail gun?
🤷♀️🤷♀️ sometimes I mute it, sometimes I turn it down
@@WhosTheVoss but it's the best part of the whole video
Ok thanks
👍
how do I get the free plans
Plans are in the description: click on "more" under the video, then click "more" to expand the description". Any plans I provide will be listed there :)
i cant find cedar pickets anywhere near me
Dang A-a ron! Id ask the Pro Desk at Lowes or Home Depot, usually they have a separate stash for deliveries and contractors
Download for plans not working for me
freeimage.host/i/JEMawil
Give it another try buddy :)