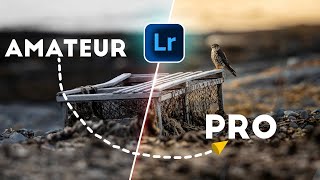
8 CRAZY LIGHTROOM HACKS TO CHANGE HOW YOU PROCESS IMAGES FOREVER!
ฝัง
- เผยแพร่เมื่อ 14 ต.ค. 2023
- Sign up for my email list and get a free e-book on How to Shoot Backlit.
www.simondentremont.com/freeb...
Want to take amazing wildlife photos? Check out my new course with 20 modules and over 5 hours of content, no fluff!
journalofwildlifephotography....
My name is Simon d'Entremont and I'm a professional wildlife and nature photographer from Eastern Canada. This video will reveal many of the "Rules" of photography, and when you should break them!
I use Topaz Labs software for noise reduction, sharpening and upscaling:
topazlabs.com/ref/1943/Simon/...
Music in intro: "Nicer", by Houses on the Hill. Find that, and other sound effects at Epidemic Sounds
share.epidemicsound.com/0fbndn
My equipment:
Canon R5 body amzn.to/3S5jtBf
Canon R6 body amzn.to/3ZYu6HC
Canon R8 body amzn.to/3M0Xoj7
Canon R5 battery grip amzn.to/3PVg8Sy
Canon RF 600mm f4 amzn.to/494Zd8S
Canon 100-400 EF II amzn.to/3FhWrPP
Canon RF 70-200 f2.8 amzn.to/45zDP8F
Canon 17-40 L lens amzn.to/3y71MGt
Canon RF 16mm f2.8 amzn.to/3M3i0HI
FLM Tripod (CP 34 L4 II) and Levelling Head (HB 75) www.flmcanada.com?aff=sdentrem
Sigma Art 50mm f1.4 lens amzn.to/3FjGkkW
Sigma Art 20mm f1.4 lens amzn.to/3Fhj7zD
Rokinon 135mm f2 lens amzn.to/3QfqIFi
Sirui x-k40 ball head amzn.to/3rRzIHf
Sirui lightweight Traveler 7C tripod with head amzn.to/3M0XDe1
Manfrotto Video Head amzn.to/3tpUzBO
Wimberley Gimbal Head amzn.to/3rSijhC
Hollyland Mars M1 field monitor amzn.to/3rQCRaa
Jackery portable 240 lithium-ion battery amzn.to/3QgBmvg
ProGrade Gold 128 GB CF Express amzn.to/46wv40g
ProGrade Cobalt 325 GB CF Express amzn.to/3RSUtNo
ProGrade Gold 256 GB SD amzn.to/48R3CMq
Zoom H1n field recorder amzn.to/3tAoJCE
Comica shotgun mic amzn.to/3REWN73
Rode Videomic NTG shotgun mic amzn.to/3tCeAW8
Rode Wireless GO II mic set amzn.to/45vsIxw
Lenscoat neoprene camera bags amzn.to/3SNiqmz
Lencoat rain cover for 500mm F4 amzn.to/3SGtyl2
Falconeyes F7 LCD panel amzn.to/3y75z6F
Lowepro 450 AW large backpack amzn.to/3xZOHyL
Lowepro Flipside 300 small backpack amzn.to/3SOTWt7
Mindshift 36L (closest available) backpack amzn.to/3ZXIiAH
DJI Mavic Air 2S drone (flymore combo) amzn.to/3M3ijSS
B&W circular polarizer, 77mm amzn.to/3SKc6Mx
B&W 2 stop ND Filter amzn.to/3URyIN6
B&W 6 stop ND filter amzn.to/3y6gs8G
B&W 10 stop ND filter amzn.to/3fwRIjs
Nikon Monarch 5 8x42 binoculars amzn.to/3rXt2qX
Blackrapid retro-classic shoulder strap amzn.to/3y0wUHt
FjallRaven trekking pants amzn.to/3rSisSc
Heat 3 gloves (shell only) www.theheatcompany.com/en-us/...
Heat Company Merino Wool liners www.theheatcompany.com/en-us/...
HP Omen 17.3" performance laptop amzn.to/3S1vd7O
Synology NAS storage amzn.to/3RVfFSX
16 TB hard drives for NAS amzn.to/3S03Hrk
Follow me on:
Facebook / sdentrem
Instagram / simon.dentremont
Website www.simondentremont.com/
What’s your favorite Lightroom trick that was hard to find or discover?
My favorite is no longer required since upgrading to a full frame, but when I used to shoot the Milky Way with a crop sensor camera, I discovered going down to the lens corrections and then selecting manual - defringe - Using the slider, and nearly pulling it all the way to the right, I could pull out nearly every bit of purple from my stars. It saved so many, if not all my photos while using that camera.
@@Warrior_Resisting_Colonialism Actually, this is a problem with the lens and not with the camera. And even expensive lenses have chromatic aberrations in extreme situations. Or do you mean something else?
I thought the same. I kept the same lens though (rokinion 24mm 1.4 full frame) and only the d3400 w/ the lens had the issue. I don't notice this at all w/ the D610. @@herobrain4445
When the "chaff to wheat" ratio is very high (large number of discards to keepers), you can go through the lot, "picking" (P), the keepers only. Then Library/Refine Photos (Ctrl/CMD+Alt+R) changes all un-Picked photos to rejected. I use this mostly when I have auto exposure bracketing in use and at least 2 of 3 photos are for the discard pile.
The feature thate let you see wich part of the image you are sharpening
You are one of the few photographers who always gives clear, concise and consistent information. I learn everything so much easier watching your videos
Happy to help!
I mostly refrain from making comments, but for this channel I make an exception.
I'm an amateur photographer, using 10y+ old tech.
Your channel provides useful tips and great techniques, enabling me to improve my skills. And whilst not being lured into the whole influencer-recommending-random-stuff. I can only say: thank you
Thanks for that!
Simon, I've watched your videos on youtube for about a year, but only recently have I watched enough to realize how talented you are as a teacher, and how experienced you are as a bird photographer. You are one of my favorite bird photographer teachers now, and you have the personality to add to the joy of learning from you. I've appreciated everything I've learned from you so far. Guy
Too kind! TY Guy!
TH-cam is so weird I have been watching for years and only found you today, your channel is amazing
Glad!
White balance using the eye dropper to select a white subject in your image. This little trick saves me so much time.
The new point color that Lightroom has is a very useful tool in my opinion!!
The embedded and sidecar preview tips will save so much time! Thank you
Thank you so much. Been using LR for years and never knew about the alt-key masking. Super useful.
Simon, Your tutorials are great and very easy to follow. Again thank you so much for sharing your skills. This was a very good tutorial especially the tutorial on culling unwanted photos. Thanks again Ricky
I love that every time I visit this channel, I learn something new. Another well done educational video. Thanks Simon for consistently sharing easy to understand content.
Cheers. 📸😎👍🏻
Many thanks!
Outstanding tutorial, and thank you so much for the ebook!!!
I find myself not using the Details for sharpening, I use the masking and select subject. Just wish we they put the "alt" feature there as well.
Did not know the dust spots! Appreciate it sir.
Love the bonus tip. Have to watch it a few times to ensure I got it correct, lol.
Good work sir.
This takes my photo's to the next level. I really feel like a professional now. Thanks Simon!
I started getting into photography more this year (motorsports) with an old Rebel T6, and all of your videos have been super helpful so far. Thank you for being such a great teacher and breaking everything down!
That duck picture looks magical wow
I really like the masking tool in sharpening that you mentioned. I also enjoy using AI sky detection in combination with dehaze. The newest version (13) has Point Color and Blur effects. These are a huge help.
You can also straighten the horizon with the Auto button on the crop box (right hand side, under the padlock). I've wasted so much time and eye strain on trying to level photos with the slider on Angle in the crop box!
Just realized that I have been watching your video for several months already. Awesome contents!
I will keep watching your work on Instagram.
The culling tip was a game-changer for me!
Another great video … thank you Simon. I’m new to photography and Lightroom processing and gaining so much from your guidance 👍🏻
Simon, very helpful tips. I always enjoy your videos - entertaining, will see fantastic images and will always learn new things.
Thanks 👍
Fantastic information. Thank you!
I always learn something from your videos! Thanks for all you do!!!
Such useful & wonderfully explained information. Thank you Simon!
Great tips as always!!
I really love all the photos you took
Although being a weathered [hard core] photographer, I learn every time I watch your videos.
I appreciate that!
Thank you Simon! Great tips! I also like to use the adjustments sync tool to apply spot removal to all images within a session.
Some more great tips Simon
I personally use Dark Table, but these tips still apply. The first tip is more used in the "Color zones" tool in Dark Table, but I find myself using it often. It's a great tip
Thank You for all of these great tips! saving this video.
Cool video mate, great for beginners and also great for refreshing of experienced LR users. Thank you!
And voilà ! Another great video. Thanks Simon
Thanks for the video. As you’ve posted some of your “rediscovered” photos lately, I’ve wondered how you manage to cull through the thousands you shoot. You answered and I didn’t have to ask!
Other tips were also good.
Thank you so much!! Always appreciate any lightroom tips from the most trusted professional like you!
My pleasure!
Thank you very much. Your videos are very useful. You’re very talented person Simon.
Thank you for the video and the book
Not really a hack, but the lightroom "keyword" tagging feature is amazing at helping organize your photos. I have been photographing my son's soccer games and using keywords I can easily pull photos up by game and/or player(s). I had to provide 2 photos of each player to feature in a end-of-season video and this made it very easy to do. I then used color coding to denote which photos were selected.
Your channel has been an amazing help for me. I've only been doing this for 5 months and your channel really helped kickstart my skill and my enjoyment.
Your videos never disappoint. Thanks again!
Glad you like them!
Your videos always leave me wanting to go shoot. Great video as always, and the tip of auto advance is going to be a game changer!
This is very helpful!!! Thanks sir! 🙇🏽♂️📸
For Before/After switching i prefer the key \. If you hold it, you see the Before while holding or if you press and release it will toggle between the two
Some really great tips in this video!
I like to straighten my images in the transform section near the bottom of the editing panel. There’s some other neat features there too.
And to quickly see before and afters as I’m editing, I press the / key on my PC.
Hi Simon. Wow, your bonus hack just changed my 'culling' life. How come no one talks about this trick for fast culling? I've been searching the internet for so long for a way to speed up this process and all that comes up is 'Photo Mechanic' as a solution. You should make a small video about this and title it ' How to cull your photo in Lightroom fast' as I 'm sure that this will help A LOT of people. Thanks a million for this awesome trick. Love your videos.
Great to hear!
Simon: "Did you know it has dust ..."
Me: *spits dinner on his mac*
The spot healing trick is now my faforite, didn't know this bevore.
Btw your tips and videos make it more fun for me to work with lightroom, many thank's 😊
You videos are of the highest quality. Thank you for so many great tips
Glad you like them!
May I add my thanks Simon. Like 4149 below, I am a budding photographer who refrains from commenting or subscribing to sites. Scoot over 4149. I've learned more from your videos in two months than from all others in the last 5 years. So very lucky to have come across your site. Wish I had seen your videos before we went to Ireland last year. Looking forward to learning from a PRO.
5DMk III/R5C/truck load of EF/RF lenses/RRS tripod and gear.
Welcome aboard!
fantastic video. im an amateur and ive been using lightroom for over a decade and never understood the sharpen mask until now. thank you.
The HSL Color panel has changed now in the latest Lightroom upgrade - for the better IMHO - the panel is now called the Color Mixer and has different and much better functionality
Following you since the very first video, everytime i come here I have learnt something. Thanks simon❤
Happy to hear that, early adopter!
As always Simon, brilliant and extremely practical advice. My favourite LR trick has been the very first one you mentioned in your video. My second favourite is one I learned very recently: in the masking module: usually when I select an object, I can subtract a colour or luminance range from that mask - this helps to place a very precise mask around an object. It's a bit complex to explain in a comment. There is an excellent video from another TH-camr, but I'm not sure it's appropriate to mention the name here. Thanks again Simon :)
Woah just found this channel and I’m so excited this is exactly the content I want!!!
Welcome!
Excellent, Simon.
Another exceptional tutorial. Thank you.
My pleasure!
Nice summary of these tips. Really helpful!
I also just looked at some older videos and my god did your quality improve not only in content but the video overall as well. Keep on going. ♥
Still learning!
@simon_dentremont
I shot my first few videos handheld with a telephoto lens. A lot was downright crap but got some nice parts in the end I wanted. There was simply no time for a tripod.
I even managed to get one decent looking still from the video after upscaling and sharpening it in Topaz.
During recording I noticed autofocus tends to sometimes be focusing to wrong parts. Perhaps a video about video autofocus as well as advanced autofocus (e.g. speed, tracking, sensitivity in change in servo mode, etc...) settings would be an idea for a video?
Awesome tips, Simon!!
Lightroom has colour labels - many edting programs do. But Lightroom lets you customize the labelling of your colour labels to be meaningful to you. And you can have more than one set of customized labels - maybe using one for stills and one for video. I use colour labels to identify the ultimate use of the photograph - website, social media, competitions. And I create colour coded collections that automatically catalogue each. If a photo is used in more than one place, a quiick virtual copy is made with its own crop and colour code and voila.
Awsome content as always. Than you Simon
This is top notch! Loved the culling tip at the end!
Glad you liked it!
Thanks Simon, I will make good use of these tips!
Great!
OMG, never heard of the auto advance feature! Thanks Simon!!!
I am simply amazed how great this channel is!
Too kind!
I'm not all the way through the video yet but using the calibration tool is my favorite way to tune colors instead of using the HSL sliders
This was very helpful thanks 😊
Glad it was helpful!
Thanks for the bonus tip it gonna help me a lot 🙇♂️
No problem 👍
With winter coming I would love to see a Camera Care video. Taking equipment in and out in cold weather. What to do when you come in from rain?
Some of it here! th-cam.com/video/4SUM08RVDjo/w-d-xo.htmlsi=RLnMDjOmcMnm8Wn6
Not necessarily hidden, but the calibration tool is a great addition to workflow. It makes it simple to adjust overall red, green and blue throughout the image, often reducing the need for vibrance or saturation, which could have an intended consequences. Also allows for hue adjustments as well. Used sparingly, it’s great tool, though I do have to wonder why they call it calibration… 😊
Wow, I've been using lightroom for several years now and I just learned about the saturation by dragging photo option. Thank you so much!
Happy to help!
To add onto finding sensor dust, I've found that sometimes cranking the dehaze to 100 and adjusting the exposure up and down some helps me find spots that the visualize spots feature doesn't show.
Hidden feature I use is changing the grid overlay to assist with compostion; open crop tool, then press O repeatedly to give yourself different grid options. There are “golden section” grids there too; to get the one with appropriate alignment for your pic, press shift-O.
A lot of great information.
Your informative and encouraging style is very helpful.
Glad you think so!
Hey Simon, great videos (can't stop watching). I've noticed on a few you keep talking about "auto-advance".
Here's my tip for you,
Instead of going to "photo > auto advance", you can easily toggle auto-advance on and off using caps lock (e.g. capslock on = auto-advance on). This saves a few seconds each time which soon adds up when jumping back and forth between editing and sorting.
Great helpful tips keep up the good work!
Thanks, will do!
Thank you
Fantastic Simon - Thank you!
My pleasure!
Thanks for the tips
Any time
You're insanely talented. Thank you for the advice!
I appreciate that!
Im still learning Lightroom and I love this video I had been following you almost a year and had learned a lot from you thank you keep up the great work
You are so welcome!
Good morning sir thank you for another great video
Good morning!
Amazing video!!! Please do more like these!
More to come!
I always knew LIghtroom had more features than I knew how to use. This video unlocked several that I can employ immediately to improve and speed up my editing process. Thank you!!
You're very welcome!
Interesting bonus tip.
The way I work around this by doing 2 sets of work - 1 where I review images in Library and use B key to put in Quick Collection, then 2 develop the selected images.
Library view doesnt take time to load image preview compared to Develop view, and you still get to see your edits if you applied some mass filter
Another great informative video! I love the fact that your videos are "meat and potatoes" with none of the "gravy" that I see on other photography sites. There's nothing more frustrating than having to fast forward past useless B roll to get to the juicy stuff. Thank you!
Glad you like them!
Hey Simon, great tips as always! One note on the horizon leveling or straighten tool: it also works vertically, like on the corner of a building or a flagpole. Try to pick something as close to the center of the image as possible, especially on wide angle photos, or the distortion will create some rather unsatisfactory results.
Great tip!
Thank you!
You're welcome!
Awesome tips for Lightroom users 🎉🥳
Glad you like them!
Thanks simon
Thank you Simon.🙂
Very useful thank you.
Glad it was helpful!
Another nicely done video. Although I use Camera Raw, everything you cover I use. thank you Simon.
Waow, really great tips, and easy to follow as well. Well done :D
Glad you liked it!
This is the most comprehensive tutorial about LR that I have seen and I have suddenly discovered a whole new realm. I am using LR5 and I have tried every shown hack and found only one that does not work, Panorama. But I am not greatly stressed as there are other good stitch apps out there. This is going to make a big difference to my basic photo processing. Thank you Simon!
The trick to panos is a level tripod and lots of overlap between shots…try overlapping 50 pct.
Very good detail..... thanks for sharing.
This video was uploaded 5 minutes ago, there’s no way you watched this 10 minute video in just one minute. Yes he makes good videos and they’re very good, but at least don’t be pretentious
Thanks for watching!
@@tdw8991 Sorry to bust your bubble TD, but I did watch the whole video. I watch every video he makes. Maybe you should not be so judgemental.
Ty for the great tips
No problem!
Very useful information 👏
So nice of you
good tips! since this is shown for lightroom classic, it would be nice to do the same for lightroom too.
Another great video! I like the GEOMETRY tab (I use it in Camera Raw). You can skew or stretch the angle and perspective in various ways and also tilt for rotation. I use it with landscape shots that have a foreground like flowers that has a depth of field that stretches way back to mountains. Then, I can adjust the perspective to get a sort of sweeping "wide angle" look from the point of view of the foreground. Just need to crop a little.
Great tip!