
- 28
- 271 099
BluemonxterDIY
เข้าร่วมเมื่อ 19 ต.ค. 2019
3D printing, 3D modelling, Mini lathe, CNCs & DIY :)
Hermit Crab Quick Tool changer installation | Ender 3 Upgrade
In this video I will install the Hermit crab quick tool changer on my Ender 3.
มุมมอง: 3 438
วีดีโอ


Will this Z axis anti backlash nut improve your 3D printer accuracy?
มุมมอง 63Kปีที่แล้ว
In this video I will install the commonly available spring loaded anti backlash nut for the T8 lead screw on my 3d printer Z axis. Then I will use the dial indicator to verify if it does anything to eliminate the backlash.
Is the dual z upgrade (with Oldham couplings) worth it?
มุมมอง 27Kปีที่แล้ว
As you may know I burnt the stepper drivers on my ender 3. In order to test the Z axis dual z upgrade, I found a workaround. So in this video I will test the upgrade with the dial indicator. The results are definitely interesting.

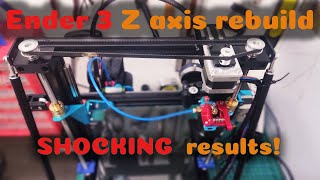
Fix your Z axis with Oldham couplings, dual z screws & thrust bearings!
มุมมอง 95Kปีที่แล้ว
Say no to elephants foot, inconsistent first layers & Z banding. This is the ultimate z axis rebuild / upgrade using brace rods, Oldham couplings, dual z screws & thrust bearings. You can see quantifiable results before and after the upgrade. I will show you the what, how & why of every upgrade. After this you can forget your z axis troubles once and for all. This video is a part of my Ender 3 ...

Original Ender 3 Linear Rails Upgrade (MGN12) with the BLV Kit
มุมมอง 25Kปีที่แล้ว
Hi Guys, in this video I will be installing the BLV kit on my original Ender 3. BLV kit is for the Ender 3 pro with the 4040 extrusion, so I had to make some mods along the way to be able to make it work with the 2040 extrusion. The X & Z axis installation remains the same. Because of my previous frame rigidity upgrade, I also had to make some adjustments to the Z axis end stop and the electron...

Assembling the Ender 3 frame the right way | Keep it square and aligned !
มุมมอง 13Kปีที่แล้ว
In this video I will re-assemble my Ender 3 frame as part of my Ender 3 rebuild and upgrade project. It is very important to keep the frame aligned and square so your prints are not skewed and your rails don't bind. You need very basic tools, most of which are already provided with the printer. The key points when assembling the frame are: 1) All extrusions should be at right angles to each oth...
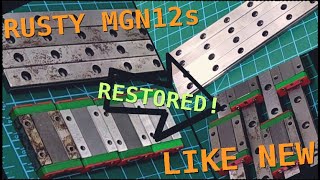
Restoring MGN12 Linear rails | Ender 3 upgrade
มุมมอง 8Kปีที่แล้ว
In this video I will be restoring the MGN12 linear rails for my Ender 3. This is part of my Ender 3 restoration and upgrade project. In the previous video I did a complete teardown of my old Ender 3 & these rails were removed from it after almost 4 years.

Ender 3 full teardown, my upgrade journey
มุมมอง 7Kปีที่แล้ว
I am planning to build a new 3D printer so before started with the build, I wanted to restore my 4 year old Ender 3 to its full glory. In this video I disassemble my Ender 3 and discuss where I went wrong. I plan to install the BLV kit and many other upgrades.

Designing a 3D printer in Blender | Part 3 | Based on the BLV MGN Cube
มุมมอง 355ปีที่แล้ว
Hi guys, this is the 3rd part of the printer design series. I have mostly completed the rough design. Now I am at a stage where I can start building the printer and revisit the design if I need to make any modifications. Once I have finishes the build and finalized the changes, I will share the design files. The printer is based on the BLV MGN cube. I will be using the BIQU hermit crab tool cha...
Designing a 3D printer in Blender | Precision Modelling | Part 2 : Designing the printer frame
มุมมอง 311ปีที่แล้ว
This is the second part of the series. In this part I will design the frame of my printer in Blender. I recommend CAD transform, a free add-on, to anyone using blender for precision modelling as it will make your life much easier. I based the design of my printer on the BLV cube but made some tweaks here and there. I wanted to use use standard length aluminum extrusions as opposed to custom siz...
Designing a 3D printer in Blender | Precision Modelling | Part 1 : Modelling the aluminum extrusion
มุมมอง 684ปีที่แล้ว
Hi everyone. I am designing a 3D printer & I will be using Blender for precision modelling. This is the first part where I make the aluminum extrusions. In the next part I will use the extrusions to make the frame of the printer. Download the blend file : www.thingiverse.com/thing:5606008
Planetary Gearbox Satisfying Animation | Blender 3.2
มุมมอง 299ปีที่แล้ว
Planetary Gearbox Satisfying Animation | Blender 3.2
Wine Glass Blender 3.2 Time lapse | Modelling and Animation
มุมมอง 113ปีที่แล้ว
Wine Glass Blender 3.2 Time lapse | Modelling and Animation
Robotic Arm Animation (Hard Surface) | Blender 3.0
มุมมอง 647ปีที่แล้ว
Robotic Arm Animation (Hard Surface) | Blender 3.0
Thor's Anvil V2 | Dramatic scene | Blender 3.0
มุมมอง 103ปีที่แล้ว
Thor's Anvil V2 | Dramatic scene | Blender 3.0
Thor's Anvil | Dramatic scene | Blender 3.0
มุมมอง 143ปีที่แล้ว
Thor's Anvil | Dramatic scene | Blender 3.0
First animation in Blender | Donut & Coffee
มุมมอง 1652 ปีที่แล้ว
First animation in Blender | Donut & Coffee
The axis always moves up when running ABL that process moves the z-axis in both directions.
How do I align the y-axis without a machinists square?
Why not just get silicon feet at this rate They didn’t fit my printer but i would have loved to use them, vs installing all this, where as I believe mine may require firmware edits as well, But if anything anything at all, Just get an integrated lead screw Z stepper and a top end mount The real problem is warped surfaces I mean am I really the only one to get 3 in a row within 7 hours of printing on a glass bed? Rails can wait til next decade But yours look sick, cool edits ❤
Great but sad story, I love it!
I know this is an older vid, did you ever completely solve your issue? That last bit of the video it look like there might be some slight runout on the belt pulley. I'm thinking of just going dual Z linear guide rails (MGW12) and driving each side directly with a stepper and belt without a leadscrew entirely. Also wondering if, instead of loading the printhead on the front, if it would be better to balance it so there's no extra load on one side or the other of the gantry.
Will this upgrade work for the Ender 3 Max?
Can’t wait til you tune everything properly and show the difference in print quality.
I wish I saw this a year ago.
What's wrong with the "olde worlde" method of spacing two nuts with threaded studs and dialing out the backlash that way? I understand that this method requires periodic adjustment as the nuts wear, but at least it's as close to zero backlash as makes no difference when set up correctly and produces close to zero drag unless the lead screw is badly bent.
if i want make this type of envorment how?
10:36 you could've just swapped the corner brackets around. lmao.
Thanks for the explanation. It was very elucidating. In my opinion, there could be a software solution to this lacklash problem. We could and a small Z axis turn just after the printer finishes homing the Z axis. How much turning of the Z axis would have to be gaged through trial and error. Just found your channel and became a subscriber. Keep it up! 😊👍
Wonder if itd be possible to have a bedslinger multi color tool changer at the way top of the gantry. Itd be alot of z movement but thatd be an interesting concept.
I wanna know how everyone else seems to get their Y axis belt so perfectly straight on the spindle lol. Mine always is off to one side and I can’t get it to stay centered
Have you tried removing the springs and only using double nuts?
The BLV kit had no issues with nuts holes spacement, the issue was your nut. It was not the correct one.
I imitated the working principle of the thrust bearing by using normal bearings (I don't know how it will work for long-term use), I think it worked, the z movement is very consistent, I ordered the oldhan coupling and it is on its way (I tried this way because I did not want to order a thrust bearing from Aliexpress and did not want to wait)
Definitely doing this on mine soon. Thanks so much!
its from the free course of the blender bros isnt it?
correct
@@bluemonxterDIY nice i did it too and it was really good
dude did you made this printer beg on the streets or sth damn thats a nasty looking printer man
first thing i'll point out is that in Z axis applications there is already always a screw/nut preload equal to the weight of the gantry and you cannot change the faces in contact by changing directions in Z (like in 00:49) unless you are doing so faster than g=9,800 mms-2. are anti backlash nuts a scam? of course not. they work exactly as advertised.....in X and Y screws like those in CNC machines. NOT Z screws in 3D printers for the reason I mentioned above. secondly, and not related to backlash, by mounting the oldham coupling above the gantry, it is in constant tension and not working in the optimal manner. it is supposed to be mounted under the gantry so that its horizontal surfaces can bear the load while the coupling is being compressed. while upside down, that same load puts the nut in tension, and the weight of the gantry is now transmitted to the dovetails interfaces instead, which have a much smaller total surface area than the flat faces and were meant only slide past each other instead of now also being loaded. faster wear and reduced capability to perform its original function.
Lol love the editing 👍Nice video thanks. Fun journey making upgrades!
Thank you for sharing. Where did you get the Y axis rigidity supports?
Can the issue of the gantry weight exerting pressure on the motor shaft be resolved by inserting a thrust bearing between the coupling and case of the stepper motor?
Hm just a quick Question in The Video at 4:43 you can see that there is a gap between the carraiage and flange means the flange sits not flat on the wagon? Is this intended? I have the problem, that its not easy to fasten these 4 screws??
Hi, sorry I don't get your question. Are you talking about the y axis aluminum plate mounting on top of the linear rail carriage?
@@bluemonxterDIY Hm well maybe I was not clear at all :-D - Imean the 2 plates holding the Y-Motor and The extruder. I have had troubles to mount them flash on top of the rails wagon because the edge of the linear rail carriage ist sharp 90° and the bended Metalplates hav an inner radius because of the bending this is what I am concerned about. In my case the two verstical 20x40 Rails were no longer paralell to each other they are 90° to the base but in fache of each other rhe one on the extruder site is slightly rotated - not shure if this may cause some trouble later on. Hm I am almost finishes and I will see when I do a Testprint maybe a cross with 90° then I will se if the x-y alignment is not orthogonal. I write a short notice when I am done how it was going :-D
Hey Dude, to reverse the spinning of the stepper motor its easier to change 2 of the wires either on the left or right, doesnt matter. think its bether to do this instead damaging the connector. Depending ob the electronics its also possible to reverse the motor in the firmware settings - if running klipper its an easy task. I am a lot delayed with my upgrade although I have the party laying arount for some while 😀Ty for your detailes videos they have helped me a lot and by ther way sorry for my bad englis spelling and grammar
besdt ender 3 channel ever thanks for your work
Thank you very much for the help, I have been printing with the Ender 3 for 6 years and over this time I have always received poorer printing results even though the settings have remained the same. I have now carried out a complete maintenance of the PC rollers. The Zwobble with the flex decoupler and the Anti Backlash Spring Loaded Nut has eliminated all my problems. I wanted to replace the printer with a new one. I flashed it with Klipper. Now it is one of the quietest prints there is and I can print between 80-100mms print with good results
kek,drill dial knob
Man, thak you for this!
I've seen other youtubers doing this kind of upgrades, even many years back, and they all came to the very same conclusions: it does not work or at best is not worth the time and money, at a certain point we are better off buying a way more expensive 3D FDM printer, that is based on other technologies, specially because every year their prices falls
Huh you've shown your backlash is mesurable, so the question is, is it consistent or atleast a percise enough change that you could alter the firmware as to hsve a backlash adjusting setting? same as having a z off set. When fhanging directions you could set the value he motors will add to their travel inorder to midigate slop in the screw and nut. Lathe logic "if its not accurate, make it extremely adaptable.* something along those lines.
Seems like a lot of work to fix a fundamentally flawed setup. Does something like a corexz (Switchwire) setup fix these issues? Or does it trade one set of issues for another?
Can't find this model of bearing. Could you please give another suitable example? From AliExpress for example
Could you give me a link for the bearings on Y belt tensioner ?
Can I change the Y axe pilar to a bit longer ones ?? So that I can print higher
Yes, you will have to change the lead screw aswell to account for the added height aswell. No problem to do that. You may want to add braces to the top of the gantry with some 3d printed braces to compensate for lowering the stability when making the printer taller though.
Thanks for finding that wiring issue so I don't have to.
Can't this backlash be avoided by always following all downward movements by a movement up, equal to whichever is smaller, the downward movement or the backlash amount? This is possible on the Z-Axis due to the nature of layered printing where the Z axis is stationary during extrusion.
Hi! there IMHO, wouldn't you introduce unnecessary wear and tear to the dovetail surfaces on the oldham couplers if you were to place it hanging on the gantry? However, if the gantry is made to rest on the oldam couplers, then the weight of the gantry with gravity in our favor will mitigate for any play on the Z direction. And the weight of the gantry will always press against the oldham couplers and correspondingly to the lead screw to also mitigate backlash. Anyways thanks for sharing this very informative and helpful video to mitigate Z banding and other Z related issues. Cheers and keep up the good work.
Curious, I have the dual z upgrade from creality (the one that uses dual z steppers) has anyone done a comparison between a setup like this vs that? Next, would it be possible to use 2 z steppers in a setup like this? Dunno if it'd be just redundant, but methinks that having 2 motors split the load may lead to more accuracy?
do not put loctite on plastic.
I put a steel ball in the flexible coupling so the shafts can rest on each othet while allowing some misalignment
It's really great what you're doing with your printer. I only noticed one thing when wiring: These were/are all flexible, individual strands, right? It is attached using a screw, right? Wouldn't it have been better to put wire end sleeves on it? Are there even such small ones? Next year i will assamble my new Neptune 3 Plus. I hope there is no Z-wobble.
Thanks. Always better to use the sleeves but i could not find the right size. Its very tiny
use a ball screw
Nice solution. I wasn't aware of the spring washer in the motor, so thanks for highlighting that. One further improvement you could make is to use self-aligning bearings - any bend in the shaft will cause angular misalignment that will require a small amount of lash to prevent the thrust bearing binding. Maybe an SKF 108 TN9 would work?
The self aligning bearing sounds like a great idea. I will give it a shot.
You want no ZZ back-lash?! Buy ball screws...
Unnecessary expense, unless your accel is set higher than 9800 mm/s2. Ender 3 is set to 100
Where ever the gcode moves up and then down like during a vertical hop, can it move up, down (a little further than needed) and back up (a little) to remove the backlash? If the added bit is the amount of backlash, there should be no visible difference.
Would putting a thrust bearing between the coupling and case of the stepper motor fix putting the gantry weight on the motor shaft?
Your video is very good, and if you used a belt on the Z axis instead of the tr8 spindle would it improve the accuracy? Can you perform this test and film it?
Not perfect but better than most! Geez thanks man! YOU FREAKING ROCK! 🤘 ❤