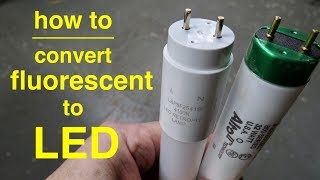
How to install a T8 electronic fluorescent ballast in an old magnetic T12 ballast fixture

ฝัง
- เผยแพร่เมื่อ 8 ก.พ. 2025
- www.totalbulkl...
Discover how easy it is to install and overhaul an old magnetic T12 fluorescent fixture that contains two, two lamp magnetic T12 ballasts with a more modern four lamp T8 fluorescent ballast and brand new fluorescent lamp sockets or tombstones.
Buy T8 fluorescent replacement ballasts:
www.totalbulkl...
🌎 Our web site:
www.TotalBulkL...
🌎 Like us on Facebook:
/ totallightingsupply
🌎 Follow us on Twitter:
/ totallightings
🌎 Plus us on Google:
plus.google.co...
🌎 Follow us on LinkedIn:
/ total-lighting-supply
🌎 Subscribe to our TH-cam Channel:
/ totallightingsupply


Every step was clearly explained and direct. No jiggly camera work was a real plus. You calmly walked us through each step so it was easy to understand and follow. A sign of a very good teacher. I hope my project goes this easy.
I have been going crazy trying to figure out how to fix my florescent light in the kitchen. I bought a new ballast and saw that the wiring was not the same as my old. This video is clear and concise and I was able to easily fix my light after watching it. Thank you so very much!!!
Just did this project today, very simple and well worth it. Not only are the T8's more efficient, they're much brighter than the old T12's, not to mention they come on instantly with the new ballast. Next step is to get a set of LED T8's.
One of the most excellent DIY videos ever. Thank you so much. My situation was exactly this. I replaced 2 old magnetic style ballasts and upgraded to one T8 4-lamp version. The install went exactly as you demonstrated. I even decided to buy the same ideal wire ends as you used, and I replaced all 8 sockets just for good measure. Fantastic how to. Thank you
WOW have the same exact fixture - down to the make/model old double ballasts - your TH-cam vid is the best, most thorough, calm, and comprehensive I have seen for a particular project, but especially for a novice with DIY experience. I shall post my experience when I complete this project.
I was confused by the schematic on the ballast and this cleared things up immediately. I would not have guessed that only one wire is used on each end.
Thanks so much for taking the time to post this.
The light fixture that I had was different, but this video helped a ton. I replaced all the insides with a T8 ballast, wires, and tombstones. I put the bulbs in, turned on the power, and everything worked on the first try. Thank you!
Best demonstration of replacing a ballast. I never knew this would really be that simple.
Thank you!
I really know what to do with my old fixture now! I couldn't figure out what I was doing wrong. A trip back to the hardware store to buy new tombstones and I'm set Best video ever!
Excellent instructions. I have 8 fixtures in my kitchen and it took about 2 hours to convert them all. The LED lights are about 25% brighter. Instead of getting 16 replacement LED lights, I'm going to go with 8. No more buzzing and flickering florescent lights! Yay!
Best video on this subject on TH-cam. Amazingly thorough and very informative. Nothing else even comes close.
Great video! After watching your “how to” I was able to convert my 4-bulb T-12 fixture with 2 ballasts to a 4-bulb T-8 with 1 ballast. I removed all the wires from my existing bulb sockets and installed the new electronic ballast just as shown in the video. The T-12 used 2 wires to each socket and the T-8 uses only 1 and it doesn’t matter which side or wire you use. THANKS
Although grounding was mentioned and you addressed the issue well., may I suggest that you also mention grounding plane as well. Assuming that the fixture is properly grounded and the lamp-holders are within the specifies distance. Electronic ballasts are more sensitive to the grounding plane, this is important when performing a retrofit to verify that the lamps are the proper distance and that the fixture provides a grounding plane. Best Regards.
Excellent job on replacing a T12 Ballast (In this case, 2x2 bulb ballasts with a simpler and better 1x4). I wish all videos on youtube could be this helpful start - finish. You sir are a natural teacher, well done.
Thank you!
thank you! followed directions to a T and worked perfect. I wanted to get soft white bulbs instead of cool white. little did I know i would be learning all of this t12, t8, different ballast stuff. Guy at store recommended an electrician but I just followed your video and it was easy.
Great camera shots! Most videos have crappy camera work; this video was great. It looked exactly like my experience changing the T12 to T8 fixtures at work. Down to the broken tombstones and dirt! LOL Great job!
THANK YOU THANK YOU THANK YOU. no more buzzing from the old ballasts
Thank you so much for this video! This made a job that could have been very daunting...extremely simple. My husband and I really appreciate it, it worked just as you said! Our marriage survived this diy project, so again, much thanks for your informative video. :-)
Overall a good video on how to convert an old fixture to a new ballast and T8's. A little concerned however that you failed to address the dangerous situation with the jagged, raw hole where the power wires enter the light housing. There should be a grommet or smooth sleeve there so the line wires can't come in contact with that sharp metal and over time, due to vibration, wear through the insulation and cause a possible short.
Thank you for this wonderful video. It gave me confidence and courage to make a light repair that I've needed for 5 years.
Good video. Video was easy to watch and understand. I watched it, went to Home Depot, purchased the parts, returned home and updated. Now I have more light at less cost. Thank you.
Thanks for this post. Very helpful to see this done by a pro instead of another DIYer. I've changed out a few but now I'm doing one that's pretty similar to this one and may also need new tombstones too.. I bought myself a Klein wire stripper a couple of years ago & love it. Money well spent in my opinion. Pricey on the front end but it's paid for itself many times over.
Thanks again! I'm not sold on the T8 LED lamp, priced around $50 each for only 15 watts, doesn't really make sense. It's better to purchase a specific LED Luminaire or kit from somebody like, Acuity, Cree or Cooper. Plus, once you retrofit to this T8 LED, you void the UL listing of the fixture. Thanks again!! I'll check out your other videos!
I realize this video is pretty old now, but I just wanted to express my gratitude. Have the exact same fixture. Two old magnetic ballast, with multiple wires going everywhere. Did everything you did, step by step, and it all works great now! Only problem I came across was putting the ballast cover back on. Won't clip back on. 2/3 of it will snap in, but the last clip won't work. It's all of a sudden too long. The metal strip that holds all the "tombstones" in it, seems like it's too far away from the back end. I'm literally millimeters from it locking it in. Very aggravating for everything to work great but that one part. Anyway, thx for the very informative video. Well done, sir.
Perfect!!!! Just wanted I needed to see!! Will save 40% on my electric bill!!! Thanks!!
Thanks for making the video. updated my t12s this morning. Not 100% like yours, but close enough I could figure it out. No more flickering and they come on right away! I don't know how one of the fixtures was working...the ground wire was simply laying on the fixture. No screw!
Thank you so much!!! I did it myself!!! REPLACED THE T12 BALLAST WITH A T8 AND ALSO REPLACED (TOMBSTONES WITH NEW ONES).... With husband working long hours...thought I'd give it a shot! The Only thing that was not said was that you cannot take out wire from (tombstone) once in won't or can't come out. Unless I missed that... I did see that some people leave a long piece from the tombstone and use a wire connect to ballast, instead of replacing the tombstones..Personally I think it was best to replace with new tombstones! Love those quick connects thingees as opposed to the ones that you twist to put wires together, anyways thanks a bunch!!!
My light fixture is buzzing. I replaced it with another tube that doesn't buzz from another fixture... but the buzzing continues. From the interwebs, I assume it's due to an old ballast.
I know absolutely nothing about wiring things. And fear not, I have no intention of giving it a try. But your video was beautifully made, and super easy to follow. Even including some seasoned tips. Great camera work, nice tutorial.
It was very satisfying to watch.
Hi... Thanks for posting this video. I was planning to just buy a new hanging (not ceiling-mounted) fluorescent shop light. Now, I'm considering this little DIY project to simply 'update' my old one. VERY informative Thanks again!
Thank you for a clear idea of how to do this. I was rather overwhelmed with all the wires and you made it simple.
I'm no expert, which is why I'm here, but I've read that you need to use shunted tombstones with an instant start T8 ballast. It appears that the tombstones in the video are not shunted, but the light turned on without calamity...
excellent video. I had this exact condition in our garage and was skeptical that I could replace it until I saw this. The suggestion to replace the sockets was great...don't think I would have recognized the need for this. I watched video; made a trip to Home Depot; made all the changes; all in less than 2 hours. THANKS
Thank you very much for this video. I don't like doing electrical work but this help me replace a double ballast which I have never done before.
Totally agree. Awesome! Best ever on this subject. I too had a double ballasts with 4 fluorescent tubes. Would you consider doing a "You Tube" and show the wiring for this setup? Thank you so much!!!!!
This is my project for tomorrow. Thanks for the great instruction. I was a bit worried I wouldn't know how to do it - being my first time - but I think it will work out okay. Thanks again.
Single wire connection is a tube KILLER! no preheat at all
Excellent demonstration! Could not be explained any better.
Glad it was helpful 🙂
Thanks. I got a lot further so far replacing some four footer T12s There's a green wire coming from somewhere that looks like it's crimped into the strip. I got a little aluminum clip in the new one and I don't have a clue what it's for.
Thanks for helping me get updated on procedures.
Just some info for you. I was trained to always disconnect the Hot/Black first then the Neutral/White. When reconnecting the Neutral/White first then the Hot/Black.
Just one small suggestion, it's worth while installing the lamps (bulbs in the USA) in the fittings and testing they work ok before reinstating the gear tray cover (ballast cover). Not saying its the right way, just a suggestion. Loved the vid!
Thank you for posting this! Very informative for the amateurs
That state of the art mechanical wire splicer you are using has been around a long time.
Very helpful. Easy to follow. Just what we needed.
Only one concern. The black / white wires (power feed) insulation can be cut on the fixture where the wires come through the top to supply the power to the lamps. It would be wise to install a grommet on the fixture, to prevent the wires from being cut on the insulation.
A GREAT demonstration. Thanks!! Very clear.
thanks, got them installed while back, good ground, they work awsome.
That was a great video. Thank you . Your a good teacher.
Awesome, well detailed tutorial. Just what we needed. Thanks!
Thank you! I'd have had no idea how to do this myself!
Great tutorial! Quick and specific.
A problem I've found with electronic ballasts is the tubes tend to last much longer than them. If buying more expensive replacement ballasts saves money I must be missing something. This particular one is an instant start type which shortens lamp life anyway compared to a magnetic ballast. Also you need to put the yellow wires in the same side of the socket instead of across as all the current for the other lamp must pass through the electrode of this one causing a premature failure.
perfectly clear and understood no even an extra word to make me confuse
Exactly the info i need. Thanks!
Excellent how to video
Thank you so much, older house!
Thank you very much, your video very detail and helpful.
Great video. It helped a lot! Thanks so much!
This was a great
help, thank you.
Thank you sir! You just saved the day ;) Cannot thank you enough !!!!!!
Thank you very much, that was fantastic !!
0:22 about how to open the darn thing helped me a lot. thanks haha
Great video. And now "we're ready to go!"
I wonder about that way that you wired the tombstones for the common side of each of the 2 bulbs (yellow wire). The way that you show means that the electrical connection depends on the bulbs internal grid for connection to the next bulb. That means if the power always flows through the bulb's internal grid and in fact if the first bulb fails due to a open in the grid then the second bulb will also turn off. In other words the two bulbs are in series. Isn't this a problem? The wiring diagram on the ballast shows that the two bulbs should be wired in parallel.
P.S. If the "tombstone" lampholders are the shunt type then the wiring shown is correct.
that was very helpful , thank you sir
Thanks!
Very helpful! Thanks!
excellent video. Thank you!
be careful when using the T8 bulbs on a T12 ballast, they will work but they will tend to do a lot of flickering and can shorten the T8 bulbs, unless the ballast is compatible of operating both T8 and T12 bulbs
great video, very helpfull
THANK YOU FOR THIS!
that was awesome, thank you for posting this!
what do you do when you have four of each color wires. 4 red, 4 blue and 4 yellow wires? To of each on either side of the fixture?
I like this very informative, once again thanks!
I tried it and piece of cake thanks
Great video
Thank you
This is like the 4th video I have looked at and noticed no mention of connection of grouind wire . I thought the house ground was important with the T8 ballast. Or is it considered grounded with the metal ballast and that screw that secures it to the lamp housing?
Thanks
Thank you. love it..
well done....thank you!
good video thanks
Two questions, please: What about grounding? My system has a ground wire. How do I incorporate that into the new ballast?
Also; what if the two yellow wires are not long enough to make "jumpers" out of them?
***** Thank you. Just saw this after adding another question to my first post. Wondering what to do if the yellow wires are not long enough to make "jumpers" out of them.
If you change out the ballast to an electronic one, do you have to use the new version T8 neon lights too or can you still use the old T12 bulbs? Also, how do you determine the electronic ballast conversion - the number of bulbs or the overall wattage? thanks....
The sockets in the video appear to be non-shunted. Can you still jumper the last two sockets in the video using shunted sockets?
Are you still answering on here? If so I have an older T12 4 bulb ballast, I was all good to go with this video but then read a comment about Shunted and Non Shunted !!!! I want to convert the T12 over to a non LED T8 just like your video. Do I have to do anything or look for anything different regarding shunting ?
Followed your video, worked BUT I have a live always black/white, and a non live always black/White.... if I hook up to the live always the lights never go off, even with switch... what should I do?
I hate my new T8 fixture. The bulb life is quite short, maybe only one third or less that of the T12's. Which means any energy savings is blown out of the water due to the cost of the T8 replacement bulbs.
Are some ballasts better than others when it comes to bulb life?
our electrician just changed the ballast to a modern electronic one and the t8 bulbs to replace the old t12s. he never did anything to the sockets. that normal?
Do I need to flip the circuit breaker off?
Hey how are you? i really like your video and the way you work! but i have a question and maybe you can help me. How should i install 8 lamps/flouresents in one fixture? i see that you installed 4 using one ballast,so do i need to buy two ballast? sorry i have no experience at all!
i'm trying to build an Exposure unit.
i hope you can answer soon,thank you very much and have a great day!
Can I use t5 bulbs in this set up? I have 5 fixtures That I'm retrofitting for indoor plant starting and want the efficiency of the t5 bulbs..
T5 requires a T5 ballast. You will need to follow the wiring diagram on the T5 ballast and use the correct T5 tombstones / sockets to retrofit correctly 🙂
I replaced my T12 magnetic ballasts with T12 rapid start electronic ballasts a few years ago. Can I use my existing ballasts with T8 LED lamps like the Philips InstantFit series or do I need to replace the ballast with a T8 ballast or can my current electronic ballasts drive the T8 LED replacement lamps without modification? Thanks for your help.
thank u well done video.
Man, would love to do this, but my business has over 50 lights like this style. Would take a really long time. :(
Intresting to see american electronic ballasts are not using all pins of the tube. The european electronic ballast are using all pins of the tube and preheating it before igniting
Would it be easier to just buy a new one? Also. Florescent tubes are bad for your health.
The 120 volt supply conductors enter through a jagged hole. Not code compliant ever. While the original installer is to blame, that should have been corrected during this video. It involves a good bit of extra time and effort. Shoddy work when it is left that way.
You have the best video in detail etc......
Thank you
WAGOS ARE FAST BUT GARBAGE...USE A WIRE NUT AND NOT LOOK BACK OR WORRY ABOUT THAT JOB ..