Whirlpool/ Kenmore Electric Dryer Drive Motor Replacement

ฝัง
- เผยแพร่เมื่อ 16 ต.ค. 2024
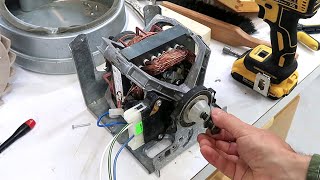
- This video provides step-by-step instructions on replacing the motor in Whirlpool dryers. The most common reasons for replacing the motor are when the dryer makes a humming noise, stops turning during a cycle, trips a breaker, won’t start, or won’t turn at all.
Click here to purchase Part #279827:
www.repairclini...
Additional dryer repair, troubleshooting tips, help with finding your model number, and part replacement videos: www.repairclini...
All of the information in this motor replacement video is applicable to the following brands: Whirlpool, Kenmore, Maytag, KitchenAid, Amana, Inglis
Tools used: hex socket, flat-head screwdriver, Phillips head screwdriver, putty knife, wrench, socket wrench
Connect With Us!
plus.google.co...
/ repairclinic
/ repairclinic
/ repairclinic
Join our free VIP email list for discounts and money-saving tips: tinyurl.com/pnn...
Check out our blog: www.DIY.RepairC...
Don't forget to like and comment on this video, and subscribe to our channel!


Thank you for posting, I was able to diagnose and repair with a used motor i purchased for $50, a new one was $100. Took me a lot longer than you, but I got paid $12 in in change I found in the bottom of the dryer :-)
Just changed mine out after ordering a new motor. Since I was there I changed the belt too. Cost was around 50 bucks and I did not have to borrow a truck to buy a new one. Thanks for the video. I could not have done it with the printed directions. This video was what did the trick.
+Kevin VanHeulen We are glad we could help.
My one wish is that all instructional videos on TH-cam were this good. Great video! Replaced my motor and dryer is back to normal
Great video, it really helped out. May I suggest removing the motor first or just buying a new fan and foam tape seals along with your motor. Mine would not release I had two adjustable wrenches tightened down snug and wound up stripping tie plastic square of the back of the blower fan. I had to cut the center out of the fan with an oscillating saw to remove it from the motor. The threaded brass insert in the fan looks like it has loc-tite on it. Anyway waiting for my fan and foam tape to arrive so I can finish the job. I did find a ton of stuff stuck in the lint vent and was a good thing I took it apart since it could have resulted in a fire in the future. Hope everyone elses experience goes smoother than mine. Once again TY for the video.
First let me say thank you for the video. It was helpful. Now I have to say doing in real life is not as easy as it looks here. The retaining clips on the motor only come out if you curse them. Loosening the motor from the blower is also trickier than it looks here. Mine came off but the plastic was busted. Luckily I had a scrap dryer with the same blower down the road. I had to totally disassemble the scrap one then come back home and remove the back of the dryer I was working on to reinstall the blower. And getting the motor clips back in requires a triple cursing. At the end of the day the job did get done. The dryer now has a new belt, tumblers, tensioner and motor to boot. My wife loves this dryer so I will be ordering parts to replace all the guts again just in case.
Great video. To echo some other comments, here was my experience that might help someone in the future:
- Use vice grips on the square nylon nut that connects fan to motor shaft. A wrench will just slip and round the nut edges. Vice grips grab better. My dryer is 10+ years old, and nylon nut remained mostly okay after the grips.
- The motor shaft into nylon fan nut is REVERSE threaded. Righty loosy on that one! Force required, might need light hammer tap on the wrench holding motor shaft.
- Front motor clip not too bad. Rear clip removal is difficult. Recommend vice grips or slip joint pliers to hold the left side clip's "lip", then pry using flathead driver. The pliers provide more edge, so driver has better leverage and won't slip off.
- Rear motor clip replacement: get a skinny piece of wood, maybe a heavy dowel rod. Place right side of clip over the locking sheet metal finger. Put left side of clip in place over finger. Place dowel on left side lip, tap dowel with hammer to engage left side finger.
- The rest is as easy as the video indicates.
Thank you for the tips.
Tried to twist off the motor from the blower as instructed and crushed the plastic blower square nut. Had to angle grind off the blower and replace it too.
You guys do some clearly stated, well lit, and professional videos. Thanks!
I followed along with this video and everything went as shown. Thanks for the clear instructions. The rear motor clip was tough, I used pliers to bend it a bit and it went on.
This worked for me with pliers. Thanks bud!
You might need to find a socket that will fit the nut and use a long handle ratchet wrench. Sometimes they just will not come off without breaking the wheel . You will need to hold the belt side of the motor shaft with another wrench. You need to be very careful because when the wheel does come loose your hand can slip off and get cut from the sharp metal.
Thanks, this looks pretty straightforward and is clearly presented. Saved me a lot of money and avoided buying a new dryer for no real reason.
this video saved my ass, thanks! my old lady kenmore's drum stopped spinning yet i could hear the motor buzzing. turned out to be a snapped belt! fixed it within the hour. thanks again!
Wish I had took the time to read all the comments before stripping my fan with wrenches (just like the ones in the video) - that impact wrench suggestion is golden.
However, if you strip the fan plastic like I did, you can still get the fan off fairly easily by taking the back off the dryer, then taking the lint trap chute off, and then hitting the fan in the center with a hammer until it cracks in half (I only had to smack it a few times).
In any case, thanks for the clear (and especially concise) video. I hate it when you have to wait fifty years for the video to get to the point, and through the repair. I don't mind pressing pause at all.
Hi, so after you broke the fan, you obviously needed to buy a new fan for it? After breaking it, how were you able to still remove it?
This is so frustrating.
Thank You!
Underrated comment, and to clarify, you would need to purchase a new fan. Once the fan is broken, you can pull the motor right out essentially.
my blower wheel was frozen also. I did manage to get it off by attaching vise grips to the motor shaft. then I placed a pc of wood underneath where the vise grip handle touched the bottom of the dryer. I removed the blower shroud in the back. I then rotated the blower wheel back and with as much force as I could get, I struck the pc of wood(with the locked vise grips) three or four times. this eventually broke the frozen bind on the motors shaft. good luck for the next guy w/ this prob.
As mentioned, is difficult to remove the nut. Use vise grips on rear nut. Then use 22mm socket with breaker bar on front. Remember it's reverse threaded. Comes right out
Having that mentioned in the video would have been awesome. I absolutely annihilated that thing.
Great video. It really helped a lot. To all who are watching this though, don't expect the inside of your dryer to look this clean. Also, make sure the screwdriver you use to get the clips off is pretty substantial. The back one can be hard to get to if you're working in a small laundry room and you'll need the extra oomph, especially when you're putting it back on.
Thanks for the tips! Yes, we do work on new machines to keep it simple :-)
The back clip was a nightmare, yes! The front one just popped right off.
Took me a little longer than 20 minutes--after 15 years, it was hard to get those motor clips off and the screw attachment to come loose. The line "may need a little force" is true.
THANK YOU for a great tutorial and shipping the parts when promised. The dryer is running nice and quiet.
We're glad we could help! Congrats on your repair.
I used an impact wrench, electric and it worked great. 13/16 wrench on blower fan. 7/8 socket with the impact wrench~clockwise and it came right off!!! Thank you for who ever suggested this! Great video too!!! Thank you all around!!!!
Great thanks!
For those without an impact wrench, I used my largest ratchet with 7/8 socket on the front and very tightly clamped vice grips to the rear nylon nut. I held the vice grips as stationary as I could while turning the ratchet to the right, clockwise (upward).
The torque from the large ratchet helped easily break free and loosen the nut from the motor.
Sweet just stripped the fan off, can you post a video on how to change a fan? Dude at the appliance store said 1 in 3 fans won't come off without destroying it. Maybe the vid coulda mentioned that.
well the information couldnt be more simple
This is an excellent video. But this video is like the rest in that all the man can do is give you the info. You have to have a few skills that you have picked up along the way. For instance I know that a plastic fan that has been turning every day is going to take great care in removing it unharmed. I have never taken one of these off before but I know I will get it off in one piece. Skills bud. If you dont have em pay that dude at the appliance store. I'm out.......
@@paulbrandt1832you sound so incredibly stupid. The amount of cringe that was oozing off of your comment was insane.
You’re a bobble head if you can’t figure out how to unscrew a fan lmao
@@paulbrandt1832it’s not his fault. It’s a metal shaft wrapped in plastic. You have to turn it by the plastic. If your dryer is 10yrs old the plastic is too brittle to handle the force of breaking the motor free. It ain’t about skills bud.
@@mattmatthew9422you’re wrong. It’s impossible to salvage this plastic junk if your dryer is old. It’s like playdoe
This is a great video though I did have trouble with the nut.
My dryer got about 18" of water in a flood. There is power to the motor and the shaft spins freely. Not sure if replacing the motor will fix the dryer or if it is likely that a control board or some other component got wet and stopped it for working.
EXCELLENT video, spot on!!! I looked online and found a motor and had it overnighted, which was 1/2 the price of any local business wanted. Anyone can see from your video that the motor is reverse threaded, so that wasn't an issue. However, as you mentioned, the old motor was nearly impossible to get off. When I switched gears and used a channel lock on the rear, and 7/8's socket on the front, it broke loose fairly easy. Using a wrench on both nearly destroyed the rear blower wheel. Thanks!!!
Thank you so much. This saved me hundreds of dollars! Your videos are very easy to follow and just the right length. I agree with some of the comments on removing the old motor. I had no problems using two vice grips to release it without it stripping, just be prepared to use some muscle. Thanks again!
I am about to embark on this little adventure, but could you please clarify a couple of things? There are a lot of comments about reverse threading, but if I do exactly what is in the video, won't that eliminate any reverse threading concerns? Also, I've seen comments about using a socket, but I don't see where I could use one unless I removed the metal and plastic parts on the very front of the shaft. Can someone explain please? I have zero mechanical abilities, so this is really a challenging project for me. Thanks!
Can you replace just the two bushing’s on each side of motor? Or is it a whole unit? My motor works but it vibrates from worm out bushing’s
This video helped allot, but after I rounded the plastic on the first attempt to lose the shaft, I realized if I put the front clamp band back on, that would help hold the motor steady. After I put the front clamp back on, the motor steady, my next attempt worked.Thank you very much for the help.
Tony Caulder Congrats on the successful repair!
Whats that thing behind the motor that you're holding steady to unscrew the motor called? Mine was plastic? I'm replacing the motor and I suspect I need a new one of those too.
I couldn't get the motor axle to unscrew from the blower fan. It was impossible even with strong vise grips. I had to use a reciprocating saw to cut the motor from the blower fan. Then, I had to open up the back and also replace the blower fan.
Great videos! Very thorough and direct. I found my motor was bad because when I spun it, it wasn't smooth. So I vacuumed it all up and found a local motor online I'll pick up, and as I was trying to remove the bad motor I kind of crushed the long plastic rectangular nut, housing a metal nut (in your video it is metal) where the motor would thread into. It was getting late but I noticed that the motor spun smooth for a good minute. So I practiced putting it back together and it ran haha. It'll probably act up immediately so my next plan of action is to check behind to see what the motor connects to. Got any tips?
If the lint screen is on top like it is on this model, the drum is supposed to turn counterclockwise
Great video. Only suggestion would be to also buy the blower wheel, as in my case it was frozen to the motor and was not coming off.
is the blower motor a reverse thread? my blower is plastic and doesnt seem to want to come away from the motor shaft
Awesome video! GREAT JOB! One question here. When I pulled the motor out there is an electrical connection on the tensioner with a blue wire coming out of both ends Where do these go? You video did not show any wires connected to the motor from the tensioner bracket only one main connector to the motor
Don Sherbo In the control panel of your dryer there should be a wiring diagram. We cannot not say without looking at the diagram.
Wondering if the clear plastic bit that is by the motor support tab -closer toward the front of the motor by the belt- will effect the functionality of the entire motor itself? I recently found mine warped out of shape and broken when I opened my unit up
is the rear retaining clip supposed to a huge pain to get back on? because mine is and that is the one thing you didn't show
Good video and very helpful. One thing that was not clear to me after watching the video the first time was that the motor is reverse threaded.
Instead of replacing the motor I was able to lubricate the bearings with motor oil and it rotated like new again. Not sure how long it will last but its running great right now.
I managed to repair the motor in place - the centrifugal switch weights - one had lost the spring perch, I simply used the new ones and put them in place of the old ones and viola all good !
Super helpful video! Glad I didn't have mess with the wiring on the new motor. When taking the fan off spray the best you can with penetrant and find the biggest plyers you have for the front and back that will fit for the leverage. Should loosen right up.
Great video - it really helped me on replacing the motor. I want to thank the person who made the comment about breaking the blower wheel because I had to do that too when the back connection stripped. Your video on replacing the blower wheel was helpful also.
Lynn Butler Awesome!
Awesome vid! Thank you. I noticed from the video that this is a left handed thread. Glad I noticed that.
Thanks for for this well made video. I was able to replace the motor in the dryer and my wife thinks I rock.
I guess I do.
+Eric Ofsthus Thank you.
Thank you! I changed the belt myself with your help!
You're welcome!
We are always happy to help. If you would like to give us a review on Google, we would much appreciate it: g.page/r/CcVUrahZNozMEBM/review
We hope that you have a great day!
The male screw for the motor is tightened counterclockwise, and loosened clockwise?
This video was really helpful. I couldn't have replaced it correctly with the "instructions" that were sent with the motor.
The old motor in my dryer is attached using individual spade connectors. Is there an adapter to convert to a wire harness?
What did you end up doing? Mine is from 1994 and it’s the same as what you’re saying.
The blower fan is very difficult to get off. If you are not careful, you will break it. I used some automotive penetrant (Liquid Wrench, Kroil, PB Blaster, MouseMilk, etc...) and "gently" struck the blower disc with a hammer before attempting to get it off.
Also, leave the front bracket on while attempting to loosen the blower from the motor to give it some stability. A wrench on the front end is useless, use a socket (should be 22mm) and ratchet. After a good amount of force, the threads will release suddenly so wear protective gloves and watch out for sharp edges. Remember, the blower fan is REVERSE THREADED.
Don't use the socket to tighten the blower onto the new motor as the blower and pulley wheel are opposite threads and you'll end up just threading the pulley wheel off. Use the wrench or vicegrips on the shaft.
Brian Petz Thank you for your input.
Sure wish I had seen this prior to trying :(. Now the plastic piece on the back broke and I can’t get it off. I’ve already spent more on parts than I spent on the dryer and now I have np idea what to do since I can’t get it off. The video made it look super easy and now I’m in a worse situation than I was at the start
those some good tips.
wish I read all of the "this is not as easy as it sounds" comments before I attempted this repair. So far, the square plastic nut on the blower has disintegrated and my lousy vise-grips are not holding the motor shaft. May end up using an angle grinder or hole saw to cut the blower off. What a shitty design perfected by the Whirlpool engineer(s)--crafted so that you end up calling for the service repairman to come out. He's gotta be laughing his head off at me as he sits in his Lay-z-boy puffin away at that retirement pipe....
So if the plastic piece on the back is broken off does that mean I need a new blower fan now too? This motor isn't coming off at all.
Another tip if you can't get those stiff motor retaining clips back on. Or if you have trouble getting them off. Buy a big honking flat blade screwdriver with the tip at least 3/8 inch wide. Use a grinder or file to cut a wide notch into the tip with a raised "ear" on each side. This tool will now grab onto the retaining clips without slipping off, a tap with a hammer will unseat or reseat the clip onto its locking tab. And yes, video does make it look easy when dryer is not 10 years old.
I have the exact Kenmore mine has a hard start, like an extra grinding sound before the motor engages.Is that motor or the start switch? I made a video to show the sound, listen for the extra 2-3 seconds before the dryer starts to spin. Kenmore Dryer with a Hard Start?
Sounds like the motor bearings are bad and the motor is hard to start. Most likely will need a new motor soon.
Bit late to the party here, but is the dryer motor supposed to spin freely with Estate/Whirlpool units without power?
If the motor isn't spinning is there other possible causes? I see what looks like a temp sensor beside the fan on the back.
I recently replaced the dryer motor. Now the tub spins counter clockwise, and makes a stripped gear type noise when loaded full. Is the new motor wired different than the old, and is the drum supposed to rotate counter clockwise ? It seems to me it used to spin clockwise.
The dryer motor start switch is usually the failure point and it's easy to fix. Just take the switch off of the motor by removing the screws. It almost falls apart. It has these leaf like springs with contacts at the end. File the contacts until they are clean and flat. You may notice that the leaf spring is sort of weak, so bend it a bit so it pushes the contact closed with more force. Re-assemble and you are likely good to go. It doesn't hurt to clean the spinning hinge mechanism that controls the switch and oil it a bit. Make sure everything moves smoothly. I bought the cheap motor from Amazon and it was so loud my wife hated it. So I repaired my old motor as described above. It has worked perfectly for a year now. If it is too bad to repair, buy the expensive motor.
I have the same issue after hours checking everything the lat culprit was the motor it checked good. But something told me it wasn't so I pulled the spinning mechanism back it was stuck so I figured the other was bad. I turned it on and it worked until it turned off then was the same thing. My question is .can I just buy the switch or it's a one piece with the motor. Also the heat stays on fire its off
Thanks for the video! Had a broken dryer and now it's working!
Sweet!
I don't have a flat spot on the shaft of the motor, it's just completely round, a wrench does no good. I couldn't get the shaft to stop spinning when I tried to loosen the blower wheel from the drive motor, not even with vice grips on the shaft. Any suggestions?
I followed the instructions above but when the new motor runs it is very loud and seems to be rattling somewhat. Any ideas?
This video is missing key steps. The required beer after the motor removal and after the reinstall.
I have a whirlpool Imperial Series Clean Touch 7 cycles. The drum isn't spinning, but sounds like it's trying to spin and after a few seconds shuts off. would this mean I need to replace the belt, pulley, or motor?
+Jeffrey Hernandez If the motor is running, but the drum does not turn then the belt is likely broke.
This was a great video BIG Thank You for the help !!
Very helpful. I did the job today and it worked great!
Thanks.
Scott Greene Congrats!
can I change a motor in a Kenmore dryer with one from a whirlpool both electric? if not are the heating interchangeable? I have two dryers one the motor is week and the other will not heat.
Thanks! We appreciate the comment.
You may want to mention to vacuum the dryer out and also remove the back panel and duct to clean.
Thank you for your instruction of the dryer motor replacement. It helped just fine.
Great! Congrats on the repair.
You're welcome! Congrats on a big repair!
I have a kenmore series 70 dryer. My dryer turns on, gets hot, but the drum doesn't turn. I checked my belt, and it's not broken. Is it possible my motor isn't turning, and if so what's the best way to check it? Thank you for any help.
+msford ### The motor has a centrifugal switch that has to close to allow the dryer to heat. If the dryer is heating without the motor running that the switch has likely shorted and the whole motor will need replacement.
TIP - Great video, but I had the same problem as many getting the blower fan loose. I used the two wrenches per the video and started to round out the blower fan plastic nut. What I ended up doing was getting a super tight wrench on the pastic nut, and turned it so it wedged against one of the drum rollers. Then I used a socket and an impact wrench on the front of the motor. The impact was able to jar the plastic nut loose right away.. I also had to take the bolt of of the motor mount bracket in order to remove the braket so I could slide the motor straight out away from the blower fan. For some reason I couldn't get it slid out all the way at an angle. Hope this helps someone.
Thanks for the tip.
Replacing the rear motor mount clip is what you didn't show and that's what I needed to see.
I have the 80 Series dryer with the lint filter down low on the left of the front. Recently, on any setting other than Delicate, the dryer would cut off after 10 minutes or so; let it cool and it would then give me another 10. On Delicate, it would run and finish the load. Last night I took the front apart; a fair amount of lint on the blower wheel and in the open space, but not excessive; I vacuumed out all I could see or reach. Oh--I also explored the entire exhaust tube; it's completely free of blockage or lint. Waiting now to run another load on "Cotton" and see if that works; is there someplace else I should look for lint? I think the motor itself was in the back right of that opening, and if so I vacuumed it on this try.
nice video. mine didnt go as easily. i mangled the rear motor mount clip, and had to completely destroy the blower fan to get it off the motor shaft. that plastic housing "nut" strips so easily, DO NOT use an adjustable wrench. DO get an open end wrench that fits exactly. 7/8" for the front shaft and 13/16" for the blower end of the shaft
so anyhow, the video is still helpful, but unless you're swapping out a brand new motor in a brand new dryer, don't expect it to go as easily. Ok, done ranting, and I'm off to pick up a new motor, now plus a blower fan, and hopefully some new mount clips.
I wish I read this before I started mine. I also shredded the plastic nut. What did you do after that?
On the front, I used a 7/8 socket with my largest ratchet, which was a nice tight fit. On the nylon nut at the rear, I used a 13/16 open ended wrench which started stripping the nut because it wasn't a tight enough fit.
I instead replaced the open ended wrench with vice grips, which I very tightly clamped down with on the nylon nut.
Holding the vice grips as steady as I could, I turned the 7/8 socket wrench clockwise (upward), and the nut loosened right away without further stripping the nylon nut.
If the plastic screw cracks when taking out the motor, is it okay to leave it? Where can I order a new one?
+tlmacaul Are you referring to the blower wheel? If so, we sell new ones. www.repairclinic.com?TLSID=1773
+RepairClinic.com
the plastic screw at the back of the motor. The one that has to unscrew to get the motor out to replace it.
My dryer has a different layout. The lint screen is inside the door as opposed to the top of the unit so the blower is at the left-front of the machine. I disassembled the dryer up to the point of taking the motor out, but I have nothing to grab on to between the motor and the blower to prevent it from turning. At 1:50, it looks like there's a nut. I don't have that. Is there something I'm missing?
Mike F Enter your dryer's model number in our website's repair help search engine for model-specific repair help: www.repairclinic.com/repairhelp?TLSID=1773
I had to replace the blower fan after 34 years. Had to break it off in pieces and cut off the steel threaded insert with a Dremel.reinforced cutting wheel tool.. The original fan had split
I was replacing the motor on my whirlpool gas dryer but the back screw split while I was trying to unloosen it, what can I do now to remove the old motor
+Phil Brugman We are not sure what screw you are referring to. This video show the whole process of the motors replacement.
The belt was ran instead of the pulley, behind that plastic restrainer, burning up the restrainer until it tore off and breaking the belt.. What to do to replace this plastic washer?
Good video. Explains everyrhing needed to change the motor. At 1:55 when it says you may need to use force he is not kidding. A few times i thoight i would strip the nut. It dis work and the reat went smooth.
Great video...However I could not get the motor off at all. The plastic piece would not hold on to the vice scripts and eventually broke....Now what?
Is the motor reverse thread?
Someone please help!!! I just reassembled mine and now its making a loud noise like if its hitting something. I made sure the motor was placed correctly so it wouldnt hit idk im stuck
Just as an FYI, the dryer motor and fan unit have REVERSE threads. Hold the blower motor nut REAL tight, and turn the dryer motor nut CLOCKWISE. After almost shredding the plastic nut, I watched his hands in the video again, went over to the dryer, turned the nut the correct direction, and it came apart right away.
Yes, it is. We're going to add an annotation so viewers will know in the future. Thank you for bringing this to our attention.
The electric harness to my motor was screwed onto it. When I took the screws off, the "harness" fell apart revealing copper plates that looked to connect similar colored wires - blue to blue, white to yellow. The red and the black wires had already separated so I am guessing, hoping, that they also match up when installing the new motor.
The two clamps holding the motor were difficult to remove. I had to use a hammer and chisel.
That's why I only buy Whirlpool/Maytag products. They're build to last. My brothers washers dryer broke with in 3 years. I bought my washer dryer back in 2004 and it's a old model. It finally just started to act up both washer and dryer!
If you go to our website and plug in the model numbers of your dryers it will show the parts that are compatible with your dryers. If the dryers take the same motor or heating elements, you can switch them out.
Great video. Thank you for posting it and making the motor swap a simple task.
when I push the start button it works, but if I let go it does not work, We replace the push to start button but it still the same, I research on the internet, it says it is a problem with the motor, my dryer in Kenmore Elite with the door in front, Please helpI dont want to buy another one because I'm just renting this house. God Bless You, please Reply ASAP☺️
It does sound like you need a new motor . The motor centrifugal switch is not working properly; that is why you have to hold the start switch. Replacing the motor should solve the problem.
thanks for the quick reply, but what I do is I use tape to hold it down, and does it affect the dryer, or I mean if I continue doing that will it damage the dryer? God Bless you brother
Yes, absolutely. I've just spent a couple hours fighting with this and finally looked at the thread on the new motor...
🤦♂️ this also dawned on me after fighting with it when I rewatched the video and noticed the guy loosened it by going right instead of left, reverse threads. Good video however that is a detail that should be mentioned and is vital to doing the job. It might be common knowledge to people who do these all the time but the avg Joe might not know it. Btw the piece in the back is plastic also so if someone doesn’t know this they could ruin that piece on the back causing an even bigger issue.
Videos like this is why i love you tube!!!!!!! Awesome video!!!!!!
Thank you. This saved me tons of money.
No problem! Congrats on the repair.
Thank you ! Couldn’t figure it out
Thanks for your help. I got it. Even though everyone said just but a new one... nahhh!!!
You're welcome!
We are always happy to help. If you would like to give us a review on Google, we would much appreciate it: g.page/r/CcVUrahZNozMEBM/review
We hope that you have a great day!
So my dryer doesn't dry the clothes. I can hear the clothes spinning inside and I know it's warming up because the clothes come out wet and hot. Is this likely the part I need to replace? I've already cleaned all the vents of lint and took apart the back and cleaned that as well. Also, the vent leading out of the house has been cleaned.
check the coils in the bottom, they are failing maybe
NICE!! Great video!!!🫡
You're welcome!
We are always happy to help. If you would like to give us a review on Google, we would much appreciate it: g.page/r/CcVUrahZNozMEBM/review
We hope that you have a great day!
I stripped the plastic part entirely in the rear shaft :( What to do next? How can I remove this darn motor?!!! Thanks in advance!
Dante Parado There is a metal hub under the stripped plastic. You will have to use a small pipe wrench or channel lock pliers to try and hold the hub. If you still can’t get the blower off, you may need to use a hammer to break it off. Since you are replacing the motor anyway, this may be an option. After you get the motor out, you will have to remove the blower by removing the screws in the rear housing from the back of the unit and two under the top lint screen cover. You should then be able to slide the housing away and remove the old blower. Of course you will then have to also replace the blower wheel. Hope this helps.
whats the model of that motor?
Thanks this video helped a lot.🙂
excellent video! Thanks!
I just now got through disassembling the whole dryer, it's almost exactly like the first one in the video, it's funny I don't remember the name of it! Anyways, the motor was a bitch, this dryer had been sitting for several years, although it was in fact reverse threaded (almost all plastic type fans are), it was dry rotted, the square hold on the fan busted pretty much instantly, so I broke it apart with pliers from the other side! Other than that, this was just to gather all spare parts possible for my own dryer, I do all repairs myself! I gathered around $150-$200 worth of spare parts, I'm happy! To the scrap yard with the hull!
Thanks!
very good presentation.
med8tor1 Thank you!
Mine was pressed on, replaced with threaded blower. Like new.. 😊
You're welcome!
We are always happy to help. If you would like to give us a review on Google, we would much appreciate it: g.page/r/CcVUrahZNozMEBM/review
We hope that you have a great day!
Ok I replaces everything but when I turn it on its extremely loud