@@jhareng - 29.5 to 30 works well for me and no math involved. I've tried going straight in. It works okay on find threads but terrible on large threads.
So pleased to see you are using the method of setting over the top slide to half the thread angle and bringing the tool out with the cross slide. I was taught this method as an apprentice tool maker in the 1950s. It's also featured on the Colchester lathe training videos.
Thanks for the explanation on why 29.5 degrees is used, it's the clearest definition of it I've seen, long time watcher and subscriber, first time commenting, thanks for all the great videos :)
Hi Winky, you can simply keep the compound set at zero, parallel to the bed and advance the compound half the depth of cut for each pass. By moving the compound and also the cross slide this closely simulates the 30 degree angle. This method also helps with the depth of the thread as the depth is directly on the cross slide dial ( dro ). The tool load is split 87/13 so the trailing edge skims the right hand flank and the leading edge does the majority of the cutting.
Hmm... after thinking about this for a few minutes I understand what you are saying but the only advantage I see is measurable thread depth. 87/13.? dang, too much math for me but I'm sure you are correct.
@@WinkysWorkshop Hi Winky, the 87/13 is the ratio between the depth of cut on the leading edge compared to the trailing edge or 87% on the leading edge and 13% on the trailing edge. It simulates about 26.6 degrees on the compound slide.
Perfect timing and excellent explanation. Very informative. I've watched at least 4 other threads cutting videos from some TH-cam maestros but I must say your explanation was leaps and bounds bette3r. Thanks again as I just figured out the gear change required for threading and had run a quick trial last week. I can't wait to sink my teeth, or should I say my threading tooth, into this operation now.
hi Mark - That was a very good video, Thank You. You showed just enough restraint to keep it simple for beginners and not get bogged down with anything too technical. There is so much to learn about threads and cutting them that it'd take many videos just to cover a fraction of the information.
Thanks Jim. I agree. I remember when I first cut threads. It seemed complicated. Of course moving change gears around made things a little more complicated. Now with the quick change it seems almost second nature.
The divisions on the Center Gage are for measuring or comparing threads per inch. You take a light cut just scratching the surface, and then put the scale of the Gage up to the workpiece to see if you are cutting the proper thread pitch. A 6" scale can measure pitch on most threads, but the Center Gage is for comparing odd threads that the scale is not practical for. ie: 24 tpi The name PE DE wires comes from the fact that you are measuring pitch diameter, otherwise known as P.D. Good video!
@@WinkysWorkshop you are most welcome sir. Keep up the honorable job of spreading knowledge! we need to further the education of the young ones and building interest to keep the trades alive.
Great Tutorial. Thank you! Question: When you finish a pass and back the crossfeed out and slide it back to it's origin to prepare for the next pass, does it matter WHERE you park it prior to engaging the 1/2 Nut? Or does the dial work regardless? Since it's never been mentioned in any of the videos I've watched, I'd assume it doesn't matter how far to the right you run the crossfeed back??
If I am understanding correctly, no, you can return the carriage a foot further than needed as long as you engage the half nut with the dial in the correct position. You'll just be waiting longer. You are right... I left this detail out. Thanks for pointing this out.
The cork would certainly be a plus. As for letting them go I suspect the wires would flex enough to conform to the threads. I've also seen people use clay. If I had to do this very often I'd invest in these: www.flexbar.com/products/flexbar-p-d-check%E2%84%A2
Just a little thing I do is run your table in far enough to take a marker and draw a line in back of your slid and put the line so you know where it is to your table position when you cut threads this will save your behind sometime you go one turn to many ,I very rarely look up when cutting threads I look at my thread dial and line on table and compound.also give your self a little more starting room sometimes if you miss a engagement line you might need more time to get it released.! Have a great weekend.
Yeah that's a good idea. I put a stop on my other lathe and then forgot about it. I used auto feed the next day and wiped it out. No damage done but I think I'll stick with the dial. I might try what you are saying though. Thanks!
Wow. What a beautiful lathe man. i have the same lathe. i love that machine. I have a question for you. in the book. our the logan user manual. for threading. and the side panel where the gears are. To thread 8TPI to use a 32 /72/32. However with the quick change it calls for a 24 tooth stud gear instead of the 32.. Soooo i Think the quick change stud needs to be 24/72 /32 to make 8tpi?
I sold my Logan so I have no reference. However, most threads can be cut with one gear configuration using the quick change. From what I remember, lower than 8TPI requires the gear change. Sorry I can't be more help
I have a set of thread wires which have some synthetic rubber holders included with the set. The holders fit snugly onto the micrometer anvil and the wires are slid into the holders. There are 2 wires on one holder and a single on the opposing one. This takes all the awkward fumbling with the wires out of the process. Another method I have seen to free up your hands employs either a piece of modelling clay or a piece of polystyrene foam to bed the wires into. Another interesting point on threading tips. The Korloy brand thread inserts I often use do not recommend setting the compound over to half thread angle until the pitch starts to get quite coarse. They suggest plunge feeding at 90 degrees for all fine pitches. Edit to add: I have also seen operators set the wires up on the threads by bedding them into Vaseline or grease.
Interesting... I need to look for those. I knew about the modeling clay, I'd say it works well but I never have any clay laying around when I need it. Thanks!
@@WinkysWorkshop is there an email attached to your TH-cam channel? If so I can photograph my wires and rubber retainers and email the photos. The thread wire and retainer set came from arceurotrade.co.uk. They still supply the same set and are visible in their online catalogue. As you already have wires it would be quite feasible to make some replicas of the retainers I have. Edit to add link to product. Have a browse of all the photos and you'll see how they work: www.arceurotrade.co.uk/Catalogue/Measurement/Thread-Gauges-and-Wires/Thread-Measuring-Wire-Set-with-Holders
@@WinkysWorkshop not that I wish blow my own trumpet but I have a video of a new style of wires that I came up with that you might find of interest. The video shows metric thread version but adapting to Imp tpi type would be no problem. On your comment about not cutting in reverse, as thread cutting forces are generally low there is often not enough force to unscrew an averagely tight chuck, certainly worth an experiment to check.
Center Gauge has double thread pitch on it for the number of TPI you want to cut If your OD is correct or close go in what the scale says and you should be close .I use the snap taps like you have the one you are using is a 60 universal tool I use the ones that are for the correct number of threads you want to cut ..They cut your threads to correct size when your OD is too the size you want for that thread ,leave your OD .005 big when you rough ,and then color it and when you start taking the color off you are close. and cut thread to correct OD and it is to size.This tool cuts the OD of thread as well as thread to size.! We used these in high production shop a lot.
I guess I had this backward. My thought was always to set the compound at 30.5 Degrees so as to leave a small jagged edge on the right side. The purpose being that you are only cutting on one side (the left side). This helps reduce chatter because you are NOT cutting on 2 surfaces at the same time. Then when taking the final pass, you would only advance the "cross slide" enough to clean up the right side.
I too have a screw on chuck but I think it sits firmly enough that threading in reverse won't make it come loose. So far it hasn't but maybe I'm up for a scary moment, I don't know but it takes quite some force to remove it.
I think it is highly dependent on the thread fit. My current chuck might be okay but past chucks were not. I made a wood lathe that had the same spindle as my metal lathe. Apparently it was very slightly small. It came off when I turn the lathe off (very scary). I also tried cutoff on my metal lathe... big mistake. Honestly the only advantage to threading in reverse in my opinion is that you are threading away from the chuck.
winky. I have a real good question for you and i hope you will answer it for me. I changed my lathe to the right gears for single point threading. now, the job finished out great. my question to you is. Do i have to change my lathe back to the original gear settings, or can i use my lathe without changing my gears back. I havent tried to use my lathe since but would really like to know an answer to my question. thank, robert sanders
The gears are controlling the feed rate of the cutter so unless you were cutting fine threads you probably need to change the gears back or to a different combination depending on your desired feed rate. More TPI will be a slower feed rate.
@@WinkysWorkshop Thanks. There were some debates on this subject about gear changing back to the original settings and some people i have talked to didnt even know the answer.
Very educational and informative. I didn't realize there was that much involved in cutting threads. Of course I'm not a machinist, but I do find it very interesting 👍🏻👍🏻
I remember I was surprised when I first saw it done but after you do it 20 times it's second nature. There is actually a lot more info to know about cutting threads although what was in the video covered the basics and probably enough info for cutting basic threads. I've cut some internal and some left hand threads but I'd like to know how to cut acme threads. Thanks for watching.
@@jhareng - I would agree that I presented more than what is needed to do basic threading but I could have also gone MUCH deeper into the topic. From my own perspective the only part I made confusing is the threading dial. I really needed to include a few examples of other lathes. Brainwashing the gullible DIYers... Really?
@@jhareng - I think I'm in the real world even if this is my hobby. I know at the machine shop a friend of mine owns he uses this procedure and also the shop at work... of course this is manual one off stuff and not high production CNC thread forming or multi-point threading. As I said in the video, this is one of many methods.
Generally you can run your tool up to the face of your chuck and sq the tool with the face of chuck and it will be right on ,no need for the center gauge ,I have the same holder you have ,or just the side of the cutting tool I always put a sheet of white paper under tool to see if it is sq.
Yeah, that's actually what I do but thanks. Generally I eyeball it and everything works. I just felt like it was important to include the gauge in the video.
Got confused where you got the 55 thou. If you used the 10% rule it would have been 60 thou. Why did you use the undercut dimension on the other end of the shaft instead of sticking with your 10% rule. Thanks Mike
Wow... you were paying close attention! I had to go back and watch, I should have gone 60 deep. With that being said, it's not very critical. I probably had some slight scratches from the tip of the tool in the undercut but nothing noticeable. Most often I guess at the undercut depth anyway. I'm not sure what you mean by other end of the shaft. Where I ground the bevel? Technically you could grind the end about the same as the undercut but even no grind work. The bevel just makes is easier to get the nut started. Thanks for watching, I'm impressed with your attention to detail.
@@WinkysWorkshop At 5:32 you measured a previously threaded shaft under cut . I thought that was the other end of the shaft you were machining on this video. Thanks Mike
Good job on the video. You didn't explain the numbers on your center gage so I thought I'd try. The numbers on your fishtail / center gage show DD (which is double depth of thread ) for a bunch of different pitches. That is the depth of the threads on both sides added together which is a good number for you to go to for cutting your relief cut at the end of your thread. Then when your ready to set up for threading I set my cross slide to 0 at a place I want to crank out from at the end of a cut. Then I back the cross slide out the double depth of the thread from my center gage (go past and feed back in to that number so your slop in the lead screw is coming in.). Next I bring the compound in to just scratch my part and put a grease pencil mark on my compound dial where that is. Then turn the cross slide in to your zero and that is where your final cut should be. Next back off your compound and bring it back in till it starts cutting. Last you make your passes feeding in until you get to the mark you made on your compound dial. I usually stop a little before so I can measure pitch or check fit as it gets close. Also if you're checking fit with a nut, I run a tap through it first to clean out any flash from plating or get any dirt out of the thread. If possible I use a certified ring gauge instead of a nut.
Carl, that's an outstanding description! Thank you very much for taking the time to tell me this. I've really got some great viewers! Hopefully you have subscribed, I welcome your input. I'd say you did subscribe, it seems like I have seen you comment before. Thanks again.
I like to use the full form inserts that exactly match the pitch I'm cutting. They "top" the thread so you don't have to smooth it off with abrasive cloth or a file.
A VFD on the main drive would be great but you still have to have the quick change gears box to set the feed rate in relationship to the chuck rotation. I can run the lathe faster but you have to have quick reflexes. I would like the VFD on the main drive but honestly, it's fairly easy to adjust the speed anyway.
A very good video on a subject that seems incredibly complicated when one is new to the lathe. I liked your use of the diagrams. Maybe a simple video on tolerances would make a good follow up video. I know that is a complex subject but if you could explain the basics of why we have them it might make for a good video. Just a suggestion -- Andy
Most often I don't need tight tolerances although I made a wood lathe that takes my screw mount metal lathe chucks, I made those threads with accurate tolerances but I'd have to educate myself a bit more before I made a video... and I might do that. Thanks for watching.
@@WinkysWorkshop I remember the videos on your wood lathe. It was basically a pattern makers lathe if I remember correctly. Is there a connection between gray hair and memory loss? Have a good day, always enjoy your video's. Andy
@@andyZ3500s Haha... I don't know if it is connected. I tried hair dye but it didn't help. It was that "Touch of Gray" stuff... maybe it only takes a touch to screw up my memory.
Very interesting & informative. I have a few questions. Is it imperative there be a relief cut at the end of the treads? Could you stop the feed and retract the tool at the same time with 2 hands? (and live dangerous lol). With the machine you were using could it be set to cut acme threads? (would like to see that). I haven't watched all your videos yet (so you may have done it this already) but would like to see turning on a taper. Thanks for posting.
You're right, that would be pretty tricky to pull off, but I'd imagine some pros might be able to. You can cut acme threads with this kind of lathe, that's more about the shape of the cutter, as far as I know, most acme threads are the same threads per inch that most engine lathes can cut, except in my case, my Atlas won't cut metric pitches.
@@IBWatchinUrVids I have a 10X54 Atlas lathe and I've cut metric threads on it. I was curious as to the difference in lathes? I don't have a quick change gear box, just change gears so I was wondering if your's has the quick change gear box and if that's what makes the difference? My Atlas lathe manual talks about setting up for metric threads.
@@bsteleven Ahh, yes with change gears is a different story. I do have another smaller import lathe with change gears that will do metric or imperial threads, but the Atlas has a quick change gear box for imperial only. Here's a picture from right after the restoration. It looks quite a bit different these days, it's never been this clean since. i.imgur.com/JuVlNpZ.jpg
Thanks you sir, I've cut many threads without the relief but most often it looks a little messy at the end. However, It doesn't seem hurt anything. I suppose if you are inconsistant on larger threads you might break the tip off your tool. I've never cut Acme threads but this is something I plan to try... The taper should be easy with a tapering attachment (which I do not have).
@@IBWatchinUrVids - You have to use a transposing gear but you can not disengage the half nut. You have to stop, pull the tool out and reverse to the start. I've never done it but the relief area to pull out is likely more important.
Winky's Workshop Yes i did! Gave me some nice ideas! unfortunally the project has some delay. I recently got a new function and started a new study etc etc. If I have some more time left i’ll certainly do some improvements on the mill
14:05 you incorrectly stated at the end of your first pass that you “backed the compound back out”, when, in fact you were backing the crossfeed, not the compound. Just sayin’… other than that, great video.
Tried threading with the tool holder and the compound at 29.5 degrees ha ha that sure didn't work. (Why do I need so much stick out :D) Know better now :)
@@WinkysWorkshop Your little dance is brilliant! I think it shows how we all feel to be away from the missus and in the shed. You should adopt it as your signature exit.
Whole pile of mistakes in this. It's annoying that people here are saying "Ahh I understand nowwww" They go away with all kinds of wrong information and pass THAT on. So on and on it goes.!
I think overall it was a good video but maybe I got some terminology wrong. Please link me to your video on thread cutting so that I will better understand. What? No video? It's annoying when people say "Whole pile of mistakes in this" and then don't offer any useful information. I'm not above learning from constructive criticisms, in fact I welcome it. Bring it on!
@@WinkysWorkshop 3:40 There is no such thing as UTC or UTF. It is UNC, UNF, UNEF, UNS+. The UN stands for UNIFIED (NOT National) to which is added Coarse, Fine, Extra Fine and Radius. To which you can add UNR with a C, F, EF or S which is the same basic thread as UN but with a radius in the root and/or the crest according to certain rules. Then there is also a separate category, UNJ which is for aerospace use and has all the same extensions but has many parameters that differ from the UN/UNR form..
@@WinkysWorkshop 4:20 According to your drawing, the crest and root are reversed. The root would have to be twice the width of the crest. 4:30 The tool does NOT go down below the root. The tool FORMS that root. The root shape is the shape of the tool so nothing should go below the root. And you do NOT make the undercut below that root flat..
@@WinkysWorkshop 4:43 You do not and should not take off more than the "root diameter"(actually called the Minor diameter) You are suggesting a sharp pointed tool which is never the case. A properly shaped tool will stop within the minor diameter tolerance..


Wow, the explanation of why the compound angle is what it is, flat out perfect. I never truly understood why until now. Thank you
This good to hear. I wasn't sure it I explained it well enough - Thanks!
Finally, a thread cutting tutorial that I can understand. I now feel confident that I can try this. Thank you! You’re a great teacher👍😊
Wow... that's great to hear. Thanks you so much for the comment!
The clearest video I have ever watched on single point screw cutting and measurement using thread wires. Thank you. Mike UK
No need to set top slide at 29 1/2 degrees only the diyers do that. Leave at 90 degrees real simple and no maths.
Thanks Mike, this is good to hear.
@@jhareng - 29.5 to 30 works well for me and no math involved. I've tried going straight in. It works okay on find threads but terrible on large threads.
So pleased to see you are using the method of setting over the top slide to half the thread angle and bringing the tool out with the cross slide.
I was taught this method as an apprentice tool maker in the 1950s.
It's also featured on the Colchester lathe training videos.
I think I know what you are saying and I agree, its the best method.
This is By Far, the most informative threading video I’ve ever seen. I finally understand the various things I need to do. Thank you
Awesome, thank you!
You got her done just right Winky. The most enjoyable thing you can do on a lathe is single point threading.
I agree... thanks!
Thanks for the explanation on why 29.5 degrees is used, it's the clearest definition of it I've seen, long time watcher and subscriber, first time commenting, thanks for all the great videos :)
You're welcome, and thanks!
Hi Winky, you can simply keep the compound set at zero, parallel to the bed and advance the compound half the depth of cut for each pass. By moving the compound and also the cross slide this closely simulates the 30 degree angle. This method also helps with the depth of the thread as the depth is directly on the cross slide dial ( dro ). The tool load is split 87/13 so the trailing edge skims the right hand flank and the leading edge does the majority of the cutting.
Hmm... after thinking about this for a few minutes I understand what you are saying but the only advantage I see is measurable thread depth. 87/13.? dang, too much math for me but I'm sure you are correct.
@@WinkysWorkshop Hi Winky, the 87/13 is the ratio between the depth of cut on the leading edge compared to the trailing edge or 87% on the leading edge and 13% on the trailing edge. It simulates about 26.6 degrees on the compound slide.
@@machinists-shortcuts Yeah, I figured that. I can picture this in my mind. I'm just not good with the math.
Perfect timing and excellent explanation. Very informative. I've watched at least 4 other threads cutting videos from some TH-cam maestros but I must say your explanation was leaps and bounds bette3r. Thanks again as I just figured out the gear change required for threading and had run a quick trial last week. I can't wait to sink my teeth, or should I say my threading tooth, into this operation now.
Thanks! I got some of the info wrong in the first part but the rest is good into to get you started. I need to redo the first part.
I was struggling with threading, watched this and have a better understanding. Off to the lathe!
Cool. Let me know how you do.
hi Mark - That was a very good video, Thank You. You showed just enough restraint to keep it simple for beginners and not get bogged down with anything too technical. There is so much to learn about threads and cutting them that it'd take many videos just to cover a fraction of the information.
Thanks, you are right, threading is a deep subject. I'd have to study the subject a bit more myself before making a more in depth video.
Thanks for that video explanation. Seems like a lot if you have never done threading but you covered everything in a very easy to understand way.
Thanks Jim. I agree. I remember when I first cut threads. It seemed complicated. Of course moving change gears around made things a little more complicated. Now with the quick change it seems almost second nature.
Best graphic ever!
Thank you sir!
The divisions on the Center Gage are for measuring or comparing threads per inch. You take a light cut just scratching the surface, and then put the scale of the Gage up to the workpiece to see if you are cutting the proper thread pitch. A 6" scale can measure pitch on most threads, but the Center Gage is for comparing odd threads that the scale is not practical for. ie: 24 tpi The name PE DE wires comes from the fact that you are measuring pitch diameter, otherwise known as P.D. Good video!
Now I need to go redo my video... I'm kidding. It's nice to know about the gauge. Thanks!
@@WinkysWorkshop you are most welcome sir. Keep up the honorable job of spreading knowledge! we need to further the education of the young ones and building interest to keep the trades alive.
@@t.d.mich.7064 - Thanks and I totally agree!
Great Tutorial. Thank you! Question: When you finish a pass and back the crossfeed out and slide it back to it's origin to prepare for the next pass, does it matter WHERE you park it prior to engaging the 1/2 Nut? Or does the dial work regardless? Since it's never been mentioned in any of the videos I've watched, I'd assume it doesn't matter how far to the right you run the crossfeed back??
If I am understanding correctly, no, you can return the carriage a foot further than needed as long as you engage the half nut with the dial in the correct position. You'll just be waiting longer. You are right... I left this detail out. Thanks for pointing this out.
Great video. Thanks for letting me know about letting the pee dee wire go. I was taught to use a bit of cork and insert the wires to hold them
The cork would certainly be a plus. As for letting them go I suspect the wires would flex enough to conform to the threads. I've also seen people use clay. If I had to do this very often I'd invest in these: www.flexbar.com/products/flexbar-p-d-check%E2%84%A2
Good explanation of the concept Wink, thanks for sharing,
Cheers
Thanks!
Just a little thing I do is run your table in far enough to take a marker and draw a line in back of your slid and put the line so you know where it is to your table position when you cut threads this will save your behind sometime you go one turn to many ,I very rarely look up when cutting threads I look at my thread dial and line on table and compound.also give your self a little more starting room sometimes if you miss a engagement line you might need more time to get it released.! Have a great weekend.
Yeah that's a good idea. I put a stop on my other lathe and then forgot about it. I used auto feed the next day and wiped it out. No damage done but I think I'll stick with the dial. I might try what you are saying though. Thanks!
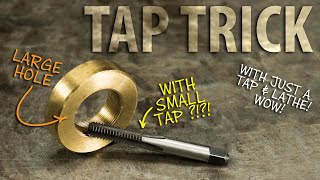
Lots of good detail. Loved the tap bit trick. Thanks.
Thanks and thanks for watching.
Wow. What a beautiful lathe man. i have the same lathe. i love that machine. I have a question for you. in the book. our the logan user manual. for threading. and the side panel where the gears are. To thread 8TPI to use a 32 /72/32. However with the quick change it calls for a 24 tooth stud gear instead of the 32.. Soooo i Think the quick change stud needs to be 24/72 /32 to make 8tpi?
I sold my Logan so I have no reference. However, most threads can be cut with one gear configuration using the quick change. From what I remember, lower than 8TPI requires the gear change. Sorry I can't be more help
a very intuitive video,very well explained.thanks for sharing my friend.keep up the good work......
Thank you Ray, glad you liked it!
I have a set of thread wires which have some synthetic rubber holders included with the set. The holders fit snugly onto the micrometer anvil and the wires are slid into the holders. There are 2 wires on one holder and a single on the opposing one. This takes all the awkward fumbling with the wires out of the process. Another method I have seen to free up your hands employs either a piece of modelling clay or a piece of polystyrene foam to bed the wires into. Another interesting point on threading tips. The Korloy brand thread inserts I often use do not recommend setting the compound over to half thread angle until the pitch starts to get quite coarse. They suggest plunge feeding at 90 degrees for all fine pitches. Edit to add: I have also seen operators set the wires up on the threads by bedding them into Vaseline or grease.
They really can be a pain in the butt, especially on very large, or very small threads.
Interesting... I need to look for those. I knew about the modeling clay, I'd say it works well but I never have any clay laying around when I need it. Thanks!
@@WinkysWorkshop is there an email attached to your TH-cam channel? If so I can photograph my wires and rubber retainers and email the photos. The thread wire and retainer set came from arceurotrade.co.uk. They still supply the same set and are visible in their online catalogue. As you already have wires it would be quite feasible to make some replicas of the retainers I have. Edit to add link to product. Have a browse of all the photos and you'll see how they work: www.arceurotrade.co.uk/Catalogue/Measurement/Thread-Gauges-and-Wires/Thread-Measuring-Wire-Set-with-Holders
@@howardosborne8647 - wow... that's fairly simple! mark21056@gmail.com
@@WinkysWorkshop not that I wish blow my own trumpet but I have a video of a new style of wires that I came up with that you might find of interest. The video shows metric thread version but adapting to Imp tpi type would be no problem.
On your comment about not cutting in reverse, as thread cutting forces are generally low there is often not enough force to unscrew an averagely tight chuck, certainly worth an experiment to check.
I knew that was a logan lathe. I have a model 922 which is very similar. That company is still in business and still supplies parts for them too!
Yep... a good lathe!
Center Gauge has double thread pitch on it for the number of TPI you want to cut If your OD is correct or close go in what the scale says and you should be close .I use the snap taps like you have the one you are using is a 60 universal tool I use the ones that are for the correct number of threads you want to cut ..They cut your threads to correct size when your OD is too the size you want for that thread ,leave your OD .005 big when you rough ,and then color it and when you start taking the color off you are close. and cut thread to correct OD and it is to size.This tool cuts the OD of thread as well as thread to size.! We used these in high production shop a lot.
I knew I'd learn something! Thanks.
I guess I had this backward. My thought was always to set the compound at 30.5 Degrees so as to leave a small jagged edge on the right side. The purpose being that you are only cutting on one side (the left side). This helps reduce chatter because you are NOT cutting on 2 surfaces at the same time. Then when taking the final pass, you would only advance the "cross slide" enough to clean up the right side.
Interesting... Maybe you are on to something. Maybe I need to try that!
Hi Wink,
I tried to load some pics for you but I had a problem loading with my desktop.......I did try .no luck
Always a great video Mark
Thanks Troy!
I too have a screw on chuck but I think it sits firmly enough that threading in reverse won't make it come loose. So far it hasn't but maybe I'm up for a scary moment, I don't know but it takes quite some force to remove it.
I think it is highly dependent on the thread fit. My current chuck might be okay but past chucks were not. I made a wood lathe that had the same spindle as my metal lathe. Apparently it was very slightly small. It came off when I turn the lathe off (very scary). I also tried cutoff on my metal lathe... big mistake. Honestly the only advantage to threading in reverse in my opinion is that you are threading away from the chuck.
winky. I have a real good question for you and i hope you will answer it for me. I changed my lathe to the right gears for single point threading. now, the job finished out great. my question to you is. Do i have to change my lathe back to the original gear settings, or can i use my lathe without changing my gears back. I havent tried to use my lathe since but would really like to know an answer to my question. thank, robert sanders
The gears are controlling the feed rate of the cutter so unless you were cutting fine threads you probably need to change the gears back or to a different combination depending on your desired feed rate. More TPI will be a slower feed rate.
@@WinkysWorkshop Thanks. There were some debates on this subject about gear changing back to the original settings and some people i have talked to didnt even know the answer.
@@robertsanders1916 You should have a change gear chart. If you don't know what feed rate you need use the slowest feed rate (highest thread count).
Spot on bloke, it cleared a mystery for me..
Thanks Karl!
Very educational and informative. I didn't realize there was that much involved in cutting threads. Of course I'm not a machinist, but I do find it very interesting 👍🏻👍🏻
I remember I was surprised when I first saw it done but after you do it 20 times it's second nature. There is actually a lot more info to know about cutting threads although what was in the video covered the basics and probably enough info for cutting basic threads. I've cut some internal and some left hand threads but I'd like to know how to cut acme threads. Thanks for watching.
He has made it more complicated than it really is by brainwashing the gullable diyers
@@jhareng - I would agree that I presented more than what is needed to do basic threading but I could have also gone MUCH deeper into the topic. From my own perspective the only part I made confusing is the threading dial. I really needed to include a few examples of other lathes. Brainwashing the gullible DIYers... Really?
Nah just copying other diyers, not how its done in the real world.
@@jhareng - I think I'm in the real world even if this is my hobby. I know at the machine shop a friend of mine owns he uses this procedure and also the shop at work... of course this is manual one off stuff and not high production CNC thread forming or multi-point threading. As I said in the video, this is one of many methods.
Generally you can run your tool up to the face of your chuck and sq the tool with the face of chuck and it will be right on ,no need for the center gauge ,I have the same holder you have ,or just the side of the cutting tool I always put a sheet of white paper under tool to see if it is sq.
Yeah, that's actually what I do but thanks. Generally I eyeball it and everything works. I just felt like it was important to include the gauge in the video.
Got confused where you got the 55 thou. If you used the 10% rule it would have been 60 thou. Why did you use the undercut dimension on the other end of the shaft instead of sticking with your 10% rule. Thanks Mike
Wow... you were paying close attention! I had to go back and watch, I should have gone 60 deep. With that being said, it's not very critical. I probably had some slight scratches from the tip of the tool in the undercut but nothing noticeable. Most often I guess at the undercut depth anyway. I'm not sure what you mean by other end of the shaft. Where I ground the bevel? Technically you could grind the end about the same as the undercut but even no grind work. The bevel just makes is easier to get the nut started. Thanks for watching, I'm impressed with your attention to detail.
@@WinkysWorkshop At 5:32 you measured a previously threaded shaft under cut . I thought that was the other end of the shaft you were machining on this video. Thanks Mike
@@michaelcostello6991 - I got you. Like I said... I seldom measure the undercut anyway.
Good job on the video. You didn't explain the numbers on your center gage so I thought I'd try. The numbers on your fishtail / center gage show DD (which is double depth of thread ) for a bunch of different pitches. That is the depth of the threads on both sides added together which is a good number for you to go to for cutting your relief cut at the end of your thread. Then when your ready to set up for threading I set my cross slide to 0 at a place I want to crank out from at the end of a cut. Then I back the cross slide out the double depth of the thread from my center gage (go past and feed back in to that number so your slop in the lead screw is coming in.). Next I bring the compound in to just scratch my part and put a grease pencil mark on my compound dial where that is. Then turn the cross slide in to your zero and that is where your final cut should be. Next back off your compound and bring it back in till it starts cutting. Last you make your passes feeding in until you get to the mark you made on your compound dial. I usually stop a little before so I can measure pitch or check fit as it gets close. Also if you're checking fit with a nut, I run a tap through it first to clean out any flash from plating or get any dirt out of the thread. If possible I use a certified ring gauge instead of a nut.
Carl, that's an outstanding description! Thank you very much for taking the time to tell me this. I've really got some great viewers! Hopefully you have subscribed, I welcome your input. I'd say you did subscribe, it seems like I have seen you comment before. Thanks again.
I like to use the full form inserts that exactly match the pitch I'm cutting. They "top" the thread so you don't have to smooth it off with abrasive cloth or a file.
I need to try those. Thanks
Winky, could do that thread cutting with a VFD controller ? then if you don't have a gear box you can do it easier ..? any comments .
A VFD on the main drive would be great but you still have to have the quick change gears box to set the feed rate in relationship to the chuck rotation. I can run the lathe faster but you have to have quick reflexes. I would like the VFD on the main drive but honestly, it's fairly easy to adjust the speed anyway.
Great explanation mate
Thanks!
Winky, a bit later than I intended but I have emailed you some images of my thread wires complete with the neoprene rubber retainers.
Good video Mark, Thanks.
Thanks Ray!
A very good video on a subject that seems incredibly complicated when one is new to the lathe. I liked your use of the diagrams. Maybe a simple video on tolerances would make a good follow up video. I know that is a complex subject but if you could explain the basics of why we have them it might make for a good video. Just a suggestion -- Andy
Most often I don't need tight tolerances although I made a wood lathe that takes my screw mount metal lathe chucks, I made those threads with accurate tolerances but I'd have to educate myself a bit more before I made a video... and I might do that. Thanks for watching.
@@WinkysWorkshop I remember the videos on your wood lathe. It was basically a pattern makers lathe if I remember correctly. Is there a connection between gray hair and memory loss? Have a good day, always enjoy your video's. Andy
@@andyZ3500s Haha... I don't know if it is connected. I tried hair dye but it didn't help. It was that "Touch of Gray" stuff... maybe it only takes a touch to screw up my memory.
Very well explained sir! 👍😊
Thank you sir!
Very interesting & informative. I have a few questions. Is it imperative there be a relief cut at the end of the treads? Could you stop the feed and retract the tool at the same time with 2 hands? (and live dangerous lol). With the machine you were using could it be set to cut acme threads? (would like to see that). I haven't watched all your videos yet (so you may have done it this already) but would like to see turning on a taper. Thanks for posting.
You're right, that would be pretty tricky to pull off, but I'd imagine some pros might be able to. You can cut acme threads with this kind of lathe, that's more about the shape of the cutter, as far as I know, most acme threads are the same threads per inch that most engine lathes can cut, except in my case, my Atlas won't cut metric pitches.
@@IBWatchinUrVids I have a 10X54 Atlas lathe and I've cut metric threads on it. I was curious as to the difference in lathes? I don't have a quick change gear box, just change gears so I was wondering if your's has the quick change gear box and if that's what makes the difference? My Atlas lathe manual talks about setting up for metric threads.
@@bsteleven Ahh, yes with change gears is a different story. I do have another smaller import lathe with change gears that will do metric or imperial threads, but the Atlas has a quick change gear box for imperial only. Here's a picture from right after the restoration. It looks quite a bit different these days, it's never been this clean since. i.imgur.com/JuVlNpZ.jpg
Thanks you sir, I've cut many threads without the relief but most often it looks a little messy at the end. However, It doesn't seem hurt anything. I suppose if you are inconsistant on larger threads you might break the tip off your tool. I've never cut Acme threads but this is something I plan to try... The taper should be easy with a tapering attachment (which I do not have).
@@IBWatchinUrVids - You have to use a transposing gear but you can not disengage the half nut. You have to stop, pull the tool out and reverse to the start. I've never done it but the relief area to pull out is likely more important.
can you give me the number of the carbide insert that you used and the number of the carbide holder please?.
I'm pretty sure it was the same as this link. amzn.to/3Bq1c7X
Thank you
Very Nice video!
Thanks, just watched your RF mill rebuild. Big job. I've fixed a few things on mine but not anything major. Did you see my quill lock video?
Winky's Workshop
Yes i did! Gave me some nice ideas!
unfortunally the project has some delay.
I recently got a new function and started a new study etc etc.
If I have some more time left i’ll certainly do some improvements on the mill
doesn't need to be 29.5. The compound angle doesn't even that fine of adjustments. Any where between 27
Yeah... I agree. It just to make you error to the low side because over 30 starts to have a negative effect.
14:05 you incorrectly stated at the end of your first pass that you “backed the compound back out”, when, in fact you were backing the crossfeed, not the compound. Just sayin’… other than that, great video.
I'm sure you are correct, I hope other are paying attention like you :o)
👍👍
خیلی عالی.
Tried threading with the tool holder and the compound at 29.5 degrees ha ha that sure didn't work. (Why do I need so much stick out :D) Know better now :)
I had to think about that... no not a good idea Ha... Thanks for watching.
Awww... no dance today?
I'm saving my energy for something more radical - Ha
@@WinkysWorkshop Your little dance is brilliant! I think it shows how we all feel to be away from the missus and in the shed. You should adopt it as your signature exit.
@@28gwdavies - Haha... thanks, I may do that!
Whole pile of mistakes in this. It's annoying that people here are saying "Ahh I understand nowwww" They go away with all kinds of wrong information and pass THAT on. So on and on it goes.!
I think overall it was a good video but maybe I got some terminology wrong. Please link me to your video on thread cutting so that I will better understand. What? No video?
It's annoying when people say "Whole pile of mistakes in this" and then don't offer any useful information. I'm not above learning from constructive criticisms, in fact I welcome it. Bring it on!
@@WinkysWorkshop Ok Here goes.....
@@WinkysWorkshop 3:40 There is no such thing as UTC or UTF. It is UNC, UNF, UNEF, UNS+. The UN stands for UNIFIED (NOT National) to which is added Coarse, Fine, Extra Fine and Radius.
To which you can add UNR with a C, F, EF or S which is the same basic thread as UN but with a radius in the root and/or the crest according to certain rules.
Then there is also a separate category, UNJ which is for aerospace use and has all the same extensions but has many parameters that differ from the UN/UNR form..
@@WinkysWorkshop 4:20 According to your drawing, the crest and root are reversed. The root would have to be twice the width of the crest.
4:30 The tool does NOT go down below the root. The tool FORMS that root. The root shape is the shape of the tool so nothing should go below the root. And you do NOT make the undercut below that root flat..
@@WinkysWorkshop 4:43 You do not and should not take off more than the "root diameter"(actually called the Minor diameter) You are suggesting a sharp pointed tool which is never the case. A properly shaped tool will stop within the minor diameter tolerance..
You are a bad example wearing long sleeves.
Sorry... cold basement
👍👍