DIY Deck Cable Railing | Tips & Tricks | SAVED HUNDREDS | Part 2

ฝัง
- เผยแพร่เมื่อ 30 มิ.ย. 2024
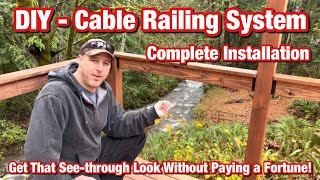
- In response to my first video DIY Deck Cable Railing ( • DIY Deck Cable Railing... ) I wanted to add a few more DETAILS and points of clarification on Deck Cable Railing Installation. This video focuses on some new Tips & Tricks I've learned from my subscribers and things I didn't cover in my last video! All items where purchased from AMAZON with links below! BE SURE TO WATCH THE FIRST VIDEO since it shows how to do EVERYTHING!
• DIY Deck Cable Railing... sub_confirmation=1
Subscribe to the channel to see more great content! DIY, Design, and Lake Fun!
www.youtube.com/@lakewarrior1...
Materials and tools needed from amazon. FOLLOW THE LINKS!!
NEW PARTS RECOMMENDED
30 Degrees Beveled Washers
amzn.to/3S9Uyca
MATERIALS NEEDED FOR PROJECT
Wire Rope
amzn.to/3RLg3R9
Tensioners
amzn.to/3QNhXPy
Pass through Connectors
amzn.to/3eNGVRL
Pass through Diagonal 30 Degrees for steps
amzn.to/3Bna51w
Crimping Tool
amzn.to/3Bna51w
Drill Used
amzn.to/3CuzLLE
Disclosure: Links contain affiliates. When you buy through one of our links we will receive a commission. This is at no cost to you. Thank you for supporting Lake Warrior and allowing us to continue to bring you valuable content. - แนวปฏิบัติและการใช้ชีวิต


This was a great follow up to your previous video. Question about the stairs and posts - What is the safe or code distance between posts for using this wire system? You step post distance seems much longer than other videos I have watched
I love the railings, what kind of wood did you use for your little bar area where the stools are? That’s such a great idea.
I love the fact that by using the wire does not obstruct your view either rather than having to look thru wood posts. it creates an open view!
Hey Thanks Cyndi! It totally opens up the view! Appreciate the comments:)
Informative video. Thank you. What "Steamboat Ken' basically used is commonly referred to as a 'storyboard'. I'm intrigued by Ken leaving the tension-er hardware fully exposed on the inside of the run, it def has it's appeal, as opposed to your leaving the hardware threaded ends overly long and just capping it with the acorns...no offense. I'm using all black hardware so leaving the hardware exposed will have even less visual impact...will have to give that some thought......thanks again.
You are the man 🤝!!! You answered all the questions that puzzled me. Even better, are the Amazon links you provided 👏
This was extremely helpful. Thank you!
Glad it was helpful!
No issues with the very long run? Is this Muzata? I thought they suggested 15’ distances between tensioners.
Thanks for the video - helped out a lot! I have the cable tensioners like you do and was wondering for the stairs, how'd you tighten the dead head at the posts? I can't tighten with the angle as the tensioners (6") are too small to get tighten them without twisting the cable. I'm stuck as I've pre-drilled angle holes for the bottom of the stairs. Suggestions? Thanks in advance!!
Tricky, I went straight through for the tensioners on my steps. U might be able to drill a larger hole to counter sink the nuts.. not great but could work.
Hope that helps
Lake warrior
Great step by step...thank you!
I'm using these tips to create a pool fence to keep the grand kids safe. I feel better running the cable vertically as then they can't climb the wires as a ladder.
Would you recommend lag to lag as I will be running cables vertically? Otherwise I was thinking of using the tension bolts on the bottom railing and running the cable up, through the top railing across 3.5" then down to another lag. A thought would be to clad the top railing so the cable cross over was hidden.
Any thoughts?
I think lag to lag would be the easiest, but if u could do a lag in top an tensioner on the bottom the nuts would be hidden an easy to access. Best of luck!
Kevin, question about tensioning, so I get where you start you crimp and run through the first end post, when you get to the other end how do you crimp that as the part of the tensioner you would crimp would be inside the post on the terminating end. I understand how it would work with the lag piece like you did not the stairs to the top of the property but not how you did it on the big railing?
The trick is install the first tensioner, string the cable through holes, insert the other tensioner into the hole, pull the line tight an measure where to cut the cable-u have to eyeball it. Then pull the tensioner out, cut the cable based on your measurement. Re insert an tighten. When u do this make sure the nuts on the tensioner are let all the way out, that allows tge most amount of tension adjustment.. hope that helps!
How exactly did you fish the cable through the post on a 45°? I have 3 posts on 3 different corners that will require the cable to make a 45° in the post itself in order to put it through the next post
If you have access to both ends you would ideally use a tensioner on each one?
I agree Scott! If you can fit them it certainly makes sense!
What spacing of posts do you recommend? 6ft 8ft ?
I’d say the closer the better. Lean towards 6’. A lot of times I just evenly divide the space I’m trying to add the railing too. Normally looks better!
Good luck an thanks for watching!
Lake warrior
shouldn't the cable have a vertical support every 3 feet?
You can add that support however by my local codes that’s not required. The trick is marking sure u can tension the cables enough. I’d add it if u feel it’s better or your local code requires it!
Thanks watching!
Lake warrior