Ford Transit Van Build | 2 Tips for Framing Cabinets Using Extruded Aluminum

ฝัง
- เผยแพร่เมื่อ 27 ส.ค. 2024
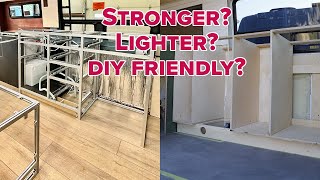
- As we begin to work on framing for cabinets and our bed system, we share two important learnings for making sure your aluminum framing is attached squarely to your van wall and ceiling for level cabinets, countertops and the bed!
Follow us!!
➡️Facebook: BlazingWanderers Page
➡️Instagram: @BlazingWanderers
➡️Website: BlazingWanderers.com


Drill the hole hole in the barstock first then cut your angles
That’s a good suggestion!
Thank you, thank you, thank you ... I've been thunking for over a year on how to do upper cabinets in my Transit. You're so right, absolutely nothing is square. And a digital level, never knew they existed, so it'll be in my Amazon order tonight. Much appreciated ... your build is excellent ... thank you for sharing your progress.
I’m so happy this is helpful! This kept my husband up at night for weeks! And as you can imagine, he’s a bit of a perfectionist😊
Thank you
Thank you for watching!
Thanks very helpful as I think ahead to this
Great to hear!
Thank you for the video. One question - with so many angle brackets used to join the extrusions, did you find it more challenging to install cabinet panels?
For our flat panels, we used a threaded insert in the back of the wood and fastened with T-nuts. The angle brackets work really well as they give you a lot of flexibility to make adjustment with the 8020 as you tighten down the nut. No issues and would do this again if I had to rebuild!
So I went through a few of the videos of yours prior to this, and I didn't see anything on the plus-nut installations that you're using for mounting those upper cabinets. In one earlier video, putting the wall panels up, it looks like you have some bolts/washers in the walls where those plus-nuts are? Or are those for attaching the panels? One assumes you plotted out your cabinet dimensions well in advance and installed the plus-nuts where you would need them for the cabinets, rather than "this looks good" and then later on, built the cabinet frames to fit?
I get the use of the wedges you cut out of the aluminium bar stock to straighten out the 8020 pieces on the ceiling to be level; I'm curious how the bolt going through the 8020 into the plus-nut is set, though. It would have to be going through at a slight angle, with relation to the aluminium extrusion, yes? The head of the bolt can't be nice and flush with the surface inside that bottom-facing slot of the extrusion?
You’re correct we used plus-nuts in the roof cross rib supports. The plus-nuts we used were 5/16-18 X .020-.280 steel pre-bulbed purchased from Amazon (S31MG280). I talk through this briefly on our ceiling and lighting video. You can see a plus-nut location through the furring strip at ~3:04 in that video. This did require some planning for both the cabinets above the sink as well as our cabinets above the bed. There are only so many places to mount the plus-nuts in the Transit roof support ribs. This combined with the limited number of roof support ribs and the hole locations for lighting are important considerations to consider when planning for the cabinetry. You are correct that the bolt going through the 80/20 aluminum extrusion will have a slight angle relative to the extrusion for the roof connection supports. Thank you for watching!!
@@blazingwanderers Thanks for the reply! So the bolt head isn't going to seat flat on the inside of the slot - that's not an issue?
That trick using two corner brackets - that's sneaky. I like it. I'm tucking that one in the back of my brain for when I get to this point myself.
The bolt is just ever so slightly at an angle but will not pull through. We haven’t had any issues either at this point.
Good luck with your build!
Interesting!
How are you preventing to create a "cold bridge" from the outside, as basically now the outer skin of the van and the interior cabinets are connected?
or
In a cold day, do you feel the outside temperature through the cabinets?
Thanks in advance for your input!
We have only used it once in late March in west Texas where it got cold those nights-in the 40s. We did have to turn on our Webasto heater a few times during the night (on a program) but not for long. All of our walls (even behind the cabinets) are insulated with KILMAT and THINSULATE so it’s pretty cozy inside and I don’t notice any major temperature difference around the cabinets.
I really like your video's and your van build. I am also in the middle of my Transit HR Ext. build. My question is, how is using your level meter going to be accurate unless you have leveled all your wheels to make the van floor perfectly level? Otherwise you will be not getting square to the floor. I am measuring from the floor and then parallel and perpendicular to the floor.
Yes, we did realize that we had a slight slope in our driveway, and so we measured it (with the level meter!) and took that into account as an offset when we measured in the van . The other way around that is to use levelers under the van, but we were able to make it work!
I appreciate the great, practical video on 8020 nitty gritty. I’m in the design phase for my cabinets and feeling intimidated.
If you’d placed your plus nuts further in, would you skip the wedge approach altogether?
We discussed that a bit. Just like in your standard house, walls and cabinets are not square either, and a lot have wooden shims behind them. Obviously, having the plus nuts where you want them to be makes life easier! But even then, you’ve got to make sure they line up exactly with your design. once we started using the digital level and could measure more accurately, cutting shims of various degrees was pretty easy.
What size aluminum extrusion is that 10 series?
15 series!
I just turn off when anyone starts using any kind of level on a van build... You need to go back to school. If your van is not PERFECTLY level, you are wasting your time. And even if it were, as soon as you step in to do anything it will move because of your weight and stuff called suspension 🙄🙄 please stop making videos using a level...
Well, it worked for us, and all of our cabinets are perfectly straight and level. We made adjustments for when we stepped inside and on our gently sloping driveway. Lucky for us, our build turned out great and we would do this again in our next build. You don’t have to use our tips(although several folks have with lots of success) but thank you for your constructive criticism.