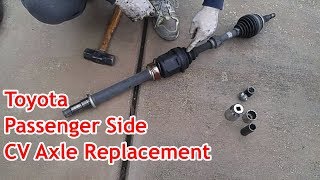
Control Arm and Ball Joint Replacement With Torque Specs! Toyota Camry

ฝัง
- เผยแพร่เมื่อ 8 ก.พ. 2025
- In this video, I will go through the steps to replace the control arm and ball joint for most Toyota motor vehicles. Popular vehicles such as Toyota Camry, Toyota Highlander, Toyota Corolla, Toyota Avalon etc.
Removing wheel & Axle nut 1:04
Removing Strut bolts 1:46
Removing brake caliper and tie rod 2:57
Removing ball joint 3:56
Removing steering knuckle 4:31
Removing engine mount 5:18
Removing control arm 8:16
Install new control arm 9:11
Install ball joint and steering knuckle 10:50
PARTS
Control Arm & Ball Joint D side: amzn.to/3JoLIUv
Control Arm & Ball Joint P side: amzn.to/3pzepWZ
Wheel bearing: amzn.to/3exXv4C
3/8 torque Wrench: amzn.to/3z7nkSt
3/8 socket set: amzn.to/3Jq8w6g
1/2 torque Wrench: amzn.to/32DUJIs
1/2 socket set: amzn.to/32CfrbI
Axle nut set: amzn.to/3sAGDm9
30mm 12 Point Axle nut: amzn.to/32AxmzI
Breaker Bar: amzn.to/32JeNcg
Milwaukee Impact Wrench: amzn.to/3Hh5NKz
Wheel bearing kit: amzn.to/3EtfqUI
Disclaimer:
TrackPalmer assumes no liability for property damage or injury incurred as a result of any of the information contained in this video. Use this information at your own risk. TrackPalmer recommends safe practices when working on vehicles and or with tools seen or implied in this video. Due to factors beyond the control of TrackPalmer, no information contained in this video shall create any expressed or implied warranty or guarantee of any particular result. Any injury, damage, or loss that may result from improper use of these tools, equipment, or from the information contained in this video is the sole responsibility of the user and not TrackPalmer. Due to factors beyond the control of TrackPalmer, I cannot guarantee against improper use or unauthorized modifications of this information.


Just plain fabulous. The explanation, the camera work showing how to, and most of all, the torque specs, make this one of the best how to videos I've come across. Thank you sir.
Happy it helped
This guy really knows his stuff. Very nicely done, especially with torque specs and tips on removal of the knuckle and motor/transmission mounts. Could wire brush the parts reused, though, to further show figment. All together, excellent!
🫡
Dude... I love your style of tutoring! What's most helpful is the pausing and arrows (to point out key details) and the fast forwarding (expediting monotonous work). Perfect layman's tutorial!
Glad it helped!
This Video should have 1 milion views and 5k likes. Thanks alot my friend!!!!!!
Happy it helped 👍
Great vid. I just replaced (2 hours ago) the control arm on my Venza and I struggled a bit with the side engine mount until I saw the video. Loosening the front mount as you suggested made all the difference . Thanks.
I'm trying to replace the engine mount on my Venza. Did you have to take out the rear engine mount? The Camrys/Avalons/ES do not have this extra mount in the back.
🫡
Excellent video thanks. I’m a DIY’er. First time. Great advice for wannabes like me: plan on finding/planning ahead. U might find sway bar links, struts, tie rod ends, rotors, pads needing replacement (like his bearing). I said to heck with it, car had 120k on it and did all suspension up front both sides. $900 but it’s brand new. A shop would’ve cost ~2300 USD. They always double the parts cost to YOU. Also, O’Reilly, Autozone lifetime suspension parts. Best of luck to everyone out there.
Glad it was helpful!
I don’t know about the control arm but to change the ball joint you don’t have to remove the knuckle and all that other stuff. You just need a good tight wrench for the castle nut like Wright Wrench. What I did was shave down the box end of a 19mm wrench so I can get it over the castle nut.
Watch the entire video. I said that
In sandles! Love it!
Glad you like it!
I have replaced my suspension by watching this video excellent video specially torque spec I write it down and used them when I need to be
Happy it helped 👍. Hope you smashed the like button ✅
This video was spot on for my 2016 Camery. Thank you so much.
Glad it helped
I had a broken lower control arm. This video was excellent. Thank you.
Happy it helped. Hope you clicked the like button :)
Genius work, sir!! Bravo!
Glad you liked it!🫡
Fantastic video brother! Very well explained and great visuals. Amazing work! Thank you!
Much appreciated!
This was incredibly helpful and thorough!
Glad it was helpful!
Great video Bro!!..When I get some time will use it to change mine!!
Much appreciated 🫡
Thanks for the video mate. Appreciate the information a great deal
Happy it helped. Like the video 👍
Great video. Thanks so much for the torque specs!!!!
Happy you found it helpful 👍
This is an excellent tutorial!
Glad you think so!
Hats off to you sir! Thank you so much for making such a thorough video. I need to reeplaze the strut assembly, lower arm, link assembly and ball joints and after looking at several videos i was ready to give up and pay the shop instead, but you explained most of what i need and gave me the confidence to try it! Cant wait for my parts to be ready. Do you know if torque specs are the same on a 2013 Avalon?
Glad it helped🫡
Glad it helped🫡
Good quality of video, detailed and documented very well. Thank you,
🫡
Really gretat instructions and tips! But I wonder why you re-used the old castle nut on the new ball joint when a new castle nut was provided? Are the old factory castle nuts somehow better than the new ones?
The older castle nut was made with a tougher iron material
Love this. Perfect demonstration thank you do much
🫡
Well done
GREAT JOB
Thanks 🫡
Excellent video, thanks!!
🫡
Great work.
Thank you! Cheers!
Great video
Thanks for the visit
Excellent job.
🫡
Thank you for the video! Great info. Subscribed!
Happy it helped. I appreciate it 👍
Is there anything extra required on the hybrid model? I need to replace the lower control arms on a 2013 Lexus es300h hybrid and was told it was more involved for the hybrid model.
The process will be similar. It’s also similar for most Toyota sedans and SUV. Even Lexus too. You would be good
Can you tell me what brand of lower control arm you are using in this video? What do you suggest import direct control arm from O’Reilly or Detroit axle from amazon?
I used genuine. Bought from a dealer online
perfect job
Happy it helped 🫡
Do you know if this is the same set up and steps for a 2005 Solara? Thank you.
Its very similar.
Good video
Thanks for the visit🫡
Great Tutorial! I just saved myself $2K in repairs! $2K I can spend on tools! : )
That is awesome!
Great video and you included torque specs! Good job. I'm trying do this job but my three lower engine mount nuts just spin with the bolt and never come off. Any tips for overcoming this?
It sounds like you have an aftermarket engine mount right there. It is spinning at the top and if you're able to talk welded that will work. If you're not able to stop it from spinning at the top the on the solution will be to cut it off and replacing the engine mount. I highly recommend using genuine engine mount
That was perfect,....thank you
🫡
that camry suspension looks very much like the suspension on a 2010 toyota venza but you didn't mention in the video.
Its the same process
thanks and well done
🫡
If I’m changing the passenger side control arm only where do I jack up the engine transmission? If I Jack up the left/ driver side as shown in the video, would it raise the right side enough to remove the engine Mount? Thx
It's recommended to find a solid area close to the engine mount. Just avoid the oil pan
So, you only have to half remove the top bolt on the engine mount?
I don’t understand the question
Thank you
You're welcome
You’re a beast 🎉
Happy you like the video
Nice!!
🫡
How much you think it will cost me to take the control arm parts for front right and front left? And take it to an auto mechanic shop?
I don’t understand. Asked another way
Awesome video... would this work on a 4wd model. I have a 2013 highlander
Yes. Some torque specs might be different though
@@trackpalmer thanks for your feedback 😊
Is is necessary to take off the whole rotor assembly for this job?
It's not necessary. I removed it for a wheel bearing job. I think you referring to the knuckle
@@trackpalmer Yeah the knuckle, I don’t know all the terms haha, do you think this is possible with just hand tools? I got a few sets of tools from harbor freight but I dont have any power tools.
@@trackpalmer what size socket is needed to remove the steering knuckle?
@@juliangrigoriciuc 30mm 12 point
I have links in the description for all tools used
Oh so both sides have the mount in the same spot, wow
Yep
What year and model is this. Also passenger or driver side. This is I protest to know
2014 LE. Work was done on both driver and passenger side but demonstration was done on the passenger side
@@trackpalmer thsnsk. My 2008 Lexus es350 I think only has a engine mount on the passenger side right ? Basically it’s v6 Camry
@@All-about-everything Yes, there is only one on the right side. I think it might use the same engine mount at the camera too. The parts are similar
Where u located?
Wisconsin
👍🏼👍🏼👍🏼👍🏼 👏🏻
Thanks
Reminds me of the sound clip "mmmm tooyota, tell me how the hell I'm supposed to get this bolt?"
That's a design that they still use on the newer vehicles. I don't see them changing that design soon
You can replace the control arm without removing anything all that
The control arm cannot be replaced without removing the engine mount. Remember other parts where also replaced do other things needed to be removed 🫡
I’m just confused on how that Milwaukee didn’t take that nut off
It was the first time removing that 9 year old bolt
Bad Bearing are not good for driving
Yep. It was replaced
And for this mechanics charge 300$ for labor
If that includes wheel alignment that's a good price
Fantastic video.
🫡