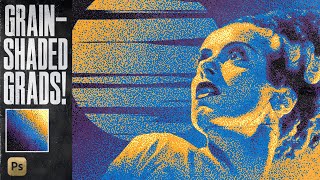
3 Ways to Add Film Grain in Photoshop

ฝัง
- เผยแพร่เมื่อ 26 ก.ย. 2024
- Download the tutorial asset here: www.nucly.com/...
Get the actions here: www.nucly.com/...
In this quick tutorial, I’m going to show you three different wants to add film grain in Photoshop. Then I’ll show you how to add them non-destructively and finally, I’ll show you which is my preferred method.
-
Don’t forget to SUBSCRIBE and turn on notifications! And likes and shares help a lot too!
Check out my full professional Photoshop training courses here: www.nucly.com/...
And all my asset packs here: www.nucly.com/...
-
Follow me:
Professional Training - www.nucly.com
Blog - zevendesign.com
Facebook - / zevendesign
Instagram - / zevendesign
500px - 500px.com/rika... - แนวปฏิบัติและการใช้ชีวิต


The only thing I'd add, which I do, is to use "blend if" on my grain layer to take the grain effect off my brightest highlights. Real grain tends to be more visually obvious in shadows, especially in digital images, so for realistic composites I find this helps sell the image as having been taken by the camera " as is ".
I'm so old that I have shot a lot with old, analogue films, and there it seems that original film grain does appear mostly in the mid tones, not so much in the highlights and the deep shadows. This is one of the things that f.ex. NIK Softwares Silver Effex take into consideration.
So, I would recommend you to try to use Blend If to restrict the grain to the mid tones - which of course is easy to do.
Try it, since that's a way to do it that I personally think makes the most realistic results.
While at it - when denoising an image, there is never digital noise where it's enough light. Using Blend If to make the noise reduction just "blurr" the immage where it's needed - not where it's more or less no noise - the image as a total will look sharper.
Thanks for great tutorials. It's really nice to have found you (at last), since you're talking about things that's is usable in daily photography, and you use "normal images", not something specially made for the demonstration :)
Grain adds a cinematic sense of inclusion to everything in our compositions, and it’s important as anything else for me.
Three ways to create it? Perfect. Thank you!
Exactly what I needed for my actual project. Thank you so much! This was very helpful, indeed.
I only just posted about the importance of this yesterday, after having completed Rikard's 'The Orb' class in his Photoshop Secrets course. It was definitely my favourite takeaway from the class, and it made such a huge difference to the final product. Thanks for this, Rikard! 🙏🏽❤🔥💪🏽
I've been following your work for a long time and every time I watch your videos I learn a new approach and new techniques. Thanks for sharing your knowledge and expertise :)
Thank you so much!!!!
Amazing tips here. Thanks always for sharing.
Great tips. I use a similar method to your gray layer technique, but I use two gray layers -- one for coarse grain and the other for light grain. Then, I adjust the opacity of each layer separately to create the result I'm looking for. The reason for the two layers is that the light grain layer will fill in gaps between the grain modules in the coarse layer. I learned this technique from Robin Whalley.
Thanks for sharing!
Great Video! Thanks!
Nice, thank you!
i dont like the patterns that the filteres>noise makes creates.. but its the method ive been using for years too
In addition to the grey noise overlay you can use empty overlays with added black & white colors. The layer blend modes should be changed to neutralize the main added tones showing only the added noise. Then use opacity, blur, transform size and blend-if to make adjustments to accurately blend the grain across the low, medium and high tones. This method is the best way to mimic how grain varies across the various tones. It’s as close to analogue as digital can get.
Grey=soft light
Black=screen
White=multiply
Does anyone know how to export just this film grain layer with a transparent background? Thank you!
You missed a fourth way of doing and it might just be the best one (if you ask me). The Blur Gallery:)
Here's a setup that makes for a great action:
1. Create a 50% grey layer and make a smart object of it.
2. Set the layer mode to Linear Light with Opacity set to 100 and Fill set to 50.
3. Change the Blend If settings so the markers to the right of the Underlying Layer is set to 242/255 (more about this below).
4. Open Blur Gallery from the filters menu. Anyone of them will do but I use the Field Blur.
5. Important! Make sure the blur amount is set to anything else than zero. I use a blur setting of 1.
6. Under the Noise tab choose Grain. Adjust to taste and you're done. I'd set the Amount to 100 since it's basically an opacity slider and you get the same result by changing the opacity of the grey layer instead.
The great thing with this is you've got the same (as far as I can tell) grain engine as in Camera Raw but with the addition of a color slider. The Highlights slider won't do anything useful when the effect is applied to a grey layer but you can get the same result by tweaking the Blend If settings of the grey layer. The settings in step three in my setup above is equivalent of the Highlights slider set to 100%.
Very cool! Thanks for sharing.
how did u make the pattern ?
thanks