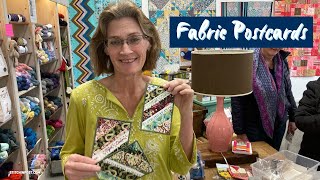
Simple Fabric Postcard Tutorial

ฝัง
- เผยแพร่เมื่อ 27 ธ.ค. 2015
- Make a simple fabric postcard.
Materials required:
4 x 6 rectangle of Peltex
4 x 6 rectangle pattern fabric and white fabric
Cutting tools
Sewing Machine and Thread
Gluestick
Permanent marker
Visit my blog at skittl1321.blogspot.com to enter to have this postcard
sent to you! - แนวปฏิบัติและการใช้ชีวิต


I am watching you in 2023. So glad I found you. I will be trying these as I have been wanting to make these but am afraid to sew paper on my machine as it is not the best of machines. Thank You
So interesting. Easiest I've seen so far. Thank you.
I’m watching your video in 2022 and think that it’s still relevant. 👍🏼
Thanks for watching! These were fun to make.
These are so cute! I know its years later but I cant wait to make it!
Thanks for commenting! I love making postcards
I have watched a lot of fabric and paper card tutorials, this is the most straight forward and do forward method, so I am going to give it a try. Thank you for sharing.
Thank you for posting your tutorials for us out here, I am watching April 2022
Thanks for watching :)
I liked that she informed you about the extra postage! Good tips.
That is really cool! Thank you for the video!
I have decided to make some postcards for Valentine's Day since I have so much Valentine fabric. You cleared something up for me; most of he tutorials I've watched use paper on the back of the card but I was wanting to use fabric and since watching your tut I've decided that a pale fabric back is the way I'm going to go. Thank you, this was a very informative tutorial. Edie
Edie Ballard so glad it helped! I've made and mailed so many of these.
how fun.....and what a great use for all the pelted I purchased for tote bags....will be making some valentines this year!
Thank You so Much ! This was a fun and easy tutorial . I can't wait to get started .
these are really SWEET!!! i'm gonna have to give these a try!
4/6/22: This is a great idea, Jessica, but I wouldn't mail what I create raw. By that I mean, I would slip it into a see-through cellophane envelope, create a mailing sticker for the outside (to/from) and pay the extra postage fee. These are works of art that takes time to make and I wouldn't want anything to possibly damage it. Yours came out beautiful and I am inspired. Thank you so much for sharing.
Thanks for commenting! You could absolutely mail this in a cellophane envelope; but to me, part of the fun of a postcard, is sending it through the mail; the barcodes, the stamp, a bit of dirt- I love seeing it travel. I have mailed about 60 of these now, some to other countries through postcrossing; just make sure nothing is hanging loose. I love to make them even years later.
@@Skittl1321 That's wonderful, but I could live without the barcode. The stamp would be on the cellophane envelope, but the "bit of dirt" part is not for me. However, to each his/her own. Thanks again for the tutorial. I love it!
Great tutorial! Thanks for sharing
Very inspirational! I am going to give the a try!
Great, easy to follow tutorial thanks.
Luv them going to try making Christmas ones thank you
This is the first tutorial that uses a fabric backing instead of cardstock. I'll try this using a heavyweight interfacing because my satin stitching has cut the cardstock away from the fabric!
+Sharon Diehl I had that problem too. As long as you use a fabric marker or a thin sharpie, it is no problem to write on the fabric. I have had no problems with stamps sticking and the postcards getting where they need to go in the mail.
This is a great idea! I also wondered about making a smaller one, and slipping it inside one of those cards that have a square cut out for a photo. You would have to use an envelope, tho, but you would be able to make it as fancy as you want.
brilliant idea, i was thinking for Christmas use last years cards (i keep mine) to get ideas, maybe patchwork the pictues on there, i will have to explore the idea
You can sew paper for sure. I bet it would look really cool!
thank you for the video love the post cards i am going to have ago at making one thank you
Good luck! Let me know how it goes.
thanks
Nice video. Thanks
Hmm..i have a lot of lace...and need ro make a save the day card...how cool would this be..
Oh this is great but it costs more now so make sure u check it's about 45 cents now??? I love this video thank u. But now I use a fabric stiffner called terrail I think.lol
Thanks for the postage update! This video is a few years old.
Ikr I'm just saying what a change
What size card would you recommend for a wedding invitation? I was going to try a one sided one instead of a folded card if that makes sense lol xx
Live, Love & Learn Naturally I like a 4x6 card. It gives you enough space to put a nice design on it.
how did it sew through the glue even dry? I sewed through heat bond on an applique and it kept skipping stitches! idk what I did wrong.. very cute idea love it.. thanks for sharing!
I know it's been a year,use heat and bond lite its in the purple bag for applique. You'll see a sewing machine on the top corner. Hope this FYI helps.
Hi
So we cant put a forever stamp on these?
Mine have always been too heavy for a single first class stamp.
Hello there, I am wondering instead of using peltex or a harder interfacing, can I just use a cardboard?
Grace Ng I think it would be harder to sew through (depending on your cardboard...like I don't think hard chipboard would work), but there is no reason you couldn't try. I'd sew slowly at first, just to be careful of a needle break.
You said permanent fabric marker but used a Frixion pen. Frixion is not permanent.
Use a permanent fabric marker, like I said.
I erased what I wrote in this video because I wasn't sure how neatly I'd write on camera. My handwriting is bad.
sorry but the sound quality is such to make it impossible to follow all the instructions.
Sorry it didn't work well for you. This was the best I could do with the equipment I had 5 years ago. (The video was made in 2015.)
get me out of Latin America
FYI: everytime you grabbed something from the cutting mat, your nails would hit it and it's like nails on chalkboard to me. Terrible sound and very loud and it happened a lot in this video. So much so that I am not able to finish it. Please be aware of noises like that because it triggers some people and I am definitely one of those people. Dislike.