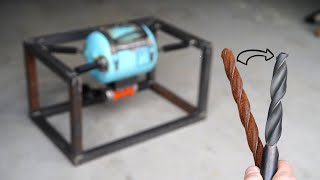
Building a Huge Rotary Tumbler from Scratch - Homemade Rotary Tumbler

ฝัง
- เผยแพร่เมื่อ 2 ธ.ค. 2020
- I need a tumbler for the current restoration project on the main channel. The parts are quite big, that's why the tumbler itself needs to be bigger. I found a 25 liter barrel in the hardware store and I built a complete rotary tumbler around it.
I hope you like my work and the video.
Huge thank you to all of my Patreon and PayPal supporters and specially to:
Tonya M Broerman
Zack Thompson
Adel AlSaffar
afreeflyingsoul
Yale Baker
Gregory
Alex McGeorge
Alistair Moor
Amar.k
Bendurion
Courtney Maleport
David Barker
Greg Marston
Joshua Bentley
Lambda GPU Workstations
Luke Schmick
Luke Stone
Matt Bosch
Mellissa Marcus
Paul Mampilly
potokslow
Todd Medbury
Vickie Bligh
Vince Valenti
Xavier Carbel
Yuri Zapuchlak
Alex Breton
alex latzko
Allen Frank
Amanda Taylor, Esq
Andreas Mimra
Andrew Phillips
Anthony Adams
Arni Bjorgvinsson
audi4444player
Blake T
Brandon Fitzwater
Brian Newton
Carlo
Chad Bryant
Chris Simondet
Fonee Pasta
Grok Senften
Haley McFadden
Harper Kim
Hunter R.
Jason Koi
Jason Tarlov
Jeremy Cole
Jonas Richartz
Jordan Page
justin f.
Kelly Imgrund
Kurt Gazow
Marc Cerisier
Marius Costan
Martin Rønnow Klarlund
Mellissa McConnell
Michael Bier
Mike Donaldson
Nick Cannon
Pasacal Schmikal
Philipp
Schultes Thomas
Scott Marshall
Svenja Iven
The Carlsons
Trevor Kam
Tucker Ifft
Warren G Strand Jr
William Wallace
웅록 윤
My camera:
Panasonic HC-V180
If you have any questions about the process, machines i'm using or other stuff, just ask me in the comments. I read them all and i try to reply as soon as possible.
Sorry for my bad english, it's not my language. I try my best to improve my technical english.
Subscribe for more of my content. I'm uploading videos about mechanical stuff, as new creations and buildings and also restorations.
Thank you for watching :-)
„I make a new one“ T-Shirts:
teespring.com/stores/my-mecha...
My Main Channel:
/ mymechanics
My Second Channel:
/ @mymechanicsinsights
My Patreon Page:
/ mymechanics


![[LIVE] BABYMONSTER(베이비몬스터) - SHEESH | 두시탈출 컬투쇼](http://i.ytimg.com/vi/6q-_9s6a_1g/mqdefault.jpg)


Let's take a moment to appreciate this guy's efforts. Not only is he a machinist, electrician, painter, welder, mechanic and wood worker - he's also a videographer, sound man, editor and so on. Well done.
I'm a machinist...and one thing i love about you is how clean and tidy your works are ...no mess....keep up the good work Sir.....love from India
Thanks 👍
@@mymechanicsinsights I am working with a wood worker to build the frame. Grainger told me that in order to sell me the motor they need the motor specifications such as name, model and info from the motor label,. Can you give me that data? Love your project! I talk about it quite a bit I guess.
7
German electrician here. I approve this mans wiring skills, choice of components and materials as a professional. You rock, my good Sir!
naja egt super gemacht aber man nimmt adernenhülsen egt nur für schraubklemmen, sonnst hat er es super gemacht
@@Niveaulos12 Aderendhülsen sind für Steck- und Schraubverbindungen zulässig. Zeig mir eine Norm die was anderes sagt.
The amount of precision and detail you put into your projects is daunting, yet inspiring at the same time. Kudos to you, sir!
Thank you very much!
It's very difficult to appreciate other restoration channels once you've seen my mechanics restoration!
It so satisfying to see the attention to details.
Thank you very much!
Truth!!
It's so true. When I watch other restoration channels, even if they do a decent job, I am like 'what shoddy job compared to my mechanics'!!!
couldn't agree more
I started nodding in appreciation when you were doing that cable management. That's the real difference between a pro and an amateur, beautiful
Thank you very much, I really do appreciate it :-)
@@mymechanicsinsights Ich war amazed über the eletric work auch
That would make one heck of rock tumbler. And probably last several generations. The amount of equipment you have at your disposal is truly on another level, as are your endless skills.
and the only real wear items are the wheels and the tumbler itself. A bearing might go eventually, but the pieces that will wear out are easy to replace. A really solid design.
Seeing you insert the EMERGENCY STOP button and the three others below it was so satisfying. I can't explain it but these videos give me a warm glow inside.
I was like, surely he isnt going to leave that wire mess. And sure enough there's the sleeving... just goes to show how much work making a tool look and work decent.
Thanks, I'm glad you like it :-)
That's a wireporn
@@StmWhisper and it thrills this 40-year electronics tech. Here's a man who knows how to crimp a terminal on a wire.
@@pfadiva ratchet crimpers make such a difference omg. I got gifted a pair for making 22-30 awg dupont pins ('stapled' i call them bc i can't remember the technical term) and now ive got a multi-jaw kit on order because it's so much better, and more consistent than handforce crimping. Also less tiring bc the ratchet has huge mechanical advantage
Now I'm really hyped to whatever you're gonna restore that required you to make your own tumbler.
The next restoration will be amazing :-)
@@mymechanicsinsights the part you tumbled looked like a motorcycle wheel part... was it a clue ?
@@mymechanicsinsights I don't doubt it, they always are!
@@mymechanicsinsights which one isn't? :)
Same, I want to see more stuff put inside it, lol
While watching a very skilled perfectionist at work is rewarding, what I am really taking away from these videos is how much effort goes into making the things that we take for granted.
Well said!
This is a literal perfect video. Showing the whole process (No annoying music bonus), showing the finished product, demonstrating.
Thank you:-)
I love watching you make your own tools just as much as I love watching you restore things. You make it all look so deceptively simple.
Keep up the good work, dude! ❤️
Thank you very much. This project ended up beeing a bit more complex than I first thought.
@@mymechanicsinsights I've found that specialty tools like that tend to take an extra 50% of most everything, be that time, money, materials, etc.
@@InstrucTube Ha ha when I tackle anything like that the budgeting goes like this
- make a wildly pessimistic guess
- double it
- add 10%
... and now you are maybe in the right ballpark.
Precision of a brain Sergeon, finish of an artist, you make it look simple 👏 👌 the best on TH-cam by a country mile. 👍
Thank you very much :-)
Seriously, I try to get my “fix” of restoration while waiting for a new My Mechanic video- but I always end up upset with the “low” effort of others comparatively. His work is unparalleled
This is so me too. 👆👆
TH-cam keeps recommending me other restauration Videos tirelessly, but I can‘t watch them any more... Nothing comes even close to my mechanics
@@AxelSchweisz 😂they are mere mortals in comparison aren't they.
it is really fun to look at someone who is machining all parts and wiring the box with so much love and attention to detail. most people wouldn't even bother to invest that much time to get such a good result. they would probably slap all the cables inside the box and leave the weld beads like they are. i really appreciate the effort. makes it fun to watch. keep up the good work.
my mechanics: "I make a new one"
my mechanics insights: "I make"
haha good one ;-)
The electric control box is the most cryptic thing to me. I still do not understand electricity
I never really liked working with the electric stuff, that's why I haven't touched it for over 14 years. But glad I learned the skills, was very useful for this project.
I believe that is a sign of mental health. If it starts to make sense, you might want to see a doctor.
@@hotcoffee5542 hahaha
Brother, I was a Navy electrician for 4 years and did freelance work for 10 afterwards and watching the build still confused me.
Electricity is easy, think wires like tubes and switch like tap.. and poison inside that tubes😁
Seit über 1 Jahr, suche ich erfolglos, nach einen vergleichbaren "Kollege" von dir auf TH-cam.... Es gibt einfach kein einzigen, der so ein Level erreicht! Es gibt unzählige "rostputzer", "zerlegen-schmieren-drüber lackieren", aber keiner der die Sachen besser als neu macht - das schaffst nur du! Respekt!!! Wir alle können uns nur wünschen, dass wir öfters ein neues Video von dir zu sehen bekommen, aber wie man sagt: "Gut Ding, braucht Weile". Beste Grüße aus Österreich
Vielen Dank
There is perfectionism, there is absolute perfectionism and then there is My Mechanics.
Not the beads I saw him weld.
@@3rdEyeGnostic looked like hammered dogshit.
“Homemade” just got an entirely new definition. Brilliant!
Thanks, I'm glad you like it :-)
Everyone else: "Let's slap this together and see if this works...."
My Mechanics: "Let's make sure this is perfect and looks professional."
Everyone else: O.O
Another incredible, inspiring video. Thank you.
Yeah well, he’s Swiss. That’s usually how they do it. :-)
Pretty much!
almost makes me want to break out my lathe but then i remember i dont know how to use it and i have work in 16 minutes.
Ya
Ft by you v
...
..?
Not sure I can handle so much “making” in one video, but I’ll try 🤤
keep going :-)
@@mymechanicsinsights must be nice to spend so much money on a simple drum tumbler. Why?
@@samlinkin31
True he makes money off the video, but a cheap timer will do what needs to be done. Not spending a large amount of cash for no reason.
Would you spend $ 200.00 for a lighter to start a fire. When a match can do the job.
@@samlinkin31
True what you say. So bulky and over the top expensive.
Why not show a rotary drum that you can build for a fraction of the price he spent.
@@greg9403 You really dont get it do you?
Everyone can do it at home. Tools that you find at home. Made my life easier.
Even your wiring is elegantly done. The level of detail for what is normally not seen is what marks a true craftsman!
Be well, stay safe, and take good care.
Wish you said “from scratch” you weren’t kidding.
Thanks for watching
Ya, but he didn't build the motor from scratch. ;-)
And no ore was mined. No universe created. Hardly "from scratch."
“My rotary tumbler is missing”
“I make a new one”
Thanks for watching, much appreciated
@@mymechanicsinsights you’re welcome.
@@mymechanicsinsights thanks for watching? thanks for all the hard work you put in (editing included)!
ahhahaahhaaha
"Making the frame"
"Making the drive shaft"
"Making the motor frame"
"Making the motor"
"Cracking the hydrocarbons for fuel"
"Killing all the dinosaurs to make oil"
"Orchestrating the big bang"
haha good one ;-)
"My universe had few dents... So i made a new one"
5:45 Those spirals coming off the drive shaft holder were
In 233 years, someone will restore this for their TH-cam channel. The shaft and bushings will be used beyond repair... They'll make new ones.
Thanks for watching
His great great great great great great grandchild.
They will print new ones.
"In 233 years, someone will restore this for their TH-cam channel. The shaft and bushings will be used beyond repair... They'll make new ones." Lows Laurie, I hope that is not the case. I hope in 2 or 3 years, there is no more youtube. I hope that by the time 233 years have passed (insert whatever deity in which you trust) willing
people will have returned to a simpler life. Not thrown out technology, kept that which benefits the health of humankind and tossed aside that which incites conflict. Don't get me wrong, I have benefited from some instructional content on youtube. I have even been guilty of engaging in comments with people whom I deemed a waste of flesh and blood. This is not an attack on you Lows Laurie. This is only a difference of opinion expressed as respectfully as my skill level will allow.
The use of a piece of rubber pipe as a clutch was just absolutely genius.
Can you explain why? I was wondering what the benefit was.
Cheap and easy to replace, thank you
@@kerryabear You need some kind of flexible coupling between the motor shaft and the tumbler drive shaft because they are both tightly run in multiple bearings which are hard to keep perfectly aligned.
It is also a nice way to smooth out the the possibly shocking motion of the tumbler so those shocks will not transfer back as much to the motor.
If you would weld the two shafts together you would get a lot of stress on the shafts, weld, or bearings. :)
He mentioned in the video that there wasn't much play in the shaft after tightening everything down. I'd imagine a once over after a lot of use would keep everything inline and less likely to cause stress fractures in the shaft. Could have attached the worm gear motor right to the shaft.
That's a coupling, not a clutch (unless you count the rubber hose disintegrating as the disconnecting function)
I like the paying attention to details like smoothing edges, wire sleeves, exact measurements, etc.
Thank you very much!
My father was an engineer, I could almost smell the oil and cutting fluid, brought back long lost memories.
Thank you very much, I really do appreciate it :-)
Oh man. It looked like your lathe was about to start walking across the shop floor at one point. The result was well worth it, though-I imagine it would've been a huge pain to precisely machine those holes on the mill. Gorgeous video as always, and thanks for the bonus ASMR near the end!
I could make the holes on the mill with the boring head, but the slot wouldn't be possible. Well, maybe in a super fancy setup. The boring head might also reach its absolute limit with the big holes. It worked very well on the lathe. Thanks Adrian
@@mymechanicsinsights Oh that slot for the circlip? I wonder if it's even possible with a mill
@@flat-earther it's possible. You could use a fly cutter and go around the circle. Also a radial wheel type cutter. I've seen them for bores ~150mm (6") or larger. I worked at a large machine shop.
@@fletchro789 But how do you go around moving the table x y axis simultaneously in a perfect circle with a manual mill?
I have never milled but on a manual mill I imagine you just have to leave the spindle in the center of the hole and then somehow have a cutter which will expand somehow I don't know?
Actually after writing that I figured if you have a rotary table on the milling machine you could use a woodruff cutter (or a slitting cutter if you have one that's small enough to fit in the hole) and mount the part in a rotary table on the milling machine, feed the cutter into the part and just rotate the rotary table.
Im amazed at what you are able to do. I'm sitting here with my mouth open in awe. You're awesome!
Thank you so much 😀
Your skill is amazing! I would love to have the tools you do to get a chance to remotely learn the things you make look so easy. I'd love a quick overview of your shop, the tools, and layout.
It’s so nice of you to do the captions and notes in English. Thank you very much. Love the channel!
Taking "make a new one" to another level.
Glad you like it :-)
As a maker, your channels are my favorite because of how well you work. It's peacefull, slow paced well edited and I love it.
Wow, thank you!
Well now I can build a huge washing machine.
Love your work.👌👍
You can do it!
Incredible! Excellent machining, professional electrical work, great video work, and hand model hands! I take it you designed it ,too.
This video is way too good to be only shown on your „second“ channel. Amazing!
Wow, thanks!
The skills of this man never cease to amaze me. Jack of all trades, master of most
I haven't seen one he isn't a master of yet........ He is the mother of all trades...... (So far)😂😂
@@jonny555ive welding ;)
Thanks for watching
Most talented man on TH-cam. Pure gifted man
Thank you so much :-)
7:05 real nice! I did not even realize the precision and detail until I saw the bearing-guard fall into place. I actually went back in the vid to confirm you made the drive shaft holders like that.
Everyone: So what do you do for a living?
my mechanic: Well some might say I'm a jack of all trades, master of all.🤓
Thank you very much, I really do appreciate it :-)
That looks so easy... in your hands lol I would have to spend 20 years learning if I had to do this by myself ^^
You can do it!
I don't know what it is about watching metal be cut like butter but its wild to me. Like 😍
man machinists have a crazy concept of what from scratch means. amazing
Thank you so much :-)
@@mymechanicsinsights do you have a source for hobby monitors slow ones
Your machining is truly top-notch, I really do look forward to every upload.
Thank you very much :-)
This really shows off your machinist skills. Love it!
Glad you enjoy it!
Just found the channel. Super impressed. Ive been a practicing mechanical engineer for 30yrs and your approach is nearly identical to the way I learned it at the Robert Bosch Corp in the 90's. Subscribed.
Excellent video. Just when I begin to think my amateur scratchings on metal have approached adequacy, I find a vid from a REAL machinist. Great job!
Man, this guy has so many tools... I'm really jealous
keep going :-)
i have to say. I love that cable management!
Glad you like it :-)
A well thought out and perfectly designed creation. I admire your ability to make your own parts and do everything so well. You are a very rare human being.
To be honest, he can do anything because he basically own two very important things, power tools and money.
I'm not hating but machining metal with good power tools isn't that hard, it hardly like doing it without power tools.
Every video I watch I’m blown away at his skill to mill parts from nothing. To apprentice under someone with this much knowledge would be the dream.
I enjoyed this immensely. I would love more “new” builds alongside your restorations.
Will do!
As a person, who is machining metal for living and who knows how to build electric cabinets, I'm saying "well done" !
this dude is beyond good.... I'm speechless.
The best camera work on the whole of TH-cam
Wow, that was so nicely executed! I loved how the electrical panel turned out, outstanding work!
Thank you very much!
I like the connectors you crimp on the ends of the wires to give you a hard cable end. Here, wires are just stripped and the bare copper inserted into the device (and tightened with a screw).
That's definitely the way to go! Thanks Uli
Well, those spring contact terminals from Phoenix are actually designed to take wires with or without those wire end connectors. If you don‘t have good crimping pliers, it‘s better to insert the wire without end connectors because otherwise, the wire can slip out of the connector. But on all the other components like the contactor, switch and timer relay that have screw terminals, wire end connectors is the way to go 👍🏼
Some folks crimp on a connector AND solder it on. I believe that's overkill.
You really shouldn’t solder your connections due to physical properties of the solder under pressure
They're called ferrules, though a good screw connection is fine with just the bare wires, twisted
Watching that arbor press do what it's meant to after being saved from becoming scrap is very satisfying
I think so too
@@mymechanicsinsights thanks for your reply! You should know that your craftsmanship and skills inspire others and myself, I enjoy bringing old equipment back to working order
Thanks again for awesome videos!
Your precision in everything that you do never ceases to amaze me. Hands down, the best mechanics/restoration channel on the Tube! 👍🏾
Wow, thanks!
Thanks, this made me realize, I need to add "Tool & Die Shop" to my Christmas list.
good idea :-)
Beautiful robust, heavy-duty design and high quality construction! Much stronger and better quality than any tumbler you can buy. 17:15 Nice neat wiring job in motor controller is about 100x better than the so-called professional electricians who wired my house.
I honestly would love more video of you just making your own creations and not even restoring. I love it.
The amount of detail you put into every project is amazing!
Glad you like it :-)
Man, that was incredible! I'd love to learn to do this type of stuff :)
You can do it!
A trifle over engineered perhaps, but oh boy is that thing going to last! Quality work as always.
Thank you very much :-)
Is that plastic barrel/drum really going to last long though?
I was going to say the same, but it’s not over-engineered, it’s just sooooooo clean and tidy.
@@1EFeKT1 Not expected to, It`s consumable.
I worry about the plastic drum wearing through where it contacts the metal wheel on the engine side.
I'm speechless, that's amazing sir. Well done and thank you for making a longer video so we could see it.
Glad you enjoyed it!
The control box is just......beautiful
Redefining perfection every time.
Thanks a lot
Excellent work, as always!
Thank you very much :-)
Some just have it and some just don't. You've certainly got it. We'll done.
The cable management is just amazing.
It's good to see that you've been getting so much use of that beautiful arbor press. (Do you store it beside the magnificent beverly shear?)
Yes I do!
Love the shot when you’re turning the drive shaft (~7:20). Starting zoomed out with the carriage fully out of the shot. Very sleek, some great videography. The movement of the carriage along with the slight movement of the cross slide is visually appealing.
Clearly this came naturally from having to turn such a long part but it’s worth noting it’s aesthetically appealing for future videos.
I probably wouldn't move the carriage so much behind for turning this part, but I liked to have a free bed when putting the part in on camera. I also really liked the look how it moved over to the work piece, that's why I kept that clip. Thank you Sam :-)
@@mymechanicsinsights Sure, bud. No problem. :)
The wiring was brilliant. Keep it up.
Finally some very well made electric enclosure. Clamp terminal blocks, crimped wire, labels. Thank you.
electricians will appreciate it.
機械加工からシーケンス制御まで扱えるのすごい
one day, i want to posses this electrical knoweledge and confidence to build the controll box....
16:03 - thank you, THANK YOU for this! For some reason, one hardly ever sees those in TH-cam-videos. Which is unforgivable.
Watching all these inspires me to build my own little machining shop. Very awesome work!
The ultimate "I make a new one" LOVE IT
Glad you like it :-)
Even when he is just making something 'homemade', it still turns out a work of art...
Thank you so much
Impressive the mind of an engineer, fabricator, cnc lathe operator
Bravo! I am impressed when I see that you use real clamping pliers and sleeves for the cable work. Not all TH-cam videos show this. But keep it up. You always teach someone.
Thank you very much!
When i saw the panel i thought “oh man this is going to be a MESS.” Why was i surprised? This is my mechanics
Thank you so much :-)
I want this guy with me when the apocalypse hits
haha good one ;-)
Your wiring skills are as excellent as your machining prowess! Excellent videography too, as usual. Bravo!
This man is the biggest enemy of sharp edges
“Everything’s ready, but it seems raw, isn’t he gonna blue and paint... oh, nevermind. There he goes!”
I had to ;-)
Yes; I was slightly on edge until I saw that part, then I could breathe again.
great video!
Thanks for the visit
Yeah
P
Nice unit. I once worked briefly for a company that made stents and remember seeing the heart stents highly polished and smoothed using similar porcelain grinding stones. Would love to see parts coming out after more hours.
Never seen a better video on this topic on yt
Just curious, what's the actual difference between the OFF and Emergency stop buttons for this motor?
off is just that. off. when you hit the on button, it restarts. EMO will disable the on button until you reset the EMO button (the twist you saw him do). Its also easier to hit (no frame around the button, it's a mushroom style) so you can slap it in an emergency. The idea is that if something is going wrong and you hit the EMO, you can't accidentally restart it before the issue is fixed.
One other small thing is that the motor doesn't actually see the difference. The difference is actually for the control box alone. You could, if you wanted, set up the motor so that as soon as you plug it in it starts going until you unplug it, though that would be inconvenient and unsafe.
Exactly what Greg says ;-)
@@th3greg Thanks for the thorough explanation
@@mymechanicsinsights There's quite a few changes from the switchgear I worked with. The special EMO button wasn't there. But the starter button was similar with the protective ring, and the stop button was bigger and un-guarded.
i clicked on this without reading the description. the blue drum in the thumbnail made me think it was an upload from Made In Poland 3 mins in and i've only just realised
Haha, thanks for watching, much appreciated
I am impressed with the workmanship of your tumbler. Would love to have a setup like you have in that shop.
Glad you like it
As usual I'm impressed with the work that went into the making of this.
Great job my mechanics