Меня учили в ателье люкс, и я полоску для петель, сложенную вдвое обязательно сильно увлажняла и вытягивала утюгом до полного высыхания. Потом прострачивала от сгиба на 2-3 миллиметра. Полоска ткани для петель вырезается точно под углом 45° к долевой нити. Рулик готовый и вывернутый налицо тоже увлажняла(шнур для петли), обязательно приутюживала( разглаживала утюгом с четким положением шва на бок), он становился плоским и хорошо выкладывался в петлю. Так дольше, но выглядит дорого. Причем иногда петли размещаются без промежутков вообще, когда пуговицы близко намечены. ❤🎉 Шейте так, чтобы выглядело дОрого!
@@hortensiableu377 у каждого свой взгляд. Мой опыт в пошиве определяет моё понятие качества как "дорого", потому что качество работы бывает и у не выглядящей дорого вещи.
@@TrinaLemurg ведь есть самый разный уровень исполнения, как любительский от начала обучения, так и профессиональный. Кто то только учится и этот способ для начала прост в исполнении. Профессионализм наработается со временем и желанием. Профи как правило не нуждаются в таких видео. Ютуб мне в подборку поместил это видео, я даже не знала, что такое бывает 🙂
Hint: When you pull the piece off the sewing machine, cut the thread at the garment, not the footer. It saves thread It cleans up the garment immediately, sparing additional scissor work, and It keeps your house free of all those threads
I can't tell if anyone else has already mentioned this b'c the comments are all in a foreign language & for some reason TH-cam doesn't translate!!! Grrrr! But anyway, cutting the thread at the presser foot would mean she'd have to pull the thread out for a ways before she started sewing again or it will come out of the needle when she she starts sewing! That's so aggravating when you lose your thread!
I absolutely love your videos, the skill and knowledge demonstrated, and how you share it all with others. As a result of catching measles prior to vaccines being invented, I have very poor vision plus coordination problems that will never allow me to do any of it, but I love seeing what can be done! Thank you so much for sharing your knowledge. I am fascinated by it all. Diane, using Joe's tablet.
my gran used this idea, but with satin and lace, she was a very creative woman who made and mended. Thank you for sharing and bringing back wonderful memories to my heart.
A realizzare cose belle e utili per sé , la famiglia , e anche guadagnare con questo lavoro creativo . Brava continua a dare buone idee , sicuramente molte ragazze apprezzeranno e metteranno in pratica ! Dal tuo modo d' insegnare !
I just started sewing during the lockdown so I'm quite new, but I watch a ton of videos you experienced seamstresses put out. This is a technique I doubt I will ever use, but it is ingenius. Brilliant idea. And so simple. Almost wish I wore women's clothes lol not really
Зря вы так говорите ??? Я мастер швейного производства и мы детей обучали ещё не таким способам обработки горловины !!!! Просто пришло время китайскому одноразовому пошиву во всем мире и там качества нет !!!! Москва Россия ✋✋✋✋✋🌷🌷🌷🌷🌷
This would have saved me so much time years age! A little smaller bead for the back of fancy dresses to match the fabric would have been great !! I love to learn something new at 72 years of age .. keeps me going! Thank you ! ❤
Wow! So simple and so genius! My grandmother was an inventive seamstress, I learned so much from her, but she never came up with this idea. Thank you for sharing.
That is great...WOW, thank you for sharing. I used to sw well, but haven't done so for some years due to illness, but I'm sick of bought clothes so I'm getting myself up and going and with brilliant videos like yours, it's given me great enthusiasm to get on with it. Thank you again and greetings from S. Africa, much love to you❤💐
Hey, Greta! Hope you’re doing well and have made some super-satisfying clothes. I just made my first pair of sweatpants because I’m tall and thin and all the XXLs out there are massive. Might even dare to wear them in public. 😊 Have a great summer! Happy New Year!! 🎉🇨🇦
В восьмидесятых работала в ателье, также делали петли и обтягивали тканью пуговицы и кнопки, только без помощи шпульки. Кстати, на видео работа не аккуратная
Да, в 80е работала в ателье-я там километры этих руликов делала и кружева буквально из них выкладывала)). Причем , сам рулик надо тоньше делать, а припуск больше-тогда он тугой, как бечевка получается. А вместо бусин делали жатые из ткани пуговицы👍🏻.
WOW. You are very kind to share your knowledge for those of us who are without thumbs 'so to speak'. I definitely am inspired by you although my work will not be as good as yours. Simply trying to follow your instructions and tips will give me some accomplishment. thank you.😊
В 80 годы нас в техникуме тоже учили как сделать воздушные петли.Но их должно быть больше в плотную друг к другу,тогда смотрится красиво и нежно.Особенно на широких манжетах на блузках из нежных тканей.Кроить надо по косой,после выворачивания обязательно проутюжить ,шов на бок ,а когдя уже пеля делаеться то шов с внутренней стороны.Благодоря тому что покроено по косой красиво ложиться.
Слава Богу за профессиональное обучение в то время и контроль качества что стимулировал не терять прогрессивку за на миилиметр смещенный карман...да было время...а сейчас все технологии попраны
Danke für die Mühe, dieses schöne Video zu machen. Ich kannte das zwar schon, und habe auch gelernt, selbst klassische Posamentverschlüsse zu machen, aber sowas weiß nicht jede Hobbyschneiderin, sollte das aber wissen. Sehr gut erklärt. Herzlichen Dank! 🥰 🙏🏻 Übrigens: Deine Nähmaschine... ist das noch eine Super Ace von Brother? Die ist so großartig, präzise, haltbar und robust. Ich habe mir eine zweite, gebrauchte Ace gekauft, damit ich irgendwann mal einen Teilespender habe, wenn es keine Ersatzteile mehr gibt, denn diese Maschine wird vermutlich so lange leben wie ich. 👍🏻😂 Das selbe habe ich für meine Husqvarna gemacht. Auch da habe ich Ersatz. Die alten Nähmaschinen sind doch die allerbesten. Und Brother ist so wunderbar. 🥰 Euch allen hier demnächst frohe Ostern und viel Erfolg beim Nähen.
Personally I would have used a zipper foot to sew along the "button" side, it would have been easier to get a straight line. Good tutorial, thank you x
I think she used a standard foot as not everyone will have the zipper type (so this is suitable for everyone to test out and not just those with the extra sewing foots)
@@elenalizabeth A zipper foot is indispensable in the sewing room! I have a regular one and a micro zipper foot that I use constantly as one side is 1/8 inch so is perfect for top stitching.
@@meacadwell oh yeah they’re absolutely useful, but not everyone can afford to buy extra add-ons for their machine, so it helps to show how to do it using the basic functionality/sewing tools.
@@elenalizabeth A conventional zipper foot is a basic sewing tool. It's why so many sewing machines come with one nowadays. Even my antique Singer 27 machine from 1904 came with a zipper foot.
This is wonderful! Thank you so much. I want to make woven blouses with the back buttons but do not like the opening and wondered how to put something behind it.
Самой идее 👏, но исполнение очень неаккуратное, кривое. Понимаю, что для многих это нормально, по принципу "из далека не видно". А у меня в голове, когда я вижу такое отношение к делу, всплывает фраза из фильма "Делом надо заниматься серьезно или не заниматься им вообще"))).
@@inakorn2299 то, что человек делает лучше меня, то чему я могу у него поучиться, то о чем рассказывают-покпзывают без лишних слов - я считаю достойно уважения! С удовольствием бы и у вас получилась красоте и аккуратности, если вы можете больше дать!


Меня учили в ателье люкс, и я полоску для петель, сложенную вдвое обязательно сильно увлажняла и вытягивала утюгом до полного высыхания. Потом прострачивала от сгиба на 2-3 миллиметра. Полоска ткани для петель вырезается точно под углом 45° к долевой нити. Рулик готовый и вывернутый налицо тоже увлажняла(шнур для петли), обязательно приутюживала( разглаживала утюгом с четким положением шва на бок), он становился плоским и хорошо выкладывался в петлю. Так дольше, но выглядит дорого. Причем иногда петли размещаются без промежутков вообще, когда пуговицы близко намечены. ❤🎉
Шейте так, чтобы выглядело дОрого!
Соглашусь с Вами по обработке, но слово ДОРОГО здесь не уместно. Здесь пр менить надо слово - КАЧЕСТВЕННО!
Это вы шибко деликатно выразились. То, что я в этом ролике увидела - жуткая дешёвка; зачем так делать? Грубо, некрасиво. И очень много мороки.
@@hortensiableu377 у каждого свой взгляд. Мой опыт в пошиве определяет моё понятие качества как "дорого", потому что качество работы бывает и у не выглядящей дорого вещи.
@@TrinaLemurg ведь есть самый разный уровень исполнения, как любительский от начала обучения, так и профессиональный. Кто то только учится и этот способ для начала прост в исполнении. Профессионализм наработается со временем и желанием. Профи как правило не нуждаются в таких видео.
Ютуб мне в подборку поместил это видео, я даже не знала, что такое бывает 🙂
О чем речь, если она канелярскими ножницами режет все... Не мечите бисер.
Hint: When you pull the piece off the sewing machine, cut the thread at the garment, not the footer.
It saves thread
It cleans up the garment immediately, sparing additional scissor work, and
It keeps your house free of all those threads
but.... but.... I love my thread carpet under my sewing machine. It just adds flair!
@@timmothycopeland4866That's a cute comment - i have a "thread carpet" at my machine, too !!! 😉🥰😉
I can't tell if anyone else has already mentioned this b'c the comments are all in a foreign language & for some reason TH-cam doesn't translate!!! Grrrr! But anyway, cutting the thread at the presser foot would mean she'd have to pull the thread out for a ways before she started sewing again or it will come out of the needle when she she starts sewing! That's so aggravating when you lose your thread!
I absolutely love your videos, the skill and knowledge demonstrated, and how you share it all with others. As a result of catching measles prior to vaccines being invented, I have very poor vision plus coordination problems that will never allow me to do any of it, but I love seeing what can be done! Thank you so much for sharing your knowledge. I am fascinated by it all. Diane, using Joe's tablet.
So impressed. Am a seamstress with a business of my own until a few years ago and here I have learnt something new
my gran used this idea, but with satin and lace, she was a very creative woman who made and mended. Thank you for sharing and bringing back wonderful memories to my heart.
A realizzare cose belle e utili per sé , la famiglia , e anche guadagnare con questo lavoro creativo . Brava continua a dare buone idee , sicuramente molte ragazze apprezzeranno e metteranno in pratica !
Dal tuo modo d' insegnare !
I just started sewing during the lockdown so I'm quite new, but I watch a ton of videos you experienced seamstresses put out. This is a technique I doubt I will ever use, but it is ingenius. Brilliant idea. And so simple. Almost wish I wore women's clothes lol not really
Зря вы так говорите ??? Я мастер швейного производства и мы детей обучали ещё не таким способам обработки горловины !!!! Просто пришло время китайскому одноразовому пошиву во всем мире и там качества нет !!!! Москва Россия ✋✋✋✋✋🌷🌷🌷🌷🌷
согласна!
This would have saved me so much time years age! A little smaller bead for the back of fancy dresses to match the fabric would have been great !! I love to learn something new at 72 years of age .. keeps me going! Thank you ! ❤
I really like your sewing page thanks for sharing great tips n tricks on how to sew n fabric cutting my dear ❤
You are simply a genius!! Thank you for your awesome videos!!😊❤
Cool closure! And such nice workmanship 😊 ty for the video
Непонятно, в чем фишка? Это есть во всех книгах по шитью. Старомодно смотрятся самопальные пуговицы.
Wow! So simple and so genius! My grandmother was an inventive seamstress, I learned so much from her, but she never came up with this idea. Thank you for sharing.
That is great...WOW, thank you for sharing.
I used to sw well, but haven't done so for some years due to illness, but I'm sick of bought clothes so I'm getting myself up and going and with brilliant videos like yours, it's given me great enthusiasm to get on with it. Thank you again and greetings from S. Africa, much love to you❤💐
Great tip!
Hey, Greta! Hope you’re doing well and have made some super-satisfying clothes. I just made my first pair of sweatpants because I’m tall and thin and all the XXLs out there are massive. Might even dare to wear them in public. 😊
Have a great summer! Happy New Year!! 🎉🇨🇦
I study not as IT seams, by investigating it's just the way it is, thanks for the information t00 patterns ❤
В восьмидесятых работала в ателье, также делали петли и обтягивали тканью пуговицы и кнопки, только без помощи шпульки. Кстати, на видео работа не аккуратная
Не аккуратная это одно, но ещё и не совсем правдивая!!! Невозможно! такой широкой лапкой близко к пуговицам пришить и отсрочить планку 😕
È un lavoro mal fatto
В то время за такое качество выгнали бы с работы
Насчёт шпульки и бусинки конечно гениально просто, мы делали по другому за неимением бусин,а кулиску протягивали так же.
Да согласна кулиску делали так же
Да, в 80е работала в ателье-я там километры этих руликов делала и кружева буквально из них выкладывала)). Причем , сам рулик надо тоньше делать, а припуск больше-тогда он тугой, как бечевка получается. А вместо бусин делали жатые из ткани пуговицы👍🏻.
Achei incrível suas dicas mas, vamos concordar que é para uma pessoa qualificada como vc!! Parabéns!
WOW. You are very kind to share your knowledge for those of us who are without thumbs 'so to speak'. I definitely am inspired by you although my work will not be as good as yours. Simply trying to follow your instructions and tips will give me some accomplishment. thank you.😊
Шила милому штаны, вышла рукавица, милый глянул и сказал, что я мастерица.
Love it! I agree, a dryer should rarrly be put on high heat anyway. Very creative! Good job!
Thank you. I always learn something from your videos.
Super nifty techniques and excellent video. Well done 👏
That was a shocker, quick and simple and also relaxing. Keep up the good work !
That fabric-covered bead idea is clever!
Nice 👍🏻 I love 💕 your technique 👏👏💕💜💚💝💐
В 80 годы нас в техникуме тоже учили как сделать воздушные петли.Но их должно быть больше в плотную друг к другу,тогда смотрится красиво и нежно.Особенно на широких манжетах на блузках из нежных тканей.Кроить надо по косой,после выворачивания обязательно проутюжить ,шов на бок ,а когдя уже пеля делаеться то шов с внутренней стороны.Благодоря тому что покроено по косой красиво ложиться.
Very educative video. Nutching your work also helps keep your stitch in place
Thanks for sharing...Much appreciated. ❤ Love it ❤ to you.
Wow thanks a million for sharing ❤💋
Все ждала, когда трюк покажет..)
Ничего нового...)
Ну, как-же? А запихивание лоскутка в шпульку? Портные такого точно не делают.😅
Brilliant! Thank you for sharing this. I’m excited to give it a try!
Это просто жесть! Господи, спасибо тебе за то, что меня учили шить в Советском Союзе!
И меня учили в Техникуме лёгкой промышленности в Ленинграде
Слава Богу за профессиональное обучение в то время и контроль качества что стимулировал не терять прогрессивку за на миилиметр смещенный карман...да было время...а сейчас все технологии попраны
Всё верно пишете! Такой порнографии точно никто не учил. Ужас просто!!!!
A very useful video! Thank you for sharing. 😊
Очень небрежное шитьё. Идея хорошая, но нужно аккуратнее смётывать и строчить. А в результате ещё и неровные края бейки получились.
The trick i did learn was the way you flipped that strap! Thx
Сразу видно,человеку нечем заняться 😊
Точно! Сразу видно, что шить не умеет.
Great technique. Thank you.
That is a great idea.
Thank you very much for sharing.
God bless you
Süper olmuş ellerine sağlık 👍❤️🌹🙋🏼♀️🇹🇷🇹🇷🇹🇷
I was AN ART MAJOR IN HAVERHILL MASSACHUSETTS
HAVERHILL HIGH SCHOOL.
4 YEARS SEWING CLASSES
that puts a striking finish on garment, and nice and even, many thanks.
Спасибо за идею очень профессионально Вы швея от Бога.
Brilliant! Thank you. Such clear instructions.
Thank you for sharing. I can get more creative with patterns for my garments.
А в чем здесь трюк?
Меня учили этому на курсах в 1980г. в Москве.
Most interesting,
Is it as easy as it looks ?
I tried but difficult to manoeuvre the whole process
But you did it so effortlessly
Wow
Супер! Какая Вы молодец!
Danke für die Mühe, dieses schöne Video zu machen.
Ich kannte das zwar schon, und habe auch gelernt, selbst klassische Posamentverschlüsse zu machen, aber sowas weiß nicht jede Hobbyschneiderin, sollte das aber wissen.
Sehr gut erklärt.
Herzlichen Dank! 🥰 🙏🏻
Übrigens: Deine Nähmaschine... ist das noch eine Super Ace von Brother?
Die ist so großartig, präzise, haltbar und robust.
Ich habe mir eine zweite, gebrauchte Ace gekauft, damit ich irgendwann mal einen Teilespender habe, wenn es keine Ersatzteile mehr gibt, denn diese Maschine wird vermutlich so lange leben wie ich. 👍🏻😂
Das selbe habe ich für meine Husqvarna gemacht. Auch da habe ich Ersatz.
Die alten Nähmaschinen sind doch die allerbesten.
Und Brother ist so wunderbar. 🥰
Euch allen hier demnächst frohe Ostern und viel Erfolg beim Nähen.
Завидую, кто умеет красиво шить!👍👍👍
Personally I would have used a zipper foot to sew along the "button" side, it would have been easier to get a straight line. Good tutorial, thank you x
I think she used a standard foot as not everyone will have the zipper type (so this is suitable for everyone to test out and not just those with the extra sewing foots)
@@elenalizabeth A zipper foot is indispensable in the sewing room! I have a regular one and a micro zipper foot that I use constantly as one side is 1/8 inch so is perfect for top stitching.
@@meacadwell oh yeah they’re absolutely useful, but not everyone can afford to buy extra add-ons for their machine, so it helps to show how to do it using the basic functionality/sewing tools.
@@elenalizabeth A conventional zipper foot is a basic sewing tool. It's why so many sewing machines come with one nowadays. Even my antique Singer 27 machine from 1904 came with a zipper foot.
To je sjajan, uskoro ja ću da napravim košulju, ja ću ga pokušavam. Hvala puno
Those little pink "buttons" are cute, and quite creative. I don't think I would have considered using the bobbin to make them.
This is wonderful! Thank you so much. I want to make woven blouses with the back buttons but do not like the opening and wondered how to put something behind it.
Cute idea- good way to use up scraps and leftover baubles.
Love it,thank you. ❤
Demaciado interesante mil y mil gras DIOS LE BENDIGA🙏👍🤗❤️👈
Thank you very much a great tip
Çok ama çok teşekkür ederim rabbim ne dileğiniz varsa kabul etsin bildiklerini paylaştığın için
Какая умничка❤🎉🎉🎉👍🌷🌷🌷супер.
Спасибо, что вы поделились своими умения и с нами. ☀️✨💓
Супер. Спасибо за идею.
Итог выглядит неаккуратно. Много бугров, а ткань тонкая, все криво
I’ve been wanting to do a row of little buttons on a back of a dress. This technique could work with that too. Thank you 😊
Заготовку для" воздушной петли" надо отпарить и тогда петли будут тонкими и плотными
Excelente esplicacion gracia por compartir bendiciones 🙏
جميل وسهل وانا بحب الخياطه لقد تعلمت شى جديد بشاهد الفيديوا من مصر
Sei bravissima complimenti 🌹
Wow simple and easy thank you for the tip
Самой идее 👏, но исполнение очень неаккуратное, кривое. Понимаю, что для многих это нормально, по принципу "из далека не видно". А у меня в голове, когда я вижу такое отношение к делу, всплывает фраза из фильма "Делом надо заниматься серьезно или не заниматься им вообще"))).
Great tutorial, thank you very much!!!
Интересная переделка 👍🏼
А вот ножницы можно и поострее 😉
Этой переделке , семь лет в обед , есть ролик один в один пятилетьней давности , воруют и не стесняются
там не только ножницы, там всё неаккуратно. Если уж показывать, то делать красиво, а не тяп-ляп.
What a clever idea! Love it!
Me parese Muy hermosa Gracias 😄😘 me gustó mucho
Такие страшнючие петли не стоит учиться делать , а вам милочка, не мешало бы поучиться шить, прежде чем учить других
Супер БлагоДарю берегите себя и природу
Πολύ-πολύ καλό!!! Ευχαριστούμε!!!
Very clever!🤩👍🏻
This is so cool! Thank you for sharing!
I've been sewing for over 55 years, and I've never seen that before.
Меня не учили шить, но заметила несколько моментов, которые выполнены не профессионально, по детски!
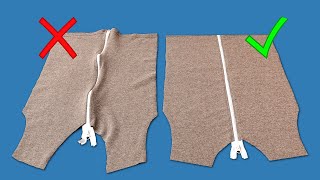
But...but now there is a bubble. Shouldn't it still lay the same on the right and left front after it's buttoned up?
Muy bueno 👍 Espectacular.
На самом видном месте всё выглядит плохо
Evolui cinco anos de aprendizado vendo essa costura! Pulando de alegria! Obrigada!
Muy buena idea ❤❤❤❤❤
Zo'r gap yo'q oson ekan o'rganib oldim
Very good idea 🎉🎉🎉🎉
А в чем фишка? Нас в обычной школе всему этому учили
O ponto é ensinar quem não sabe
@@rhodesiqueira5791 как НЕ надо делать
Achei incrível ❤❤❤❤ 😍😍😍😍
Thanks for sharing, will try that!❤
Loved this, especially how to do those buttons with a bobbin!
ما شاء الله معلومات حلوه جزاكي الله خيرا وتسلمي
Gracias por compartir este consejo tan bueno ❤️
Interesting, simple and easy. thanks
Как все кажется просто. Очень красиво, аккуратно, быстро! Класс! Спасибо!
Вы это на полном серьезе написали? Это аккуратно и красиво? Это ужасно!
@@inakorn2299 то, что человек делает лучше меня, то чему я могу у него поучиться, то о чем рассказывают-покпзывают без лишних слов - я считаю достойно уважения! С удовольствием бы и у вас получилась красоте и аккуратности, если вы можете больше дать!
Здорово! Браво!❤
И помимо этого горловину нельзя обрабатывать стрейчем. Стрейч растягивается и горловина не будет держать форму. Это так для общего развития
Спасибо. Быстро, четко, понятно.
Die Idee ist gut, die Ausführung lässt zu wünschen übrig.