Water Pump || DIY or Buy

ฝัง
- เผยแพร่เมื่อ 9 พ.ค. 2024
- Trinamic Website: www.trinamic.com/
Join Trinamics ROCINANTE newsletter: blog.trinamic.com/rocinante/
Previous video: • How to remove buzzing/...
Facebook: / greatscottlab
Twitter: / greatscottlab
Support me for more videos: www.patreon.com/GreatScott?ty=h
Websites which were shown/used in the video:
www.thingiverse.com/thing:165...
www.thingiverse.com/thing:311...
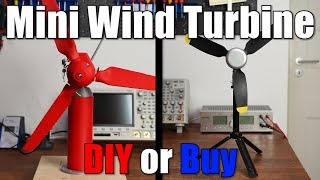
In this episode of DIY or Buy we will have a closer look at a small commercial 12V DC Water Pump. We will find out how it works and why it is called a centrifugal pump. Afterwards I will then 3D print a bigger water pump in order to find out whether it makes sense to DIY such a pump with a 3D printer or whether we should stick to the commercial solution instead. Let's get started!
Thanks to Trinamic Motion Control for sponsoring this video and sending an early version of their DOCK5 board, which features the ROCINANTE chip with integrated RISC-V processor.
Visit www.trinamic.com/ to get awesome motor control ICs.
Music:
2011 Lookalike by Bartlebeats - วิทยาศาสตร์และเทคโนโลยี

![Testing Different Water Pump IMPELLERS - Which One PERFORMS THE BEST? [REMAKE]](http://i.ytimg.com/vi/0nPJvRR5HLs/mqdefault.jpg)


I noticed that quite a few people are disappointed that I did not improve the 3D printed pump with a metal shaft. So here is a quick explanation why I stopped at that point. The reason is quite simple and is called time. I already spent 60 hours on this project when I got to the point when the shaft broke. That of course includes everything like planning, getting parts, writing a script, doing test, filming,......... Of course I could have tried improving the pump with a metal shaft but due to other problems I noticed that come with such a 3D printed design, I decided that such an option would not be sufficient for my garden and declared buy as the winner. If I would not have done that, then there might have been a successful water flow with the 3D printed pump but then again I would probably not have enough time to produce the next video for my channel. I appreciate all your feedback and I also love to tinker and get things to work. But I still have to think about getting content out regularly because this is my full time job. You can always support me through Patreon if you do not like this concept. So I can pretty much independently decide how much time I want to spend on projects instead of thinking about how to please the TH-cam algorithm. Thanks for understanding.
I think that's fair enough! At some point you just have to call it quits. Thanks for being honest tho!
I like your channel!
Why can't this level of transparency exist in government also.... Great Scott for president???
So can we expect a part 2 of the video? I'm eager to know what would be it's flow rate.
What is the vga port on the microcontroller used for?
You should have drilled the plastic rotor axle, to replace it with a metal one. I guess this could have made your pump work a little better.
Yes but since the impeller is 3d printed, a plastic shaft would be present because if not, how would you couple the motor shaft to the impeler ?
@@Aybex97 You know that there is such a thing called shaft with a keyway?
I'd make a hole, and glue it, or use a shaft with a key-way as Thomas suggests for better results.
@@Tomas970506 or just drill through and put a screw in keyways are difficult to make without a mill
Clément 2000 THE VANES ARE BACKWARDS...!!!! How come no one is saying it..? SCOTT ITS BACKWARDS ;))) look at the vanes on the small pump you bought and see which way the vanes curve in respect to the direction of rotation ;)))
3:25 THEIRS (note exit hole location, impeller rotation direction and the angle of the vanes.
5:05 YOURS, note same things ;)
@GreatScott!
There's a lot of issues with your diy solution.
1)the axle was thin enough that there was no contact with the bearing. The oscillation of not being held perfectly centered could have contributed to the shaft breaking
2)the long axis of the shaft was printed upright, meaning it could easily shear along the layer lines. Print it sideways so the layers run along the long axis of the shaft
3)petg is one of the most brittle 3d filaments out there. Abs would probably have been a better solution in the first place
4)3d printing the shaft was probably not the best idea in the first place
5)you could add a u groove in one of the sides of the pump enclosure, and lay a thick bead of silicon in it to create an o ring
Those are the issues I'm seeing right off the bat. I'm sure there are more issues that led to failure, and I also saw a lot of areas that could be improved, but didn't necessarily lead to failure.
Just use a metal shaft. Or mount the impeller directly on the motor shaft. Then there is no need for any extra work. I would also add a seal for the shaft
There is more, the pump isn’t primed”
Which is important for it to work without any issues.
@@zainahmed4172 true. Centrifugal pumps have a very difficult time pulling suction without sufficient pump head, as well as issues when cavitation happens or if there's large pockets of air. Air is compressible, and these types of pumps (impulse type impellers) are meant to really push incompressible fluids, not cause flow due to a pressure difference.
4:59 Your fins are mirrored, that causes a lot of extra stress and resistance to flow.
could you elaborate? edit: nvm i figured out what you meant from someone elses comment. sweep angle is wrong
@@justd3fy more that that there are a even number of blades that cause cross pressure when the water is released on the output side
@@justd3fy Water is incompressible. The water is 'flung out' by the wheel and follows a spiral. The circumference of a circle increases with radius, so for conservation of mass, the cross section normal to the flow has to stay constant. This creates a certain geometry for a spiral.
@@justd3fy no, the impeller is facing the wrong way:
www.researchgate.net/profile/John_Anagnostopoulos/publication/228664782/figure/fig3/AS:667634819403779@1536187953532/Sketch-of-a-centrifugal-pump-impeller.png
The impeller should rotate towards the pressure side.
@@thorerik I went back through the video and you are indeed correct.
Direction of rotation is clockwise from the back (outlet facing right): 8:29
Direction of the impellers requires clockwise from the front (outlet facing left): 5:08
the impeller needs to be taken out and turned around the other way. If he simply spun it the other way with the outlet where it is he would get some hellish eddies
Honestly, this is the kind of design I would use for an air blower or vacuum not a water pump.
A metal shaft and blades might have helped too.
You got so close and just said “eh whatever “ 😂 all you needed was a metal shaft and your gasket would’ve worked and you need to prime the pump but it’d have done the job
No. The forces that these pumps go through are extreme. Traditional centrifugal pump vanes are usually made of glass reinforced plastic and have extra reinforcement designed into the impeller just to handle the forces that are exerted on them. That large pump design was designed to fail, and I'm shocked that it wasn't the vanes that did.
@@christopherjones2301 Yeah true, but in this case he made a very clear mistake. The impeller vanes/fins are wrong. It should be the opposite. We can compare to the commercial pump at 3:25 to the DIY one at 5:00. I dunno how Scott can miss it and commit such a fatal mistake. I hope he rectifies it and try with a metal shaft, it will definitely work to pump water if not on very high power.
what else do you expect? this video was made just to show that trinamic board
Christopher Jones yea no kidding, I fix pool pumps and the impeller is 1/4 the size of that thing on the orange pump he made. Meanwhile on pool pumps they are about 1-2 horsepower
@@DSmartLife It rotates the correct way. See later footage... Notice the rotation of the motor coupler??
Should have tried a metal shaft. The rest could be 3d printed
yeah, first thing I though. Design a pump with less flow load and use a metal shaft. The massive eccentricity between the rotor and motor also did not help at all (the wobbling shaft)
Also didn't help that his 3d printer wasn't properly calibrated. You could see the top layer lines peeling away
Tomgie yes METAL for all shafts and hinges.
@@christianscandi yeah, while the thing in the upper layer is a problem (one that I'm having right now) it doesn't seem to have caused any failure at all
th-cam.com/video/aXcEiOuWKx4/w-d-xo.html&t DIY is winner!!!!
i used motor direkt on impeller.. make 10meters lift.
this guy is one serious engineer. he knows his stuff
Did you see the "rocinante" and the drawing of the ship from the expense on the ship ? Nice touch ahah
I saw it. Hi five "Nerd". ;-)
Loyal soldier of the MCRN im glad im not the only one
To na kang setóp da mesach!
Detim imim finyish du wa ting, im ye fo sémpere.
Da Rosi im gútegow xitim!
9:16
anyone with a 3d printer saw that one coming since 4:20
such a small cross section of 3d printed material is really weak
especially when printed along layer lines
especially in PETG, PLA has the strongest layer bonding of the "low temp" materials unless you go to high temp like nylon in a heated chamber
@@l3d-3dmaker58 And PLA flexes less and the biggest mistake he made, is not actually using to bearing, but letting the shaft flapping in the breeze.
The was a pretty obvious problem even to those of us who haven't used a 3D printer yet.
At least he leaves the comments open to let people tell him what he did wrong. Some TH-cam technical channels delete comments pointing out errors. The Raspberry Pi Guy has contributed to many destroyed boards because of bad directions. He deletes comments pointing out his serious mistakes.
Yup I would have printed that piece separately oriented another direction and glued it in. Or just used a metal rod.
@@Alobster1 even printed in a different direction, it still would have broke. Just get a small/cheap section of m6 threaded rod, and it would have been fine.
I noticed this in the first instance. I have made my own pumps but without 3d printing. I made small pumps by casting exposy resin and grinding it down. Now all you need to do is screw in proper shaft and add a waterproof bearing. These you could get from old blenders. Yes, the size will be large but you can adjust your shaft to be thick in the middle.
Remember, this is a sponsored video
I bet that Trinamic are great 'The Expanse' fans :) Lovely print on that chip!!
Great Scott, you are great. Thank you for all your awesome videos.
You can always replace the plastic impeller shaft with a metal one.
I'm watching your channel after a long time. Used to watch it regularly. Great to see you grow so big.
The vanes on the orange pump curve the wrong way, that would put more strain on the shaft, although the shaft sould be bigger or replaced with metal
Also he's spinning it the wrong way even for the given vane direction (ie trying to suck through the outlet) I'm not sure he realised this though as he still tried to use the intended outlet as the outlet. I think you can even see it push a bit of air into the bath tub water near the end.
Edit: I was wrong, see Daniel's comment bellow for why. Short answer is that centrifugal force wins out over any effects that the blade angle or curvature could impose.
Not sure about that, he was hand turning it the right way, but much like wagon wheels on western movies, the shaft could look as though it's turning the wrong way when powered.
@@maxk4324 vane curve has very little effect on centrifugal pumps. Direction will effect it but not reverse flow.
@@maxk4324 It will still pump water, even with the vanes curved the wrong way. It will just be very inefficient because it causes a lot of turbulence, the pump is fighting itself. But the fundamental principles of centrifugal pumps mean it will never reverse flow. In-fact forward curved centrifugal pumps do exist but are mainly used in air pumps and tend to have smaller vanes closer to the edge of the impeller.
@@danielrouw2593 The curve has a high effect on the flow dynamics inside the pump.
seeing them at 5:00 they are the wrong way. They should be curved in the rotation direction, so they "throw water" into the outlet part - not shovel it in circles.
The turn direction by hand was correct there.
Dear Greatscott,
Thank you very much for giving us Directions for our DIY projects through your experiments ...
Great job mr scott you proved that everything is possible by ourselves. I really appreciate your work and dedication.
Why didn't you make a 5mm hole in the rotor and put a M5 bolt to be used as a strong shaft? I think your huge pump could work well! 💪
He wouldn't be able to seal it since a shaft seal can't work on threads
You could use a long m4 screw with two washers to act as a shaft . It would be more durable
I have that Chinese exact pump. It's been sitting at the bottom of a water butt for two years. Still working. It switches on when the soil gets dry. I designed a capacitatave sensor thing to activate the pump. It moslty works. I added a float sensor so that it never runs when the water butt was empty. Happy plants.
Hadn’t heard of Trinamic. Now I have, checked out their site. Just what I needed! Good sponsor to have.
9:26 they probably used the motor shaft instead of a 3d printed one, judging by how close the motor is to the impeller
its also badly printed, the layers look terrible
Having printed one of those tiny ones, I can confirm that it does use the motor shaft. The impeller just friction fits directly onto the motor shaft.
@@rueebliortak no, it is clear that the parts were printed on a raft, however this should not affect the shear strength of the shaft.
@@s.sradon9782 The layers being perpendicular to the shaft certainly contributed to its weakness and failure. Also, he printed the fins the wrong way around, which creates more drag and stresses the shaft a lot more. Still, a metal shaft would have been a much better idea
Use a metal shaft for the impeller and it will work perfectly. I have made several 3d printed pumps with no issues. Simply attach the impeller directly to the metal shaft of the motor. I understand that it wasn't worth your time though. Also your pump impeller had blades that are curved in the wrong direction. they need to be curved backwards to the direction of rotation.
Love your videos bud. Been a subscriber for a while now and never miss a video. Keep up the good work.
Awesome, the same I was trying to get a automatic water supply solution for my garden, which works on three input (humidity/moisture, time and temperature)
7:38 *The Expanse* fans? 🚀
me haha
Is that black rectangle with the Roci a chip or is it just decoration?
@@henterpeter4806 yes it's a chip
glad im not the only one who noticed lol
Love that show!...cool looking chip!
0:08, yeah, the "winter" in Germany now is incredible!
Ja da skokmt aber noch
Hello from Russia. Its from -1 to +1 for last 2 months insted of usual -10/-20. Its best winter in my memory and i'm loving it. We're starting to think global warming isnt a bad thing after all.
@@goodfis624 Shit 😂, my sister is sad because here isn't even snow. And we have like 7-13 instead of - 5 - 3 or colder / warmer
@@batery5156 mal hoffen, will Rodeln D:
@@TRMrStone lebt im Harz da war ich mal im Winter war so geil bin da auch mal vom Berg mit demm Schlitten gefahren besste Zeit ever fahren halt nur 3 Stunden dahin
When i was younger i built a couple of small water pumps and one thing to say never start with big one. Me and my friend tinkered with mamy designs ,diferent propelers, etc. After that we built one from old drill motor and pvc tube. She had very good flow it was frickin good even at 6 volts. It still needed some tinkering overall. I have it disassembled on my workbench and when the time comes i would definetly improve it.
I designed a similar project a few years ago. I used a submersible aquarium pump which is self-priming with magnetic drive. You need to ensure that not only the flow is good but the "head" or how high the pump can pump the water is also adequate. I had some hanging plants. Interested in seeing the control and measurement part of the design.
Instead of printing the shaft as a cylinder, you can rotate the model in the slicer 90deg and print it so that the layers are parallel to the axis of the shaft. This will add a TONNE of strength compared to your current design. You will have a lot of supports to remove in the end it won't looks as pretty bu it will be hidden anyway😉
the sweep angle of the 3d printed vanes is backwards.
I had this same problem. Get an RV style pump and a ballast. Works perfectly with hoses. Much less work than 3D printing. Shuts itself off, runs on 12V. Cheap. Extremely effective.
I feel like this boils down to your R&D restrictions: there are numerous solutions that all might help fix the issues with DIY that you found. Perhaps try to use those solutions when you actually get to implementing it in your greenhouse system. Printing in another direction or not with the layered extrusion method might help, or using metal parts for things like the shaft will very likely solve it. Great video even if it was less conclusive than you like to be, time constraints are tough to work with! :)
Nice experiment there. I enjoy your sunday videos every time. A steel shaft for the impeller(fine tuned inner diameter for the shaft) with two 608s in line would improve things. Mach weiter so!!!
Dude you need an aquarium ;)))
And at 5:09 the pump vanes are backwards bud
6:08 STILL BACKWARDS...!!!!! ;)))
If you have the canes in the correct orientation then it might not fight itself and won’t have such stress forces.
You forget about plastic axle what is not fitting to bearing... It is better to use real sealing like simmering or o-ring. It is also better to make small one with higher rpm than bigger with lower.
Yes, they are! It's kind of disappointment. From mechanical point of view this pump is terrible ...
Its not necessarily his fault that the pump vanes were backwards. Remember that he used a user created file that he just downloaded and printed.
Very good video. You have not only printed a pump set but also discussed about its advantages and disadvantages. Some other TH-camrs are there who just takes credit of making a pump without any actual result.
Always appreciate your videos, buy vs build. Keep up the good work. Thanks
8:52 „… does not work well with my small balls.” :-D
Any other "The Expanse" fans caught the reference? :D
Yes I got it. Hi five "Nerd". ;-)
First thing I noticed when he displayed the board on screen!😁
Massive smile when I saw that! Kudos to Trinamatic
I have long ago predicted that the laminated 3D printing is rather (we have one in the lab.) weak; thank you for proving my foreseeing!
may be if you drilled a hole for a metal shaft; but this is too much work and you do not have much space for this operation!
My first time seeing this youtuber & I appreciate his efforts & I have subscribed.
I do have a comment for all those who are coming across as critical. His purpose was determining whether it was worth diy or not. So he succeeded in his purpose. Realize that commercially manufactured pumps are (generally) designed by college educated engineers who are experienced in pump design. While I found many of the comments to be beneficial to my own education, it simply wasn't worth the time for him to research and learn all of that in order to accomplish his goal.
That was such a wrong use of teflon tape in the beginning
I love it
Idk why, but i really like water pumps
for a glasshouse I'd suggest trying rugged and low cost AC submersible pumps sold for fountains and aquariums - completely waterproof cos they're designed to work underwater - AC has less problems with electrolysis if some moisture does get in to your wiring.
if self priming is required you could try to DIY a peristaltic pump - which also meters the amount of liquid pumped if you count revolutions.
or for simple DIY pumping solution you could use an airlift pump
I've made small water pump with junk plastics, metal and dc motor. I've made the fan by cutting and and glueing plastics and metal. The performance is satisfactory for a small pump. The most important thing is I had fun doing it :)
Please do the irigation automatization. It would help a lot.
"I noticed the big tubes did not work well with my small balls (bowls)" Funny :)
Yet again we get projects exactly at the right moment. Logged into TH-cam after closing a dispute with AliExpress over failed delivery of a 12v water pump and voila! We now know how to make one ourselves.
Some day in near future I think we need a material science class with regards to 3d printer materials.
I like these build or buy videos, they raise all kinds of comments and opinions! The metal shaft comments are valid, in my opinion, but the sweep of the impeller vanes brings up an important issue when trying to decide whether to build or buy. It seems, after very little research that both the forward swept, radial and backward swept designs have a place. The forward swept vanes are used in higher pressure pumps and are more often used for air. The shape of the impeller is also very different from your design. The backward swept design is more forgiving and it seems for general use this is a better choice. It also looks like the design of the impeller was for backward swept vanes.
This however is NOT my point, my real point is that when you decide to build you should do the proper research so that you build the right thing. For your application you may have to change the one design you find online. You don’t just build a design because it seem to match your needs.
The build route requires more research and maybe a few prototypes even if they are on paper. Some research would have shown that the shaft needs to be stronger than the pla material. This should almost have been intuitive, or gut feel/obvious to anyone who uses motors. The impeller design definitely needs more research for the application.
In the Arduino era the tendency for hobbyists is to jump in and do it, buy a few already made modules and start the ide, a few hours later you have something that works. A hack job, but one that works. For one of this is ok. This attitude creeps into mechanical design too with the advent of 3D printing but is often less forgiving than software and digital logic.
I am a firm believer in doing it rather than talking about it. You have my full admiration for doing it and not just watching videos about other people doing it, well done and thank you. i also believe it is quite brave to open yourself up to criticism when the designs are defective or not optimal. I learn a lot from these ideas and the comments.
I suggest you do the build or buy videos in 2 stages. One is the build it and see if it works but then when you get the feedback (we call this a design review in development projects) have another shot at the design including your, now follower sourced, design inputs. The second stage will,probably be much shorter because so much will already be covered by the original build but will tie up many loose ends and will be interesting.
Either way, keep up the open friendly, informative dialog we have with you.
second attempt with metal shaft?
You need make a second part for upgrade and fix the pump.
Go for a gear or screw pump, they are self priming. This might be a better option for your garden, as you will not need to fill your pump with water each time you need to water your plants. Gear and screw pumps can also be used to prime a centrifugal pump
I love the look on your face as you scowl at the garden out the window.
the diameter of the impeller axle shaft, made me react instantly :-) Otherwise it was a nice video
Not the biggest issue honestly
Your impeller is wrong. As it is, it tries to draw inverts.
You can always make parts like the shaft thicker to increase strength.
Additionally, there are many other materials you can print with, such as carbon fiber, to get much stronger parts.
I would consider magnetically coupling the impeller instead of a direct drive. Also, I would experiment with different blade design to make for more efficient fluid transfer.
You could also print a negative of the wheel instead of the wheel itself and use this as a mold. Then place some thin strips of metal, cut and bent in the shape of the vanes out of aluminum or tin sheets, as reinforcement. Then pour in some epoxy. You could also add a metal shaft while you are at it... I bet that wheel would be strong enough.
I think there are many great and easy suggestions in the rest of the comments to warrant a second part of this video ;-)
Every video he says "Stay Creative" his voice gets up a tone xD
Olha só se não é o Pesterenan
Nobody:
Great Scott: *H O T G L U E*
When in doubt - hot snot it!
I don't think it will hold. Especially with cold water after a few weeks.
Connecting the two shafts directly causes a lot of dynamic stress to the system if it is not lined correctly, which seems to be the case according to 8:35 and in really any case where the motor is on. The system also seemed quite unballanced which also causes extra wear on the axle. Also added, that the baldes were backwards (as noted before) pretty much destined this to fail, but there is so much room for improvement here, and I am pretty amazed how far 3D printed materials have come in the line.
I will do some changes to the base design of this and I think this could be pretty impressive:
- do an other ball-bearing at the other end of the pump case, so the rotor will be supported by both ends (decreasing the dynamic stress levels), this can be done the same way as in the initial desing.
- do a fan belt clutch for the driving motor or just a simple cogwheel clutch thus enabling errors in positioning to some level.
- A bleed-valve at the top of the pump would be a nice addition to the initial to help priming.
- alse there are quite some liquid sealing materials available off-the-shelf that are good for sealing this type of applications (i prefer f.b.s for this kind of applications).
- A steel axle of course desired (you can use normal threaded shafts or long bolts for this), but I think if it is supported on both ends and ballanced, the plastic should be enough.
I also think it was fair in this point to call it quits, but I can see so many points for advancement in this, that I wanted to add it to this experiment. Nice job.
I use flexible filament for seals on outdoor long term timelapse cameras, and they work pretty well
The Expanse :D 7:35
Hell yeah!
00:14 I totally *NEED* that 😋
I did a same type with an old vhs tape motor. Its powerful even with 6Volts.
I used two soda caps and a lot of hot glue
But the wheel was flat. Not rounded
Fantastic video and I'm glad you tried so hard. Love your videos and keep up the good work. X
Never seen anyone use Teflon tape on barb fittings before....
Why didn't you try that with other materials? (in the 3D Printer)
Well, I could have tried ABS. But I doubt that ABS would have been the solution. It would have been better to use metal for the wheel shaft. The rest of the pump might have been able to deal with the forces. But then again there were a bit more problems with the 3D printed pump that did not make it in the video. I think even if I invested more hours in the DIY pump, the result would not have been that much better. That is why I decided to stop as soon as I realized that PETG could not handle the forces.
But waht is wiht PLA?
PLA can take less forces than PETG and ABS.
@@greatscottlab PLA is definitively stronger than PETG and ABS but it is more brittle and not water tight. Maybe a steel shaft and nylon for the impeller would work.
@@greatscottlab How was the shaft sliced, would slicing it in a different way mean it wouldn't shear like it did
I'm also into hydroponics and purchased the little tan pump from Amazon, w/o realizing how small it is. IMO, Shurflow pumps are among the most reliable, but much more expensive (depending upon the price of your time 🤔). I'll try the little pump to circulate HW in a radiant floor heating system for my new camper van build.
IMO, the flaw in your 3D printed pump is that you should have used a stainless steel shaft all the way through the impeller with set (aka grub) screws holding them together (similar to your shaft coupling).
To share my meaning of buy or diy:
You did a great job on reasearching, but a little bit of engineering is missing. With more 3D printing experience you could know that you could reinforce the shaft more by changing printing temperature, som other settings and also printing it turned 90 deg would make it stronger because of the layers a 3D printer makes. On the mecanical side you could know that the shaft does not have to be 3D printed and if I would guess, a metal shaft would be the strongest solution here. Even a pencil with a screw secured to the rotating disc would be enaugh to make it at minimum 10 times stronger.
Thats my opinion, furthermore, I love youre content, love to see you make these things and I hope these tips above are something for you!!! :)
3:43 That's what she said...
...
*sighs now that all faith is lost in humanity
@@mr.coolio4321 2020 isn't over yet!
2:43 why do I find this funny
Bc it is
Wtf?!? I looooove the motor controller board with the IC named Rocinante!!
It's the ship from the expanse, but u guys knew that already. It's a must watch show!
You could use stainless steel shaft attachad to pump fan hole. Also ball bearings should be sandwiched with simmerings on both sides to prevent leaks. Great vid!
Next episodes of Greatscott:
LEDs - DIY or buy?
p-n junctions - DIY or buy?
n-type silicon - DIY or buy?
silicon crystal - DIY or buy?
sand - DIY or buy?
🤣🤣
8:52. That's what she said :)
😂😂
LMAO
I'd say, if you want a custom fit and cavitation is not a concern, you can print one. If a person wanted to print that big orange one, they'd need to build a metal bolt plate which is coupled with a chrome or stainless metal shaft to hold the impeller which would then needs to pass through a bearing (double is better) and a mechanical lip seal. Obviously that is time consuming so often buying is better for basic use. One thing not often considered in most pump videos is the difference between a volume pump and pressure pump. If you were to insert a metal shaft into that big plastic impeller, it would ultimately chew out the center, this is simply due to the resistance of water across the given surface area.
Great video. I have done quite some 3D printing myself, and I saw the weak point from a mile away ... 😀👍
I am watching you now for some years and normally enjoy your videos, but this was unfortunately your worst one.
The design you chose is pretty terrible. Also not really comparable at all to the commercial one.
Large pump is worth a revisit BUT using:
1. A stainless steel shaft instead of the plastic one
2. Stainless lock nut on the outside end of the shaft, captive bolt head at the inside
3. Use normal bathroom silicone sealant bead to seal the outside cap
4. Probably MOST important ... Use a sealed bearing AND shaft water seal on the inside between the bearing, the shaft and the housing
Great video as usual.
This video just need a second episode. It is so fun.
2:53 "and it seems the water can onlky enter this way , and exit that way"
well i dont know what you were expecting but the last time i ckecked, centrifugal forces always paint outwards from the center of rotation. I mean its literaly called centrifugal pump.
These basically create a more or less stable pressure difference between inlet and outlet. based on rpm.
On the other hand there are positive displacemetn pumps that "trap" whatever they are transporting and transport it to the outlet. these have a fixed transport volume that is linear to the rpm. some like gear or scew pumps can work in both ways.
For low pressure I use Rule boat bilge pumps, cheap and rock solid. For high pressure I use RV water pumps that will do 55 psi, for things like spray emitters irrigating my lawn.
lol I like the Expanse reference on the speed controller.
Loved the video!
Fatal flaw: You compared a non-self priming pump, to a DIY non-self priming pump that you then tried to use as a self-priming pump. Assuming the shaft broke as the water initially filled the pump. Had you primed it yourself at a reasonable RPM it may not have broke.
Obviously, more happened than what was on camera. Maybe you were too exhausted to print another wheel and shaft, or maybe you did print another, primed it like the first. and it broke as well.
Very well executed and filmed!
All that would be needed is a metal shaft that is octagon at either end or one end. Threaded at one end the length of the pump wheel and 3D print the area needed to hold the nut at one end near bearing then the other end just thread on with nylon nut thus griping the pump vanes.
Next slip through and attach to the pump shaft as you have done. This would indeed solve the problem. If one has to just cut the nut end off a long shaft short threaded bolt. This is simple buy at hard ware store. Smooth shaft at one end threaded at the other.
Really solve the problem and as for locking down the PCB use Flex seal which is rubber based and one can make mold to make a gasket using that material and make small grove to accept that gasket in the 3D printing process of the pump case. That also includes the pump bearing seal as well.
Tip, let boiling water rest for 2-5min then rest the end of your hose in it for the same 2-5min and then quickly push it over your fitting I've had to do this with a few different types of hose with grate success.
🥃cheers🍻
I found that shearing forces are the death of 3dprinted parts but can be easily fixed by desining in a bolt into such axles and the thing will stay in place. So your shaft can be printed with a smaller diameter bolt inside and it will work.
oh my that pcb with the Rocinante spaceship from The Expanse looks awesome
Legendary video as always mate! Even with a metal shaft you would have had a leak from the shaft entry point at the bearing. Best is a mechanical seal, but for diy i would recommend a normal lip seal. You could have just printed a longer “hole” where your bearing went in and put a lip seal in there. For the lid normal motor silicone would of been fine. I Recommend, do not throw away the pump, just put a seal and a nice metal shaft to your impeller, you could even use a bolt for the shaft. And give it another go. The housing looks nice and the impeller is not too bad either.
Next time don’t give up at ur first failure. The electric part with the motor and controller was brilliant.
Nice work !
I own an irrigation business and dang 2gpm is terrible for that amazon pump unless you’re doing drip/micro irrigation. I assume you’re using recycled water rain water or something and that’s why you’re using a pump? Irrigation booster pumps are a bit bigger but will definitely push more water at a higher psi.
If you’re not using recycled water from a basin or barrel and you’re just using water from the town, you could just use a solenoid valve and hook that up to your microcontroller and sensors. Love to see an update to this
Awesome job, dude! 😃
The only thing I can think of is to modify the design to use a metal shaft. Maybe it could work. 😊
Amazing pump. Engineering is just like this...try, try, try and try it again until you get the desired results. Congratulations.
Buy definitely wins here. A change of solution makes DIY for this greenhouse application a bit more interesting. Instead of using a water pump, build a raised water storage tank with solenoids to control the outflow. Let gravity do most of the work for you and you can refill it with a hose which relies on your house's water pump. Refilling may be problematic if you leave for a long vacation and rely on manual refilling.
Ahh, look at that Noctua fan on 3D printer! Beautiful! :)
You may swap the PETG filament with ABS or Nylon Carbonate Fibre , these have a much greater strength properties comparing to PETG, and also the mechanical design of the 3d prints plays a crucial role to decide whether it is strong enough or not, that means you can improve the strength of the prints even if you using the same filament here
I liked it, thx for the comment on the time to put things together.
please @greatScott during the creation of your green house, share how you do it, that way we can see the cool stuff such as humidity measures and auto watering
That automated greenhouse project that you mention at the beginning of the video sounds really interesting. Please keep us updated on that.
I think your conclusions are VERY debatable, and I wish you'd admit that more.
But all in all, you do great projects and I really enjoy your content.
Lastly... You asked my opinion. And you got it :)
I made one of these, the same happened, shaft cut off, i decided to use aluminium shaft. It works like a charm. Try it.