This is LIGHTROOMS MOST POWERFUL Tool! (Masking Tutorial)

ฝัง
- เผยแพร่เมื่อ 8 มิ.ย. 2024
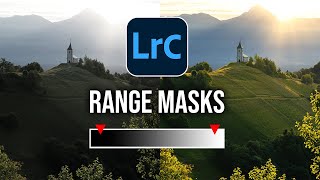
- Masking in Lightroom is the most vital thing to draw attention to your subject. Let me show you an example with this HDR Panorama.
As always feel free to follow along this Lightroom Tutorial by downloading the raw photo here: drive.google.com/drive/folder...
▬▬▬▬▬▬▬▬▬▬▬▬▬▬▬▬▬
Thank you for watching my video!
► www.the-phlog.com
► Patreon: / phlog
► Instagram: / thephlog
Below you'll find affiliates links to gear I personally use every day when photographing. These are products I believe in.
► My Camera amzn.to/48faXok
► Mount Converter amzn.to/3tuaM9F
► 16-35mm (CANON) amzn.to/4axZh1x
► 24-105mm (CANON) amzn.to/3tDlPx6
► 70-300mm (SIGMA) amzn.to/3RYfeqE
► Tripod amzn.to/3GZG9fu
▬▬▬▬▬▬▬▬▬▬▬▬▬▬▬▬▬
0:00 Intro
0:28 Basic Raw Adjustments
2:17 Masking
9:40 Color Grading
10:54 Sharpening - ภาพยนตร์และแอนิเมชัน


![ไม่ต้องมีที่ที่ให้ฉันอยู่ แต่ขอแค่มีฉันอยู่ก็พอ (Spaceless) - getsunova [OFFICIAL MV]](http://i.ytimg.com/vi/4N8idbxZ-7M/mqdefault.jpg)


Great video. I really enjoy the way you utilize the power of Lightroom in adjustments of landscape photos effectively.
Thank you very much!
I watch a lot of tutorials while on the treadmill. This is one of the very best I’ve ever seen! Very helpful!
Thank you so much! Great way to watch videos, too! :-)
Just MAGICAL ! Thanks !
Excellent!!...Thank you.
Superb as always Christian.
Thank you! :-)
Thank you excellent tutorial On new masking features
Happy you like it!
Thank you.
Great video,thank you!
Thanks a lot!
Very well done and explained. Due to your continuous videos I am getting much better now in LRC. Thanks a lot!
Thats great to hear, makes me very happy, thank you! :-)
Excellent!🎉
Deine Videos sind wie immer sehr gut aufgebaut und sehr gut erklärt. Bringt mich immer ein Stück weiter👍
Freut mich sehr zu hören, vielen Dank!
Love your tutorials keep up the great work, very nice edit as usual 😊 🎉
That means a lot to me, thank you!
Amazing result. Totally impressed. Always learning something. Thanks for posting.
Thats great to hear, thank you!
Another excellent demonstration.
Always very useful your video`s!
Thank you very much :-)
A very good tutorial 😊
Thank you!
Thanks alot. Great video again, I especially like the sketch at the beginning to get an impression, what you are going to do.
Thank you! I'm going to try and include sketches like this more often!
mooie foto en heel mooi bewerkt dank je
Thank you. Masking has never been one of strong points. Watching you process this image has furthered my understanding of how to use masks to shape light and create depth in an image. Thank you again.
I'm very happy to hear that, thank you so much!
Awesome 😊😊😊😊😊
Great video Christian, very useful. I couldn't help noticing the small horizontal shift in the waterfall towards the top. I guess that is one of the hazards of doing multiple shot panoramas when moving objects (ie. the water) are involved.
Great catch, didn't notice this until you pointed it out! Shooting an HDR panorama with the moving water this close is indeed tricky :(
That was excellent Christian, thank you! I hadn't used the Intersect Mask before, wasn't really sure what it was for tbh!
IM very happy to hear that, thank you so much!
magnifico!!!
Thank younger this great video.👍
Happy you like it, thank you!! :-)
You are a wizard! Thank you.
Thank you so much!
💪📷top
Did you make the hdr-panorama in Photoshop in the first place?
I merged this in Lightroom (but I could have done it in the camera raw editor of Photoshop as well)
Christian, Thank you for your excellent illustration! I have a question about saturation, both in today’s and the previous projects, that is, at about 10:18 minutes, raises yellow +29, compared with color grading of yellow reduced to -39, then in calibration saturation at 10:49 raised to +46., which I did’t catch it , in which there is an obvious connection between color grading and saturation that I am not aware about, or what is the impact of these “raise or reduce “method.
Thank you so much for commenting!
For this image I reduced the yellow hue in order to introduce more of those autumn colors in the foliage since it shifts the green leafs more into the yellow range. I boosted the yellow saturation to make these colors in particular pop a little more. Pushing the saturation in the calibration tab is just a nice way to make ALL the colors pop some more at the end :-)
Great thanks! I catch it. @@ThePhlogPhotography