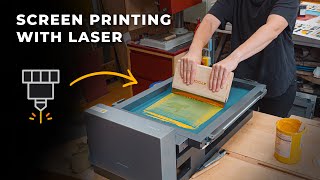
Kit Serigrafia facile | come stampare magliette | Screen Printing Tutorial DIY Serigrafia fai da te

ฝัง
- เผยแพร่เมื่อ 22 ต.ค. 2024
- Questo kit serigrafia è in vendita qui:
www.keygadgets....
Screen Printing Kit on Ebay UK:
www.ebay.co.uk/...
Kit Serigrafia su Ebay ITALIA:
www.ebay.it/itm...
Siebdruck set DIY - Ebay GERMANY:
www.ebay.it/itm...
Kit Serigraphie - Ebay FRANCE:
www.ebay.fr/itm...
Ebay SPAIN:
www.ebay.es/itm...
SEGUICI:
/ keygadgets
/ keygadgets
Screen printing to do it yourself! With this DIY-Screen Printing Set for beginners, you can print monochromatic designs on T-shirts, bags, canvasses, wood, carton and paper. It contains the basics, to start immediately and without any delay your own design ideas can be implemented. It is perfectly suitable for beginners, who want to try out screen printing, but are initially worried about high costs. With this set, high-quality monochrome graphics can be printed up to a size of DIN A3. We will add a precise step by step screen printing instruction to every set.
How long does this Set last? The colour in this set lasts for roughly 50 T-shirts. With the TOP SCREEN photo emulsion as well as the decoater/degreaser 5-8 different Motifs can be exposed on the supplied screen printing frame.
Environment and Responsibility? In all of our sets we exclusively use environmentally friendly screen printing chemistry, skin-friendly screen printing colours and biodegradable screen printing cleaner. This is why the kit is ideal for use at home.
----------------------------------------
People who watched this video Also searched online for:
make your own t shirts
screen print t shirts at home
screen print t shirts machine
silk screen print t shirts
screen print t shirts cheap
screen print t shirts no minimum
screen print t shirts online
screen print t shirts fast
----------------------------------------
Don't forget to check out our TH-cam Channel and click the link below to subscribe to our channel and get informed when we add new content:
/ @keygadgets
--------------------------------------------
#makeyourowntshirts
#screenprinttshirtsathome
#screenprinttshirtsmachine
#silkscreenprinttshirts
#screenprinttshirtscheap
#screenprinttshirtsnominimum
#screenprinttshirtsonline
#screenprinttshirtsfast
#siebdruckset
#siebdruckdiy
#siebdruck
#sérigraphiekit


NEW KIT WITH UV LED check:
th-cam.com/video/c9V90UjhJ7I/w-d-xo.html
I've seen many many videos how it's working serigraphie. This was the best and easiest to understand. Thank you.
tremendous video, thank you very much! greetings from Argentina
e dopo aver stampato la maglietta come faccio asciugare/polimerizzare l'inchiostro? mi serve una pressa o basta il phon?
Buon giorno, é normale che dopo il lavaggio per rimuovere l’emissione, mi rimanga leggermente il disegno prima fatto?
Buongiorno io vorrei acquistare il Gadget ma vorrei chiederle che tipo di stampante ha utilizzato a laser o Inkjet ? E se questo stesso procedimento si può fare a colori e come poi si asciuga il colore sulla T shirt ? Ci vuole per forza una termopressa o va bene anche un Phon ?
Ciao! è passato un pò ii tempo da questo video ma provo lo stesso, se per esempio preparassi la cornice con un logo per stamparla su dei vestiti, devo fare sempre questo procedimento per ogni stampa o posso riutilizzarla?
Grazie.
Ciao Luca! Con un telaio inciso stampi mille o più volte lo stesso disegno.
quindi con questo kit e questa tecnica si possono realizzare solo t-shirt di un colore ? quindi una stampante laser monocromatica andrebbe bene ?
Can you write the name of the products you use ? Please 🙏🏼
Ciao ho un paio di domande:
vorrei sapere quali sono i fogli a3 compatibili,se oltre al kit consigli l’acquisto di una lampada per l’asciugatura e se si possono usare con questo kit i colori plastisol per creare un disegno su t-shirt in rilievo di 1 o 2 mm
Where is the finished T-shirt? Can you wash the shirt without damaging the design?
hello,! im really interested in this kit 😍😍 does the ink need heat to fully dry or does it air-dry?
Air dry
molto interessante! per quanto tempo posso tenere l'emulsione nel telaio? io dovrei fare delle t-shirt e terrei un telaio sempre uguale da usare vari giorni... e come si pulisce il telaio dalla vernice? acqua? Grazie per questi video!
ciao pure io ho il tuo stesso quesito, cortesemente..nel caso tu avessi ulteriori informazioni, potresti darle anche a me? Grazie
@@trapsoul5725 se correttamente inciso dura anni, se volete riutilizzare il telaio vi consiglio di applicare del nastro adesivo sul retro del telaio dove la racla finisce e fa l'angolo, in questo modo evitate eventuali perdite dovute all'usura della gelatina.
Scusate volevo fare una domanda,
ma al posto del vetro,posso usare il plexiglass trasparente?Grazie!
Credo di si, ma dopo due mesi penso tu abbia già trovato la risposta
Cool and informative vid. Thanks
Wow this is cool! I am thinking to start a business like this. Can u help me? How can I get all this stuff?
you can buy directly on our site keygadgets.it
La luce gialla è necessaria per fare il passaggio di stesura del colore ?
È necessario avere luce attenuata gialla o rossa solo mentre si stende l'emulsione sul telaio.
con questo kit si possono serigrafare anche i CD-R?
Dove compri questa prodotti mi puoi sapere per favore.👍🔥
i saw your kit on ebay , would be willing to make some change for me ? : like change Aluminum Screen Printing Frame 20 x 30 cm with mesh 100T or 120T, and Wooden Squeegee 20 ,Scoop coater 30 ?
molto carino e ben spiegato peccato che nel kit proposto mancano alcune cose come oggetti come la gomma piuma,molto tentato all acquisto , grz di tutto ottimo video
Salve sarei interessata al kit.. volevo sapere cosa mette sul frame prima di iniziare l'esposizione.. è vetro? Se si di ch spessore? Va bene anche del plexiglas?
Ciao Ramona, è un pezzo di vetro con uno spessore di circa 5mm. Meglio il vetro che il pexiglass
mi scusi ma l'esposizione e di 8 minuti o 20?
Hey, what is the bulb E27 used for?
con una stampante inkjet non è possibile lo stesso risultato? sempre stampando un immagine vettoriale e al 100% di nero...grazie
si funziona lo stesso
Ciao ho due domande:
1)E' possibile una volta fatta la prima stampa ripulire il telaio dal colore, senza perdere/rovinare l'incisione in modo da poter utilizzare un altro colore?
2)E' possibile conservare un telaio inciso per un tempo indeterminato cosi da riutilizzarlo tutte le volte che si vuole stampare una maglietta/supporto con lo stesso motivo?
Grazie!
Assolutamente sì. È molto importante però rimuovere l'inchiostro quando è ancora fresco.
@@keygadgets Grazie per la risposta!
Ma l'inchiostro va rimosso con acqua e spugna o sono necessari prodotti specifici, anche in base al tipo di inchiostro?
@@djcalisse Acqua e spugna!
Dove posso comprare questo kit?
Può acquistarlo sul nostro sito keygadgets.it
how to cure the tee-shirt low price ? heat press ?
Our inks dry to air
Thanks
sarebbe stato belle almeno un video con l'audio.. si fa davvero fatica a capire!
Gianluca Nicolini prova ad attivare i sottotitoli del video e vedrai che è descritta tutta la procedura. Nel kit è comunque inclusa una scheda a colori con le istruzioni...
l'esposizione è 20 minuti o 8? a video c'è scritto 8, nei sottotitoli 20
15 max