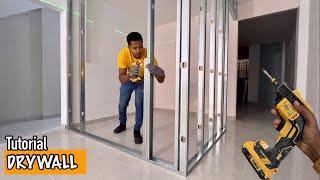
🔥 Build PLASTERBOARD PARTITION in Curve ▶︎▶︎ Drywall Wall

ฝัง
- เผยแพร่เมื่อ 3 ก.ค. 2024
- GYPFOR website ▶︎ www.gypfor.com
🔥 How to MAKE a PLADUR Wall with 70mm Profiles 👉 • 🔥 Cómo HACER una Pared...
In this video you will see how to mount a curved plasterboard wall.
We will use 70mm angle and studs. We will place two layers of Gypfor brand plasterboard. In the first layer we will use a 6mm thick plate and in the second layer we will use a 10mm thick one.
The plates with these thicknesses are manufactured to be able to do this type of work.
✅ If you are going to do some PLADUR work, and you are going to choose to hire a company that does it, I have created a brief guide to help you analyze the budget and avoid common deceptions in the sector.
Go to www.tutorialcreativo.com/guia to download it.
🟢 Drill 👉 www.banggood.com/custlink/3Km...
🔵 Page 👉 www.banggood.com/custlink/KDG...
🔴Sander 👉 ▶︎ amzn.to/3fRPTLc
Video transcript:
Very good!
Today we go with this curved wall.
We place a piece of plasterboard on the floor, to be able to fix a screw and thus mark the curve.
We mark the line on the wall.
We mark the center of the hole, which will be the radius of the semicircle.
We fix a screw just where the two lines intersect.
We take a string to mark the semicircle and hook one end on the screw.
We hold the pencil at the other end and mark.
Now we mark 7cm from the line and do the same as before.
We pass the reference point to the upper slab.
Drill at the point and place a plug.
In this case we will use another idea to mark the semicircle.
In a piece of profile we make a hole at one end.
Then we mark from the hole the radius of the semicircle and from there 7cm more.
We hold the profile with a screw.
We put the tip of the pencil in the hole and mark.
We change for the other brand of the profile and we mark.
In this case, we will fix some angles in the semicircle. We make some cuts on one side of the angle every 5cm, more or less, to be able to adapt it to the curve.
We also have a channel for curves, which would make our work a little easier. But in this case I will show you only with an angle.
We make some marks every 30cm to fix the angle. That's where the studs will go. We make sure that when marking, the meter makes the same curve as the line, so that later the uprights coincide well with the plasterboard plate.
We drill in the marks and fix it with plastic plugs with screws.
We do the same in the other brand.
Now we repeat the process on the upper slab.
You can use the leftover pieces of angle.
We measure and cut the uprights, placing them at each mark.
We fix the uprights to the channel, the axis of the upright in line with the mark we made.
We put a well plumb upright and fix it at the top. Then we use it as a reference to fix the other studs.
We mark the lead where the curved wall ends.
We measure the height to cut the plasterboard, you always have to count it so that it is suspended from the ground about 15mm.
We will place two layers of Gypfor brand plasterboard. In the first layer we will use a 6mm thick plate and in the second layer we will use a 10mm thick one.
The plates with these thicknesses are manufactured to be able to do this type of work.
We put the plate in the correct position and flex it a little, before placing it. It can be moistened a little at the back to make it curve better.
We put the plate and fix it with a screw in the center.
Now we go to the top. We adjust the plate well so that the side of the plate is in line with the axis of the upright and screw.
We screw into the central profile and then go to the sides.
We measure and cut the side plates.
We put them on and screw them on.
We go with the 10mm plate.
We flex the plate. We place it so that the joint does not coincide with the joint of the first layer.
We place the laser so that it coincides well in the center of the stud.
We screw the plate in line with the laser and then we screw profile by profile.
We measured the plate to the line we made.
We cut with the saw from the side so that the plate is well against the straight wall.
We go to the other side of the wall and put the insulation.
Now we do the same: we will place two layers of plasterboard.
We have to take into account that now we have to bend it on the other side.


¿Que tal estamos ?
Pagina web de GYPFOR ▶︎ www.gypfor.com
🔥 Cómo HACER una Pared de PLADUR con Perfiles 70mm 👉 th-cam.com/video/F8_p-UZmkow/w-d-xo.html
En este vídeo podrás ver cómo montar una pared de yeso laminado curva.
Usaremos ángulo y montantes de 70mm. Colocaremos dos capas de pladur de la marca Gypfor. En la primera capa usaremos una placa de 6mm de grosor y en la segunda capa usaremos una de 10mm.
Las placas con estos grosores están fabricadas para poder hacer este tipo de trabajos.
✅ Si vas a hacer algún trabajo de PLADUR, y vas a optar por contratar a una empresa que lo haga, he creado una breve guía para ayudarte a analizar el presupuesto y evitar engaños comunes en el sector.
Pásate por www.tutorialcreativo.com/guia para descargarla.
🟢 Taladro 👉 www.banggood.com/custlink/3KmRbZDfZp
🔵 Página 👉 www.banggood.com/custlink/KDGYQSmTH1
🔴Lijadora 👉 ▶︎ amzn.to/3fRPTLc
Impresionante como siempre! 🥇
Muchísimas gracias ☺️ por comentar. Un saludo 👋
Vaia esto si que es la ostia meu...me encanta para la cocina que el extractor se me queda corto.....puto crack eres tío.... ánimo y sigue así que aprendemos mucho
Muchísimas gracias ☺️ me alegro que sirvan para aprender. Un saludo 👋
Good job my bro .. be fine 🙂 from Yemen 🇾🇪
Muchísimas gracias ☺️
Muy buen montaje, soy montador te a quedado perfecto
Muchísimas gracias ☺️ por comentar se agradece que uno del gremio valore tu trabajo. Saludos 🖖
Gracias
Gracias por comentar un saludo 👋
Genial ¡¡¡
Muchísimas gracias ☺️
Te ha quedado súper bien
Estaría bien un video de tabiques que no lleguen al techo
En el haber que refuerzos hay que poner para evitar el movimiento
Muy buen video
Eres un máquina
Muchísimas gracias ☺️ lo tendré en cuenta. Aun así estoy planteandome de montar un curso de perfilería de pladur.
Buen video
Muchísimas gracias ☺️
... super )))))
Gran video y para montar un tabique de pladur tienes un techo desmontable como agarras el canal al techo desmontable gracias
Muy buen video, pero podrías hacer un video con un tabique que no llegue al techo sería interesante
Si no llega al techo, la estabilidad del tabique creo que sería muy baja, no?
Hay maneras y e pensado ideas para darle consistencia.
Muchísimas gracias ☺️ lo tendre en cuenta aun así estoy planteando de hacer un curso de perfilería de pladur donde dare ideas para ese tema. Un saludo 👋
Que portapuntas utilizás en la atornilladora?.
Buenos dias maestro.
Me podéis dar la referencia de vuestro tope de profundidad para tornillos? Va bien sin dar problemas de desajustes?
El tipo de brocas que utilizáis y necesitaré tambien la referencia de vuestra remachadora.
Feliz fin de semana y gracias
Buen vidio es un trabajo excelente que tacos y tornillos usas tu para colocar Pladur
Suelo usar tacos de 5mm con tornillos de 4x35 o tacos de 6mm con los tornillos de pladur pma (placa-placa)
Enseñas de lujo,un crack 💪, Tengo una pregunta si quisiera hacer una tabica en curva?
Muchísimas gracias ☺️ me alegro que sea así. Primero la marcas y luego cortas el angula para adaptarla algo parecido a lo que hice en el forjado superior. Y luego le atornillas la placa.
Muy buen video,yo me dedico al Pladur también y cuando se hacen trabajos fuera de lo común como decoraciones me mola mucho,por cierto tengo la misma caja de herramientas que la tuya,un saludo crack
Muchísimas gracias ☺️ por comentar se agradece mucho ayuda a saber que el contenido es interesante. Un saludo 👋
Que clase de placas de pladur son para poder curvarlas o que grosor han de tener..gracias
Para este tipo de trabajo uso la de 9,5mm y de 6mm una sobre otra.
Cómo lo masillas
Le tienes que pegar la cinta y trabajar con la llana al sentido contrario.
Joder,que pasada, queda genial.
Una pregunta te dejaste varias planchas de pladur en el hueco que taparte?
Me pareció que si.
Un saludo
Muchísimas gracias ☺️. Si son para otros trabajos. No quedarán ahí 😂😂
👍🏼👍🏼👀🙋🏽♂️
Gracias un saludo 👋
El próximo video puede ser el encintado en curva
Le tocara pero aun no será el siguiente. Un saludo 👋
Para fijar el angulo en la bobedilla deberían de usar remaches de flor...
esos tacos fisher quedan fuertisimos tambien
Con esos tacos no hace falta queda fuerte.
Buenas compañero me han pedido hacer un falso techo con elevador para que pongan un escalestri en cima cómo lo arias
Dependiendo del peso y las dimensiones abria que montar una balda con montantes de 70 o con una estructura de madera. Luego buscar un sistema de elevado, por ejemplo con cables y un motor. Estilo un ascensor
Pero le dare unas vueltas igual puede ser un vídeo tutorial.
@@TutorialCreativo la verdad es que seria un video tutorial cojonudo y respecto alos motores podrian ser de persianas
Radio de semicircunferencia?
El rápido puedes darle el qué quieres en este caso es de 70cm
@@TutorialCreativo hola gran vídeo, para una circunferencia de 0,50 tmbn doblaria bien la placa de 6mm o mejor colocar placa de la que ya viene ranurada un saludo. Necesito espesor 12mm no sé si colocar 2 de 6 mm o irme a la ranurada que es de 12mm
cuado subes videos de techos curvos o tabiques pared@@TutorialCreativo
Hola buen video , tengo un consulta como se llama la herramienta que usas para unir los perfiles unos con otro , veo que es de buen uso .
Pinza pladur o también se le llama dracula.
Muchísimas gracias ☺️ se le llama también punzonadora
Yo la conozco por "crimpadora"
Eso es placa de 13 normal o es una placa especial?o lo haces con cortes
Son placas de 6mm y de 10mm que son mas fácil de flexionar. Un 👋 saludo
Hola tengo que hacer un muro en un techo abuardillado y y quiero bajar el techo para que quede recto, en tus videos no veo nada asi , ¿me podrias dar alguna idea de como hacerlo ?, ya que no tengo ni idea, gracias eres un crack.
Para bajar un techo igual este sistema de este vídeo te sirve como referencia.
No se si lo vistes th-cam.com/video/aO_h6TSrI6A/w-d-xo.html
Y en este hay otra idea th-cam.com/video/EyMcmVUr7pg/w-d-xo.html
Saludos espero que te sirva.
@@TutorialCreativo buaaa perfecto me viene genial el que pones perfil de 48 al techo por que yo tengo techo de madera , muchas gracias eres un crack.
@@TutorialCreativo me viene bien pero me referia a que el muro que quiero hacer no me llega al techo ,queria saber como harias el muro sin poder llegar al techo para sujetarlo , un saludo .
y porqué el hacerla doble?
por que normalmente los tabiques son de 15 mm pero con ese espesor no se puede doblar, entonces al ser mas finas pones 2 6mm y 10 mm
Justo lo que te respondio rofer. Con una sola placa sería poca consistencia. Un saludo 👋