etrailer | Setting up the Rhino-Rack Vortex Roof Rack on your 2019 Ford Explorer

ฝัง
- เผยแพร่เมื่อ 21 ต.ค. 2024
- Click for more info and reviews of this Rhino Rack Roof Rack:
www.etrailer.c...
www.etrailer.com
Don’t forget to subscribe!
/ etrailertv
Full transcript: www.etrailer.c...
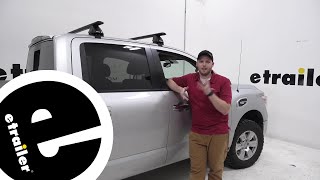
Hey everybody, how's it going Today we're gonna be going over and showing you how to install the Rhino-Rack Vortex Aero crossbar system, here on our 2019 Ford Explorer. So this is what our crossbar system is gonna look like installed. Now for starters, we'd have the black crossbars on our vehicle here 'cause our vehicles black matches a little bit better. It's also offered in a silver option as well. It really just comes down to preference, whichever you feel will look better on your vehicle. So, with the Rhino-Rack Vortex Aero crossbars, we're gonna have an arrow shape.
And what this arrow shape does is it does a couple of different things. Number one, it cuts down on wind noise, a lot of crossbar systems that use those square blocky crossbars can really get kind of noisy up here on your vehicle. You really not gonna have too much of an issue with that, due to this arrow design, obviously it's gonna be more aerodynamic. So they're also not gonna take as big a hit with our miles per gallon. So adding a Fracture Explorer, it's a great versatile option.
It's gonna allow us to do many different things. We can pretty much carry anything we want up here. We could definitely put some kayaks up here, a cargo box or even a bike rack. We're gonna have endless possibilities here with our roof rack. So, I'm sure you've noticed that we have these giant channels running down the center of our crossbars, and these are gonna be great for our roof mounted channel accessories.
So basically what this does is it makes it a little bit easier to secure your accessories to the crossbars. You don't have to worry about the wraparound clamps tightening each side. Sometimes there can be up to four equal side. The channel is gonna be nice integrated seamless into the crossbar. It's usually only one to two fasteners per side.
We also not gonna have a ton of space between the bottom of the crossbar and the top of our roof. There's actually only a couple of inches here. Therefore it may require the channel Mount accessories for certain application. A lot of the times we have these U bolts, or even these locking knobs here that we have to manipulate, could still be possible but it's gonna be a little bit harder when we don't have as much space. So these integrated channels here are gonna be an awesome feature here to this crossbar system. So, in regards to weight capacity, we're gonna be 165 pounds evenly distributed across both crossbars. So, in regards to installation, we're gonna get pretty lucky here on our Explorer because it actually uses factory fixed points here on the inside of these rails. Therefore, installation is super easy, we don't have to worry about attaching any door clips that go inside and damage our weather seal possibly everything's gonna be right up here on the roof. It's super easy to install. And again, we get this seamless look with the factory fixed points. So before we start our installation, what we like to do is we just like to get everything out of the box here, lay it down in front of you and then explain what everything is. So, first we have our crossbar here. It's pretty self-explanatory what that does. Next thing we have here is gonna be our mounting feet. Now we have to show, so this is our mounting foot. We have this square nut here which actually goes into the channel on our crossbar and then we'll have an Allen head underneath the tight-knit. So we're gonna have two of these per bar, we're also gonna have our locking in caps here, they get installed over there like so and then we can lock and remove them with the included key. Then next we have the fit kit. So to a roof rack, you're gonna have three components, the cross bars, the mounting feet and the fit kit. What the fit kit does is pretty much attached to everything for this particular vehicle here. We're gonna have fixed mounting points that this installs into using these two holes here, and then our mounting feet are gonna connect to the top of the fit kit using this hole here. So this mounts on the vehicle our mounting fee attached to the fit kit and then our crossbars attached to the mounting feet. You're also gonna notice a few other things in your kit here. So we have these little protective caps. So these are gonna get installed on top of the fit kit and we don't have our system installed. So meaning when we have the crossbars and mounting feet removed, we can still leave the fit kit on the vehicle here and protect it from any issues using these protective caps. We're also gonna get all the tools we need for our installation, we're gonna have the security torques bit. We're also