
- 5
- 96 723
Mockup Loft
เข้าร่วมเมื่อ 26 ต.ค. 2021
Hello! Here you'll find tutorials for making mockups and running your print-on-demand business! 🤓 Thank you so much for stopping by! 🤗
-Bridget
MockupLoft.etsy.com
-Bridget
MockupLoft.etsy.com
How to Make a Realistic Mug Mockup in 5 Minutes | Free Photopea.com Tutorial
In this tutorial I'll show you how to overlay your PNG design to create a realistic mug mockup in 5 minutes with Photopea.com. It's an amazing free photo editing website that's just like Photoshop! 🥳
Photopea: www.photopea.com/
Here's a link to the mockup used in this tutorial:
mockuploft.etsy.com/listing/1627386869
Visit the shop here:
mockuploft.etsy.com
I hope you enjoyed this tutorial and found it helpful! Thank you for watching!
-Bridget
© Mockup Loft
Photopea: www.photopea.com/
Here's a link to the mockup used in this tutorial:
mockuploft.etsy.com/listing/1627386869
Visit the shop here:
mockuploft.etsy.com
I hope you enjoyed this tutorial and found it helpful! Thank you for watching!
-Bridget
© Mockup Loft
มุมมอง: 3 057
วีดีโอ


How to Make a Shirt Color Chart | Canva.com Tutorial | Bella Canvas Solid and Heather Colors | HD
มุมมอง 4.8Kปีที่แล้ว
In this tutorial I'll show you how to create your own custom color charts using this editable template for Canva.com. Easily change the fonts, size and arrangement of the colors. You can also add your shop name or logo. It's fully customizable! Here's a link to the Editable Color Chart: mockuploft.etsy.com/listing/1474474284 Visit the shop! mockuploft.etsy.com © Mockup Loft

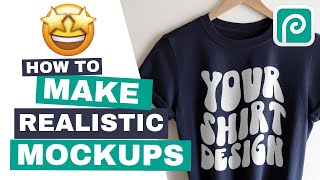
How to Make a T-shirt Mockup with Canva!
มุมมอง 11Kปีที่แล้ว
Go to: www.canva.com/ Canva is an amazing free graphic design website! You can unlock more features by upgrading to Canva Pro. In this tutorial I'll show you how to overlay your PNG design onto a t-shirt mockup! It's easy and only takes 2 minutes! 😄 *2024 Update: Canva is always updating the layout and functionality of the platform. Follow these updated instructions for importing the mockup ima...
How to Make a Realistic T-shirt Mockup with Shadows & Highlights (Dark T-shirt) Photopea Tutorial
มุมมอง 29Kปีที่แล้ว
#mockup Go to www.photopea.com/ Photopea is an amazing free online photo editor that's just like Photoshop! 🥳 In this tutorial I'll show you how to overlay your PNG design onto a t-shirt mockup and then adjust the highlights and shadows to make your mockup look realistic! It's easy and only takes 5 minutes! 😄 NOTES: Top Layer Adjustments: 1. On the top layer change the blending mode to "Hard Li...

How to Make a Realistic T-shirt Mockup in 5 Minutes with Photopea! (White T-shirt) Photopea Tutorial
มุมมอง 49Kปีที่แล้ว
Go to www.photopea.com/ Photopea is an amazing free online photo editor that's just like Photoshop! 🥳 In this tutorial I'll show you how to overlay your PNG design onto a t-shirt mockup and then adjust the highlights and shadows to make your mockup look realistic! It's easy and only takes 5 minutes! 😄 NOTES: Top Layer Adjustments: 1. On the top layer change the blending mode to "Hard Light". 2....
It turn my white colour into grey?
How can I make the white shirt on a hanger?
since the mockup is from canva, will etsy ban you for using it? (as other people will have the same mock up)
Here's a link to Etsy's listing image requirements: www.etsy.com/legal/policy/listing-image-requirements/253962679005?ref=list
You could also redo the picture with your own blank shirt and decorate how you want. You can then use that same picture for your other designs as well, as it'll always be blank.
Hi, when I try to place my design png file on top of the mock T shirt file, it snaps over the entire T shirt area and replaces it. The blank T shirt file is deleted. I've tried various ways (like converting file to jpg) to overcome this. Do let ke know where I'm going wrong.
Good video. Well explained step by step. But, with all the respect, what I was wondering: How to show the design exactly as it will be printed on the product? (So potential costumers won't get dissapointed.)
Are you making the shirts or using a "Print-on-Demand" service?
@@mockuploft I upload own designs to POD sites, which have mockups etc.
@@creatwinkles Here's a link to a tutorial that shows you how to create more realistic looking mockups with the free website Photopea.com: th-cam.com/video/tErjU7iLVK8/w-d-xo.html Also, place your design on the mockup exactly the same size and placement of your POD product listing. :)
@@mockuploft thank you very much!
THANKS FOR LEARN, I'M FROM INDONESIA
Thanks for the great tutorial! I have used Photopea for years, and this made perfect sense. I tried using the Levels function instead of the Curves function for the final step, and my results were great.
Thank you so much! This was very helpful and easy to follow. Thank you again.
Make more these please! Very helpful.
Mam please recommend image size for tshirt mockups for etsy shop
Etsy recommends using an aspect ratio of 4:3 which will be 2500 pixels (width) by 2000 pixels (height) for horizontal or landscape images. (2000 x 2000 pixels for a square crop of the mockup image.) These pixel dimensions will ensure that your mockup image will fit within Etsy's 10 MB file size limit and still have great resolution.
Excellent!😉
So glad to have found your video, super helpful.
Font name?
The font that I used for the t-shirt design is "Stay Trendy" by KA Font Designs on Etsy. (I added a "Wave" effect to the text.)
where did u get the text from
The font that I used for the t-shirt design is "Stay Trendy" by KA Font Designs on Etsy. (I added a "Wave" effect to the text.) www.etsy.com/listing/97745223...
Oops! That link did not work, try this one: www.etsy.com/listing/977452234/stay-trendy-font-retro-font-groovy-font?click_key=3b5bed09d8aef1ce9f3beaf3e0ba413d872e499f%3A977452234&click_sum=f12cb0bf&ga_search_query=stay%2Btrendy&ref=shop_items_search_1&pro=1&sts=1
thanks may god guide u
Your video is better then a lot of the biggest channels teaching the same thing, thank you.
i started creating roblox shirts and i need this thanks much girl!
Thankyouuu
I think this is helpful for things like food truck mockups for school as well.
Beautiful, indeed.Thank you!
Great!! love the hack
Doesnt Canva offer t-shirt mockups for us to choose and put our designs on??
Yes, this tutorial is for creating mockups with a unique photo of a specific brand of shirt. :)
Amazing tutorial!! Much thanks!!
Nicely done , how do we change tee shirts to Black ?
Thank you very much ❤❤❤
Hi, thank you for the detailed video. Could you please let me know the reason for exporting the final image as a jpeg as opposed to a png or other type? Thank you!
Exporting the file as a PNG works too! :)
@@mockuploft thank you. Wasn't sure if there was a quality difference.
PNG files are better quality, however if you're trying to keep your file size under 10 MB for Etsy listing images, I might save it as a jpeg file. :)
@@mockuploft Ok, makes sense. Thank you!
so where did you get the mock-up from in the first place
Hi! Here's a link to the mockup that I used for this tutorial: mockuploft.etsy.com/listing/1283970241
Etsy!
I jus got a tablet & i do not see 'edit photo'... only custom size & import file
@@KamauTheQuietWarya 2024 Update: Canva is always updating and changing the layout and functionality of the platform. Follow these updated instructions for importing the mockup image: 1. Click on "Create a design" and scroll down to "Import file" then "Open". 2. Click on "Use in a new design" then choose "Custom size". (In order to fit within Etsy's 10 MB file size limit, type in 2500 (width) x 2000 (height) pixels, or type 2000 x 2000 pixels (Units - px) to create a square listing image.) 3. Click on "Create new design". 4. Adjust the mockup image to fit to the edges of the design area by dragging the corners of the image out the edges of the design. (Cropping of the image may occur.) Follow the rest of the steps in the video! :)
@@KamauTheQuietWarya *2024 Update: Canva is always updating the layout and functionality of the platform. Follow these updated instructions for importing the mockup image: 1. Click on "Create a design" and scroll down to "Import file" then "Open". 2. Click on "Use in a new design" then choose "Custom size". (In order to fit within Etsy's 10 MB file size limit, type in 2500 (width) x 2000 (height) pixels, or type 2000 x 2000 pixels (Units - px) to create a square listing image.) 3. Click on "Create new design". 4. Adjust the mockup image to fit to the edges of the design area by dragging the corners of the image out the edges of the design. (Cropping of the image may occur.) Follow the rest of the steps in the video! :)
How did you resize the mug to 2200 x 2200? Where did you do that?
After you open the file in Photopea, go to "Image" in the top menu then go down to "Image size...". Change the width to 2200 Pixels then click "OK".
You are amazing yaar ❤ after watching 10s of videos i got someone who is patient and actually want us to follow and make a design❤
Thank you please i have creat image for gpt how to upscayl and vector image please
Such great info! I got your bundle and love them all. You truly have so much patience and talent. Looking forward to more videos! New subscriber!
Short and simple. Liked it!!
Beautifully explain
Thank you! I purchased your bundle and I check every two weeks to see what's new! Found this video. I know how to do this too, and I never considered adjusting it for mugs. Argh. 😂Thank you again!
Whats the name of this type of letter? How can I write something I want on this typography
I used the font "Stay Trendy" by KAFontDesigns on Etsy. Here's a link to it! 😊 www.etsy.com/listing/977452234/stay-trendy-font-retro-font-groovy-font?click_key=3b5bed09d8aef1ce9f3beaf3e0ba413d872e499f%3A977452234&click_sum=f12cb0bf&ga_search_query=stay%2Btrendy&ref=shop_items_search_1&pro=1&sts=1 😃I watched these tutorials to learn how to add a font to Photopea.com and give it a wavy effect: th-cam.com/video/rld9vi846a8/w-d-xo.html Here's another great tutorial: th-cam.com/video/WR7zsKqYK0U/w-d-xo.html
This is perfect! Thank you!
thanks
thx😘
Awesome. This is going to be a game changer for me. Thank you so much.😊 😊
this is by far the best video explining how to mockup on photopea, simple and to the point, thanks!
Agree!
Gaaaaa thank you!
This video was so helpful, and so clearly explained!! Thank you for this!!!!!
I'm following the steps but for some reason it's making my image look grainy :( I'm sure I'm doing something wrong but I'm just not sure what it is.
this may be because you are stretching the image?
@lisadoesstuff9368 I think I just needed more practice with messing with the "curves" 🤷🏻♀️ honestly I don't know why it was like that but it's gotten better
@@PlaguesPosies curves shouldn't make your image blurry, is your original image a low resolution? if you want i can help you create the shirt mockup :)
@lisadoesstuff9368 I'm not sure, I was using mockups I bought on Etsy and my design only looked grainy after messing with the curves. But I know that makes no sense. Thank you for your kindness and your offer to help but it's actually been working better lately :)
@@PlaguesPosies that's good :) and no worries
That’s awesome! Can you lower opacity before starting those steps?
This was a big help! Thank you!
That worked really well, thanks!
lol brilliant. Thank you
Does anyone answer the questions?
Can you do this on Canva?
difficult, but can through Canva pro
Saved my life. Thanks.